はじめに
良いコード/悪いコードで学ぶ設計入門 という本を年始に読みました。
実際に試してみたい内容が盛りだくさんだったので、以下記事の自分のコードを直してみようと思います。
【参考リンク】:【Unity(C#)】ARFoundationにおける平面検知シーケンスの実装
該当コード
今回修正するのは以下の処理です。
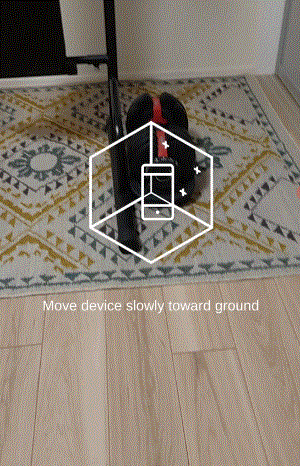
処理の流れとして、まずはスキャンを促すUIを表示します。
次に画面の中央からRayを出し、検出した平面と衝突した場合は画面タップを促すUIを表示します。
タップしたら画面の中央から出したRayと平面との交点にオブジェクトを表示するという流れです。

コードは以下です。
using System.Collections.Generic;
using UnityEngine;
using UnityEngine.XR.ARFoundation;
using UnityEngine.XR.ARSubsystems;

public class PlaneDetectionDemo : MonoBehaviour
{
    [SerializeField] private GameObject arObject;
    [SerializeField] private GameObject scanGuide;
    [SerializeField] private GameObject detectGuide;
    [SerializeField] private ARRaycastManager arRaycastManager;
    [SerializeField] private ARPlaneManager arPlaneManager;

    private readonly List<ARRaycastHit> hits = new List<ARRaycastHit>();
    private bool isDeteced;
    private Vector2 screenCenter;

    private void Start()
    {
        screenCenter = new Vector2(Screen.width * 0.5f, Screen.height * 0.5f);
    }

    private void Update()
    {
        if (isDeteced)
        {
            return;
        }

        var isHit = arRaycastManager.Raycast(screenCenter, hits, TrackableType.PlaneWithinPolygon);
        if (isHit)
        {
            //RayとARPlaneが衝突したところのPose
            var hitPose = hits[0].pose;
            detectGuide.transform.SetPositionAndRotation(hitPose.position, hitPose.rotation);
            detectGuide.SetActive(true);
            scanGuide.SetActive(false);
        }
        else
        {
            detectGuide.SetActive(false);
            scanGuide.SetActive(true);
        }

        if (Input.touchCount > 0)
        {
            var touch = Input.GetTouch(0);

            if (touch.phase == TouchPhase.Began)
            {
                if (isHit)
                {
                    //RayとARPlaneが衝突したところのPose
                    var hitPose = hits[0].pose;
                    //オブジェクトの配置
                    arObject.transform.position = hitPose.position;
                    arObject.SetActive(true);
                    var cameraPos = Camera.main.transform.position;
                    cameraPos.y = arObject.transform.position.y;
                    arObject.transform.LookAt(cameraPos);

                    //平面認識の機能をオフ
                    arPlaneManager.requestedDetectionMode = PlaneDetectionMode.None;
                    foreach (ARPlane plane in arPlaneManager.trackables)
                    {
                        plane.gameObject.SetActive(false);
                    }

                    detectGuide.SetActive(false);
                    scanGuide.SetActive(false);
                    isDeteced = true;
                }
            }
        }
    }
}
「良いコード/悪いコードで学ぶ設計入門」はUnityを題材に書かれたものではないので、私の個人的な解釈で以後の設計に落とし込んでいきます。
そのため、本記事のリファクタ方法がそっくりそのまま書籍の内容に沿ったものではない点にご留意ください。
リファクタ内容
今回リファクタリングする内容は以下です。
- Update関数のわかりにくい条件分岐をなくす
クラス名変更や処理をメソッド化して可読性を上げることも併せて行っていますが、あまり過度に気にしすぎない程度に修正しています。
リファクタ結果のクラス図
先にリファクタ結果のクラス図を示します。下記のような設計になりました。

@startuml
title 平面検知フロー

ISequence <|.. ScanSequence
ISequence <|.. DetectingSequence
ISequence <|.. DetectedSequence
ISequence ..> DetectReferenceProvider
ScanSequence..> DetectReferenceProvider
DetectingSequence..> DetectReferenceProvider
DetectedSequence..> DetectReferenceProvider
PlaneDetectionSequenceController..> DetectReferenceProvider
DetectReferenceProvider..> ARRayCasterToPlane
DetectGuideObject..> ARRayCasterToPlane
PlaneDetectionSequenceController..> ScanSequence
PlaneDetectionSequenceController..> DetectingSequence
PlaneDetectionSequenceController..> DetectedSequence
PlaneDetectionSequenceController..> ISequence

@enduml
考え方
以下の配置処理をシーケンスに分割します。
処理の流れとして、まずはスキャンを促すUIを表示します。
次に画面の中央からRayを出し、検出した平面と衝突した場合は画面タップを促すUIを表示します。
タップしたら画面の中央から出したRayと平面との交点にオブジェクトを表示するという流れです。
配置処理を分割した結果が以下です。
- スキャンを促す
- 配置予定地を表示し、設置を促す
- 配置完了
あとはこれらのシーケンスをクラス化し、適切なタイミングで呼び出す仕組みを作ります。
大きく分けて、GameObject操作の変更とシーケンス制御の変更を行っていきます。
GameObject操作の変更
まず、RayCastの処理と、設置を促すUIの挙動についてです。
これらをGameObjectの操作を行う処理とし、それぞれ切り出していきます。
using System.Collections.Generic;
using UnityEngine;
using UnityEngine.XR.ARFoundation;
using UnityEngine.XR.ARSubsystems;

/// <summary>
/// RayCast処理
/// </summary>
public class ARRayCasterToPlane : MonoBehaviour
{
    [SerializeField] private ARRaycastManager arRaycastManager;

    /// <summary>
    /// Rayに衝突したオブジェクトのリスト
    /// </summary>
    public readonly List<ARRaycastHit> Hits = new List<ARRaycastHit>();

    /// <summary>
    /// ARRaycastManagerで照射したRayCastがPlaneに衝突したかどうかの判定フラグ
    /// </summary>
    public bool IsRayCastHitPlane { get; private set; }

    /// <summary>
    /// 画面中央の座標
    /// </summary>
    private Vector2 screenCenter;

    private void Start()
    {
        screenCenter = new Vector2(Screen.width * 0.5f, Screen.height * 0.5f);
    }

    private void Update()
    {
        //画面中央からカメラの正面方向(すなわちスマホの正面方向)に向けて常にRayを出しておき、その衝突判定を取る
        IsRayCastHitPlane = arRaycastManager.Raycast(screenCenter, Hits, TrackableType.PlaneWithinPolygon);
    }
}
using UnityEngine;

/// <summary>
/// 配置ガイド用オブジェクトの振る舞い
/// 配置ガイド用オブジェクトにアタッチ
/// </summary>
public class DetectGuideObject : MonoBehaviour
{
    [SerializeField] private ARRayCasterToPlane arRayCasterToPlane;

    private void Update()
    {
        if (arRayCasterToPlane.Hits.Count <= 0)
        {
            return;
        }

        var pose = arRayCasterToPlane.Hits[0].pose;
        transform.SetPositionAndRotation(pose.position, pose.rotation);
    }
}
シーケンス制御の変更
次にシーケンス制御をリファクタリングしていきます。
シーケンスについて今一度おさらいすると、以下となります。
- スキャンを促す
- 配置予定地を表示し、設置を促す
- 配置完了
Interfaceを定義
シーケンスが遷移した際のふるまいを実装可能なインターフェースを定義します。
/// <summary>
/// シーケンスのインターフェース
/// </summary>
public interface ISequence
{
   /// <summary>
   /// 実装先のシーケンスに切り替わった際に呼び出される処理
   /// </summary>
   void OnEnter();
}
このインターフェースを先ほど定義したシーケンスとしてふるまうクラスに実装していきます。
/// <summary>
/// スキャンのシーケンス
/// </summary>
public class ScanSequence : ISequence
{
    public void OnEnter()
    {
    }
}

/// <summary>
/// 配置位置決定のシーケンス
/// </summary>
public class DetectingSequence : ISequence
{
    public void OnEnter()
    {
    }
}

/// <summary>
/// 配置完了のシーケンス
/// </summary>
public class DetectedSequence : ISequence
{
    public void OnEnter()
    {
    }
}
参照をまとめたクラスを定義
各シーケンスのクラスはPureクラスとして振舞わせたいので、MonoBehaviourのクラスを定義し、配置処理に必要なインスタンスの参照をまとめます。
using UnityEngine;
using UnityEngine.XR.ARFoundation;

/// <summary>
/// 配置処理に必要なインスタンスについて参照をひとまとめに担うクラス
/// </summary>
public class DetectReferenceProvider : MonoBehaviour
{
    [SerializeField] private GameObject arObject;
    [SerializeField] private GameObject scanGuide;
    [SerializeField] private GameObject detectGuide;
    [SerializeField] private ARRayCasterToPlane arRayCasterToPlane;
    [SerializeField] private ARPlaneManager arPlaneManager;

    /// <summary>
    /// ARオブジェクトをひとまとめにしたオブジェクト
    /// </summary>
    public GameObject ArObject => arObject;

    /// <summary>
    /// スキャン時のガイドをひとまとめにしたオブジェクト
    /// </summary>
    public GameObject ScanGuide => scanGuide;

    /// <summary>
    /// 配置時のガイドをひとまとめにしたオブジェクト
    /// </summary>
    public GameObject DetectGuide => detectGuide;

    /// <summary>
    /// ARPlaneManagerのインスタンス
    /// </summary>
    public ARPlaneManager ArPlaneManager => arPlaneManager;

    /// <summary>
    /// RayCasterのインスタンス
    /// </summary>
    public ARRayCasterToPlane ArRayCasterToPlane => arRayCasterToPlane;
}
この参照をひとまとめにしたクラスをインターフェースの実装先で利用できるように修正します。
/// <summary>
/// シーケンスのインターフェース
/// </summary>
public interface ISequence
{
   /// <summary>
   /// 実装先のシーケンスに切り替わった際に呼び出される処理
   /// </summary>
-  void OnEnter();
+  void OnEnter(DetectReferenceProvider provider);
}
/// <summary>
/// スキャンのシーケンス
/// </summary>
public class ScanSequence : ISequence
{
-   public void OnEnter()
+   public void OnEnter(DetectReferenceProvider provider)
    {
    }
}

/// <summary>
/// 配置位置決定のシーケンス
/// </summary>
public class DetectingSequence : ISequence
{
-   public void OnEnter()
+   public void OnEnter(DetectReferenceProvider provider)
    {
    }
}

/// <summary>
/// 配置完了のシーケンス
/// </summary>
public class DetectedSequence : ISequence
{
-   public void OnEnter()
+   public void OnEnter(DetectReferenceProvider provider)
    {
    }
}
各シーケンスに遷移した際の挙動を実装
各シーケンスのインターフェースを実装していきます。
/// <summary>
/// スキャンのシーケンス
/// </summary>
public class ScanSequence : ISequence
{
    public void OnEnter(DetectReferenceProvider provider)
    {
        provider.ArObject.SetActive(false);
        provider.ScanGuide.SetActive(true);
        provider.DetectGuide.SetActive(false);
    }
}
/// <summary>
/// 配置位置決定のシーケンス
/// </summary>
public class DetectingSequence : ISequence
{
    public void OnEnter(DetectReferenceProvider provider)
    {
        provider.DetectGuide.SetActive(true);
        provider.ScanGuide.SetActive(false);
    }
}
using UnityEngine;
using UnityEngine.XR.ARFoundation;
using UnityEngine.XR.ARSubsystems;

/// <summary>
/// 配置完了のシーケンス
/// </summary>
public class DetectedSequence : ISequence
{
    public void OnEnter(DetectReferenceProvider provider)
    {
        var arObject = provider.ArObject;
        var hit = provider.ArRayCasterToPlane.Hits[0].pose;
        var arPlaneManager = provider.ArPlaneManager;

        DetectObject(arObject, hit);
        DisablePlaneDetection(arPlaneManager);
        provider.DetectGuide.SetActive(false);
        provider.ScanGuide.SetActive(false);
    }

    /// <summary>
    /// オブジェクトの配置処理
    /// </summary>
    /// <param name="arObject">ARオブジェクト</param>
    /// <param name="hit">衝突箇所</param>
    private void DetectObject(GameObject arObject,Pose hit)
    {
        arObject.transform.position = hit.position;
        arObject.SetActive(true);
        var cameraPos = Camera.main.transform.position;
        cameraPos.y = arObject.transform.position.y;
        arObject.transform.LookAt(cameraPos);
    }

    /// <summary>
    /// 平面検知機能をオフにする処理
    /// </summary>
    /// <param name="arPlaneManager">ARPlaneManagerのインスタンス</param>
    private void DisablePlaneDetection(ARPlaneManager arPlaneManager)
    {
        arPlaneManager.requestedDetectionMode = PlaneDetectionMode.None;
        foreach (ARPlane plane in arPlaneManager.trackables)
        {
            plane.gameObject.SetActive(false);
        }
    }
}
シーケンスの切り替え処理
最後にシーケンスを切り替えるクラスを実装します。
using System;
using System.Collections.Generic;
using UniRx;
using UnityEngine;

/// <summary>
/// 配置処理のシーケンスを管理するクラス
/// </summary>
public class PlaneDetectionSequenceController : MonoBehaviour
{
    [SerializeField] private DetectReferenceProvider detectReferenceProvider;

    /// <summary>
    /// 位置合わせ処理におけるシーケンス
    /// </summary>
    private enum DetectSequence
    {
        /// <summary>
        /// スキャン
        /// </summary>
        Scan,

        /// <summary>
        /// 配置予定地表示
        /// </summary>
        Detecting,

        /// <summary>
        /// 配置完了
        /// </summary>
        Detected
    }

    /// <summary>
    /// シーケンスのEnumをリアクティブプロパティ化
    /// </summary>
    [Serializable]
    private class DetectSequenceReactiveProperty : ReactiveProperty<DetectSequence>
    {
        public DetectSequenceReactiveProperty (){}
        public DetectSequenceReactiveProperty (DetectSequence initialValue) : base (initialValue) {}
    }

    /// <summary>
    /// 現在の配置処理シーケンス
    /// </summary>
    private readonly ReactiveProperty<DetectSequence> currentDetectSequence = new ReactiveProperty<DetectSequence>(DetectSequence.Scan);

    /// <summary>
    /// シーケンスと各シーケンスで行う処理を実装したクラスのインスタンスを紐づけた辞書
    /// </summary>
    private readonly Dictionary<DetectSequence, ISequence> sequencesDictionary = new Dictionary<DetectSequence, ISequence>();

    private void Start()
    {
        //辞書への登録を最初に行う
        sequencesDictionary.Add(DetectSequence.Scan, new ScanSequence());
        sequencesDictionary.Add(DetectSequence.Detecting, new DetectingSequence());
        sequencesDictionary.Add(DetectSequence.Detected, new DetectedSequence());

        //シーケンスの変更を監視する
        currentDetectSequence
            .Subscribe(value =>
            {
                var currentSequence = sequencesDictionary[value];
                currentSequence.OnEnter(detectReferenceProvider);
                Debug.Log($"Current Sequence : {value.ToString()}");
            })
            .AddTo(this);
    }

    private void Update()
    {
        SequenceUpdate();
    }

    /// <summary>
    /// 操作に応じてシーケンスを変更する
    /// </summary>
    private void SequenceUpdate()
    {
        if (currentDetectSequence.Value == DetectSequence.Detected)
        {
            return;
        }

        var isHit = detectReferenceProvider.ArRayCasterToPlane.IsRayCastHitPlane;
        currentDetectSequence.Value = isHit ? DetectSequence.Detecting : DetectSequence.Scan;

        if (IsTouch() && isHit)
        {
            currentDetectSequence.Value = DetectSequence.Detected;
        }
    }

    /// <summary>
    /// 画面をタッチしたかどうかを返す
    /// </summary>
    /// <returns>True:タッチした</returns>
    private bool IsTouch()
    {
        if (Input.touchCount == 0)
        {
            return false;
        }

        var touch = Input.GetTouch(0);
        return touch.phase == TouchPhase.Began;
    }
}
Start関数でステートの変更を監視し、Update関数で操作に応じてステートを変更しています。
まとめ
非常にわかりやすい書籍で、目からうろこの内容盛りだくさんの良書でした。
本を読んでわかった気でいましたが、いざやってみると、「あれこの分割したクラス同士はどう参照すればきれいなんだっけ」とか「MonoBehaviourのときはどうすれば?」みたいな疑問がいろいろ湧いてきたのでやってみてよかったです。
※記事の内容をレビューしてくださった方、ありがとうございました!