背景
GW暇ですね。お家で手軽に遊べる技術はないか?ということでAWSの公式DOCを見ていると面白そうな題材を発見しましたので試してみました。 https://github.com/awsdocs/aws-doc-sdk-examples/tree/master/javav2/example_code/rekognition/src/main/java/com/example/rekognitionつくるもの
AWS RekognitonをJavaで実装した顔認識アプリ大まかな流れ
IAMユーザーを作成して、Rekognitionサービスにアクセスするための鍵取得→鍵を環境変数に設定→Javaソースコピペ事前に用意するもの
EclipseでMavenプロジェクトを開発できる環境(Java8以上) AWS無料アカウント①AWSコンソールのIAMでユーザーを作成する
まずはJavaでAWSサービスを使うために必要なアクセスキーとシークレットキーを取得するため、IAMユーザー作成を行います。IAMをAWSコンソール上で検索 
メニュー:ユーザーからユーザーを追加ボタンを選択 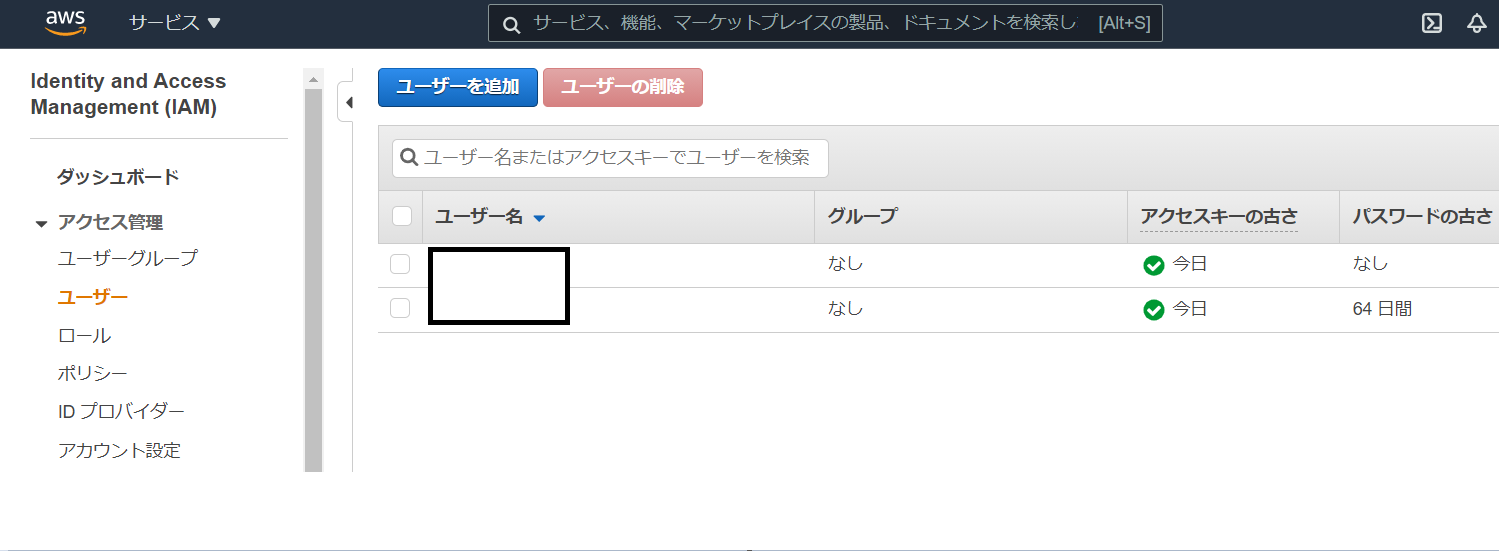
ユーザー名を入力し、アクセスの種類で「プログラムによるアクセス」にチェックを入れ次へ。 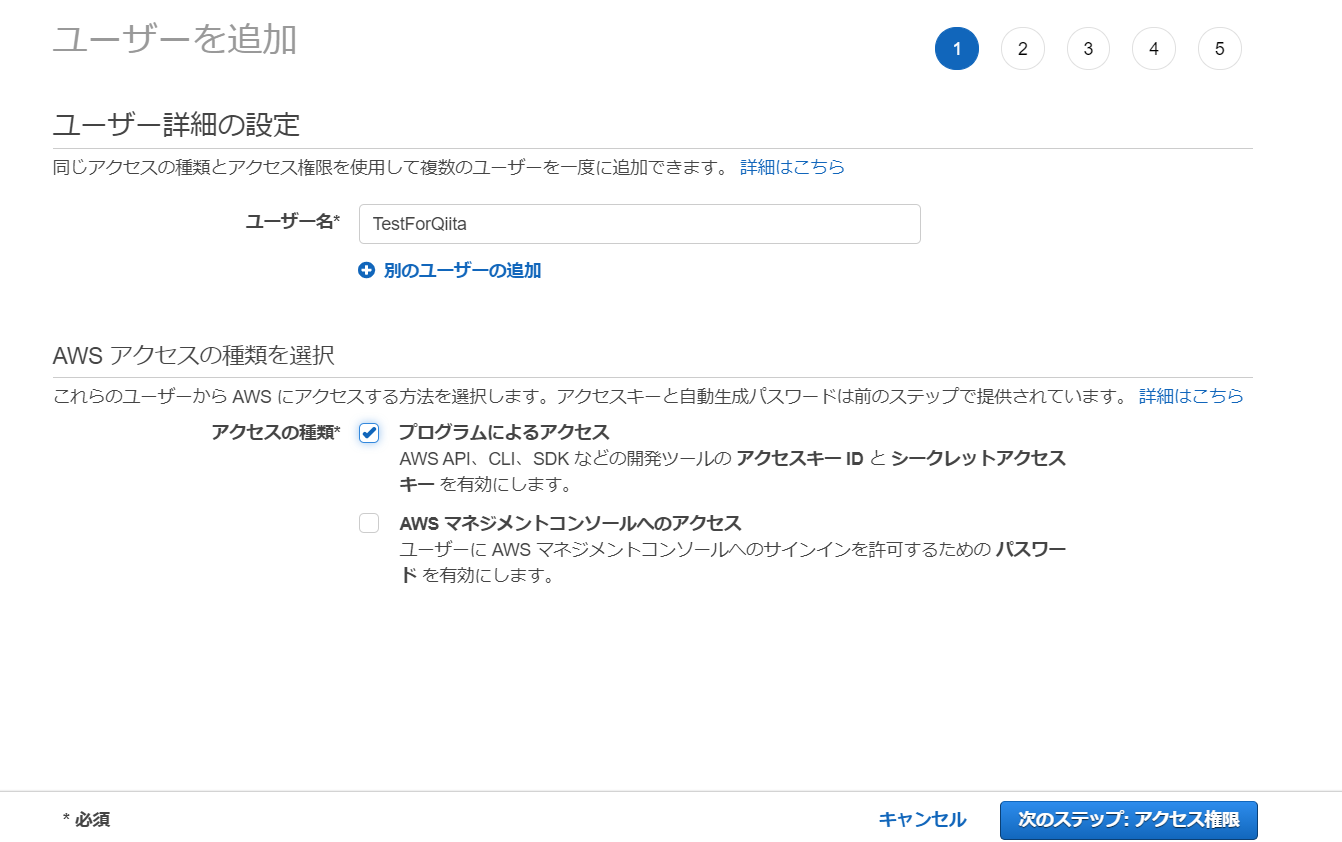
「既存のポリシーを直接アタッチ」を選択し、Rekognitionで検索をかけAmazonRekognitionFUllAccessのチェックボックスにチェックします。 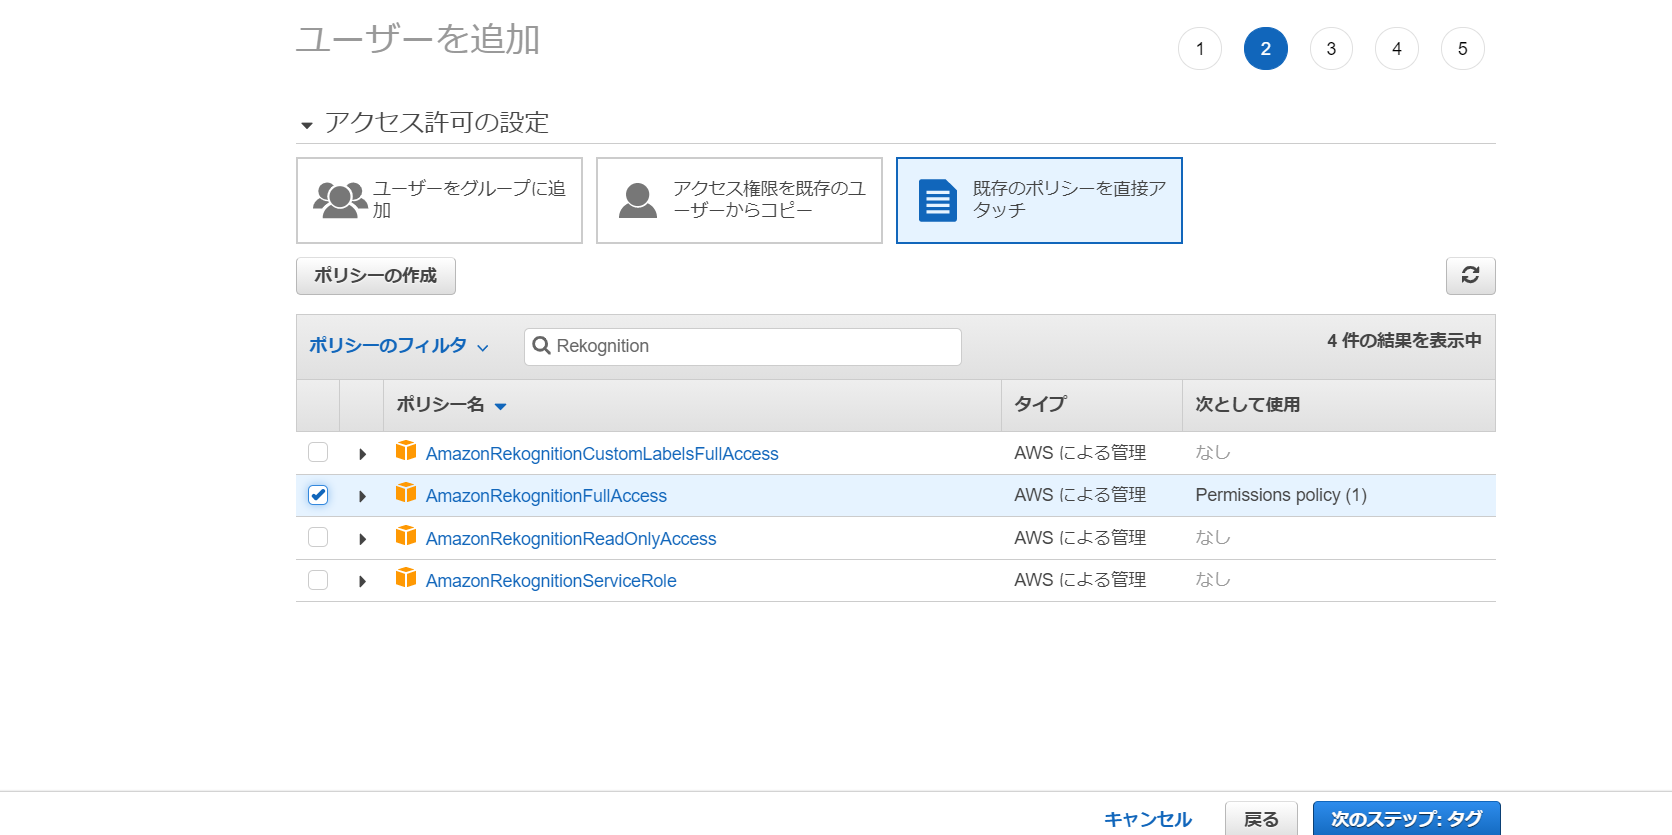
この画面は何もしなくて問題ないです。 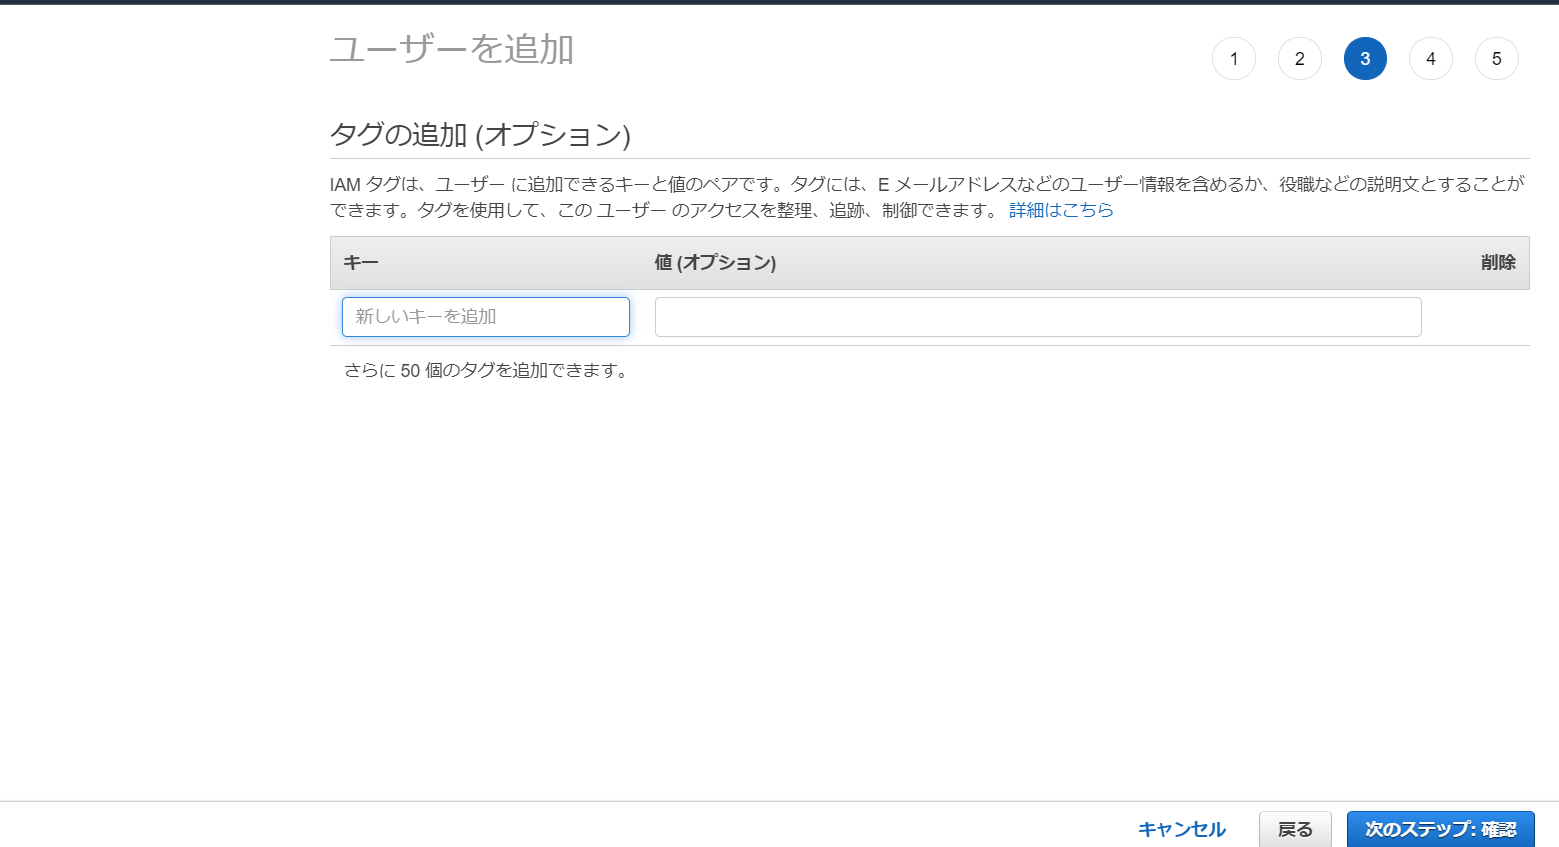
この画面もそのまま進みます。 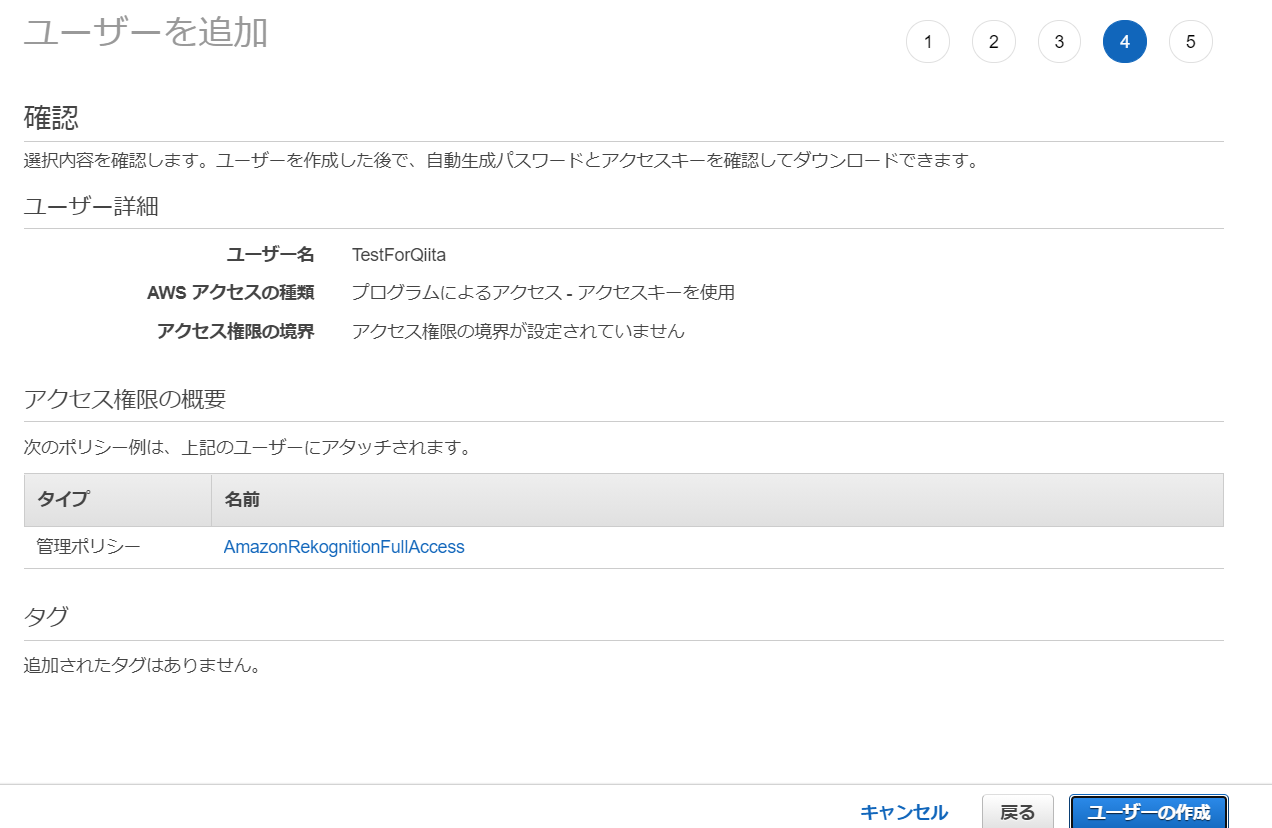
この画面がとても重要です。アクセスキーIDとシークレットキーをメモします。シークレットアクセスキーはこの段階でしか見れないので、忘れてしまうとまたユーザーを作り直す必要があります。 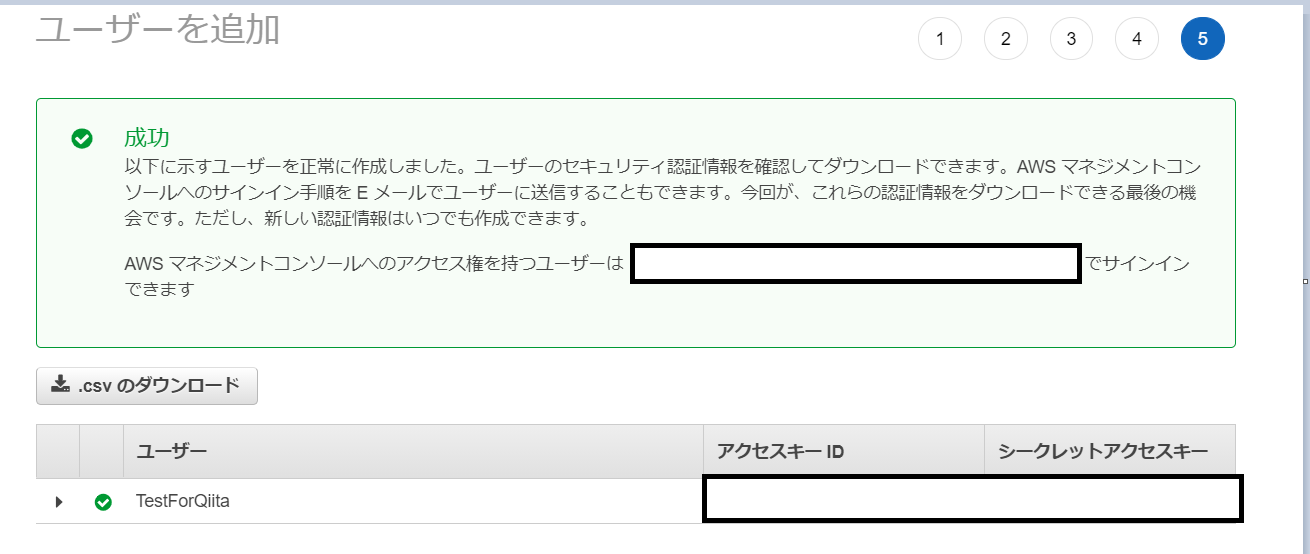
②手順①で取得したキー2つを環境変数に設定する
JAVAの環境構築時にJAVA_HOMEを設定したと思いますがそれと同様です。 ③EclipseでMavenプロジェクトを作成する
Eclipseツールバーのファイル→新規→Mavenプロジェクト シンプルなプロジェクトの作成をチェックし次へ 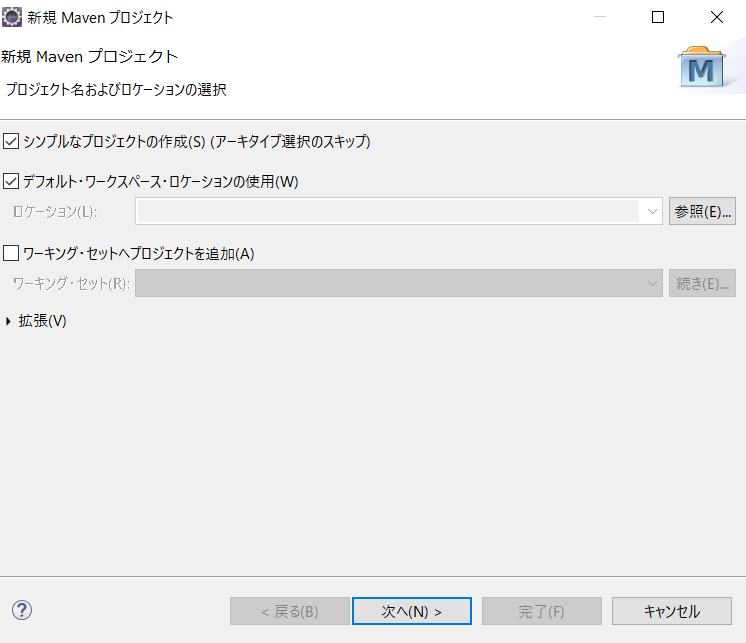
適当なグループIdとアーティファクトID入力し完了 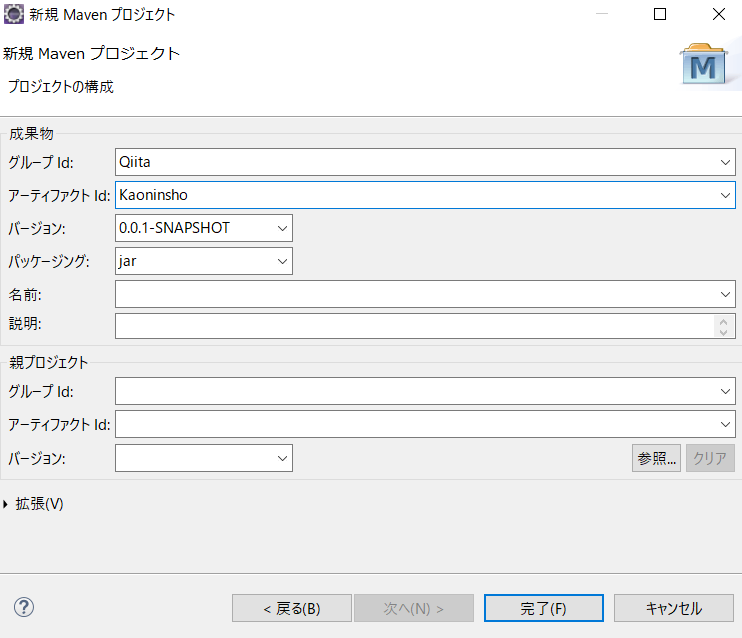
④Javaファイルを作成する
src/main/java上で右クリック→新規→クラス 名前を入力しどのメソッドスタブを作成しますか?はpublic static void...にチェック 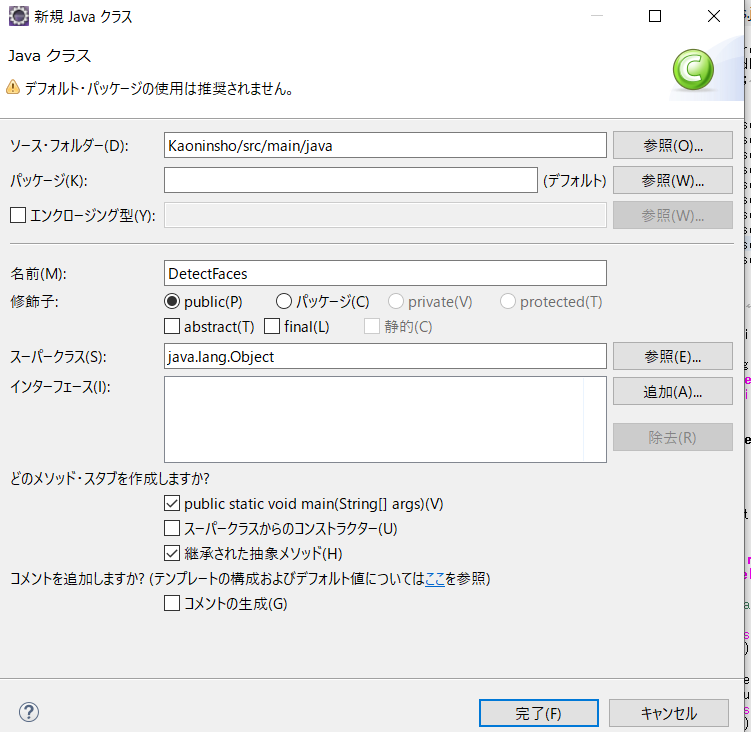
作成したクラス(DetectFaces)ファイルに下記コードを入力。エラーが出まくりますが次の手順で解消します。 公式のGithubソースから変えてるのはRegionを東京(ap-north-east-1)にしているのとSysoutの一部を消しています。
import java.io.File;
import java.io.FileInputStream;
import java.io.FileNotFoundException;
import java.io.InputStream;
import java.util.List;

import software.amazon.awssdk.core.SdkBytes;
import software.amazon.awssdk.regions.Region;
import software.amazon.awssdk.services.rekognition.RekognitionClient;
import software.amazon.awssdk.services.rekognition.model.AgeRange;
import software.amazon.awssdk.services.rekognition.model.Attribute;
import software.amazon.awssdk.services.rekognition.model.DetectFacesRequest;
import software.amazon.awssdk.services.rekognition.model.DetectFacesResponse;
import software.amazon.awssdk.services.rekognition.model.FaceDetail;
import software.amazon.awssdk.services.rekognition.model.Image;
import software.amazon.awssdk.services.rekognition.model.RekognitionException;


public class DetectFaces {

	public static void main(String[] args) {
		String sourceImage = args[0];
        Region region = Region.AP_NORTHEAST_1;
        RekognitionClient rekClient = RekognitionClient.builder()
                .region(region)
                .build();

        detectFacesinImage(rekClient, sourceImage );
        rekClient.close();

	}

	public static void detectFacesinImage(RekognitionClient rekClient,String sourceImage ) {

        try {
            InputStream sourceStream = new FileInputStream(new File(sourceImage));
            SdkBytes sourceBytes = SdkBytes.fromInputStream(sourceStream);

            // Create an Image object for the source image
            Image souImage = Image.builder()
                    .bytes(sourceBytes)
                    .build();

            DetectFacesRequest facesRequest = DetectFacesRequest.builder()
                    .attributes(Attribute.ALL)
                    .image(souImage)
                    .build();

            DetectFacesResponse facesResponse = rekClient.detectFaces(facesRequest);
            List<FaceDetail> faceDetails = facesResponse.faceDetails();

            for (FaceDetail face : faceDetails) {
                    AgeRange ageRange = face.ageRange();
                    System.out.println("The detected face is estimated to be between "
                            + ageRange.low().toString() + " and " + ageRange.high().toString()
                            + " years old.");

                System.out.println("There is a smile : "+face.smile().value().toString());
            }

        } catch (RekognitionException | FileNotFoundException e) {
            System.out.println(e.getMessage());
            System.exit(1);
        }
        // snippet-end:[rekognition.java2.detect_faces.main]
    }

}
⑤pom.xmlファイルに追記する
projectタグの間に追記しctrl+Sなりで保存します。保存するとほとんど前手順のエラーが消えます。 <dependencyManagement>
<dependencies>
<dependency>
<groupId>software.amazon.awssdk</groupId>
<artifactId>bom</artifactId>
<version>2.16.29</version>
<type>pom</type>
<scope>import</scope>
</dependency>
</dependencies>
</dependencyManagement>
<dependencies>
<dependency>
<groupId>software.amazon.awssdk</groupId>
<artifactId>rekognition</artifactId>
</dependency>
</dependencies>
⑥コンパイラ設定
コンパイラがデフォルトで1.5などになってしまっている場合今回のコードだと扱えない箇所があるので自分が使うバージョンに設定します。プロジェクト名で右クリック→ビルドパス→ビルド・パスの構成メニューからJavaコンパイラーを選択し、Javaビルド・パス上の実行環境'J2SE-1.5'から準拠を使用のチェックを外し、プルダウンから自分か使うJavaのバージョンを選択し適用して閉じるを押す。

⑥顔認識実行
プロジェクト名上で右クリック→実行→実行の構成 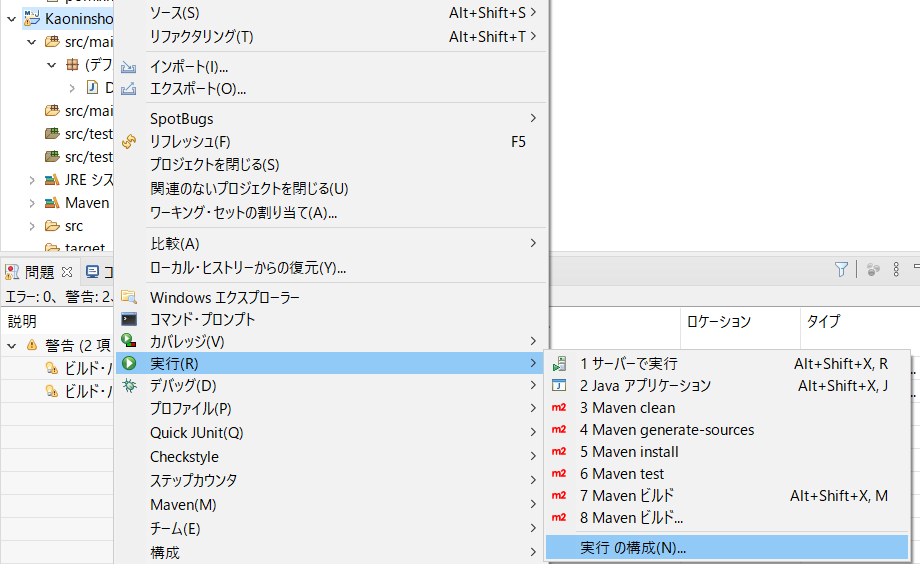プログラムの引数に、顔認識対象の画像の絶対パスを入力 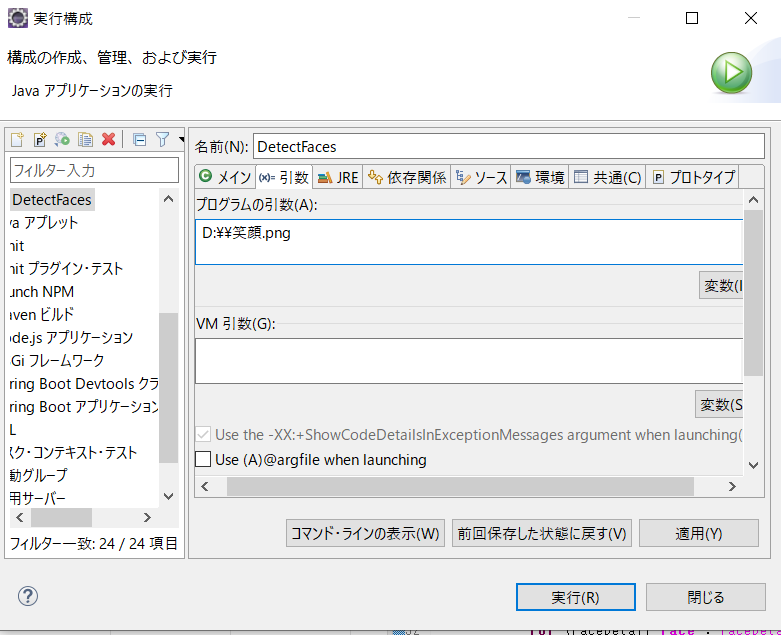
ちなみに笑顔pngの中身です。 
コンソールを見てみると、画像の人は14-26歳の人で、笑顔という解析結果が出ます。 
怒り顔でもやってみましょう。

コンソールを見てみると、画像の人は25-39歳の人で、笑顔ではないという解析結果が出ます。 
