はじめに
この記事では、pythonのdiffusersライブラリを使ってローカルで画像生成する方法について説明します
MacでStablediffusion webUIを使って画像生成はできましたが、flaskでサイトにしたいときにweUIだとできないので、この記事を書いています。
webサイトの作成等の別サービスとの連携を考えていないのであれば、webUIの方をお勧めします
環境構築
こちらを参考に環境構築すれば問題なく動作しました〜
作成するサイト概要
- 実写画像をアニメ画像のように変換できるサイト
- controlnetでcanny画像を作成して変換
- 生成される画像の精度はこだわらないです🙇
- Flaskで作成
- デプロイはしません!
- Tailwindcssでデザイン
- jqueryでローディング画面作成
完成版
Github
ライブラリのインストール
python -V
>> Python 3.10.13
pip install diffusers
pip install controlnet_aux
pip install accelerate
pip install transformers
pip install omegaconf
めんどくさい方は、こちら↓でも大丈夫です
Flask==3.0.0
googletrans==4.0.0rc1
torch==2.1.1
transformers==4.35.2
accelerate==0.25.0
scipy==1.11.4
diffusers==0.24.0
omegaconf==2.3.0
controlnet-aux==0.0.7
pip install -r requirements.txt
モデルのダウンロード
modelsフォルダを作成します
こちらからダウンロード↓
https://huggingface.co/gsdf/Counterfeit-V3.0/resolve/main/Counterfeit-V3.0_fix_fp16.safetensors
ダウンロードできたらmodels内に入れておきます
diffusersを動かしてみる(controlnet canny)
1. 準備
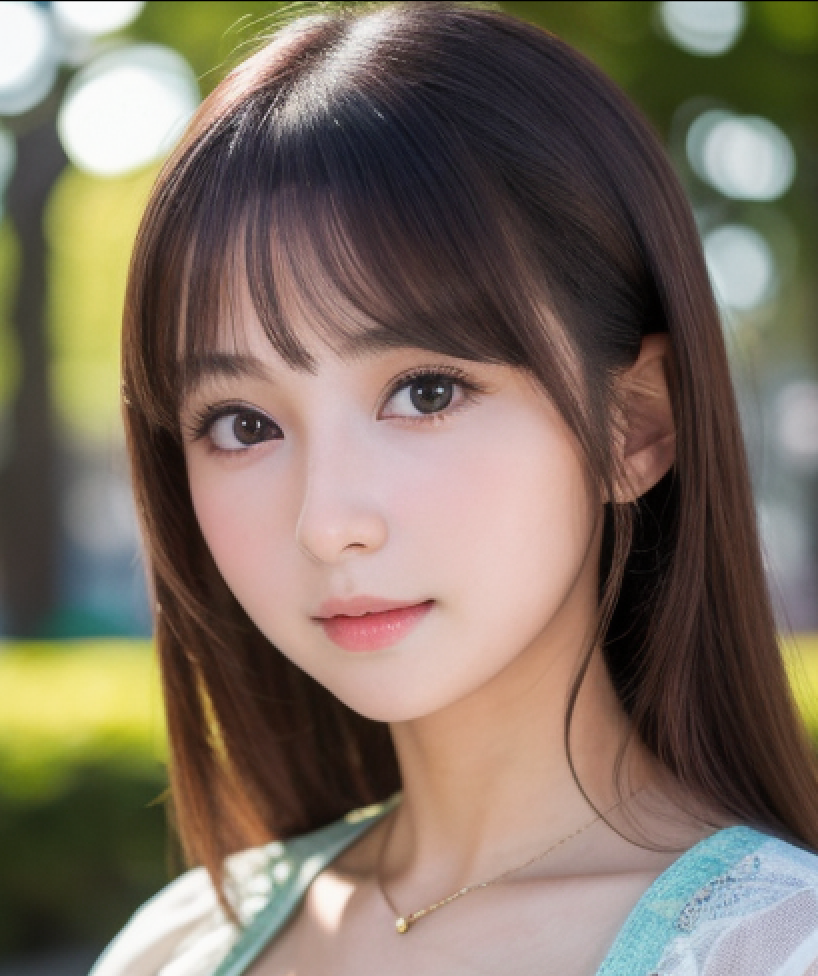
まず生成に用いる画像をテキトーに拾ってきます
(なんでもいいです)
拾ってきた画像をstatic/imagesフォルダを作成し、その中に入れておきます
これは、flaskで画像を生成するサイトを作るので、そのとき用にstatic内に入れておきます
生成用のファイルrun.pyを作成します
./
├ models
│ └ Counterfeit-V3.0_fix_fp16.safetensors ←ダウンロードしたモデル
├ static
│ └ images
│ │ └ target.png ←拾ってきた画像、ファイル名はなんでもいい
└ run.py
現状こんな感じになってれば大丈夫です
2. 流れ
画像を生成していく流れは以下の通りです
- 入力画像を受け取る
- Canny画像を生成する
あとで説明します - ControlnetのPipelineを準備
- seed値設定
- 画像生成して保存
こんな感じです!
3. 実装
実装していきましょう
Canny画像の生成
まず入力画像を受け取って、Canny画像を生成します
今回target.pngは事前にstablediffusion text2imgで生成しておいた画像を使います
(なければ普通に拾い画で大丈夫です)
from controlnet_aux import CannyDetector
from diffusers import StableDiffusionControlNetPipeline, ControlNetModel, DDIMScheduler
import torch
import random
from PIL import Image
# 使ってないライブラリもありますが、あとで使っていくので消さないように!


def create_anime_image(file_name: str) -> bool:
    original_image = Image.open(f"./static/images/{file_name}")

    # 入力画像の整形
    aspect_ratio = original_image.width / original_image.height
    if aspect_ratio > 1:
        new_width = 512
        new_height = int(new_width / aspect_ratio) - (int(new_width / aspect_ratio) % 8)
    else:
        new_height = 512
        new_width = int(new_height * aspect_ratio) - (int(new_height * aspect_ratio) % 8)
    init_image = original_image.resize((new_width, new_height))

    # Canny画像作成
    canny_detector = CannyDetector()
    canny_image = canny_detector(init_image)

    # Canny画像の保存
    canny_image.save("canny_image.png")

    return True


if __name__ == "__main__":
    file_name = "target.png" # 自分で用意したファイル名に変更
    create_anime_image(file_name=file_name)
入力画像の整形とCanny画像の作成をしています
入力画像の整形は、計算コストを減らすために、maxでも512pxまでにしてます
それに加えて、Stablediffusionは8の倍数の幅しか入力画像として受け取れないので、8で割ったあまりを引くことで8の倍数に整形してます
(めっちゃてきとーです)
実行するとルートディレクトリにcanny_image.pngが保存されています
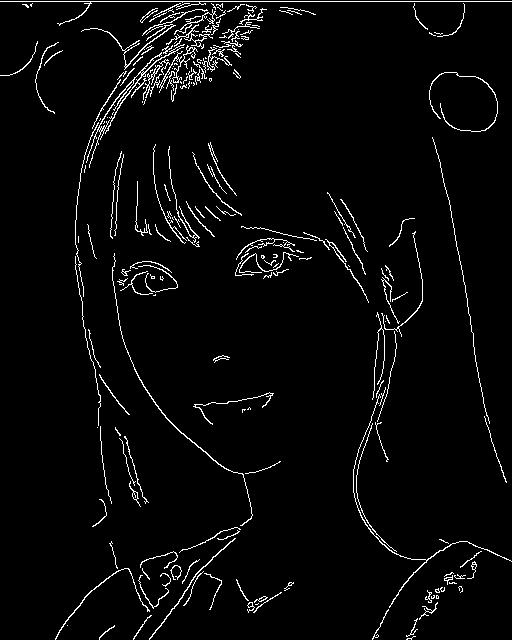
このようにCanny画像というのは線で書かれたような写真になり、もとの画像の形を維持して新しい画像が生成できます
Controlnetの準備
def create_anime_image(file_name: str) -> bool:
    # 略

    # ControlnetのPipelineの準備
    controlnet = ControlNetModel.from_pretrained("lllyasviel/sd-controlnet-canny").to("mps")
    pipe = StableDiffusionControlNetPipeline.from_single_file(
        "./models/Counterfeit-V3.0_fix_fp16.safetensors",
        controlnet=controlnet,
        safety_checker=lambda images, **kwargs: (images, None),
    ).to("mps")

    # スケジューラ、最適化、
    # pipe.safety_checker = lambda images, **kwargs: (images, None)
    pipe.scheduler = DDIMScheduler.from_config(pipe.scheduler.config)
    pipe.enable_attention_slicing()

    return True

# 略
ここでsafety_checkerとか他の設定もできます
safety_checkerは18禁画像、露出度の高い画像が生成されないようにするフィルターです
そのような画像が生成されてしまった場合は黒塗り画像が出てきます
画像生成
def create_anime_image(file_name: str) -> bool:
    # 略

    seed = random.randrange(0, 4294967295, 1)
    generator = torch.Generator("mps").manual_seed(seed)

    # 画像生成
    image = pipe(
        prompt="anime style",  # アニメ系の画像にしたい
        negative_prompt="(worst quality:1.4), (low quality:1.4), (monochrome:1.3), nsfw, NSFW",
        num_inference_steps=20,
        generator=generator,
        image=canny_image,
    ).images[0]

    # 画像保存
    image.save("./static/images/result.png")
    print(f"Saved to result.png  seed: {seed}")

    return True

# 略
ここまでのコード
from controlnet_aux import CannyDetector
from diffusers import StableDiffusionControlNetPipeline, ControlNetModel, DDIMScheduler
import torch
import random
from PIL import Image


def create_anime_image(file_name: str) -> bool:
    try:
        original_image = Image.open(f"./static/images/{file_name}")

        # 入力画像の整形
        aspect_ratio = original_image.width / original_image.height
        if aspect_ratio > 1:
            new_width = 512
            new_height = int(new_width / aspect_ratio) - (int(new_width / aspect_ratio) % 8)
        else:
            new_height = 512
            new_width = int(new_height * aspect_ratio) - (int(new_height * aspect_ratio) % 8)
        init_image = original_image.resize((new_width, new_height))

        # Canny画像作成
        canny_detector = CannyDetector()
        canny_image = canny_detector(init_image)

        # Canny画像の保存
        canny_image.save("./static/images/canny_image.png")

        # ControlnetのPipelineの準備
        controlnet = ControlNetModel.from_pretrained("lllyasviel/sd-controlnet-canny").to("mps")
        pipe = StableDiffusionControlNetPipeline.from_single_file(
            "./models/animePastelDream_softBakedVae.safetensors",
            controlnet=controlnet,
            safety_checker=lambda images, **kwargs: (images, None),
        ).to("mps")

        # スケジューラ、最適化、
        # pipe.safety_checker = lambda images, **kwargs: (images, None)
        pipe.scheduler = DDIMScheduler.from_config(pipe.scheduler.config)
        pipe.enable_attention_slicing()

        # seed値の設定
        seed = random.randrange(0, 4294967295, 1)
        generator = torch.Generator("mps").manual_seed(seed)

        # 画像生成
        image = pipe(
            prompt="anime style",  # アニメ系の画像にしたい
            negative_prompt="(worst quality:1.4), (low quality:1.4), (monochrome:1.3), nsfw, NSFW",
            num_inference_steps=20,
            generator=generator,
            image=canny_image,
        ).images[0]

        # 画像保存
        image.save("./static/images/result.png")
        print(f"Saved to result.png  seed: {seed}")
    except Exception as e:
        return False
    return True


if __name__ == "__main__":
    file_name = "target.png"
    create_anime_image(file_name=file_name)
実行すると画像が生成され、result.pngに保存されていると思います!
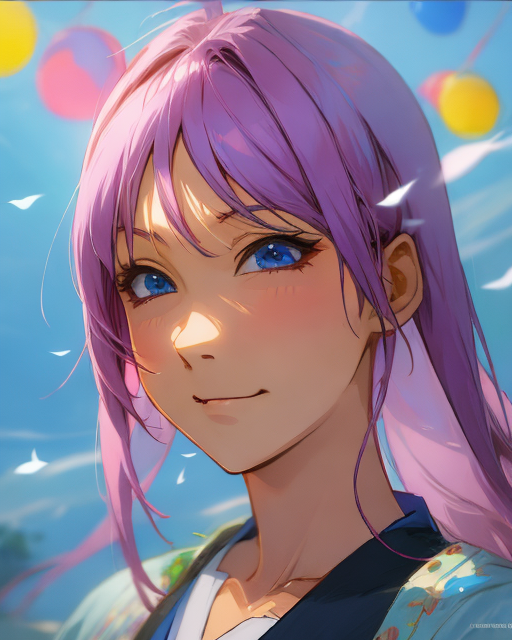
別のモデルも試してみた
「Stablediffusion モデル おすすめ」とかでググればいっぱい出てきました
僕はこちらのAnime Pastel Dreamというモデルを試してみました
models/animePastelDream_softBakedVae.safetensors
あとはrun.pyのpathを変えてあげればいけます
雰囲気変わりましたね〜〜
Flask側
ここからは、webアプリケーション内で、画像生成を行っていこうと思います!
↓Newって書いてるファイル/フォルダは新しく作成してください
./
├ models
│ └ Counterfeit-V3.0_fix_fp16.safetensors
│ └ animePastelDream_softBakedVae.safetensors
├ static
│ ├ images
│ │ └ ...
│ ├ style ←New
│ │ └ loading.css ←New
├ templates ←New
│ ├ base.html ←New
│ ├ index.html ←New
│ └ result.html ←New
├ app.py ←New
└ run.py
やること
- index.htmlで画像ファイルを受け取る
- diffusersでimg2img画像生成
- result.htmlに生成した画像を表示
- デザイン・ローディング画面作成
from flask import Flask, request, render_template, jsonify
from run import create_anime_image

app = Flask(__name__)


@app.route("/")
def index():
    return render_template("index.html")


@app.route("/result", methods=["GET", "POST"])
def result():
    if request.method == "GET":
        return render_template("index.html")
    elif request.method == "POST":
        file = request.files["image"]
        file.save(f"./static/images/{file.filename}")
        return render_template("result.html", file_name=file.filename)


@app.route("/generate_image", methods=["POST"])
def generate_image():
    file_name = request.form["file_name"]
    result_bool = create_anime_image(file_name=file_name)
    if result_bool:
        return jsonify({"file_name": file_name})
    else:
        return jsonify({"error": "Error"})


if __name__ == "__main__":
    app.run(debug=True)
<!DOCTYPE html>
<html lang="ja">
<head>
<meta charset="UTF-8" />
<meta http-equiv="X-UA-Compatible" content="IE=edge" />
<meta name="viewport" content="width=device-width, initial-scale=1.0" />
<title>Anime Character</title>
<script src="https://code.jquery.com/jquery-3.6.4.min.js"></script>
<script src="https://cdn.tailwindcss.com"></script>
{% block head %}{% endblock %}
</head>
<body class="text-center flex flex-col min-h-screen">
<header>
<h1 class="text-[2em]">{% block header %}Flask App{% endblock %}</h1>
</header>
<main>{% block content %}{% endblock %}</main>
<footer class="mt-auto">
<p>© 2023/12 GeekSalon. All rights reserved.</p>
</footer>
</body>
</html>
jqueryとtailwind入れてます
{% extends 'base.html' %}
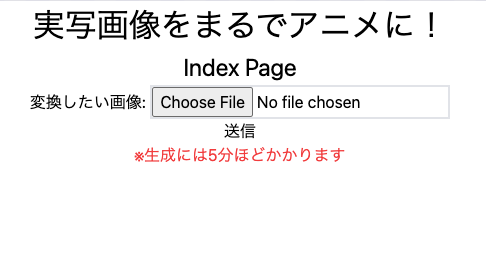
{% block header %}実写画像をまるでアニメに!{% endblock %}
{% block content %}
<h2 class="text-[1.5em]">Index Page</h2>
<form action="/result" method="post" enctype="multipart/form-data">
<label for="image">変換したい画像: </label>
<input type="file" id="image" class="w-[300px] border-2" name="image" required></input><br>
<input type="submit" value="送信" />
</form>
<p class="text-red-500">※生成には5分ほどかかります</p>
{% endblock %}
{% extends 'base.html' %} {% block head %}
<link
rel="stylesheet"
href="{{ url_for('static', filename='style/loading.css') }}"
/>
{% endblock %} {% block header %}実写画像をまるでアニメに!{% endblock %} {%
block content %}
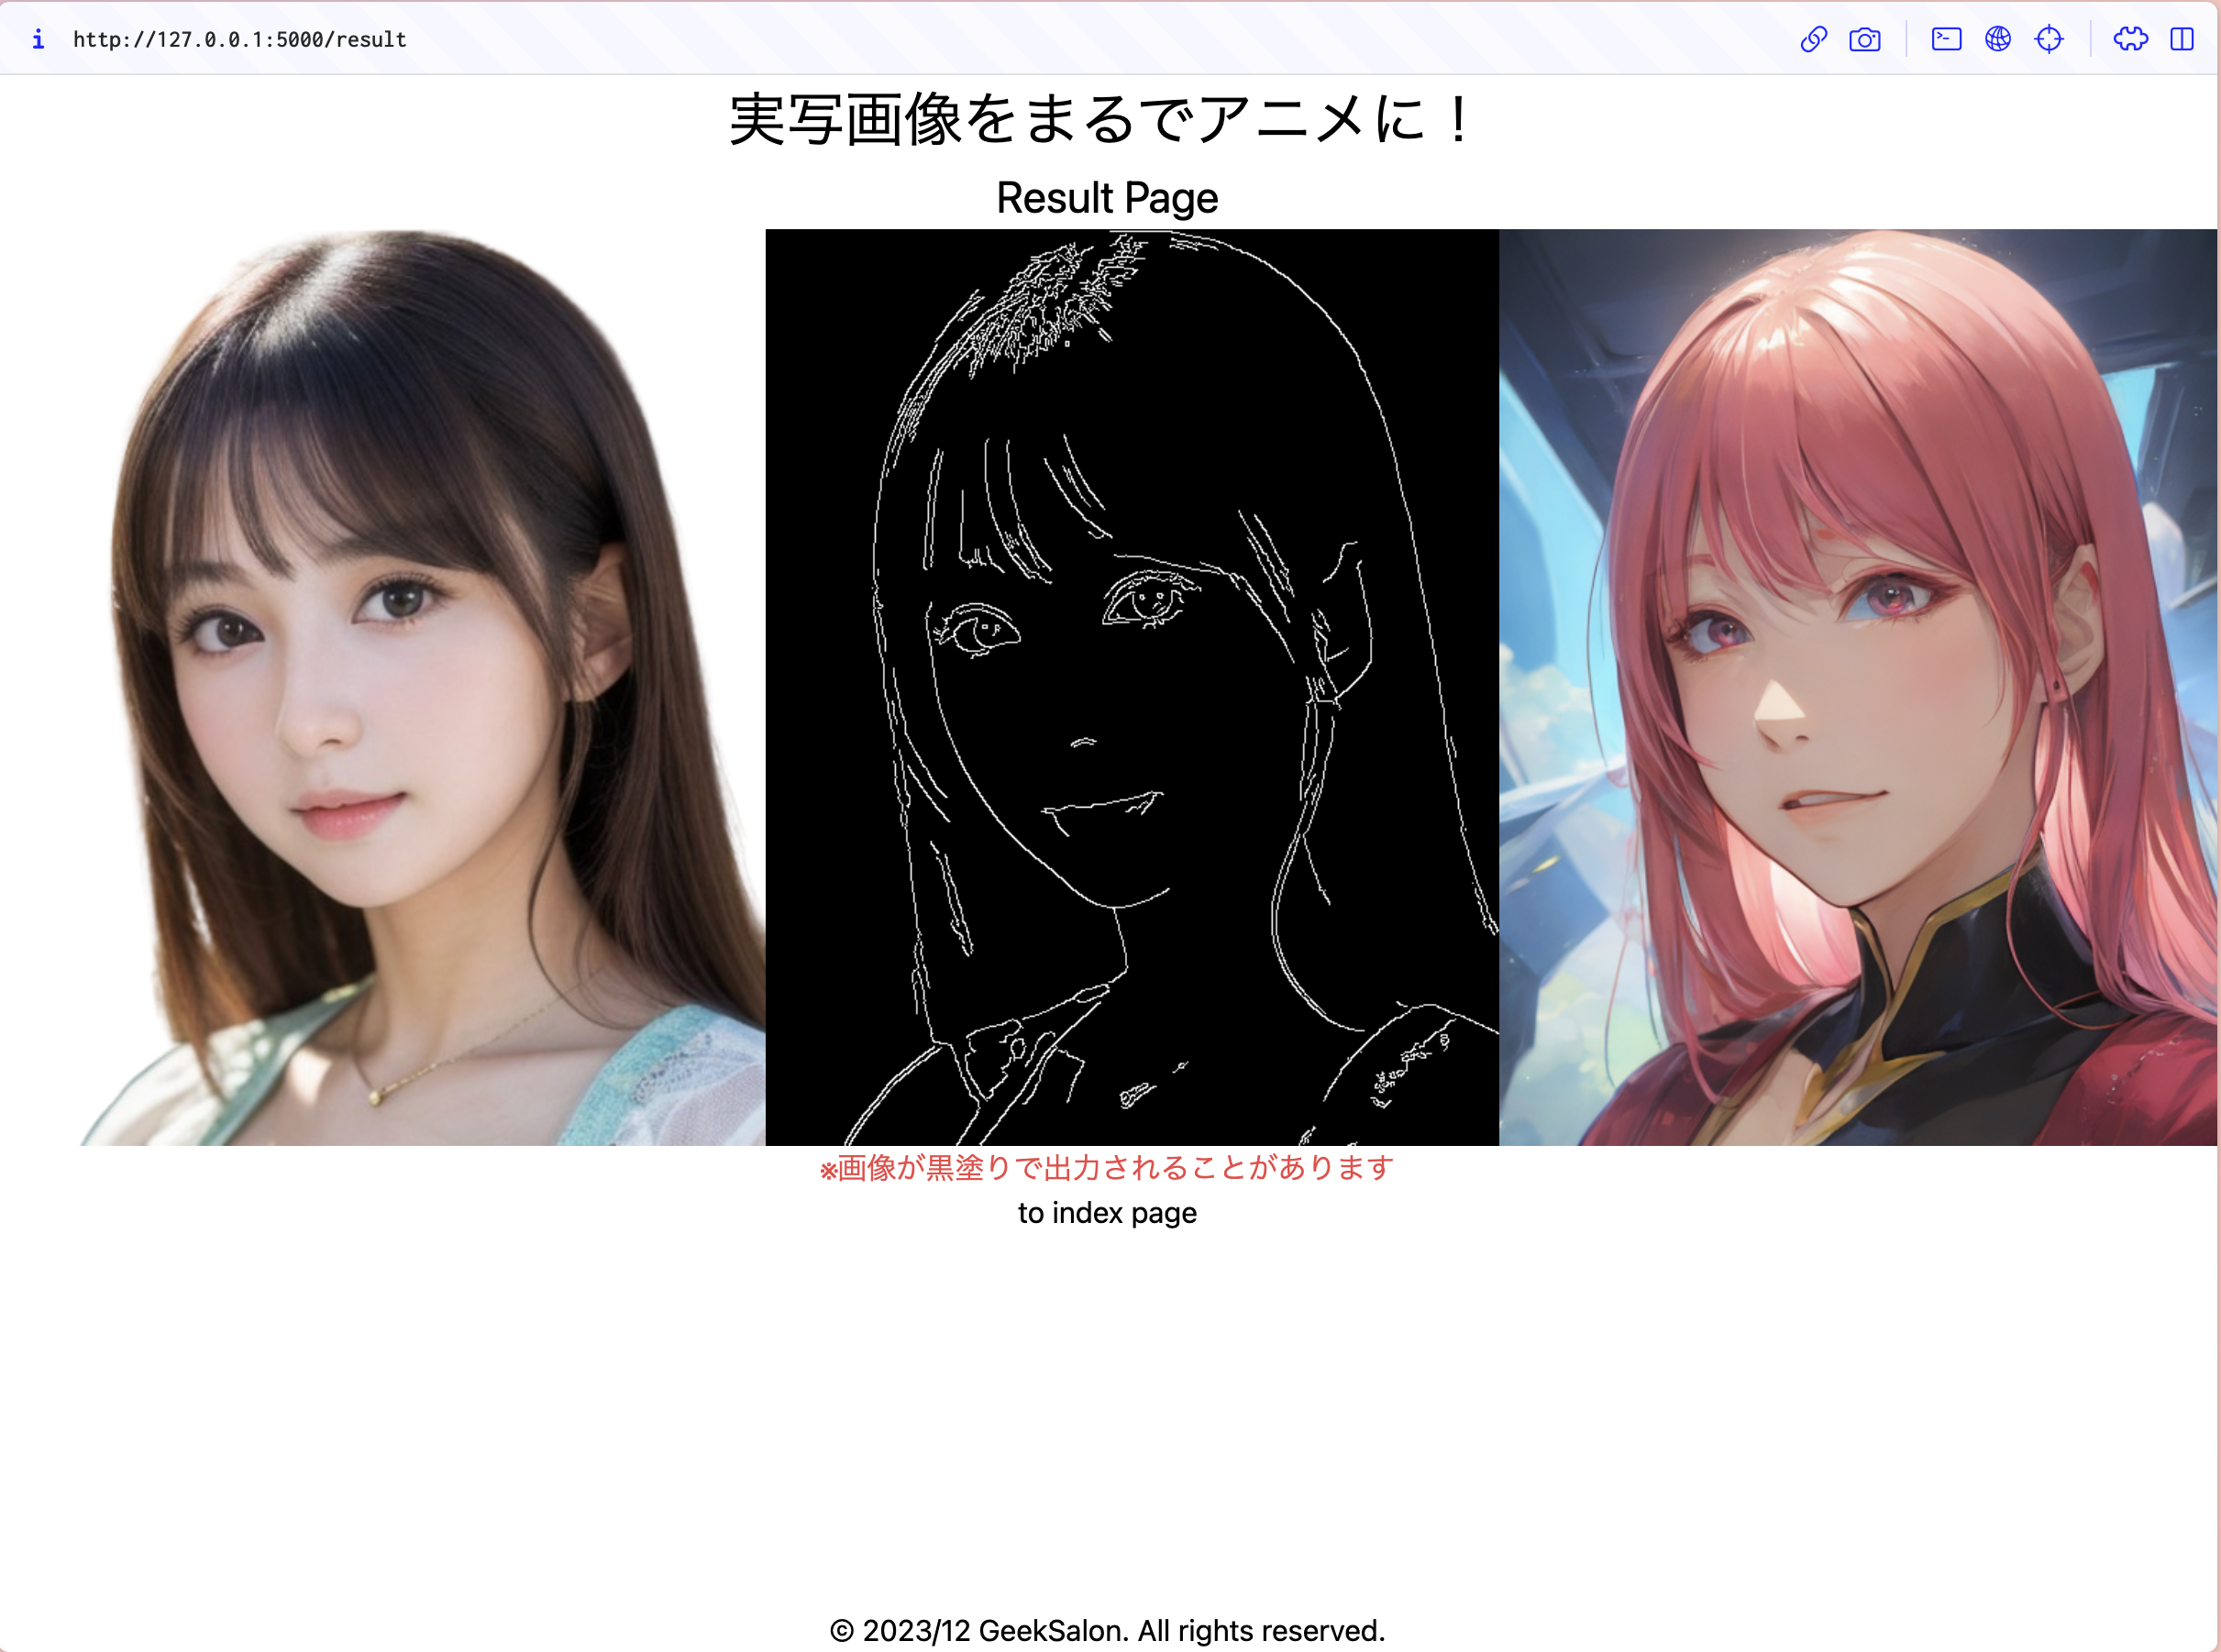
<h2 class="text-[1.5em]">Result Page</h2>
<div id="loading-screen">
<div id="loading-spinner" class="m-10">生成中...</div>
<div id="loading-time"><span id="loading-duration">0.00</span> s</div>
</div>
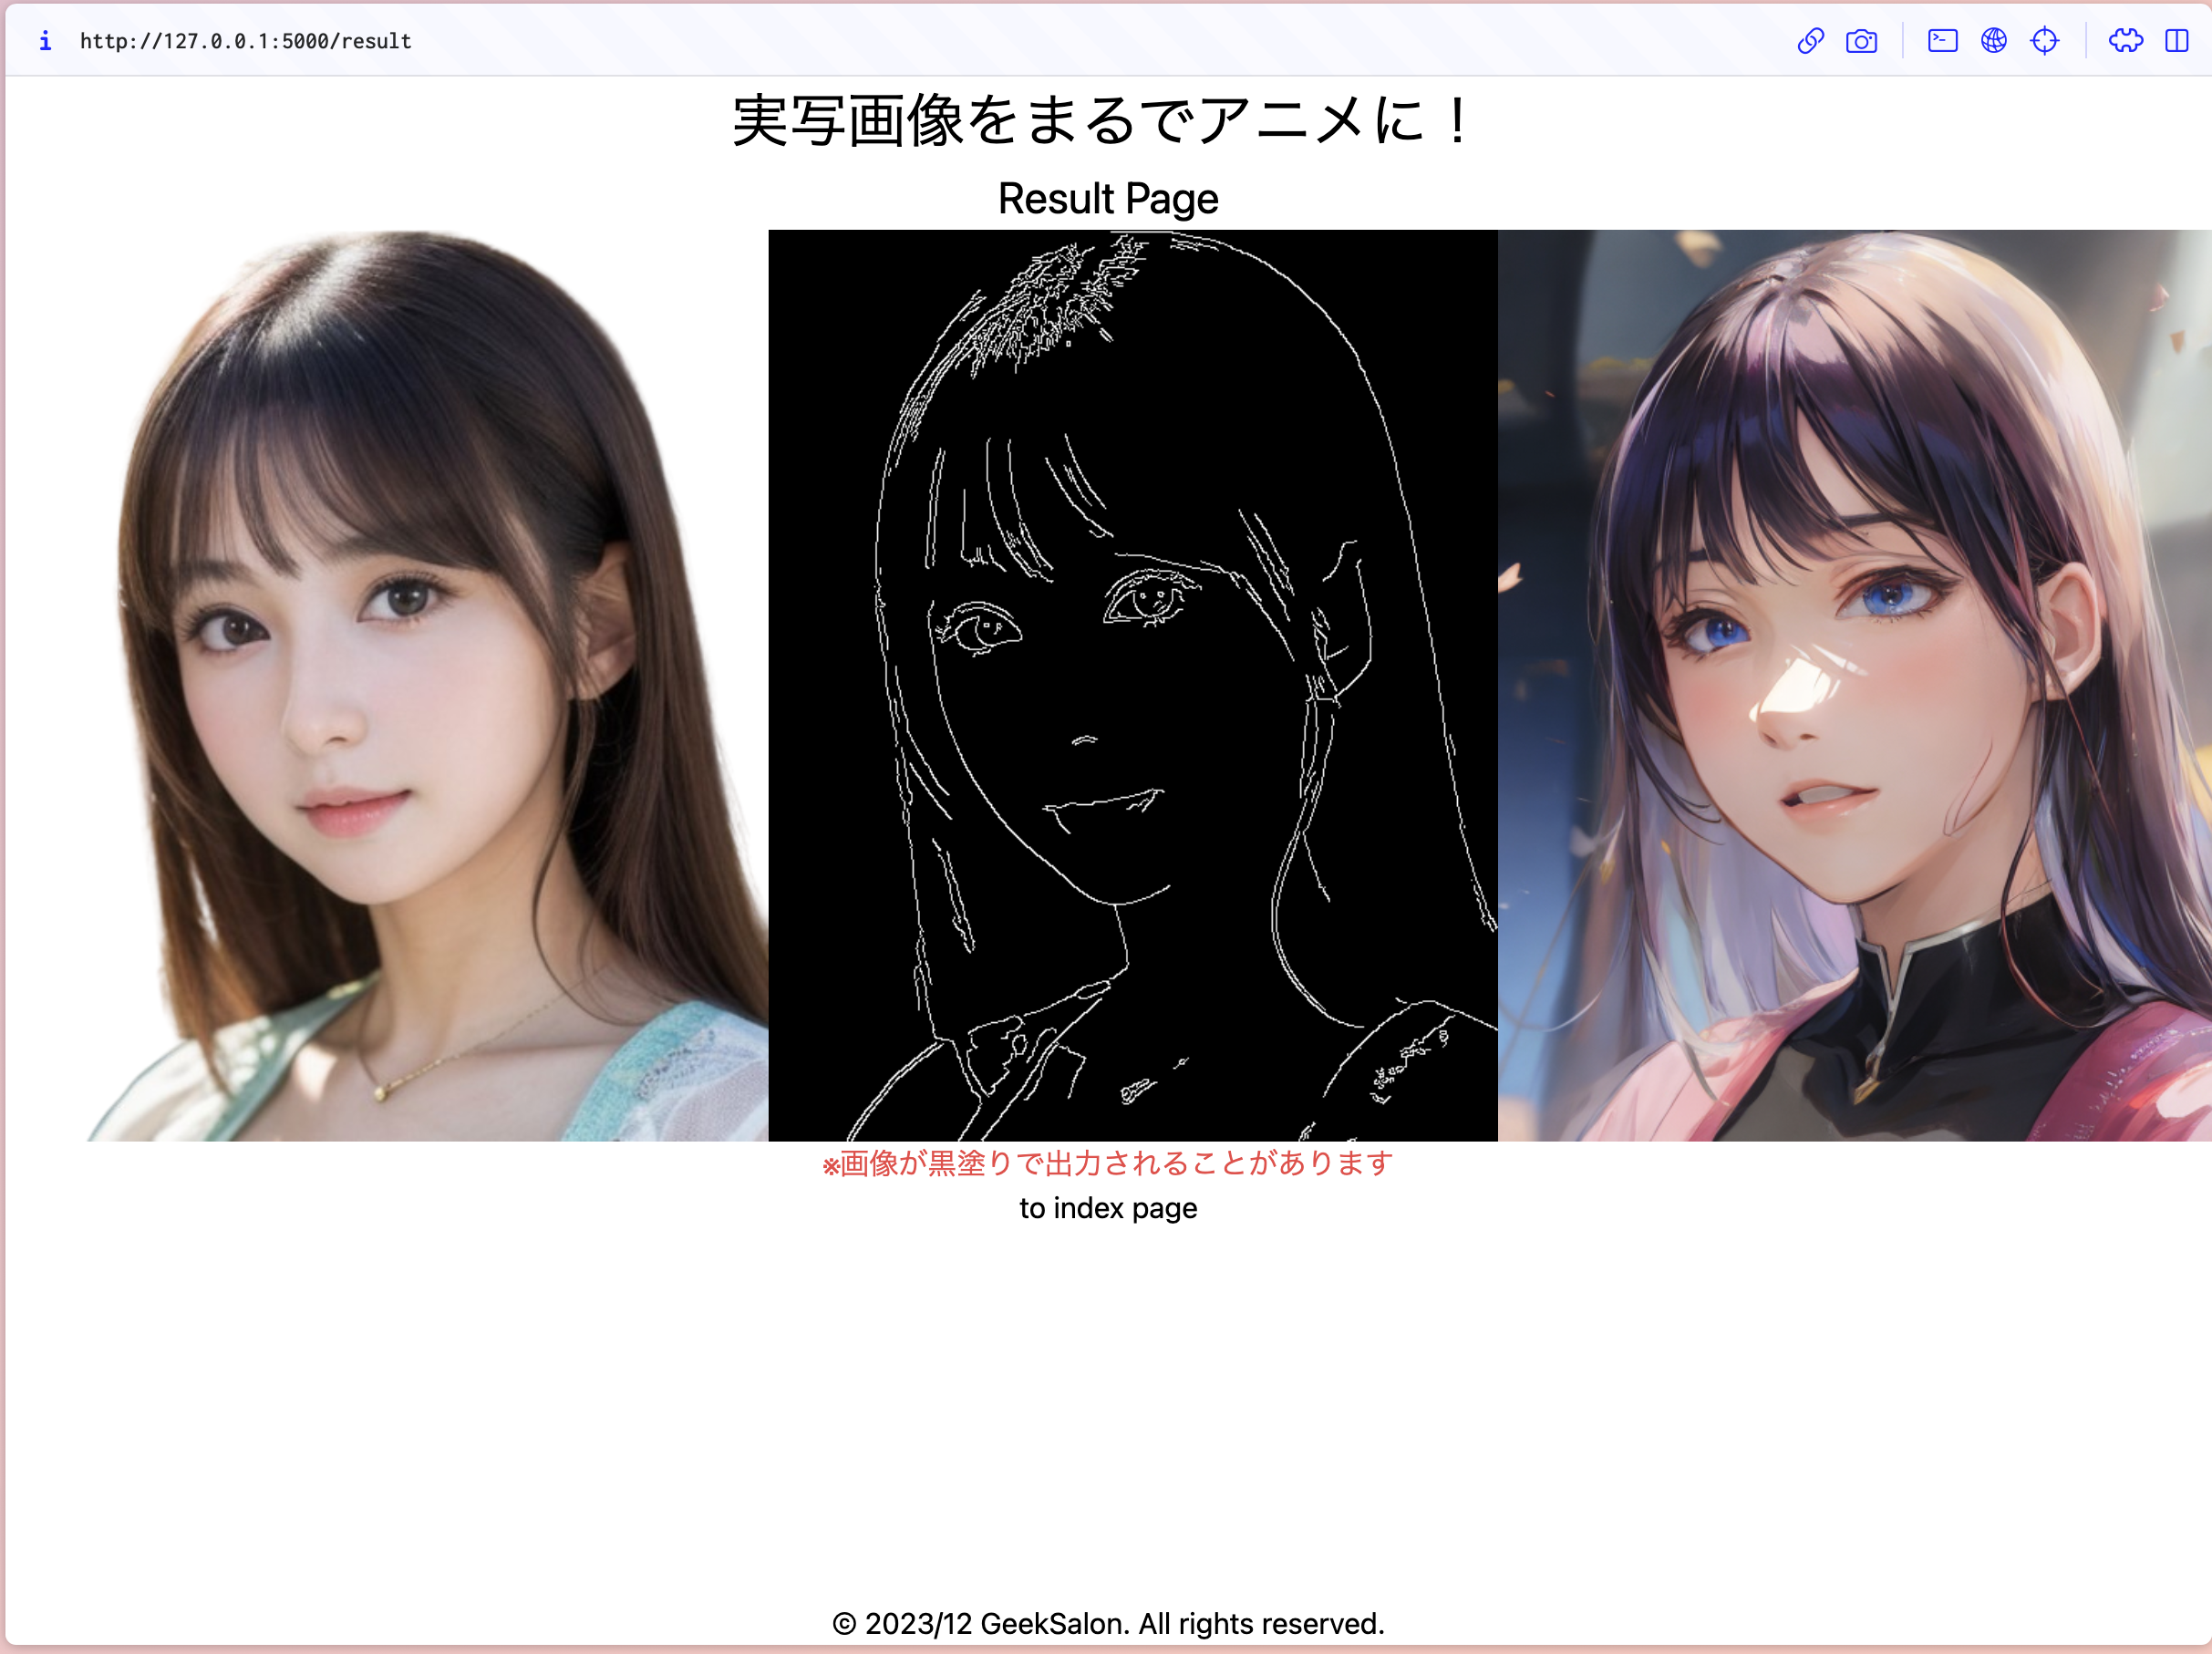
<div id="result-body" class="text-center" hidden>
<div class="images flex">
<img
id="original-image"
class="mx-auto w-auto h-[500px]"
src="{{ image_path }}"
alt="Original Image"
/>
<img
id="canny-image"
class="mx-auto w-auto h-[500px]"
src="{{ image_path }}"
alt="Canny Image"
/>
<img
id="result-image"
class="mx-auto w-auto h-[500px]"
src="{{ image_path }}"
alt="Result Image"
/>
</div>
<p class="text-red-500">※画像が黒塗りで出力されることがあります</p>
<a href="/">to index page</a>
</div>
<script>
// ローディング画面、画像生成の非同期処理
$(document).ready(function () {
const startTime = new Date().getTime();
$('#loading-screen').show();
// ローディング時間を計算
const updateLoadingTime = () => {
var currentTime = new Date().getTime();
var elapsedSeconds = (currentTime - startTime) / 1000;
$('#loading-duration').text(elapsedSeconds.toFixed(2));
}
const updateInterval = setInterval(updateLoadingTime, 100);
$.ajax({
type: 'POST',
url: '/generate_image',
data: { file_name: {{ file_name | tojson }} },
success: function (data) {
clearInterval(updateInterval);
$('#loading-screen').hide();
$('#original-image').attr('src', `./static/images/${data.file_name}`);
$('#canny-image').attr('src', `./static/images/canny_image.png`);
$('#result-image').attr('src', `./static/images/result.png`);
$('#result-body').show();
},
error: function (error) {
console.error(error);
}
});
});
</script>
{% endblock %}
#loading-spinner {
  animation: rotateAnimation 3s linear infinite;
}

@keyframes rotateAnimation {
  0% {
    transform: rotate(0deg);
  }
  40% {
    transform: rotate(0deg);
  }
  55% {
    transform: rotate(180deg);
  }
  70% {
    transform: rotate(360deg);
  }
  85% {
    transform: rotate(540deg);
  }
  100% {
    transform: rotate(720deg);
  }
}
これで終わりです!
python app.pyで確かめてみましょう!
index page
result page (loading)
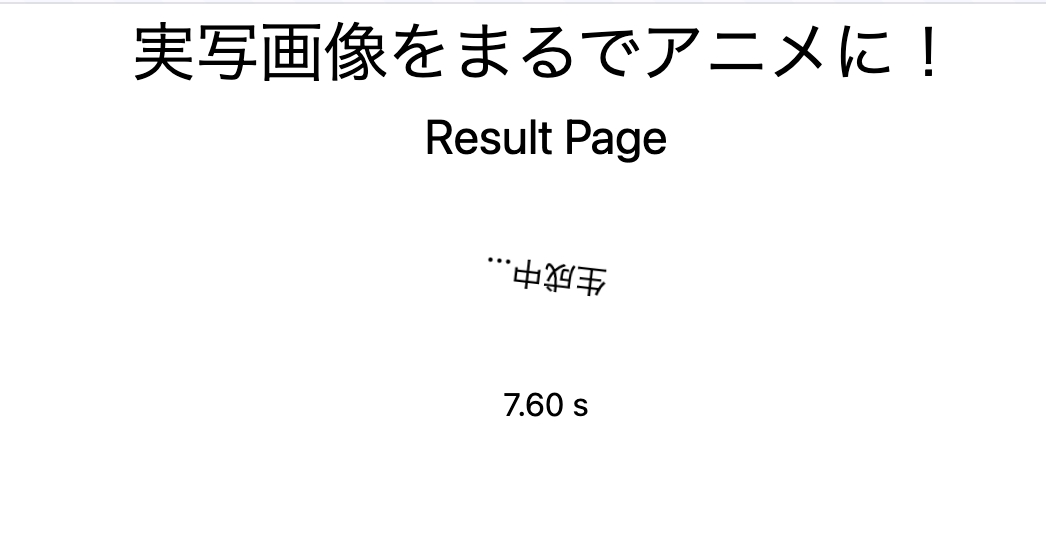
回転したり、タイム表示したりしてみました
(生成に100秒ほどかかりました)
result page
参考記事
小話
はじめはバックエンドでこのflaskを動かし、画像生成し、フロントエンドをReactで作成して、リリースまでしようと考えていたのですが、ローカルでは実現できたのですが、このバックエンドをリリースしようと思うと、モデルがめちゃめちゃ重たいのでお金がめっちゃかかるっぽいです
そんなお金かかるなら僕の趣味レベルなのでリリースは断念しました〜〜
Herokuなら月に数万円かかるみたいです
以上!
ここまでお読みいただき感謝
しぇしぇ〜