ChatGPTのAPIが公開されてから3ヶ月ほど経ちましたが、今回はFlutterでChatGPT APIを使うサンプルプログラムを作成してみました。
ChatGPT APIのAPI keysの取得
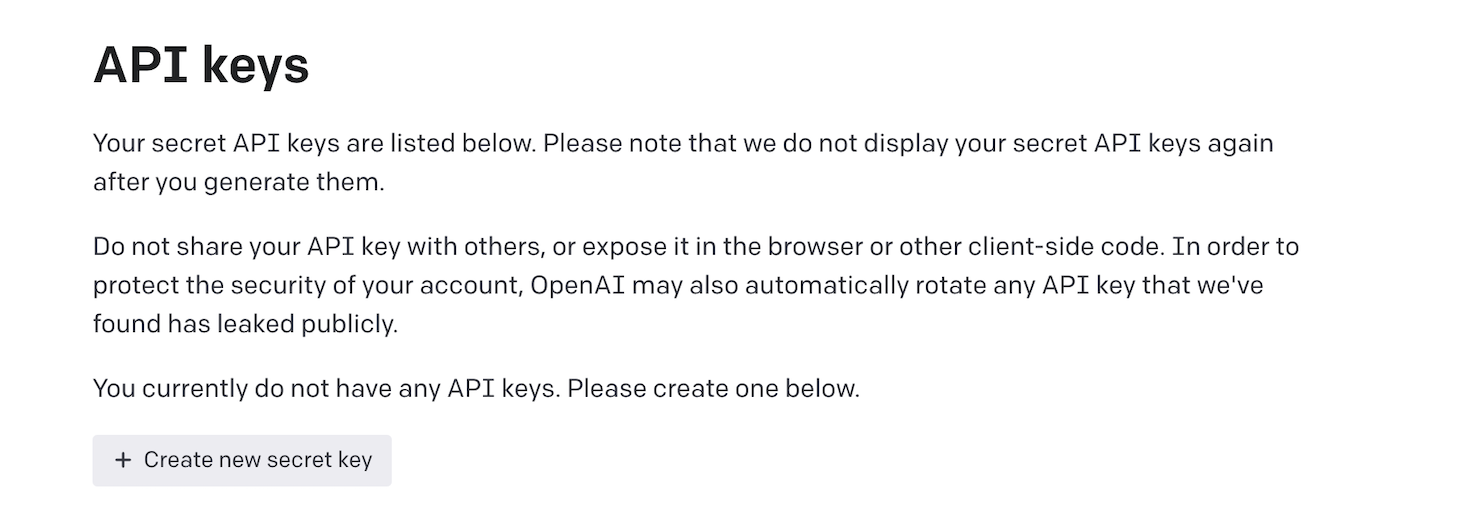
ChatGPT APIを使用するには、まずOpenAIのサイトでユーザー登録を行いChatGPT APIのAPI keysを取得する必要があります。
ユーザー登録後、[user] - [API keys]に遷移して以下の[Create new secret key]をクリックするとAPI keysを取得することができます。

ChatGPT APIの仕様について
ChatGPT APIの仕様についてはOpenAIのサイトの[Developers]-[APIReference]で解説されています。
curl https://api.openai.com/v1/chat/completions \
  -H "Content-Type: application/json" \
  -H "Authorization: Bearer $OPENAI_API_KEY" \
  -d '{
     "model": "gpt-3.5-turbo",
     "messages": [{"role": "user", "content": "Say this is a test!"}],
     "temperature": 0.7
   }'
{
   "id":"chatcmpl-abc123",
   "object":"chat.completion",
   "created":1677858242,
   "model":"gpt-3.5-turbo-0301",
   "usage":{
      "prompt_tokens":13,
      "completion_tokens":7,
      "total_tokens":20
   },
   "choices":[
      {
         "message":{
            "role":"assistant",
            "content":"\n\nThis is a test!"
         },
         "finish_reason":"stop",
         "index":0
      }
   ]
}
重要な点は以下になります。
- 最初に取得したAPI keysをBearer認証に使用します。
- HTTP Bodyに"messages": [{"role": "{ROLE}", "content": "{質問もしくは回答}"}]の形式でChatGPT APIにHTTP POSTして質問を送信します。
- ChatGPT APIからの回答は"choices"下に["messages": {"role": "{ROLE}", "content": "{回答}"}]の形式で入ります。
- ROLEはユーザーの質問は"user"、ChatGPTからの回答は"assistant"とします。ChatGPTに質問を出す時に直近の質問だけでなく、過去の質問とそれに対するChatGPTからの回答も一緒に配列に含めることでChatGPTがより適切な回答を返してくれる様になります。ただしあまり過去の質問、回答を多く含めすぎるとトークンが増えてChatGPT APIの利用料金が増えてしまいますので注意が必要です。
- ChatGPT APIの利用料金は本記事執筆時点(2023年6月4日)では1000トークンあたり0.002ドルです。今後変わる可能性もありますのでご注意下さい。
FlutterでChatGPT APIにアクセスするコード
ではFlutterでChatGPT APIにアクセスするコードを書いてみましょう。
まずChatGPTへの質問とChatGPTからの回答を格納するモデルを定義します。
class ChatMessage {
  ChatMessage({
    required this.message,
    required this.role,
  });

  String message;
  Role role;
}

enum Role {
  SYSTEM('system'),
  USER('user'),
  ASSISTANT('assistant'),
  ;

  const Role(this.name);

  final String name;
}
このモデルにChatGPTへの質問を格納したら以下のリポジトリのgetAiAnswerメソッドに渡してChatGPT APIにアクセスし回答を受け取る様にします。
import 'package:flutter_chatgptapi_sample/config/chatgpt_config.dart';

import '../model/chat_message.dart';
import '../network/api_service.dart';

/// AI Chatのリポジトリ
class AiChatRepository {
  final String _chatGptApiDomain = 'api.openai.com';
  final String _chatGptApiPath = 'v1/chat/completions';
  final String _chatGptModel = 'gpt-3.5-turbo';
  final ApiService _apiService = ApiService();

  /// AIからの回答を取得する
  Future<String?> getAiAnswer(List<ChatMessage> chatMessages) async {
    String? returnValue;
    final List<Map<String, String>> messages = [];

    try {
      for (final ChatMessage chatMessage in chatMessages) {
        messages.add(
            {'role': chatMessage.role.name, 'content': chatMessage.message});
      }

      /// ChatGPT APIのAPI keysを取得
      final apiKeys = ChatGptConfig.getApiKeys();

      /// ChatGPT APIにHTTP POSTを行い戻り値を取得
      final response = await _apiService.postJson(
        _chatGptApiDomain,
        _chatGptApiPath,
        apiKeys,
        {
          'model': _chatGptModel,
          'messages': messages,
        },
      );

      if (response != null) {
        /// ChatGPT APIからの回答を取得
        returnValue = response['choices'][0]['message']['content'].toString();
      }

      return returnValue;
    } catch (e) {
      rethrow;
    }
  }
}
ChatGPT APIにHTTP POSTする部分はhttpパッケージを使用しました。
import 'dart:convert';

import 'package:http/http.dart' as http;

/// APIとアクセスする為のサービス
class ApiService {

  /// JSONをPOSTする
  Future<Map<dynamic, dynamic>?> postJson(String domain, String path,
      String token, Map<String, dynamic> body) async {
    try {
      final response = await http.post(Uri.https(domain, path),
          headers: {
            'content-type': 'application/json',
            'authorization': 'Bearer $token'
          },
          body: json.encode(body));
      return jsonDecode(utf8.decode(response.bodyBytes)) as Map;
    } catch (e) {
      rethrow;
    }
  }
}
今回はサンプルプログラムということでAPI keysは.envファイルにAPI_KEYS={API keysの値}の形式で設定しflutter_dotenvパッケージを使用して取得する様にしました。
import 'package:flutter_dotenv/flutter_dotenv.dart';

class ChatGptConfig {

  static String getApiKeys() {
    return dotenv.env['API_KEYS']!;
  }
}
ただ.envファイルの中身は丸見えになりますので、API keysを他人に盗まれて好き放題に使われてしまう可能性があります。
その為、実際にアプリを作成するときはAPI keysは暗号化して保存する等の工夫をした方が良いです。
私の場合は色々検討した末、API keysはアプリ内に保持せずバックエンドのAPIから渡す様にしました。
サンプルプログラム全体
今回のサンプルプログラムはGitHubの以下のリポジトリで公開しています。
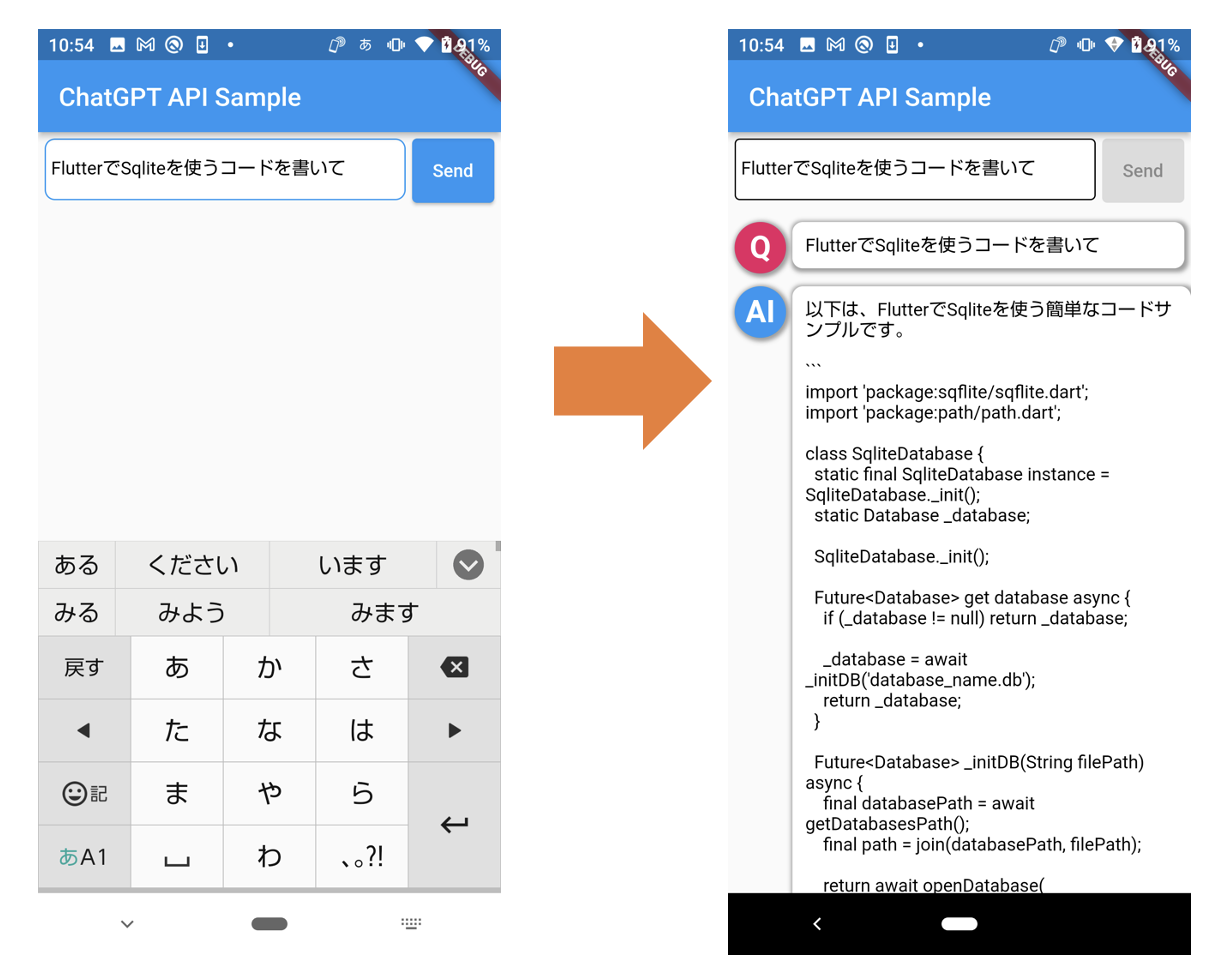
最初に.envを作成してAPI_KEYS={API keysの値}を設定し、flutter pub get & flutter runを実行すると以下の様にChatGPT APIに質問を送信し、返ってきた回答を表示するプログラムが動作します。
参考文献
OpenAI: API Reference
http | Dart Package
flutter_dotenv | Flutter Package
