はじめに
本記事では、以下の流れを実際に行った手順としてまとめます。
- PythonスクリプトをGUI化する
- PyInstallerを使ってexe化する
- ビルドを自動化する(.bat)
- GitHubに(できるだけ)綺麗なリポジトリを作る
- GitHub Releaseで配布可能にする
前提
- Windows 10/11
- Python3系
- GitHubアカウントがあること
リポジトリの構成
まず、GitHubにリポジトリを用意し、フォルダは以下のような構成にします。
myapp/
├─ assets/ # アイコンや画像
├─ src/ # アプリ本体
├─ scripts/ # build.bat など
├─ .gitignore
├─ README.md
├─ requirements.txt
1. GUI化する
今回は画面上の座標(x, y)を取得し、指定間隔で自動クリックするシンプルなツールをGUI化します。
-
画面座標の取得(例:ボタン押下→5秒後に現在のマウス位置を記録)
-
クリック回数・クリック間隔(秒)・実行周期(分)の設定
-
Start / Stop ボタンで実行制御
コードは各自の要件に合わせてください。最小サンプルを以下に示します。
例: src/app.py
# src/app.py(サンプル)
import tkinter as tk
from tkinter import ttk
import threading, time
import pyautogui

class App(tk.Tk):
    def __init__(self):
        super().__init__()
        self.title("〈アプリ名〉")
        self.geometry("360x180")
        self.running = False
        self.x = tk.IntVar(value=0)
        self.y = tk.IntVar(value=0)
        self.count = tk.IntVar(value=3)
        self.interval = tk.DoubleVar(value=0.2)
        self.period_min = tk.DoubleVar(value=31)
        pyautogui.FAILSAFE = True
        self._build_ui()

    def _build_ui(self):
        frm = ttk.Frame(self, padding=12); frm.pack(expand=True, fill="both")
        ttk.Label(frm, text="座標 (x,y)").grid(row=0, column=0, sticky="w")
        ttk.Entry(frm, width=7, textvariable=self.x).grid(row=0, column=1)
        ttk.Entry(frm, width=7, textvariable=self.y).grid(row=0, column=2)
        ttk.Button(frm, text="5秒後に取得", command=self.pick_pos).grid(row=0, column=3, padx=6)

        ttk.Label(frm, text="回数").grid(row=1, column=0, sticky="w")
        ttk.Entry(frm, width=7, textvariable=self.count).grid(row=1, column=1)
        ttk.Label(frm, text="間隔(秒)").grid(row=1, column=2, sticky="w")
        ttk.Entry(frm, width=7, textvariable=self.interval).grid(row=1, column=3)

        ttk.Label(frm, text="周期(分)").grid(row=2, column=0, sticky="w")
        ttk.Entry(frm, width=7, textvariable=self.period_min).grid(row=2, column=1)

        btns = ttk.Frame(frm); btns.grid(row=3, column=0, columnspan=4, pady=8)
        ttk.Button(btns, text="Start", command=self.start).pack(side="left", padx=6)
        ttk.Button(btns, text="Stop", command=self.stop).pack(side="left", padx=6)

    def pick_pos(self):
        self.after(5000, lambda: (self.x.set(pyautogui.position()[0]),
                                  self.y.set(pyautogui.position()[1])))

    def start(self):
        if self.running: return
        self.running = True
        threading.Thread(target=self.loop, daemon=True).start()

    def stop(self):
        self.running = False

    def loop(self):
        while self.running:
            try:
                for _ in range(int(self.count.get())):
                    pyautogui.click(self.x.get(), self.y.get())
                    time.sleep(float(self.interval.get()))
                # 周期待機(細切れsleepで停止に反応)
                total = float(self.period_min.get()) * 60
                waited = 0.0
                while self.running and waited < total:
                    time.sleep(0.5); waited += 0.5
            except pyautogui.FailSafeException:
                self.running = False

if __name__ == "__main__":
    App().mainloop()
これで「Start」ボタンでクリック開始、「Stop」で停止できるシンプルなGUIアプリになります。
2. exe化する
次に、PyInstaller を使ってexe化します。
仮想環境の作成
python -m venv .venv
.venv\Scripts\activate
pip install --upgrade pip
pip install pyinstaller pyautogui
ビルドコマンド
pyinstaller --noconsole --onefile --clean ^
  --name "アプリ名" ^
  --icon assets\app.ico ^
  src\app.py
-
--noconsole: 黒いコンソールを非表示に
-
--onefile: 単一exeとして出力
-
--clean: キャッシュを消してクリーンビルド
-
--name: 出力されるexeの名前
-
--icon: アイコンを設定(任意)
ビルドが成功すると dist/アプリ名.exe が生成されます。これをダブルクリックすると、GUIアプリが起動します。
3. ビルドを自動化(.batファイル作成)
修正等を行った後に毎回長いコマンドを打つのは大変なので、.bat にまとめます。
scripts/build.bat
@echo off
call .venv\Scripts\activate.bat
pyinstaller --noconsole --onefile --clean ^
  --name "アプリ名" ^
  --icon assets\app.ico ^
  src\app.py
pause
これで簡単にビルド可能になりました。
4. GitHub Release で配布する
事前にdist/<アプリ名>.exeを用意しておきます。
手順
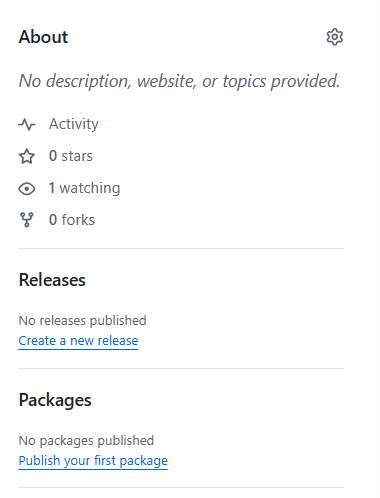
1. リポジトリのReleasesページを開く
右側の「Create a new releases」リンクをクリック。
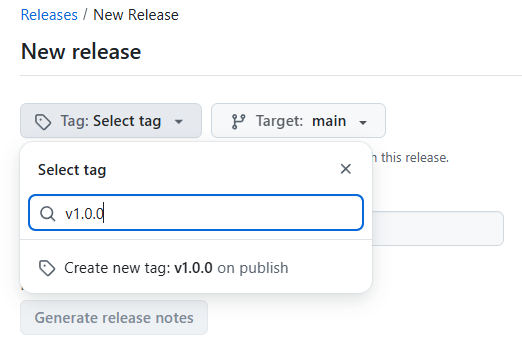
2. タグを作成
Select tag → 入力欄に v1.0.0(例:初回安定版)
Create new tag: v1.0.0 on publishを選択
ターゲットブランチは通常 main
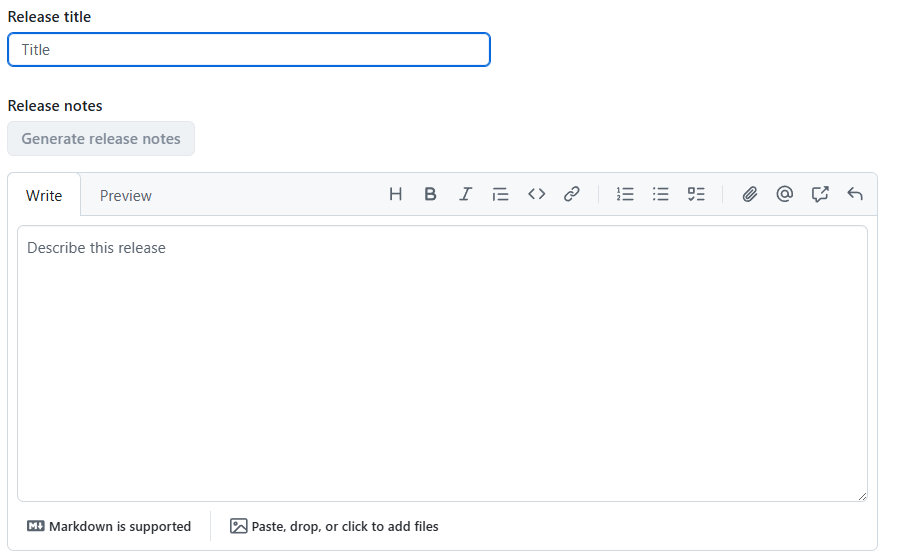
3. Release titleと説明を入力
Release title:v1.0.0 など
本文には変更点・既知の注意点・動作環境など
4. バイナリ(exe)を添付
<アプリ名〉.exe をドラッグ&ドロップでアップロード
添付が完了するとファイル名が表示される
5. Publish release をクリック
これで公開完了。
まとめ
小さなツールで、GUI化→exe化→リリースの体験をしてみました。