RESTではcurlやPostmanを使ってURLを叩くだけで簡単に動作確認することが出来ます。
一方gRPCではそのように簡単に動作確認することができません。
クライアントを実装する必要があるからです。
そういった問題を解決するために様々なツールがリリースされています。
例えば「grpcurl」はcurlのようにターミナル上でgRPCを実行することが出来ます。
$ grpcurl -plaintext -import-path . -proto proto/hello.proto -d '{"name": "Morix"}' localhost:5000 hel
lo.HelloService/Hello
{
  "message": "Hello, Morix"
}
これはこれで簡単なのですが、どうせならGUIでポチポチやりたいところです。
ということで、「omgRPC」というツールを見つけたので、それの紹介です。
omgRPCとは
そのまんまで、GUIでgRPCを実行できるツールです。
上記のgrpcurlの例で見せたものをomgRPCで実行すると以下のようになります。
インストール
まず動作確認環境は以下のようになってます。
- OS
- macOS High Sierra
- Node.js
- 8.14.0
- 10系だと動作しませんでした
- 8.14.0
手順
npmが必要なのでNode.jsは上記の通り8系でやりましょう。
$ git clone git@github.com:troylelandshields/omgrpc.git && cd omgrpc
$ npm install -g nwjs node-pre-gyp nw-gyp
$ nw install 0.25.0-sdk
$ npm install
$ npm rebuild grpc --build-from-source --runtime=node-webkit --target=0.25.0 --target_arch=x64 --target_platform=darwin
特になにもエラーがない人は、次の手順は飛ばしてください。
僕の環境では最後のrebuildで以下のようなエラーが出て失敗しました。
$ npm rebuild grpc --build-from-source --runtime=node-webkit --target=0.25.0 --target_arch=x64 --target_platform=darwin

> grpc@1.8.4 install /Users/morix/tools/omgrpc/node_modules/grpc
> node-pre-gyp install --fallback-to-build --library=static_library

xcode-select: error: tool 'xcodebuild' requires Xcode, but active developer directory '/Library/Developer/CommandLineTools' is a command line tools instance

xcode-select: error: tool 'xcodebuild' requires Xcode, but active developer directory '/Library/Developer/CommandLineTools' is a command line tools instance
どうやらXcodeを使うようです。
MacにXcodeをインストール後、以下のコマンドを実行して再度rebuildしたらうまく動きました!
$ sudo xcode-select -s /Applications/Xcode.app/Contents/Developer
使い方
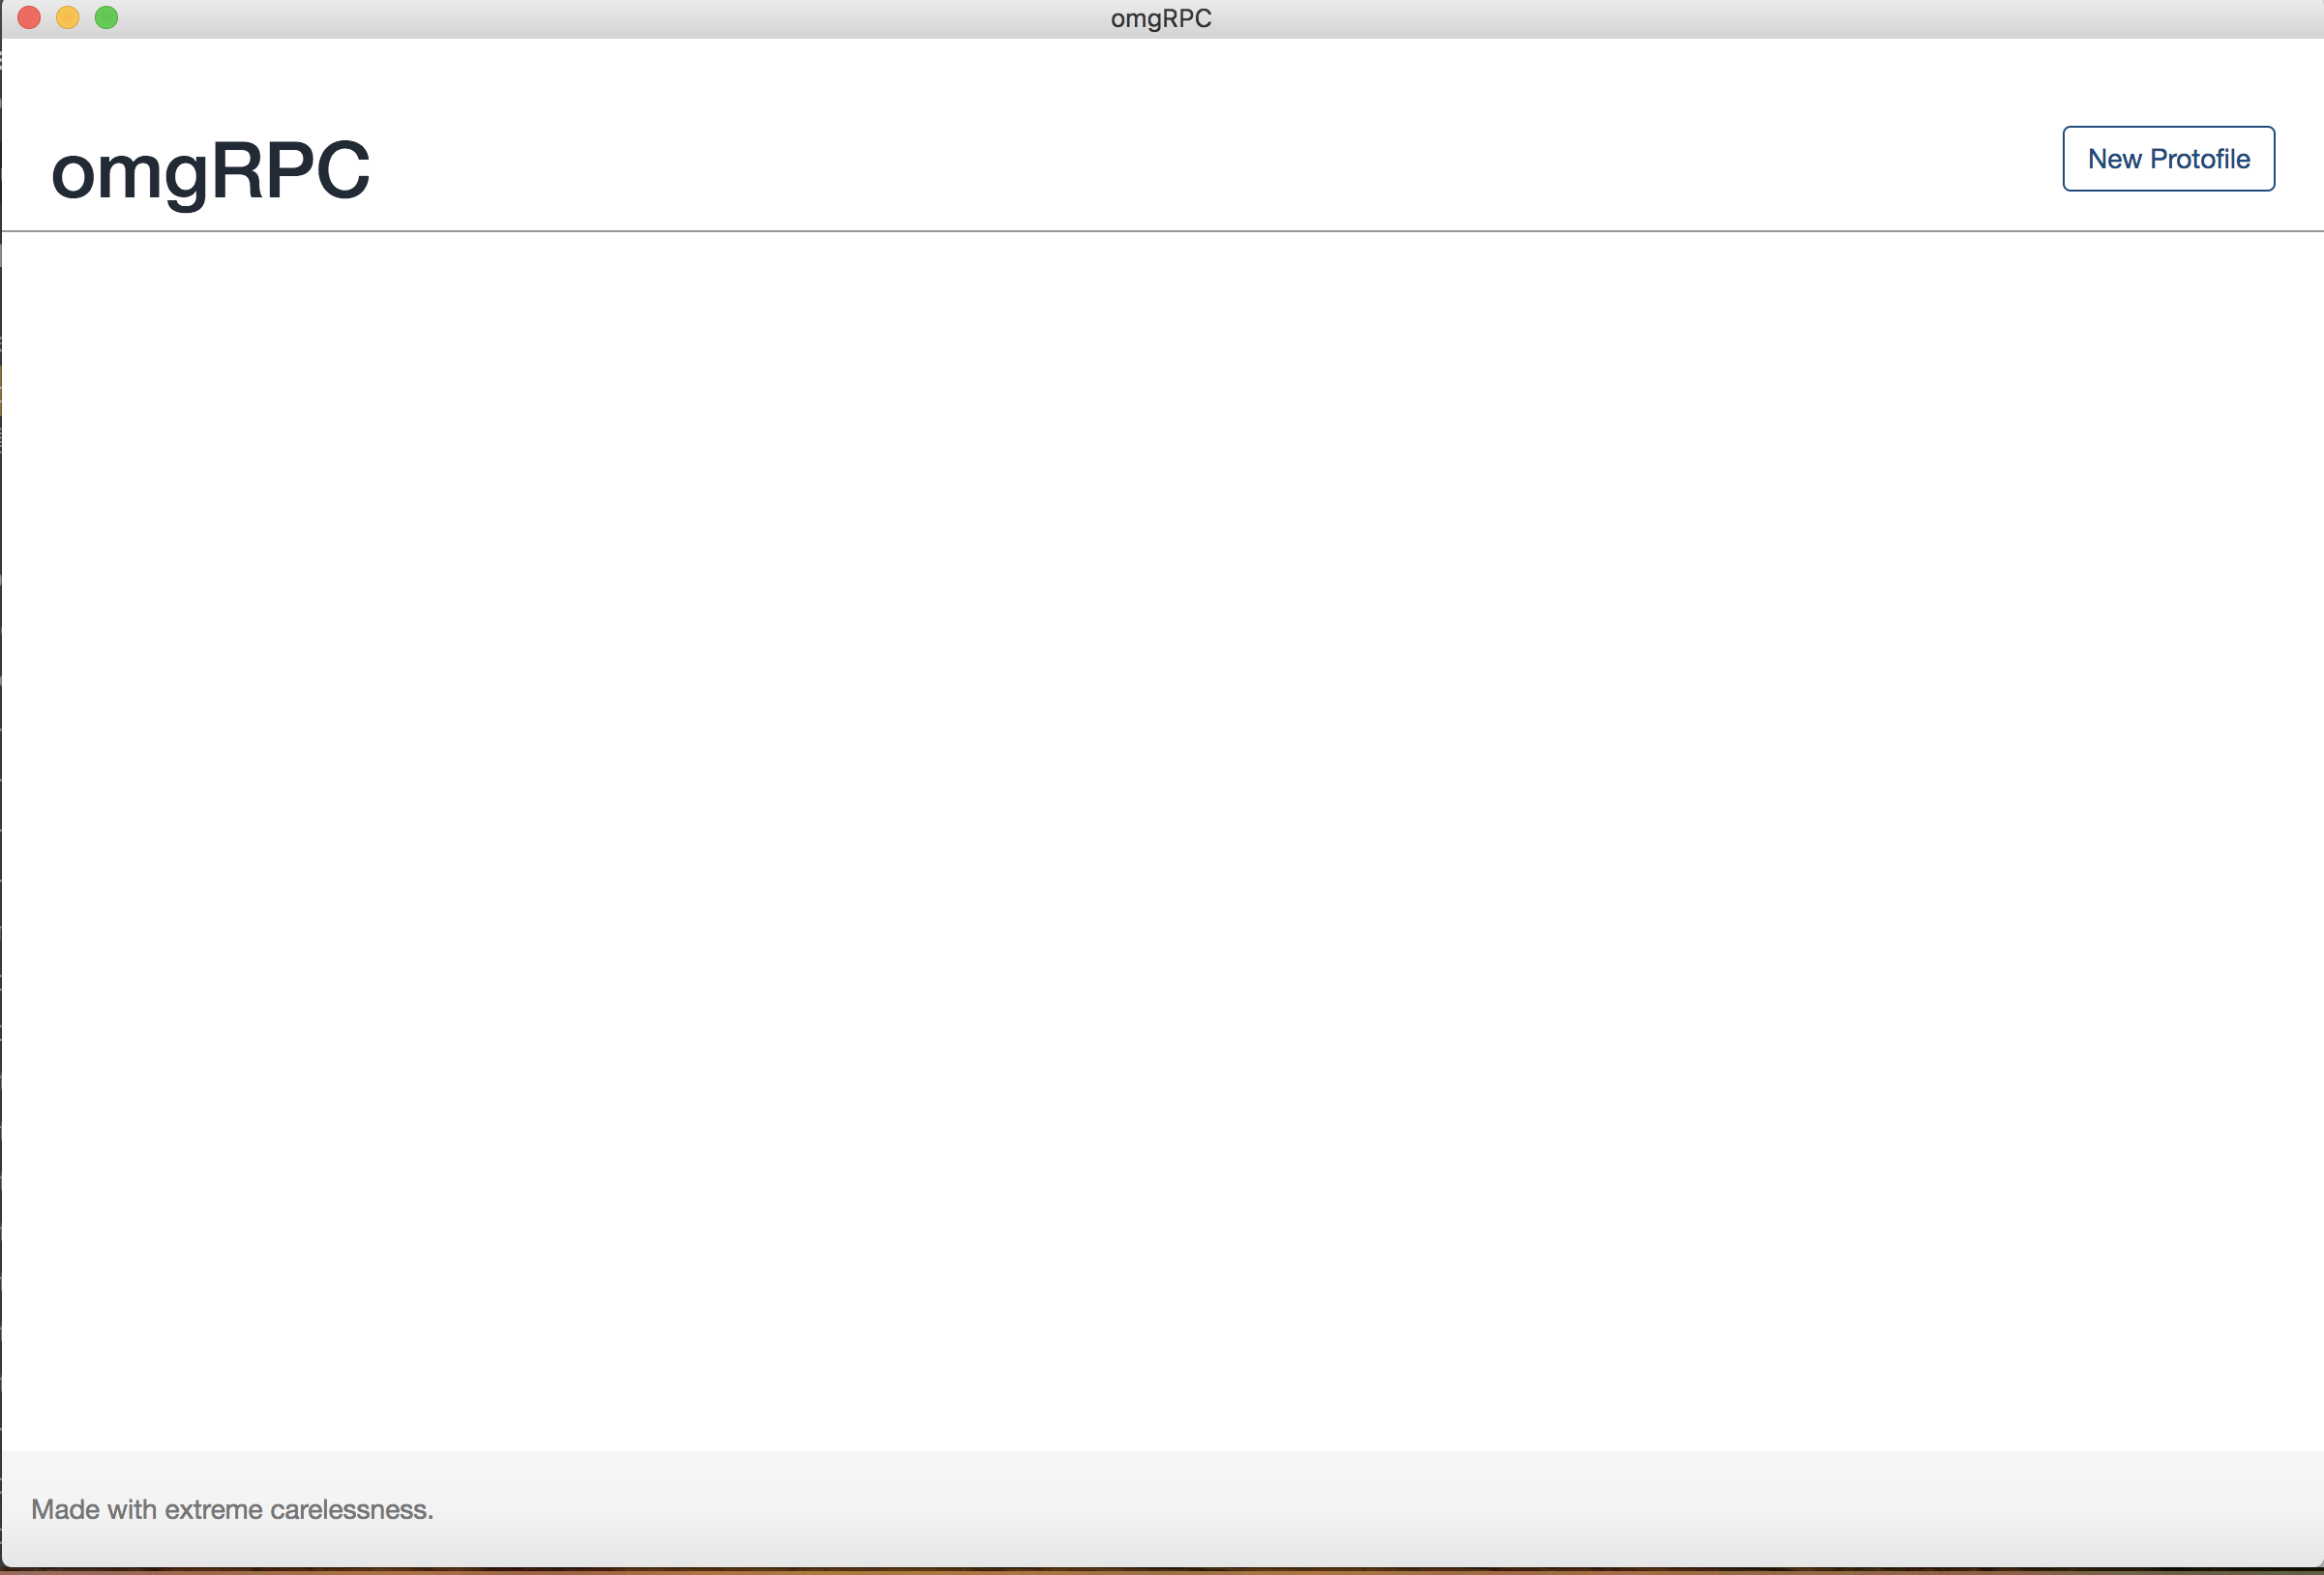
以下のコマンドでomgRPCが起動します。
$ nw .
起動すると以下のような画面が出るはずです。
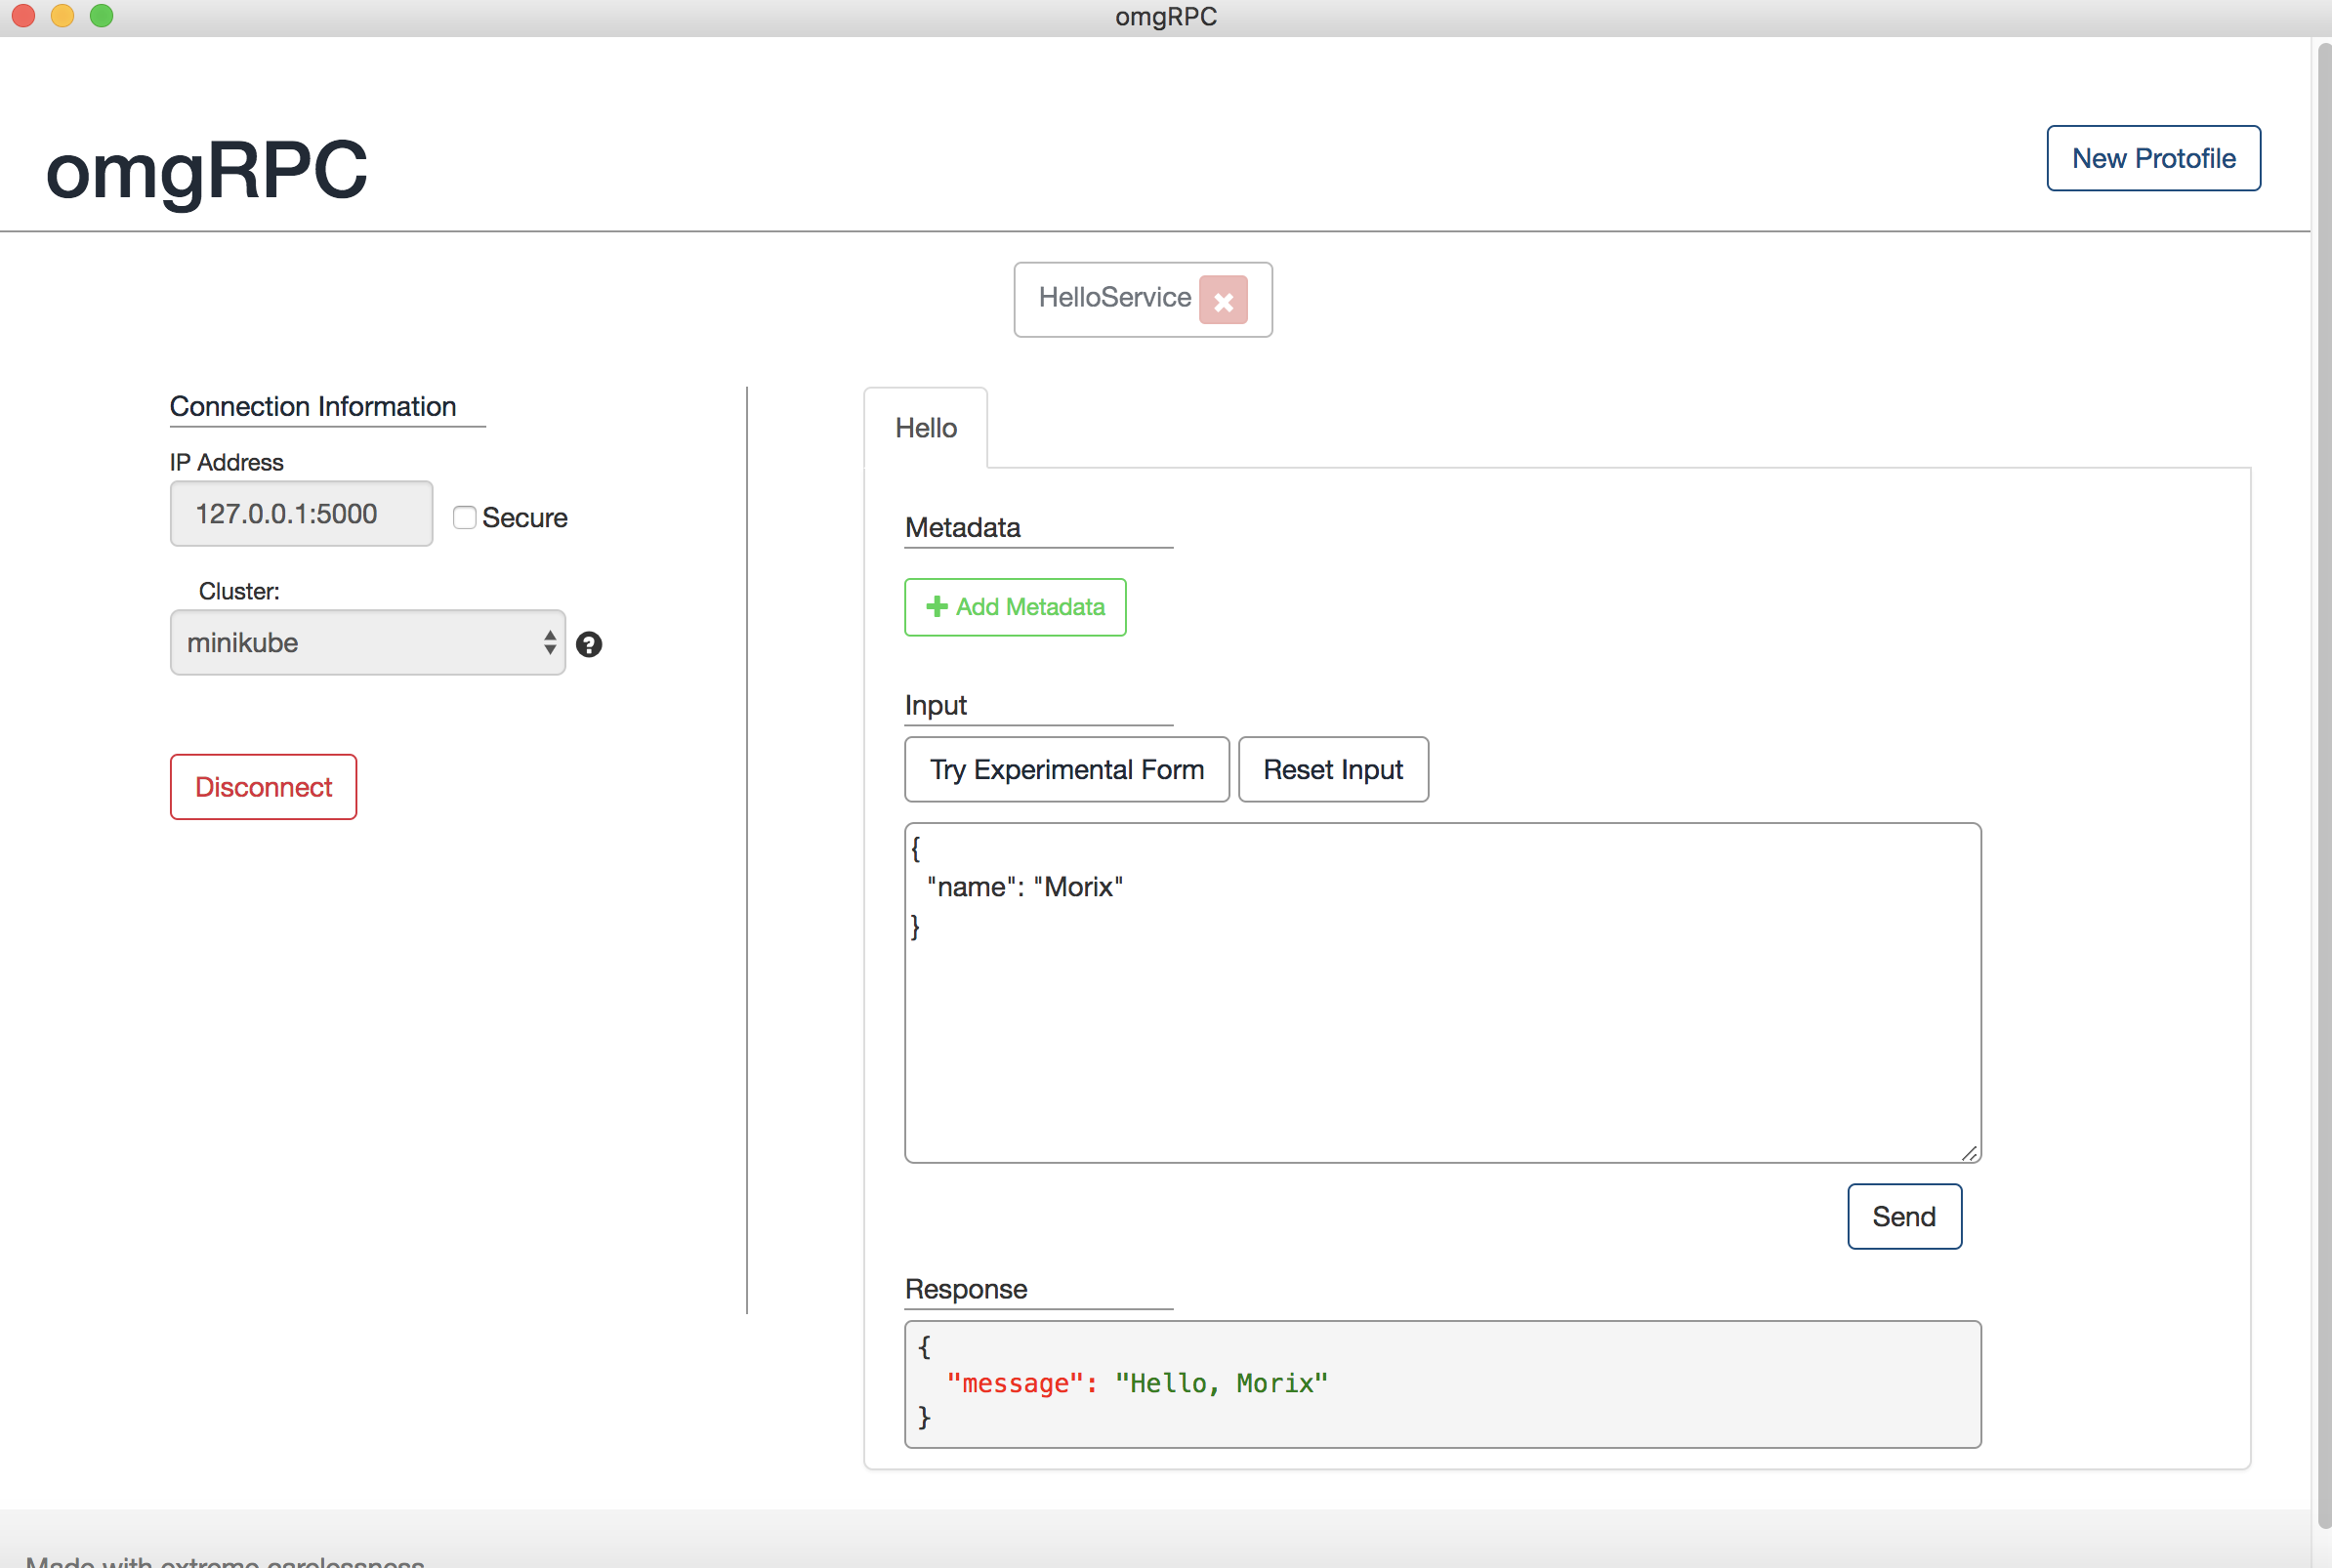
右上の「New Protofile」に叩きたいgRPCサービスのprotoファイルを選択します。
サンプルは以下のものを使ってみます。
syntax = "proto3";

package hello;

message HelloRequest {
  string name = 1;
}

message HelloResponse {
  string message = 1;
}

service HelloService {
  rpc Hello(HelloRequest) returns (HelloResponse) {}
}
サーバーなどのソースは以下を使ってます。参考に使ってみてください。
https://github.com/morix1500/grpc-web-nginx
protoを選択すると、gRPCサーバーのアドレスを聞かれます。自分で設定したところを選択します。
Clusterはminikubeのままで問題ないです。
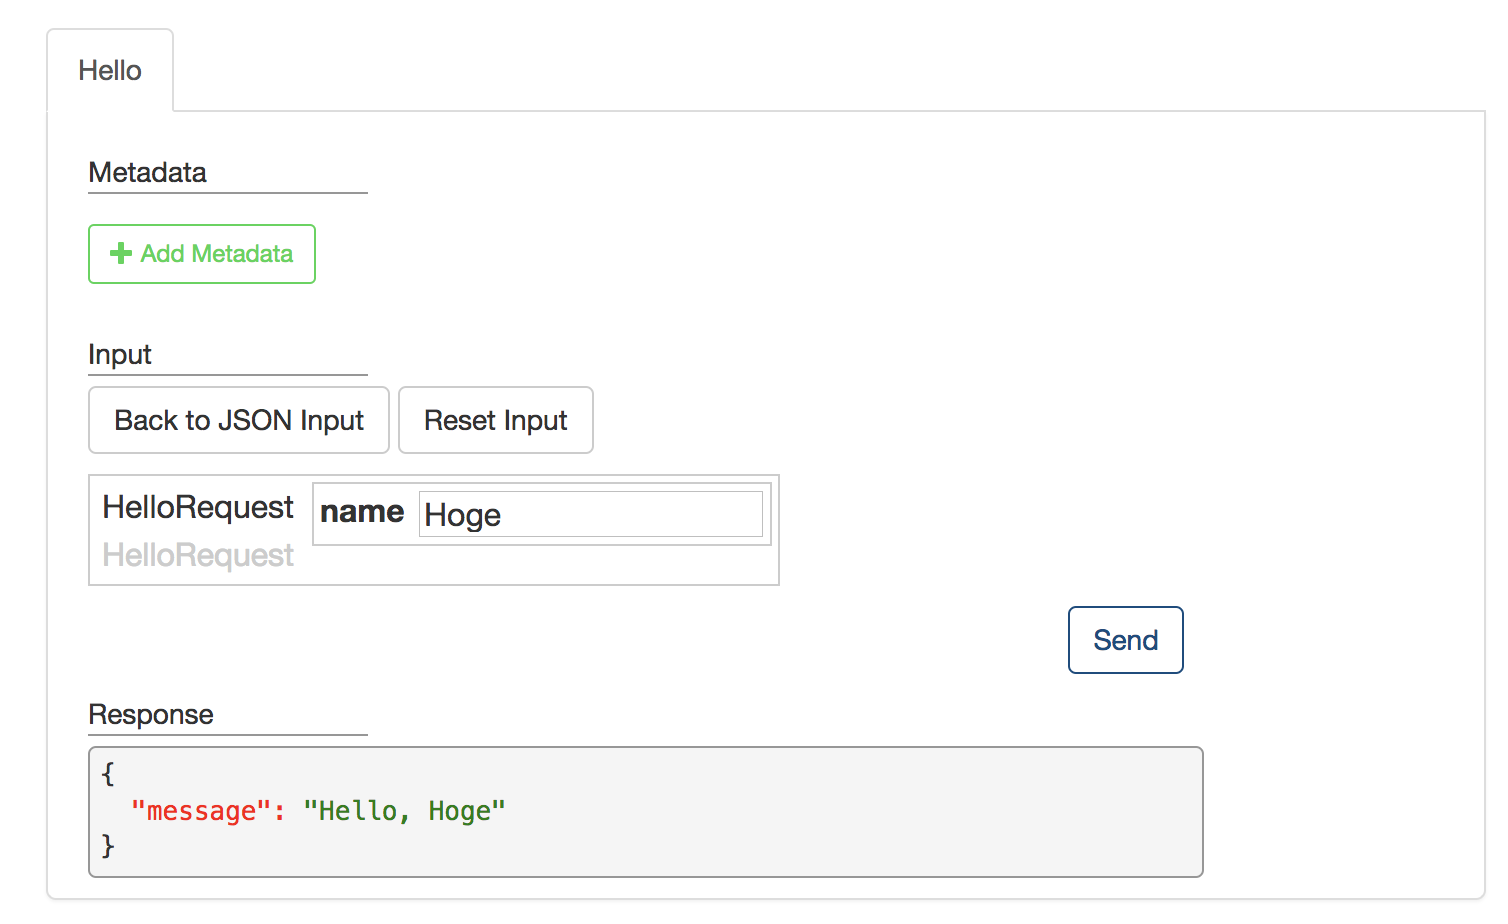
「Hello」というタブがあり、これが関数になってます。関数ごとにタブが増えていきます。
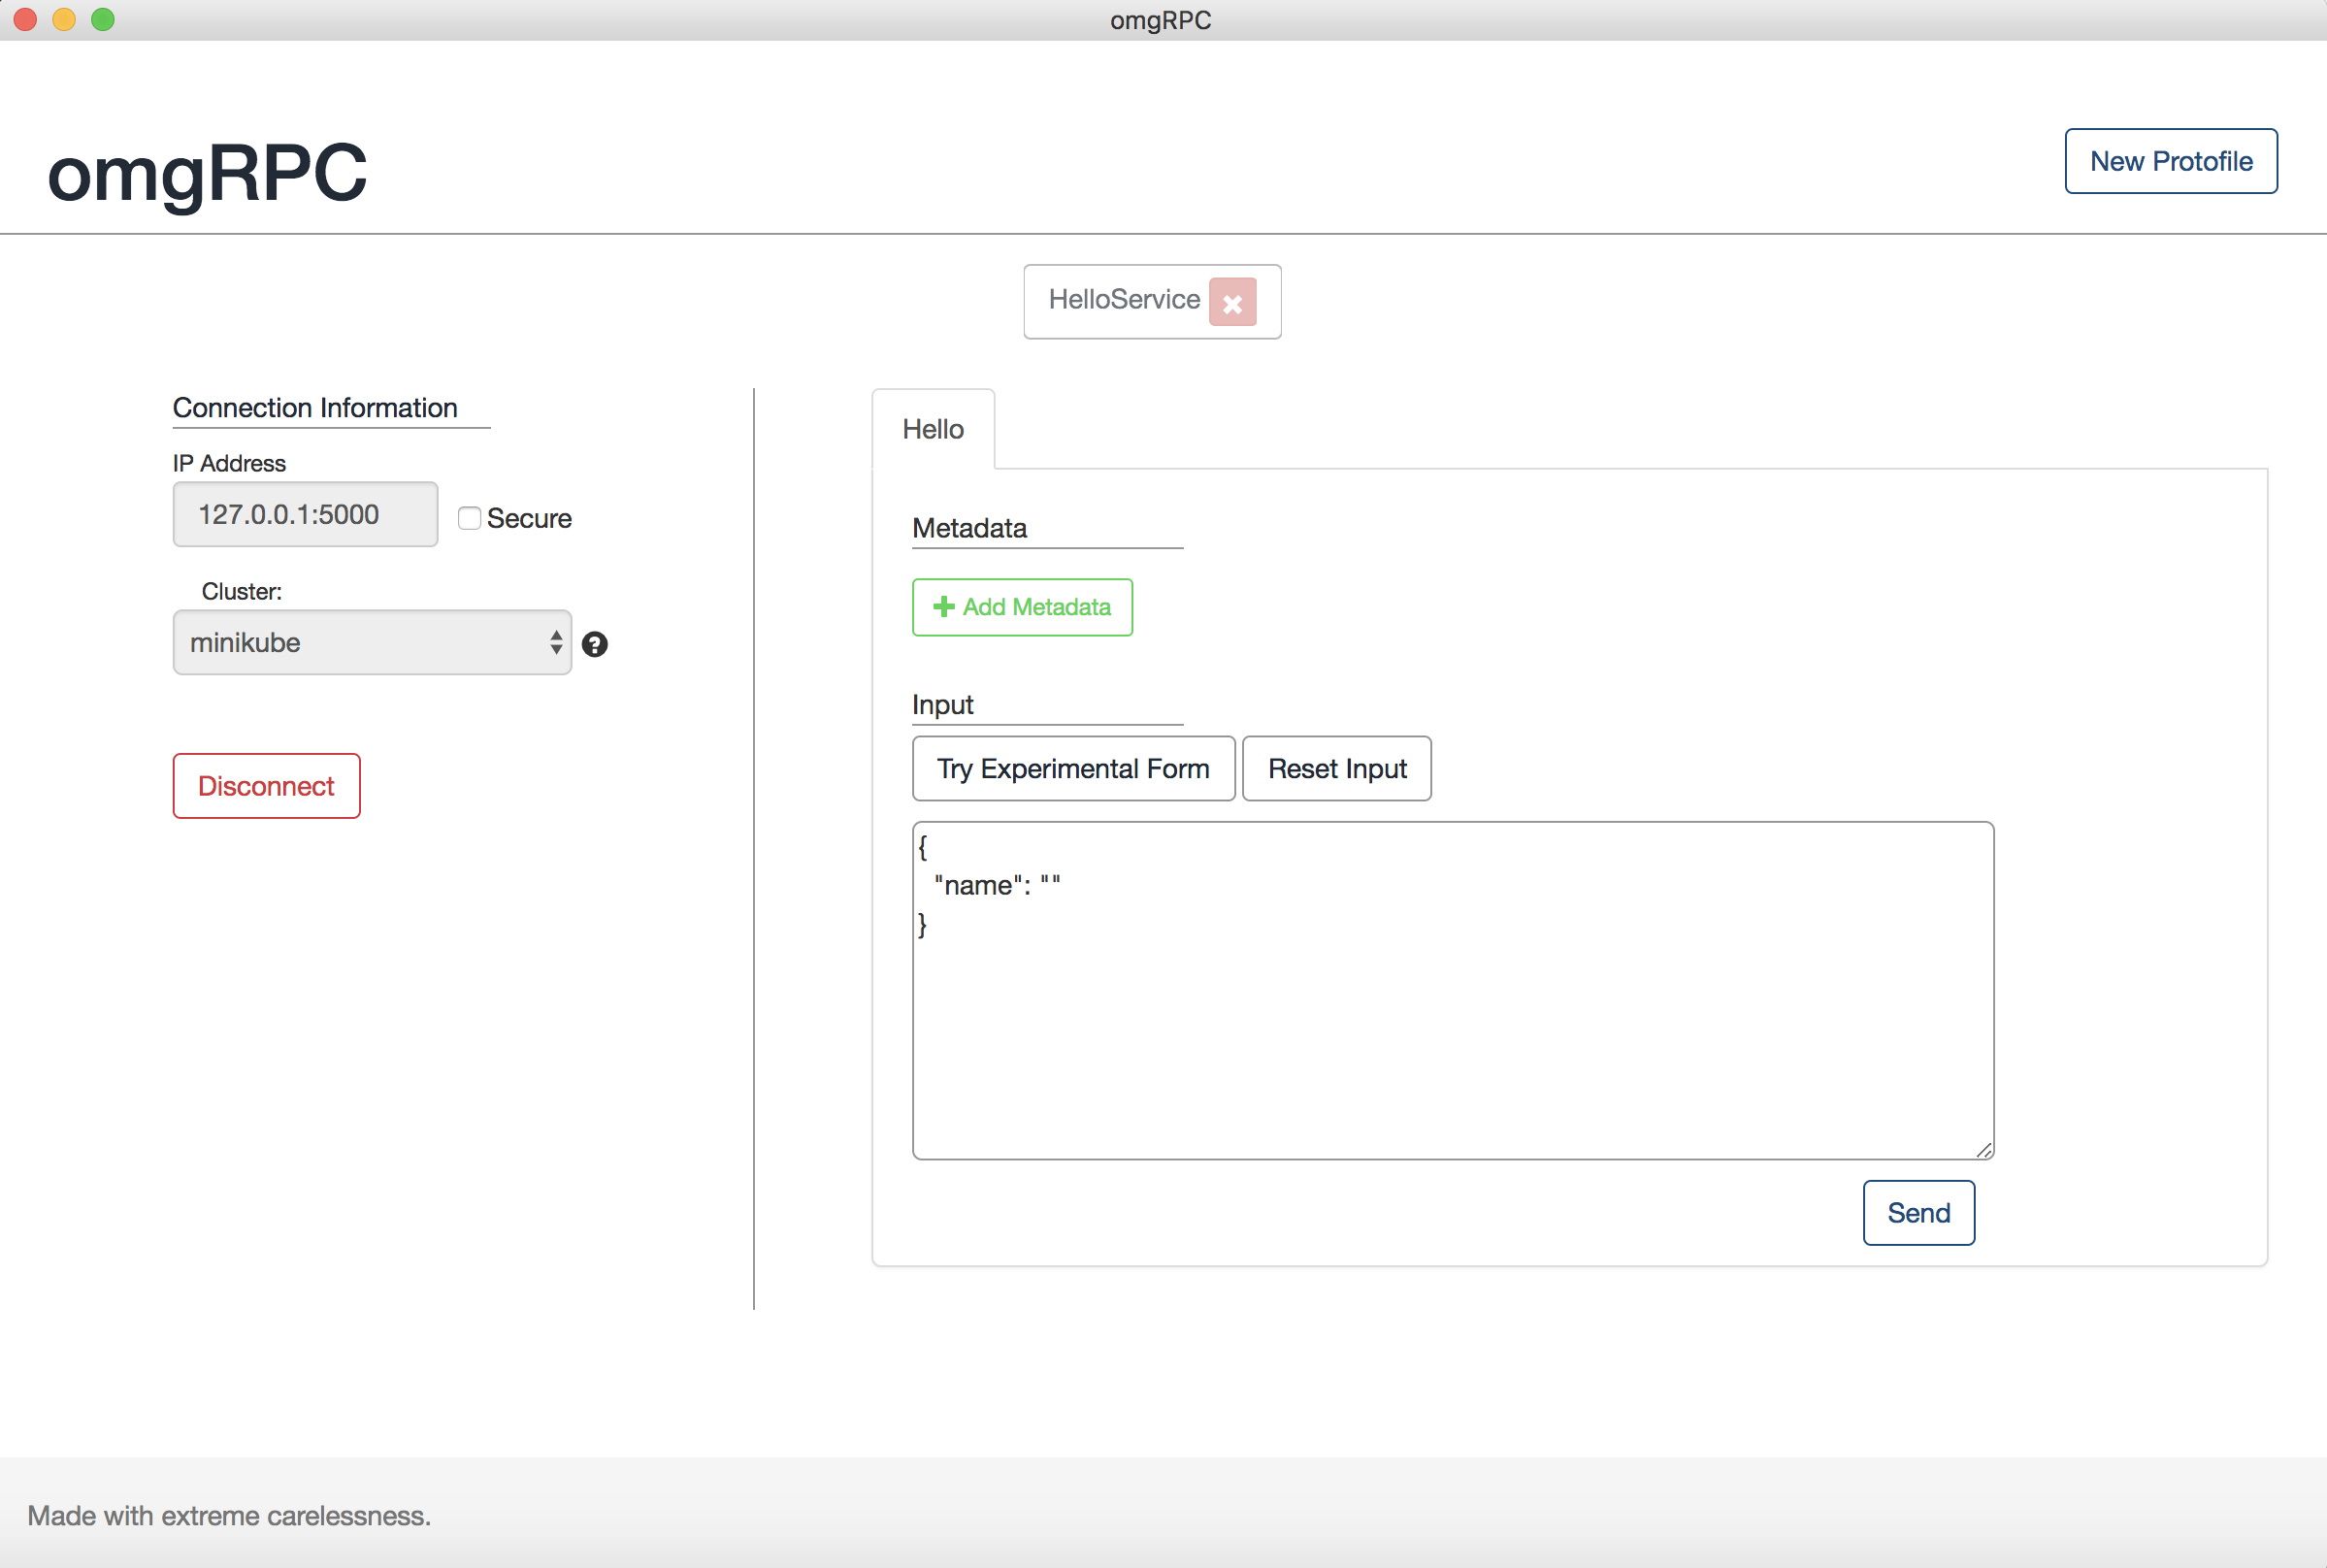
Metadataを設定できるようです。
またリクエストはJSON形式で送る必要があります。それもある程度は事前に入力しててくれます。
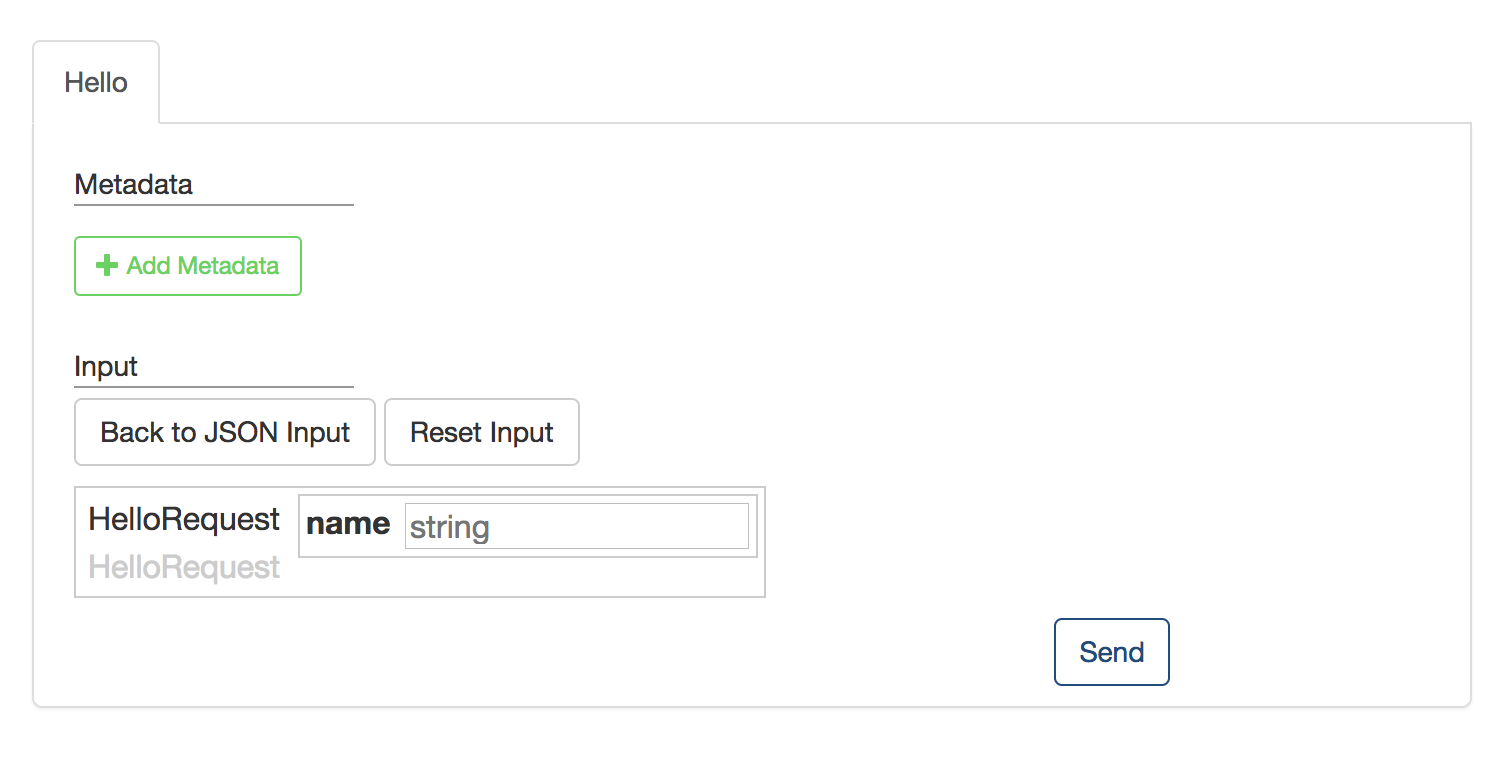
「Try Experimental Form」はJSONではなく以下のようにテキストフィールドで入力できるようにしてくれてます。
あとは必要なものを入力すると、レスポンスがJSONで返ってきます。
簡単ですね!!!