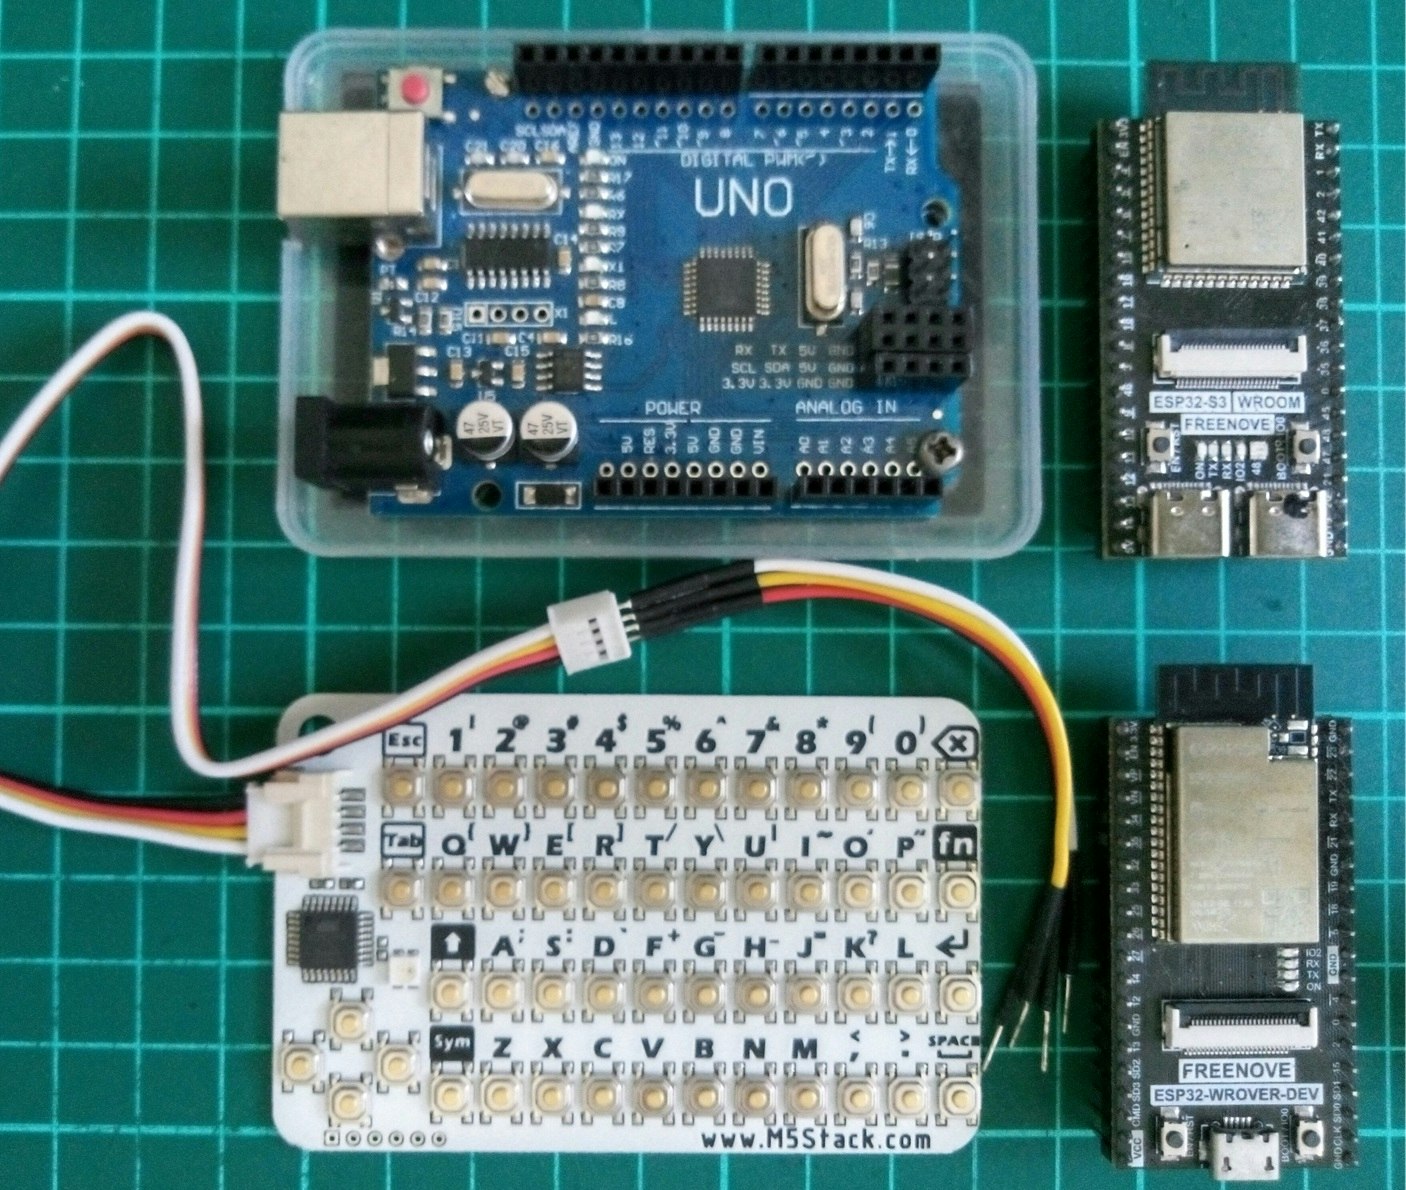
ESP32ボードなどへの直接文字入力法の選択肢の一つとして購入、3種類のボードで試してみました。
1.UNO互換機
2.FREENOVE ESP32-WROVER-DEV (with Camera)
3.FREENOVE ESP32-S3 WROOM (with Camera)
結構、簡単に動作しました。ただし、バージョン変更のためか、購入サイトの記載と、記号や大文字の打ち方が違っており戸惑いました。次のようにして出来ました。通常のPCキーボードのように「修飾キーを押しながら」では何も入力できませんでした。
| 記号 | 修飾キー | LED | |
|---|---|---|---|
| 記号 |
Sym2回連続押し |
緑に点灯 | Symbol Key? |
| 大文字 |
↑2回連続押し |
赤に点灯 |
接続に関して。ネットには、I2CのSDA、SCLピンに対し「10KΩでプルアップの必要が」という情報も。しかし、なくても動いてくれました。具体的には次のように接続しました。
| 各ライン(2mmピッチコネクタ) | UNO | ESP32 | ESP32-S3 |
|---|---|---|---|
| SCL(白) | SCL A5 | 22 | 1(変更可) |
| SDA(黄) | SDA A4 | 21 | 2(変更可) |
| 電源(赤) | 3.3V | 3.3V | 3.3V |
| GND(黒) | GND | GND | GND |
スケッチは、どのボードでもほぼ全く同じものでよかったです。もちろん、接続ピンはそれぞれ上記のようにします。そして、1行のみ次のように変えます。
UNO、ESP32 では、
Wire.begin();
ESP32-S3 では、
Wire.begin(2, 1); // (SDA_Pin, SCL_Pin)
私の場合はこれで動作しました。。スケッチ全体は次のようです。
#include <Wire.h>
#define CARDKB_ADDR 0x5F
void setup() {
  Serial.begin(115200);
  Wire.begin(); // Wire.begin(2,1) // (SDA, SCL) only with ESP32-S3
}

void loop() {
  Wire.requestFrom(CARDKB_ADDR, 1);
  while(Wire.available()) {
    int c = Wire.read(); // receive a byte as characterif
    if (c != 0) {
      Serial.print((char)c);
      Serial.print(":");Serial.println(c, DEC);
    }
  }
}
最後まで見ていただきありがとうございました。