はじめに
この記事はこちらの記事の続きとなってます。
(諸事情によりかなり時間が空きました)
流れ
- index.js の中身を見てみる
- 会話の分岐の実装(multi-turn-prompt の編集)
- sample のまま Deploy する場合は skip!
- Azure でのリソース作成
- Azure への Deploy
- Teams との連携
index.js の中身を見てみる
まずはindex.jsを見てみます。今回関係する箇所だけを抜粋してます。
// Copyright (c) Microsoft Corporation. All rights reserved.
// Licensed under the MIT License.

const restify = require('restify');
const path = require('path');

--- 中略 ---

// Import our custom bot class that provides a turn handling function.
const { DialogBot } = require('./bots/dialogBot');
const { UserProfileDialog } = require('./dialogs/userProfileDialog');

--- 中略 ---

// Create the main dialog.
const dialog = new UserProfileDialog(userState);
const bot = new DialogBot(conversationState, userState, dialog);

--- 中略 ---

// Listen for incoming requests.
server.post('/api/messages', (req, res) => {
    adapter.processActivity(req, res, async (context) => {
        // Route the message to the bot's main handler.
        await bot.run(context);
    });
});
「あ、restify っていうフレームワーク?を使ってるんだなー」と思いながら、Import,Create, そして Listen の部分を見ていましょう。
ざっくり言うと Listen 部分の bot.run というところで dialog 起動してます。bot というインスタンスを起動することで会話が開始されるんですね。
そして、その bot は DialogBot というものの引数に userProfileDialogというものを入れることで生成しています。
ややこしいですが、結論としてはuserProfileDialog を編集したら、Dialog が編集できます!
DialogBot の方は特にいじらなくて大丈夫です!
ちなみに、もしも push 通知を実装したい場合にはこの Listen部分に別のエンドポイント(現在の/api/message の部分)を用意してあげることになります。詳細はまた機会があれば別記事でお話しますね。
会話の分岐
この章は Azure への Deploy に関しては一切関係ないので、飛ばしても問題ありません。
現状の sample のままだと少し困った(?)点があります。
それは、メッセージのやり取り数が一定になってしまっていることです。
例えば、Bot への入力を"時間" だけの1要素にしたい場合と、"時間"と"場所"のように2要素にしたい場合では、会話のやりとりが変わってくると思います。(もちろん、一度に2要素を入力するように実装することもできますが)
少し前回のおさらいにもなるかもしれませんが、sample の ./dialogs/userProfileDialogs.js を開くと、constructor で以下のように記述されています。
 constructor(userState) {
        super('userProfileDialog');

        this.userProfile = userState.createProperty(USER_PROFILE);

        this.addDialog(new TextPrompt(NAME_PROMPT));
        this.addDialog(new ChoicePrompt(CHOICE_PROMPT));
        this.addDialog(new ConfirmPrompt(CONFIRM_PROMPT));
        this.addDialog(new NumberPrompt(NUMBER_PROMPT, this.agePromptValidator));

        this.addDialog(new WaterfallDialog(WATERFALL_DIALOG, [
            this.transportStep.bind(this),
            this.nameStep.bind(this),
            this.nameConfirmStep.bind(this),
            this.ageStep.bind(this),
            this.confirmStep.bind(this),
            this.summaryStep.bind(this)
        ]));

        this.initialDialogId = WATERFALL_DIALOG;
    }
addDialog というfunction が多々使われてますが、これはその名の通り、この Dialogに機能を追加しています。この js ファイルでは TextPromptやChoicePrmpt を使用するので、コンストラクタ内で書いてやる必要があります。
これは WATERFALL_DIALOG と呼ばれる形式で addDialog で登録した分だけ会話のやりとりを続けるというものです。add されているstep は Bot が送るメッセージだと思ってください(ただし、各 step で複数のメッセージを送ることができます。)
では、step の中身をいくつか見てみましょう。
confirmStep と summaryStep を見てみます。
async confirmStep(step) {
        step.values.age = step.result;
        const msg = step.values.age === -1 ? 'No age given.' : `I have your age as ${ step.values.age }.`;

        // We can send messages to the user at any point in the WaterfallStep.
        await step.context.sendActivity(msg);

        // WaterfallStep always finishes with the end of the Waterfall or with another dialog, here it is a Prompt Dialog.
        return await step.prompt(CONFIRM_PROMPT, { prompt: 'Is this okay?' });
    }
async summaryStep(step) {
        if (step.result) {
            // Get the current profile object from user state.
            const userProfile = await this.userProfile.get(step.context, new UserProfile());

            userProfile.transport = step.values.transport;
            userProfile.name = step.values.name;
            userProfile.age = step.values.age;

            let msg = `I have your mode of transport as ${ userProfile.transport } and your name as ${ userProfile.name }.`;
            if (userProfile.age !== -1) {
                msg += ` And age as ${ userProfile.age }.`;
            }

            await step.context.sendActivity(msg);
        } else {
            await step.context.sendActivity('Thanks. Your profile will not be kept.');
        }

        // WaterfallStep always finishes with the end of the Waterfall or with another dialog, here it is the end.
        return await step.endDialog();
    }
色々と違いはありますが、return の部分に注目してみてみださい。
confirmStep では最後にchoicePrompt のメッセージをreturn しています。
一方で、summaryStep では step.endDialog() となっていますね。
これがWATERFALL_Dialogの終わり、つまりその一連の会話の流れの終了を意味しています。
ここまでの内容から、会話の長さを条件によって変えるには、この WATERFALL_DIALOG を条件ごとに用意してあげて、step.endDialog() までの step 数を調整してあげたら良いことが分かります。
これらを基に、実際に簡単な sample を用意しました。
こちらからコードは見れます。
(nodeのmodule は外してます。)
最初に呼び出されるstartDialog.jsだけ少しみてみましょう。
// 自作 Dialog の読み込み
const { haveDialog, HAVE_DIALOG } = require('./haveDialog');
const { nothingDialog, NOTHING_DIALOG } = require('./nothingDialog');

--- 中略 ---

class startDialog extends ComponentDialog {
    constructor(userState) {
        super('START_DIALOG');

        this.userProfile = userState.createProperty(USER_PROFILE);
        // 自作 Dialog の追加
        this.addDialog(new haveDialog());
        this.addDialog(new nothingDialog());

        this.addDialog(new ChoicePrompt(CHOICE_PROMPT));

        this.addDialog(new WaterfallDialog(WATERFALL_DIALOG, [
            this.transportStep.bind(this),
            this.summaryStep.bind(this)
        ]));

        this.initialDialogId = WATERFALL_DIALOG;
    }

    async transportStep(step) {
        // WaterfallStep always finishes with the end of the Waterfall or with another dialog; here it is a Prompt Dialog.
        // Running a prompt here means the next WaterfallStep will be run when the users response is received.
        return await step.prompt(CHOICE_PROMPT, {
            prompt: 'Do you have Nintendo Switch?',
            choices: ChoiceFactory.toChoices(['Yes!', 'No...'])
        });
    }


    // step.beginDialog で外部のDialog を呼び出している
    async summaryStep(step) {
        if(step.result.value.includes("Yes")){
            return await step.beginDialog(HAVE_DIALOG);
        }else if(step.result.value.includes("No")){
            return await step.beginDialog(NOTHING_DIALOG);
        }
    }

}

module.exports.startDialog = startDialog;
module.exports.START_DIALOG = START_DIALOG;
注目するとしたら、自作の Dialog をコンストラクタで追加していることや、step.Dialog でDialog を開始しているところですかね。
なお、index.js なんかも変更されているので、気になる方は確認してみてください。
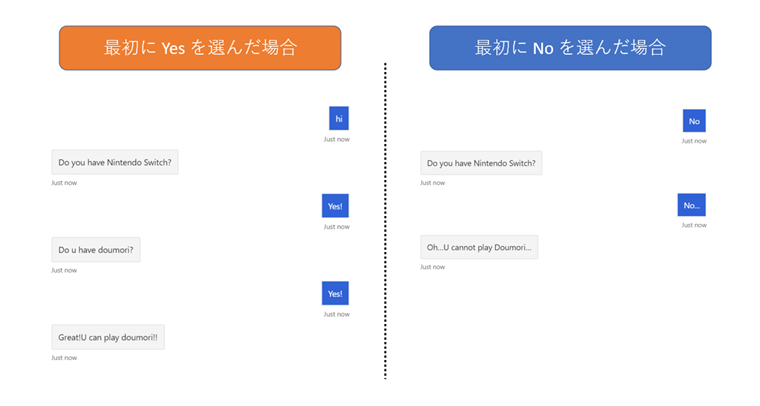
このように、長さがそれぞれ変わることが確認できました!
Azure でのリソース作成
プログラムの編集は一回ここで止めといて、実際に Azure でリソースを作成してみましょう。
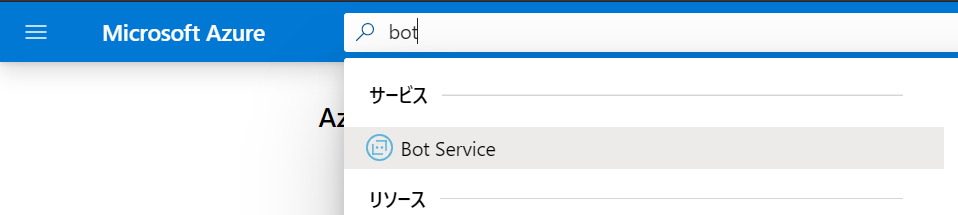
Azure の portal 画面で検索バーに「bot」と入力してAzure Bot Service を選択してください。
*Azure のアカウント作成などに関しては割愛します。
Bot service を選んだのち、「追加」ボタンを押すと2種類の選択肢が現れます。
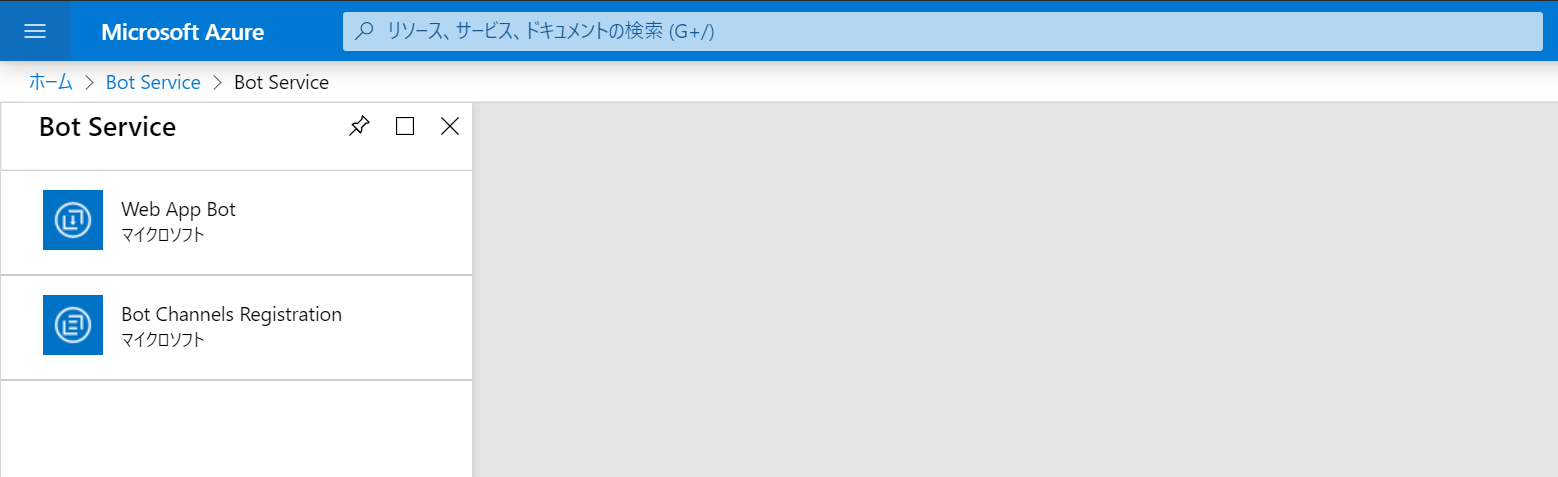
これらの違いは、Bot App をAzure App Service で作成するか、別のものを使用するかです。

今回は、App Service を使用する Web App Bot を使用します。
すると、色んなことを設定する画面になります。
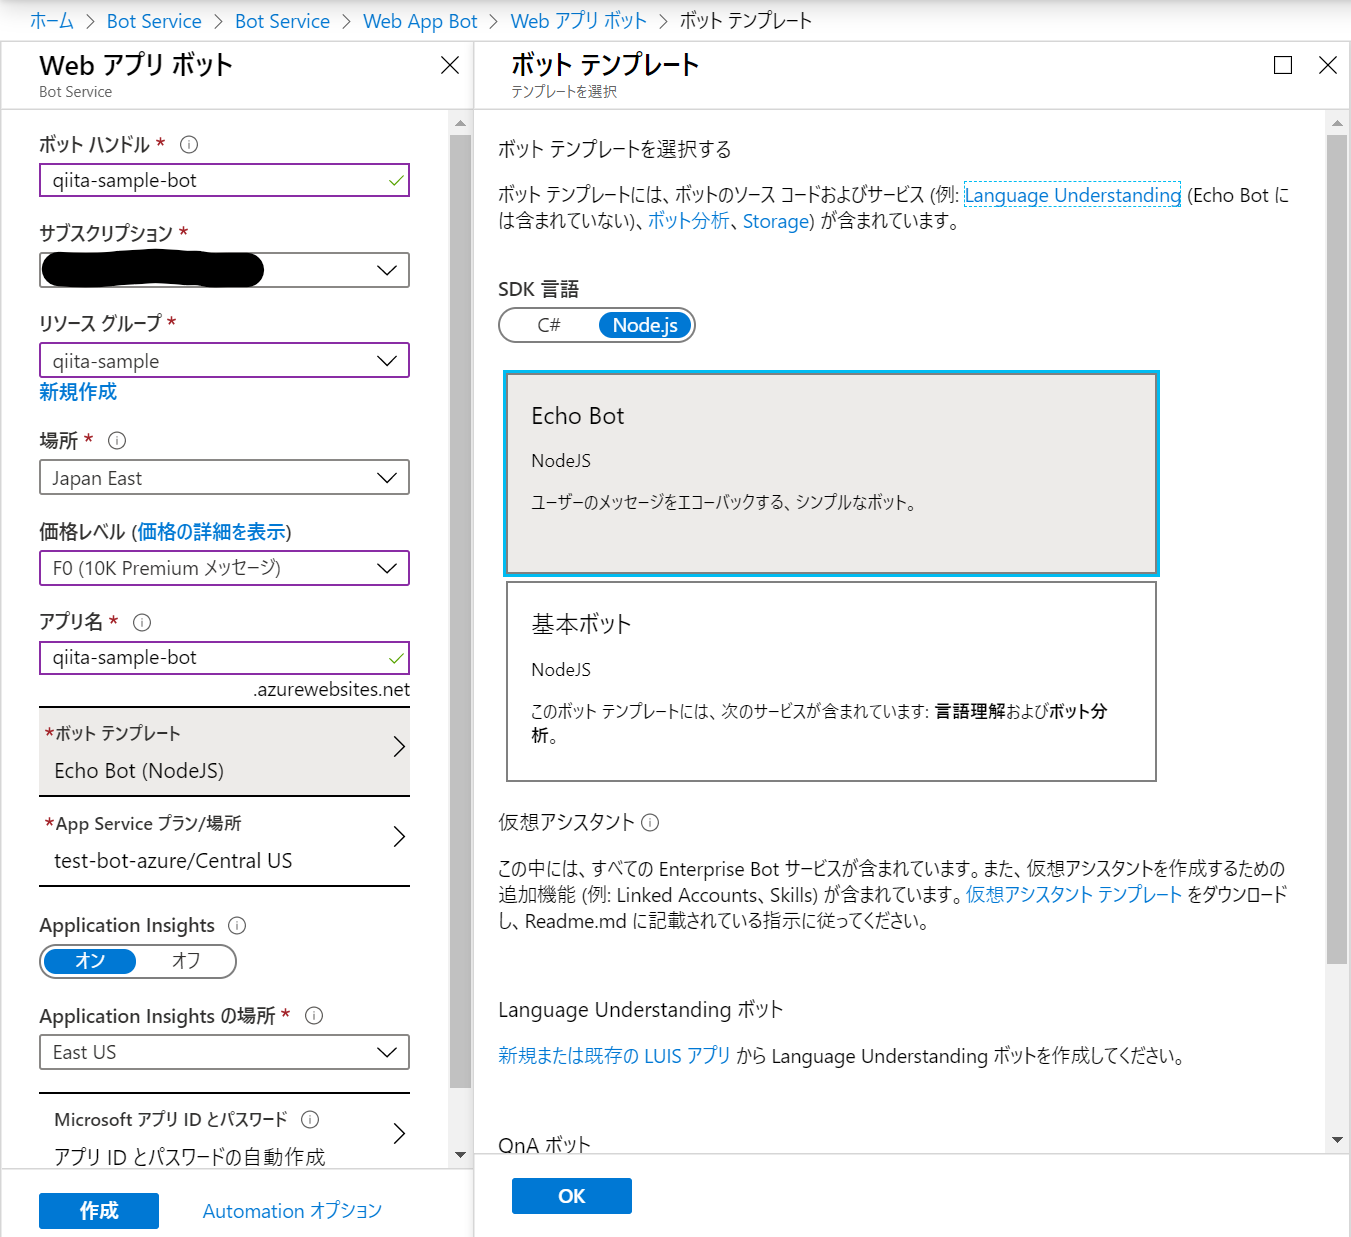
いっぱいなんかありますね!
簡単に解説します!
| 用語 | ざっくりした意味 | 備考 |
|---|---|---|
| ボットハンドル | Bot Service のリソース名 | 一意にすること(Azure のサービスだいたいはそう) |
| サブスクリプション | 請求をどのサブスクにするか指定 | |
| リソースグループ | どのリソースグループに入れるか | リソースグループはAzure のリソースを管理するグループ |
| 場所 | Bot Service を置く場所 | とりあえずは Japan East とかで良いかと |
| 価格レベル | Bot Service の料金プラン | お試しであれば F0 (無料プラン) |
| Bot テンプレート | 作成する際のランタイムなどを指定 | 今回は Node.js で Echo Bot を選ぶ |
| App Service プラン | App Service の料金プラン | お試しであれば F1: Free で作成する |
| Application Insight | Azure のサービスの挙動を確認・監視するもの | とりあえず ON にしてみると良いと思う |
最悪、なにかあれば後で削除してしまいましょう。
リソースの作成が終わったら、リソースグループのページへ行ってみましょう。
Azure Portal の上部の検索で「リソースグループ」を検索してください。
以下の Bot Service, App Service , Application Insights のリソースがあるかと思います。
(私は既存の App Service プランを使用していたのですが、新規のプランを使用していたらここに App Service のプランもあるかもしれません。)

これで、リソースの作成は成功ですね。
Azure への Deploy
さて、これでプログラムの準備、Deploy するリソースが揃ったので、あとは Azure に Deploy するだけです。
Deploy する方法はいくつかあるのですが、今回は VS Code の拡張機能を使ってみます。
サイドバーの拡張機能を選び、「Azure」と検索すると出てくる Azure の 拡張機能を install してください。
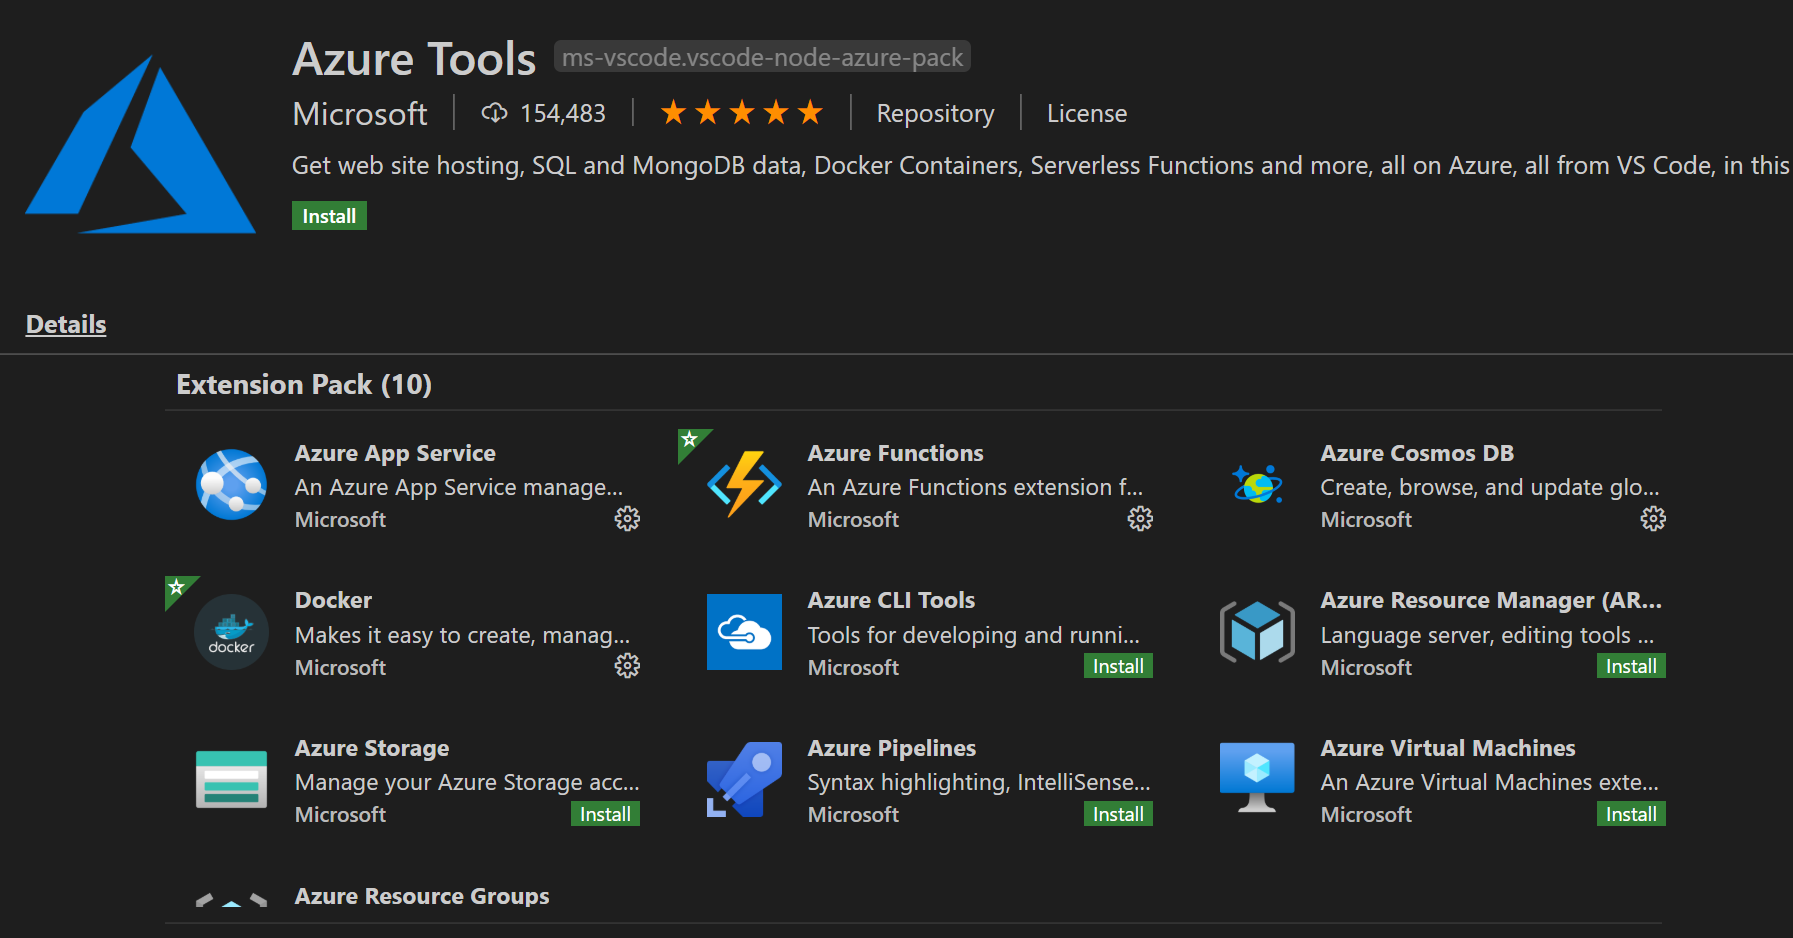
これらの全部を install する必要はなさそうですが、App Service は install してください。
(もしかしたら、「Azure Account」も必要かもです。)
これで、拡張機能がサイドバーに追加されたと思います。
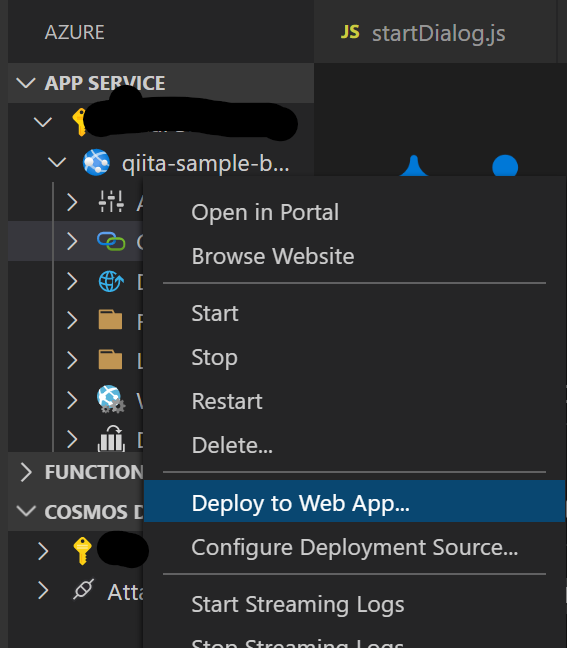
クリックしてみると、自分のサブスクリプションで生成している App Service のリソース一覧が出てきます。
(初回ログインが必要です)
その中から、Deploy したいリソースを選んで右クリック → Deploy Web App...
これでAzure に Deploy できます。
実際に Deploy できたか確認してみましょう。
Bot Service のリソースを選択して、Web チャットでテストを選んでください。

無事に動作しているようですね!
Teams との連携
最後に、Microsoft Teams でやりとり方法を示します。
先ほどテストした画面のサイドバーに「チャンネル」という項目があります。
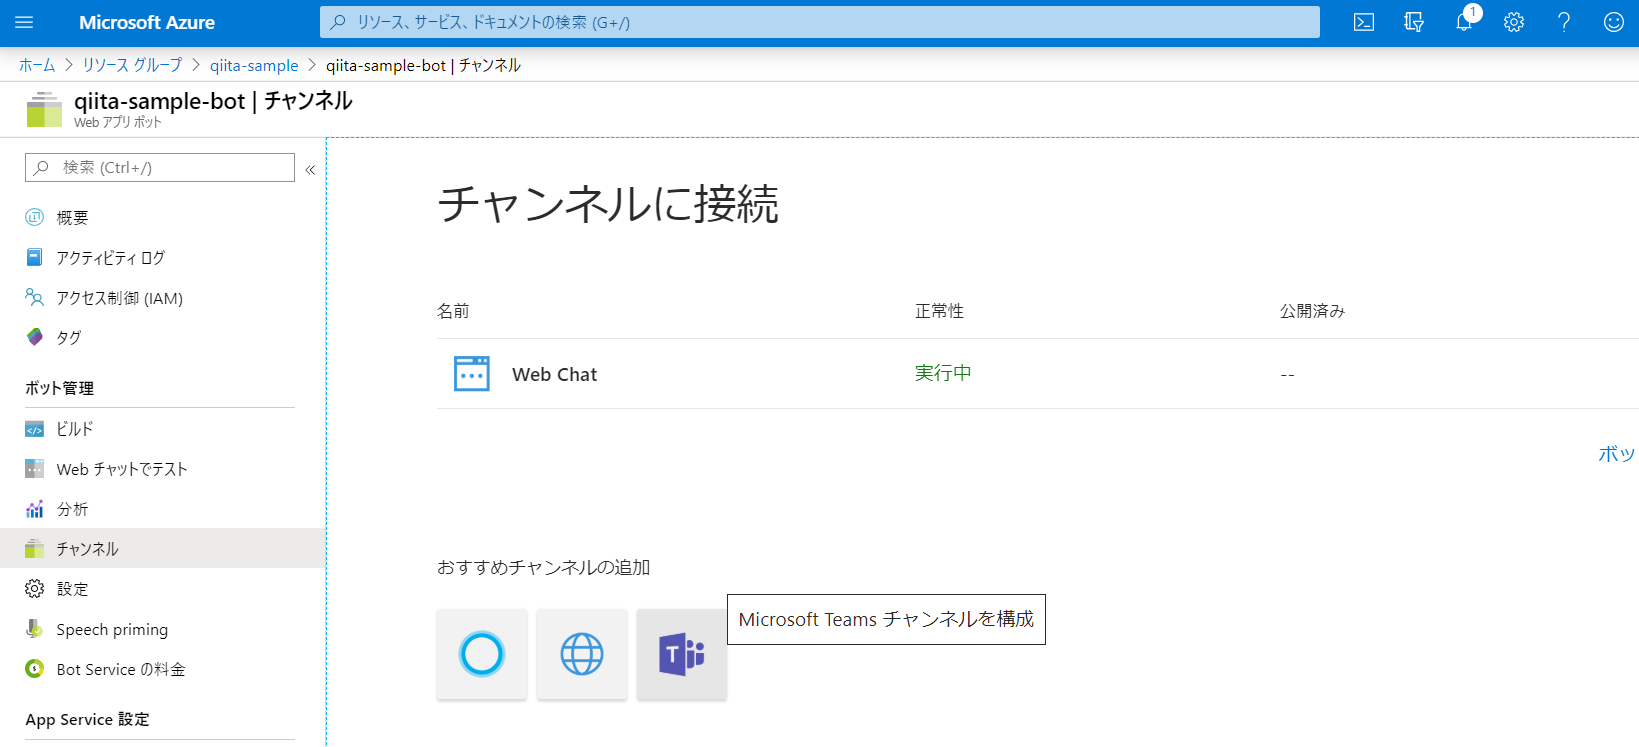
ここから Teams を選び、画面の指示に従いボタンを押していくと、
Teams でのログインを要求されます。
ログインすると、Teams の画面に自分の作成した Bot が追加されているはずです。
(気が向いたらこの辺も何か画像とか追加するかもです。)
最後に
2回にわたり Azure Bot Service での Bot の作成を行いました。
今後、またの機会に Push 通知のやり方なんかも書こうかなと思います。
リモートワークが流行っている現状、Teams などの自分の使用しているコミュニケーションツール上で色んなことを完結させられる Bot はよいぞ!
それでは良い Bot Life を。