This is the ListBox control version of the previous article 【Publisher】Creating KENDO DataSource with Sharperlight Query - UI:DropDownList.
Create a Published Query
Start Publisher from the Sharperlight application menu.
Start creating a new published query with the New button.
General Tab and Editing Query
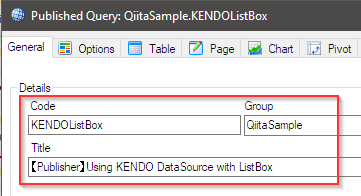
In the General tab on the published query, enter the Code, Group and Title.
A query definition is a prerequisite for a published query, so start defining the query with the Edit Query button.
Set Product to System, Table to User Accounts, Mode to CU (current user only), i.e. the details of the currently logged in user A query that returns only one row.

Save the query with the OK button.
Options tab and custom HTML
Go to the Options tab on the published query. And use the Custom HTML option.
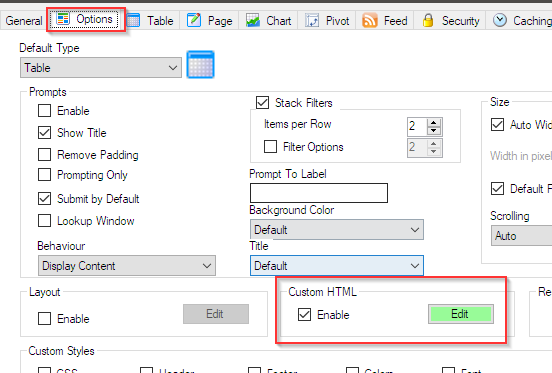
Tick the Enable checkbox and open the editor with the Edit button.
Paste the following code into the editor.
Reference:【Publisher】Import custom HTML code as a resource
<!DOCTYPE html>
<html>
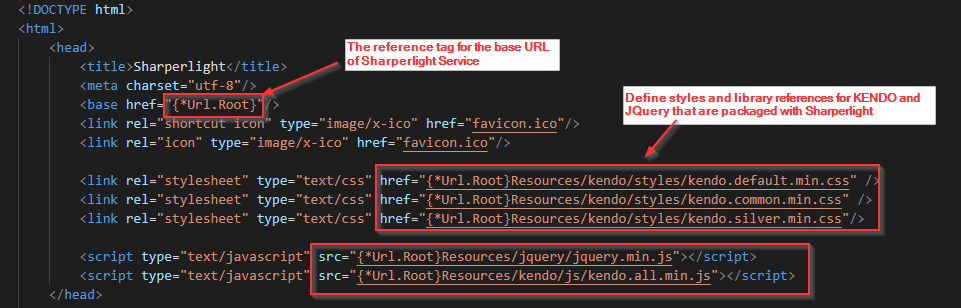
<head>
<title>Sharperlight</title>
<meta charset="utf-8"/>
<base href="{*Url.Root}"/>
<link rel="shortcut icon" type="image/x-ico" href="favicon.ico"/>
<link rel="icon" type="image/x-ico" href="favicon.ico"/>
<link rel="stylesheet" type="text/css" href="{*Url.Root}Resources/kendo/styles/kendo.default.min.css" />
<link rel="stylesheet" type="text/css" href="{*Url.Root}Resources/kendo/styles/kendo.common.min.css" />
<link rel="stylesheet" type="text/css" href="{*Url.Root}Resources/kendo/styles/kendo.silver.min.css"/>
<script type="text/javascript" src="{*Url.Root}Resources/jquery/jquery.min.js"></script>
<script type="text/javascript" src="{*Url.Root}Resources/kendo/js/kendo.all.min.js"></script>
</head>
<body>
<style type="text/css">
.header {
width: 800px;
padding: 60px;
text-align: center;
background: #1abc9c;
color: white;
font-size: 30px;
}
.demo-section label {
margin-bottom: 5px;
font-weight: bold;
display: inline-block;
}
.demo-section {
max-width: none;
width: 515px;
}
.k-listbox {
width: 236px;
height: 310px;
}
.k-listbox:first-of-type {
width: 270px;
margin-right: 1px;
}
#targetListBox{
width: 240px;
height: 310px;
}
</style>
<!-- ここにページ見出しを表示する -->
<!-- Display page headings here -->
<div class="header">
<h1>Qiita</h1>
<p>[Sharperlight] KENDO: Datasource & UI - ListBox</p>
<p>[Sharperlight] KENDO: データソースとUI - ListBox</p>
</div>
<!-- ここに KENDO ListBox コントロールが作成される -->
<!-- KENDO ListBox control is created here -->
<div class="demo-section k-content">
<div>
<label for="BPList" id="BPLabel">Business Partners</label>
<label for="targetListBox" id="SelectedBPList" style="margin-left:184px">Selected Business Partner</label>
<br />
<select id="BPList" title="Business Partner"></select>
<select id="targetListBox" title="Selected Business Partner"></select>
</div>
</div>
<!-- スクリプトの記述 -->
<!-- The script description -->
<script>
/* スクリプトの開始位置 */
/* Script start point */
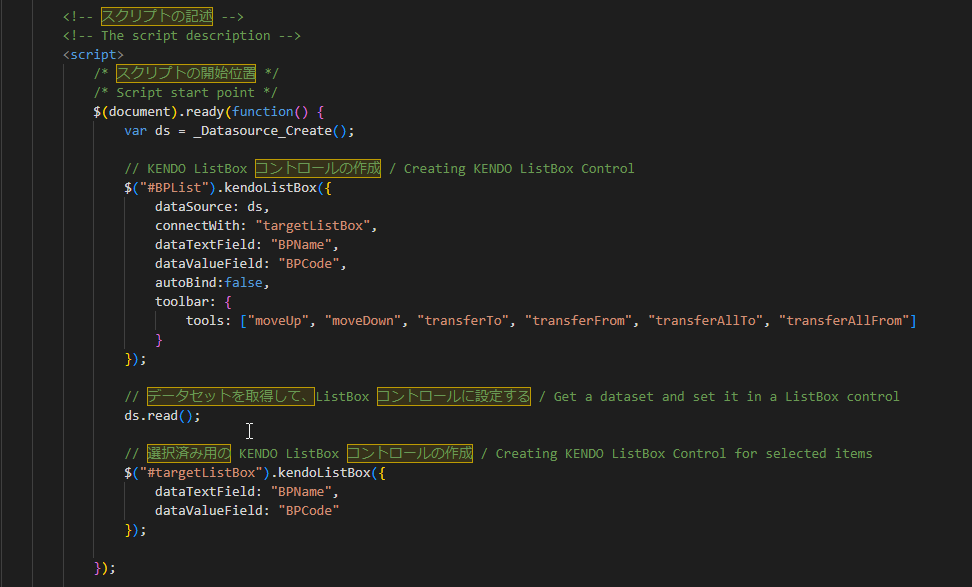
$(document).ready(function() {
var ds = _Datasource_Create();
// KENDO ListBox コントロールの作成 / Creating KENDO ListBox Control
$("#BPList").kendoListBox({
dataSource: ds,
connectWith: "targetListBox",
dataTextField: "BPName",
dataValueField: "BPCode",
autoBind:false,
toolbar: {
tools: ["moveUp", "moveDown", "transferTo", "transferFrom", "transferAllTo", "transferAllFrom"]
}
});
// データセットを取得して、ListBox コントロールに設定する / Get a dataset and set it in a ListBox control
ds.read();
// 選択済み用の KENDO ListBox コントロールの作成 / Creating KENDO ListBox Control for selected items
$("#targetListBox").kendoListBox({
dataTextField: "BPName",
dataValueField: "BPCode"
});
});
/* データソース作成用の関数 */
/* Function for creating data sources */
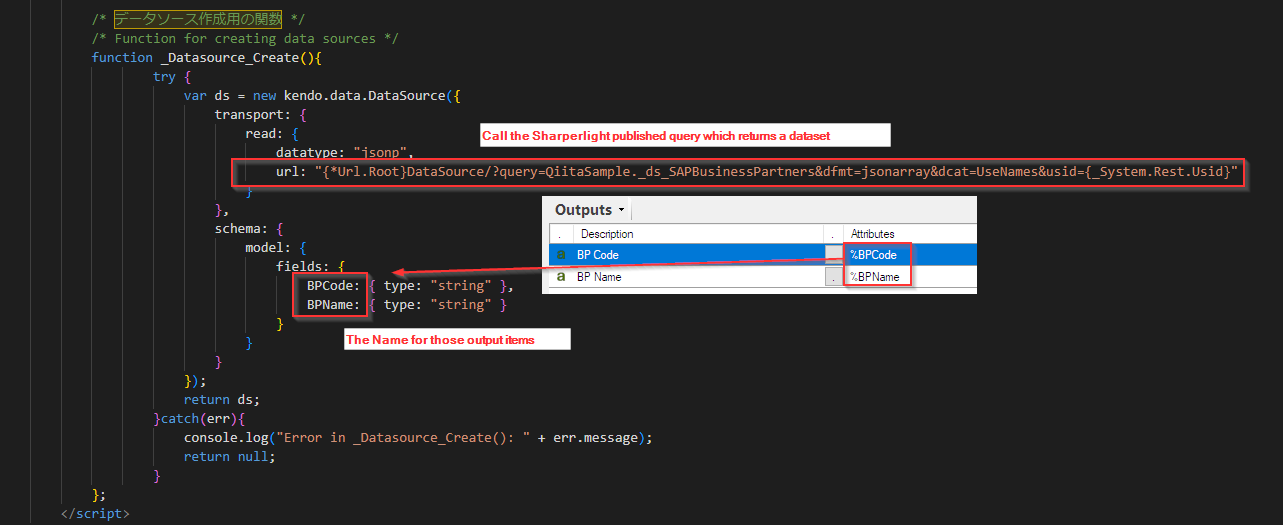
function _Datasource_Create(){
try {
var ds = new kendo.data.DataSource({
transport: {
read: {
datatype: "jsonp",
url: "{*Url.Root}DataSource/?query=QiitaSample._ds_SAPBusinessPartners&dfmt=jsonarray&dcat=UseNames&usid={_System.Rest.Usid}"
}
},
schema: {
model: {
fields: {
BPCode: { type: "string" },
BPName: { type: "string" }
}
}
}
});
return ds;
}catch(err){
console.log("Error in _Datasource_Create(): " + err.message);
return null;
}
};
</script>
</body>
</html>
Explanation of HTML code
Header Part
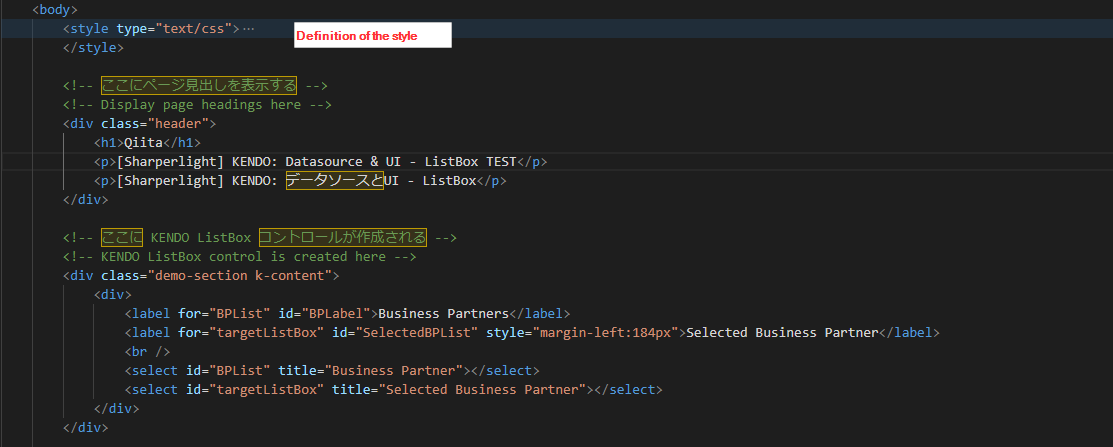
Body Part
Here we write the HTML code to display the decorative title and the KENDO ListBox control.
Furthermore, as a script, code is written to generate the KENDO ListBox control and to acquire the data source.
Creation is now complete.
Viewing in browser
Start the Sharperlight service and try to view the published report.

I hope this article helps you in your work.
Thank you.