In the article below, I pasted the created HTML code directly into the Custom HTML options editor.
【Publisher】Creating KENDO DataSource with Sharperlight Query - UI:DropDownList
Here, I would like to introduce another method.
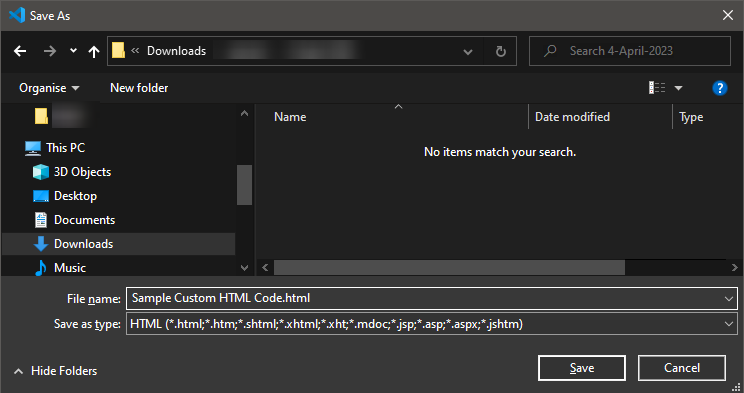
Create HTML code with a text editor such as Visual Studio Code and save it as a file.
Import that file into the Custom HTML option for a published query.
I wrote the code in Visual Studio Code like this.

Save this as an HTML file.
Published Query in Custom HTML Format
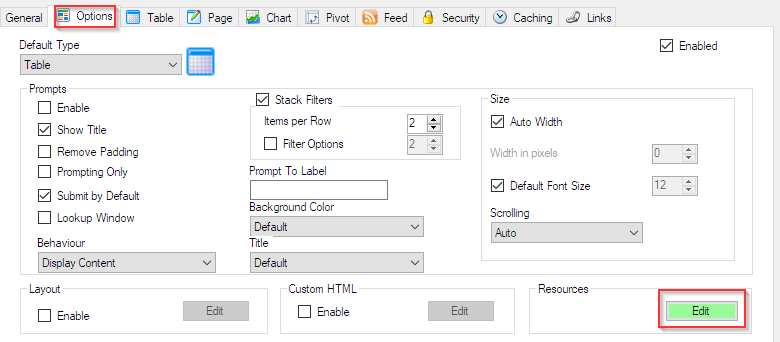
Start the Sharperlight Publisher and create a new published query or open an existing published query to use the Custom HTML option.
Go to Options tab.
Published Query Resources
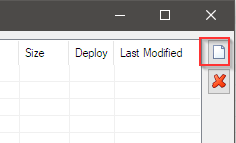
Bring in the saved HTML code file as a resource for published query.
Open the resource dialog with the Edit button.

Start creating a resource with the New icon.
Select the added template and turn on the File option.
Specify and import the HTML file saved with the Folder icon.

Once the file is imported, use the Copy button in the Reference option to copy the resource code to the clipboard.

Close the resource dialog.
Utilization of resources
Tick the 'Enable' checkbox for the Custom HTML option.
Click the Edit button to open the editor.
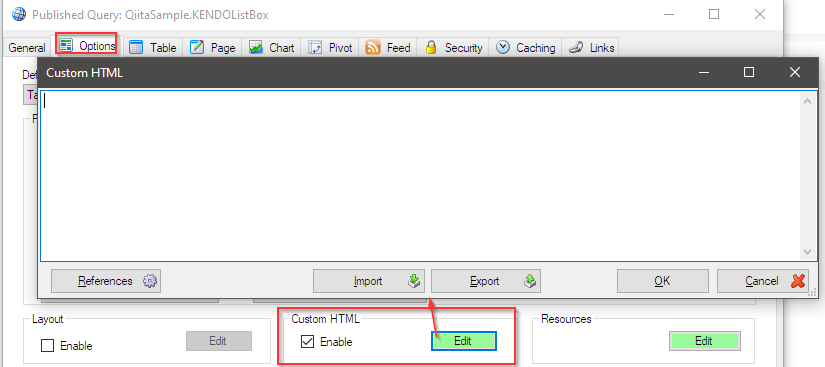
Paste the resource code you copied to the clipboard earlier into the editor.
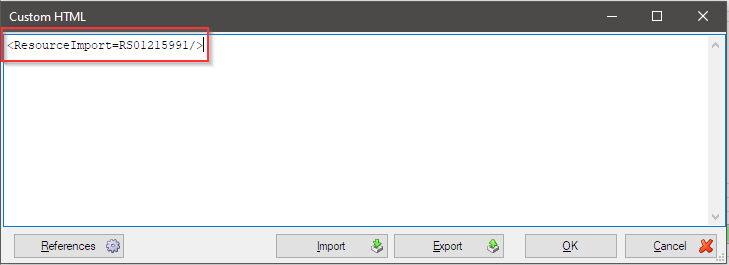
Save with the OK button.
The HTML code is now imported into this published query.
Postscript
The HTML code file is imported as a published query resource and its file path is also recorded.
So after making changes to the HTML code file and saving it, you can activate the changes by reopening this published query and updating/saving with the Apply or OK button.