今日は誤差逆伝播法(ごさぎゃくでんぱんほう)について
誤差逆伝播法とは
NNの最適化を行う一つの手法です。別名BackPropagationとも。
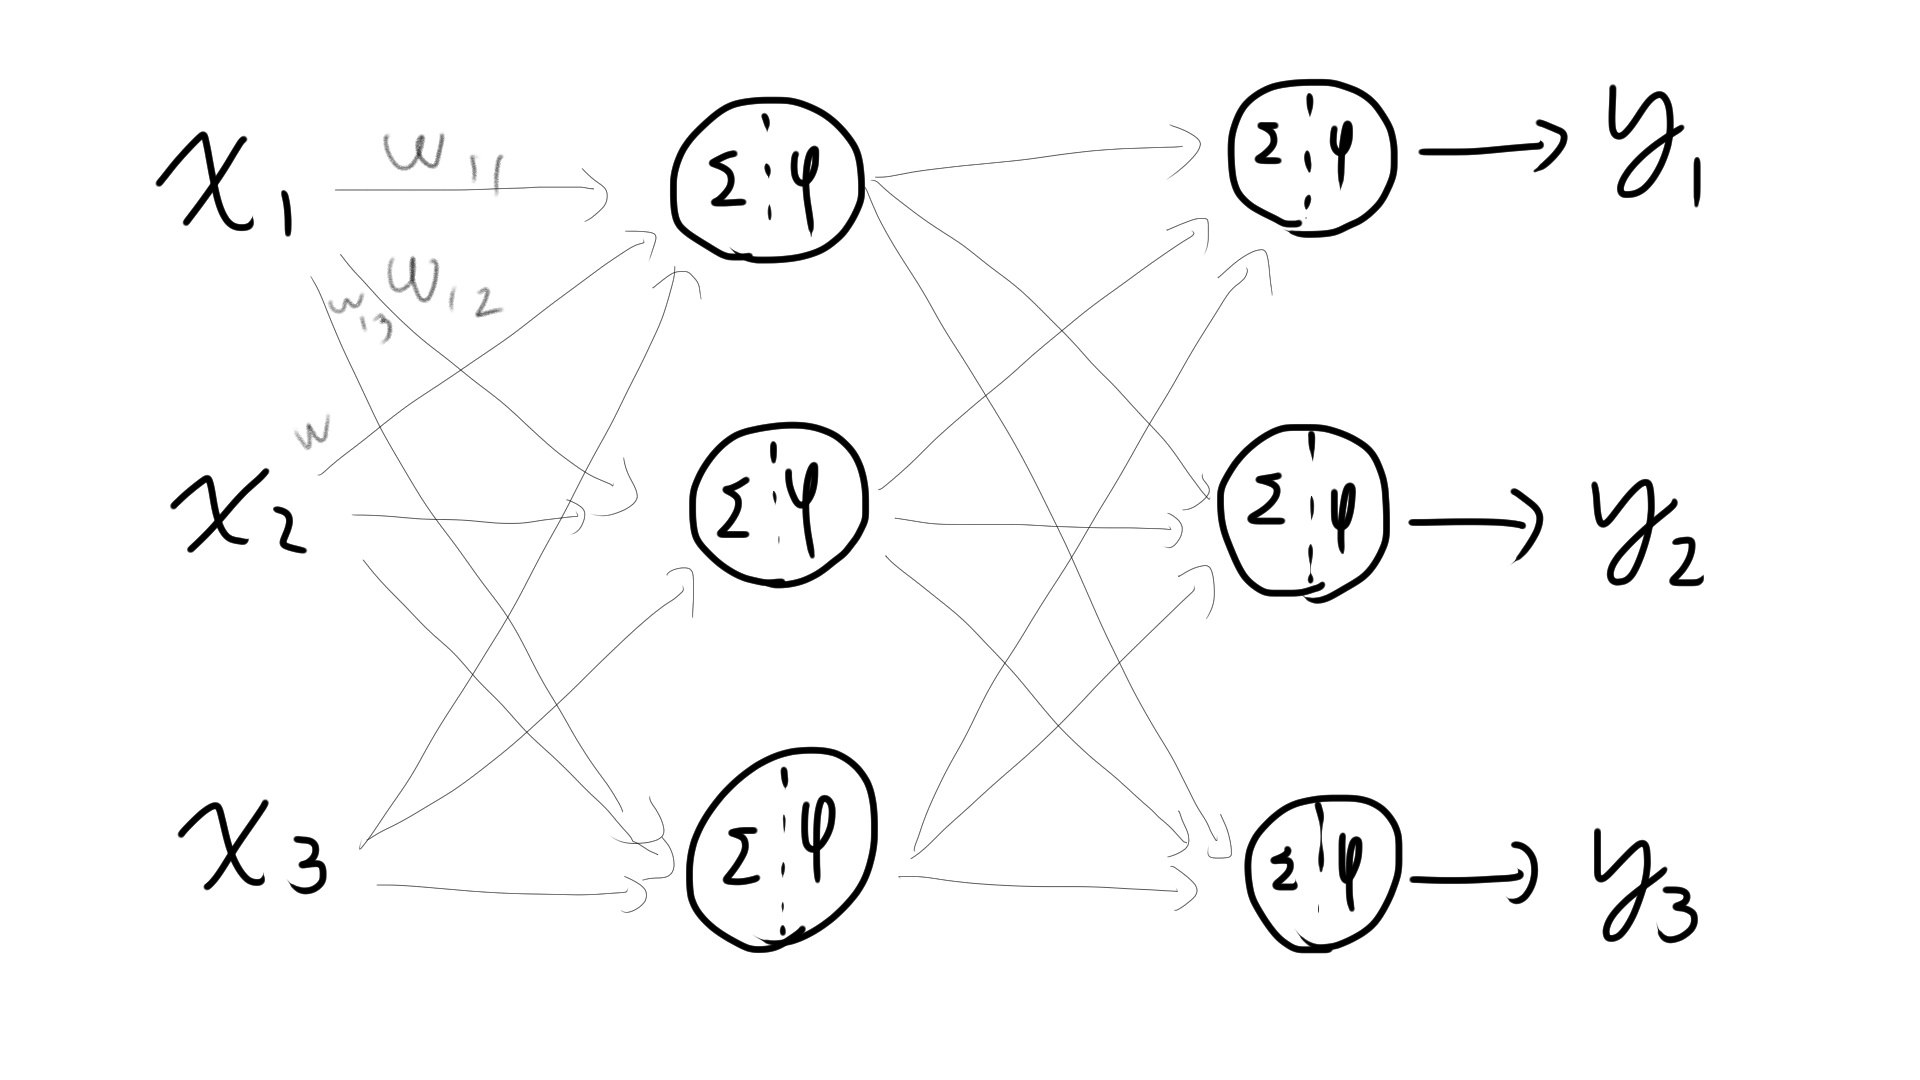
上図のNNではそれぞれのw (多すぎて途中で書くのを断念しました) を最適化する必要があります。
その最適化の手法が誤差逆伝播法です。
重みの可視化:計算グラフ
このwがNNでどう作用しているか可視化した図を計算グラフといいます。

ちなみにすべての重みに関する偏微分を計算して並べたベクトルを勾配(gradient)と呼びます。
このすべての重みのパラメータに対して
連鎖率
今回知りたいのが出力を変化させたときにパラメータの影響がどれくらいあるか。つまり値を入力したときの偏微分を求めたいわけです。
 イメージ図。中央はfです。
偏微分の値(=傾き)が分かれば、重みを最適な値にまで持っていけます。
イメージ図。中央はfです。
偏微分の値(=傾き)が分かれば、重みを最適な値にまで持っていけます。
んでこの偏微分の値ですが、図だと一層だけなので値はすぐわかりますが、では2,3個も重なっていたらどうなるんでしょうか。
結論を言うとそれぞれ偏微分した値をかけ合わせればおっけーです。

数式で表すならfがyの何かの関数(f=yとかなんでも),yがwの何かの関数であるとき
$$
\frac{\partial f}{\partial w} = \frac{\partial f}{\partial y} \frac{\partial y}{\partial w}
$$
と表せます。
足し算:そのまま
では実際に代表的な演算だけ逆伝播のやり方を見てみましょう。
足し算ではそのまま値が伝わります。
 1.4を逆伝播させると、それぞれに1.4が伝わる。
コードはこんな感じ
# 加算レイヤ

class AddLayer:
  def __init__(self):
    pass

  def forward(self,x,y):#図の黒矢印の方向
    out=x+y
    return out

  def backward(self,dout):#図の青矢印の方向, dout:上流から流れてきた数
    dx=dout*1
    dy=dout*1
    return dx,dy


a=2
b=3


# layer
alayer=AddLayer()

# forward
c=alayer.forward(a,b)
print(c) #5(=2+3)

# reverse
dout=1.4
da,db=alayer.backward(dout)

print(da,db) #1.4(=そのまま出力するから)
掛け算:反対の係数を
掛け算では反対側の係数をかけます。
 1.7を伝播させると反対側のノードにある係数を乗算した値が逆伝播する。
コードはこう
# 乗算レイヤ
class MulLayer:
  def __init__(self):
    self.x=None
    self.y=None
  def forward(self,x,y):
    self.x=x
    self.y=y
    out=x*y

    return out

  def backward(self, dout):
    dx=dout*self.y#反対側の係数をかける
    dy=dout*self.x

    return dx,dy

a=2
b=3


# layer
mlayer=MulLayer()

# forward
c=mlayer.forward(a,b)
print(c)#6

# reverse
dout=1.7
da,db=mlayer.backward(dout)
print(da,db)#5.1 3.4
RelU
入力された値によって変化します。
xが0以上の時はそのまま、xが0以下の時は0です。

class Relu:
  def __init__(self):
    self.mask=None

  def forward(self,x):
    self.mask=(x>0)
    out=x if self.mask else 0
    return out

  def backward(self, dout):
    dx=dout if self.mask else 0
    return dx

a=8.2
relu=Relu()
ra=relu.forward(a)
print(ra)#8.2

ut=1.2
rb=relu.forward(ut)
print(rb)#1.2

mrelu=Relu()
b=-9.2
rb=mrelu.forward(b)
print(rb)#0

ut=1.2
rc=mrelu.backward(ut)
print(rc)#0
sigmoid
$$
f(x)'=(1-f(x))f(x)
$$
が成り立つのでそのまま使います。(つまりRelUのように入力xを覚える必要はない)

sigmoidは入力の絶対値が大きいと勾配が0に近くなり、学習が止まります。
import numpy as np

class Sigmoid:
  def __init__(self):
    self.out=None

  def forward(self,x):
    out=1/(1+np.exp(-x))
    self.out=out

    return out

  def backward(self,dout):
    dx = dout*(1.0-self.out)*self.out
    return dx

sig=Sigmoid()

a=1
aout=sig.forward(a)
print(aout)#0.7310585786300049

b=0.006
bout=sig.forward(b)
print(bout)#0.5014999955000162
ここまで
参考文献
ゼロから作るDeep Learning: Pythonで学ぶディープラーニングの理論と実装