はじめに
Diverse Advent Calendar 2019 20日目の記事です。
12日目を担当した@nogさんの
ポケモンしりとり(ピカチュウ→ミュウVer.)を最短にする
この記事を見て僕もポケモンのネタを書くことにしました
ポケモンのデータは
すばらしきポケモンエコシステム
こちらの記事に記載されている
GitHub - fanzeyi/Pokemon-DB: A Pokemon database in JSON format.
を使います。
作ってみる
Pokemonモデルを作る
先程のリポジトリの中にpokedex.jsonというjsonファイルが入っているのでこれを使います
中身はこのようになってました
[
  {
    "id": 1,
    "name": {
      "english": "Bulbasaur",
      "japanese": "フシギダネ",
      "chinese": "妙蛙种子",
      "french": "Bulbizarre"
    },
    "type": [
      "Grass",
      "Poison"
    ],
    "base": {
      "HP": 45,
      "Attack": 49,
      "Defense": 49,
      "Sp. Attack": 65,
      "Sp. Defense": 65,
      "Speed": 45
    }
  }
]
Pokemonモデルを作る
上のjsonをもとにモデルを作っていきます
名前は日本語しか使わないので pokemon.name で 日本語の名前が取れるようにデコードします
またタイプも英語の配列しかないので、enumの配列に変換して日本語とタイプの色を取れるようにしました
struct Pokemon: Hashable, Decodable, Identifiable {
    var id: Int
    var name: String
    var type: [Type]
    var status: Status
    enum `Type`: String, CaseIterable {
        case grass      = "Grass"
        case poison     = "Poison"
        case fire       = "Fire"
        case flying     = "Flying"
        case water      = "Water"
        case bug        = "Bug"
        case normal     = "Normal"
        case electric   = "Electric"
        case ground     = "Ground"
        case fairy      = "Fairy"
        case rock       = "Rock"
        case steel      = "Steel"
        case ghost      = "Ghost"
        case dark       = "Dark"
        case psychic    = "Psychic"
        case dragon     = "Dragon"
        case fighting   = "Fighting"
        case ice        = "Ice"

        var title: String {
            switch self {
            case .grass:    return "くさ"
            case .poison:   return "どく"
            case .fire:     return "ほのお"
            case .flying:   return "ひこう"
            case .water:    return "みず"
            case .bug:      return "むし"
            case .normal:   return "ノーマル"
            case .electric: return "でんき"
            case .ground:   return "じめん"
            case .fairy:    return "フェアリー"
            case .rock:     return "いわ"
            case .steel:    return "はがね"
            case .ghost:    return "ゴースト"
            case .dark:     return "あく"
            case .psychic:  return "エスパー"
            case .dragon:   return "ドラゴン"
            case .fighting: return "かくとう"
            case .ice:      return "こおり"
            }
        }

        var color: Color {
            switch self {
            case .grass:    return Color(red: 166 / 255, green: 193 / 255, blue: 50 / 255)
            case .poison:   return Color(red: 157 / 255, green: 121 / 255, blue: 199 / 255)
            case .fire:     return Color(red: 234 / 255, green: 166 / 255, blue: 106 / 255)
            case .flying:   return Color(red: 123 / 255, green: 165 / 255, blue: 237 / 255)
            case .water:    return Color(red: 136 / 255, green: 197 / 255, blue: 245 / 255)
            case .bug:      return Color(red: 131 / 255, green: 203 / 255, blue: 98 / 255)
            case .normal:   return Color(red: 173 / 255, green: 173 / 255, blue: 173 / 255)
            case .electric: return Color(red: 226 / 255, green: 211 / 255, blue: 51 / 255)
            case .ground:   return Color(red: 191 / 255, green: 167 / 255, blue: 75 / 255)
            case .fairy:    return Color(red: 224 / 255, green: 118 / 255, blue: 152 / 255)
            case .rock:     return Color(red: 237 / 255, green: 198 / 255, blue: 61 / 255)
            case .steel:    return Color(red: 130 / 255, green: 137 / 255, blue: 163 / 255)
            case .ghost:    return Color(red: 115 / 255, green: 110 / 255, blue: 176 / 255)
            case .dark:     return Color(red: 111 / 255, green: 129 / 255, blue: 209 / 255)
            case .psychic:  return Color(red: 211 / 255, green: 128 / 255, blue: 240 / 255)
            case .dragon:   return Color(red: 228 / 255, green: 134 / 255, blue: 91 / 255)
            case .fighting: return Color(red: 210 / 255, green: 105 / 255, blue: 106 / 255)
            case .ice:      return Color(red: 151 / 255, green: 231 / 255, blue: 244 / 255)
            }
        }
    }

    enum CodingKeys: String, CodingKey {
        case id
        case name
        case japanese
        case type
        case base
    }

    init(from decoder: Decoder) throws {
        let container = try decoder.container(keyedBy: CodingKeys.self)
        self.id = try container.decode(Int.self, forKey: .id)
        let name = try container.nestedContainer(keyedBy: CodingKeys.self, forKey: .name)
        self.name = try name.decode(String.self, forKey: .japanese)
        let types: [String] = try container.decode([String].self, forKey: .type)
        self.type = types.map { Type(rawValue: $0) }.compactMap { $0 }
        self.status = try container.decode(Status.self, forKey: .base)
    }

    struct Status: Hashable, Codable {
        var hp: Int
        var attack: Int
        var defense: Int
        var spAttack: Int
        var spDefense: Int
        var speed: Int

        enum CodingKeys: String, CodingKey {
            case hp         = "HP"
            case attack     = "Attack"
            case defense    = "Defense"
            case spAttack   = "Sp. Attack"
            case spDefense  = "Sp. Defense"
            case speed      = "Speed"
        }
    }
}
画像はポケモンの図鑑番号.pngの形式でファイル名がつけられています。
ただ1番の場合、001.pngといようになっているので注意しましょう
String(format: "%03d", self.id)で0埋めして取得します。
extension Pokemon {

    var image: Image {
        return ImageStore.shared.image(name: String(format: "%03d", self.id))
    }

    // 小さい画像 図鑑番号MSというファイル名なので String(format: "%03dMS", self.id) で取る
    var spriteImage: Image {
        return ImageStore.shared.image(name: String(format: "%03dMS", self.id))
    }
}
Jsonを読み取るクラス
SwiftUIチュートリアルにあるものを使っていきます
今回は画像がpngなので
let url = Bundle.main.url(forResource: name, withExtension: "jpg")
をpngに変えました
let pokemonData: [Pokemon] = load("pokedex.json")
func load<T: Decodable>(_ filename: String, as type: T.Type = T.self) -> T {
    let data: Data
    guard let file = Bundle.main.url(forResource: filename, withExtension: nil)
    else {
        fatalError("Couldn't find \(filename) in main bundle.")
    }
    do {
        data = try Data(contentsOf: file)
    } catch {
        fatalError("Couldn't load \(filename) from main bundle:\n\(error)")
    }
    do {
        let decoder = JSONDecoder()
        return try decoder.decode(T.self, from: data)
    } catch {
        fatalError("Couldn't parse \(filename) as \(T.self):\n\(error)")
    }
}
final class ImageStore {
    typealias _ImageDictionary = [String: CGImage]
    fileprivate var images: _ImageDictionary = [:]
    fileprivate static var scale = 2
    static var shared = ImageStore()
    func image(name: String) -> Image {
        let index = _guaranteeImage(name: name)
        return Image(images.values[index], scale: CGFloat(ImageStore.scale), label: Text(verbatim: name))
    }
    static func loadImage(name: String) -> CGImage {
        guard
            let url = Bundle.main.url(forResource: name, withExtension: "png"),
            let imageSource = CGImageSourceCreateWithURL(url as NSURL, nil),
            let image = CGImageSourceCreateImageAtIndex(imageSource, 0, nil)
        else {
            fatalError("Couldn't load image \(name).png from main bundle.")
        }
        return image
    }
    fileprivate func _guaranteeImage(name: String) -> _ImageDictionary.Index {
        if let index = images.index(forKey: name) { return index }
        images[name] = ImageStore.loadImage(name: name)
        return images.index(forKey: name)!
    }
}
UIを作る
SwiftUIでレイアウトを組んでいきます
今回はList表示とGrid表示を切り替えて表示できるようにします
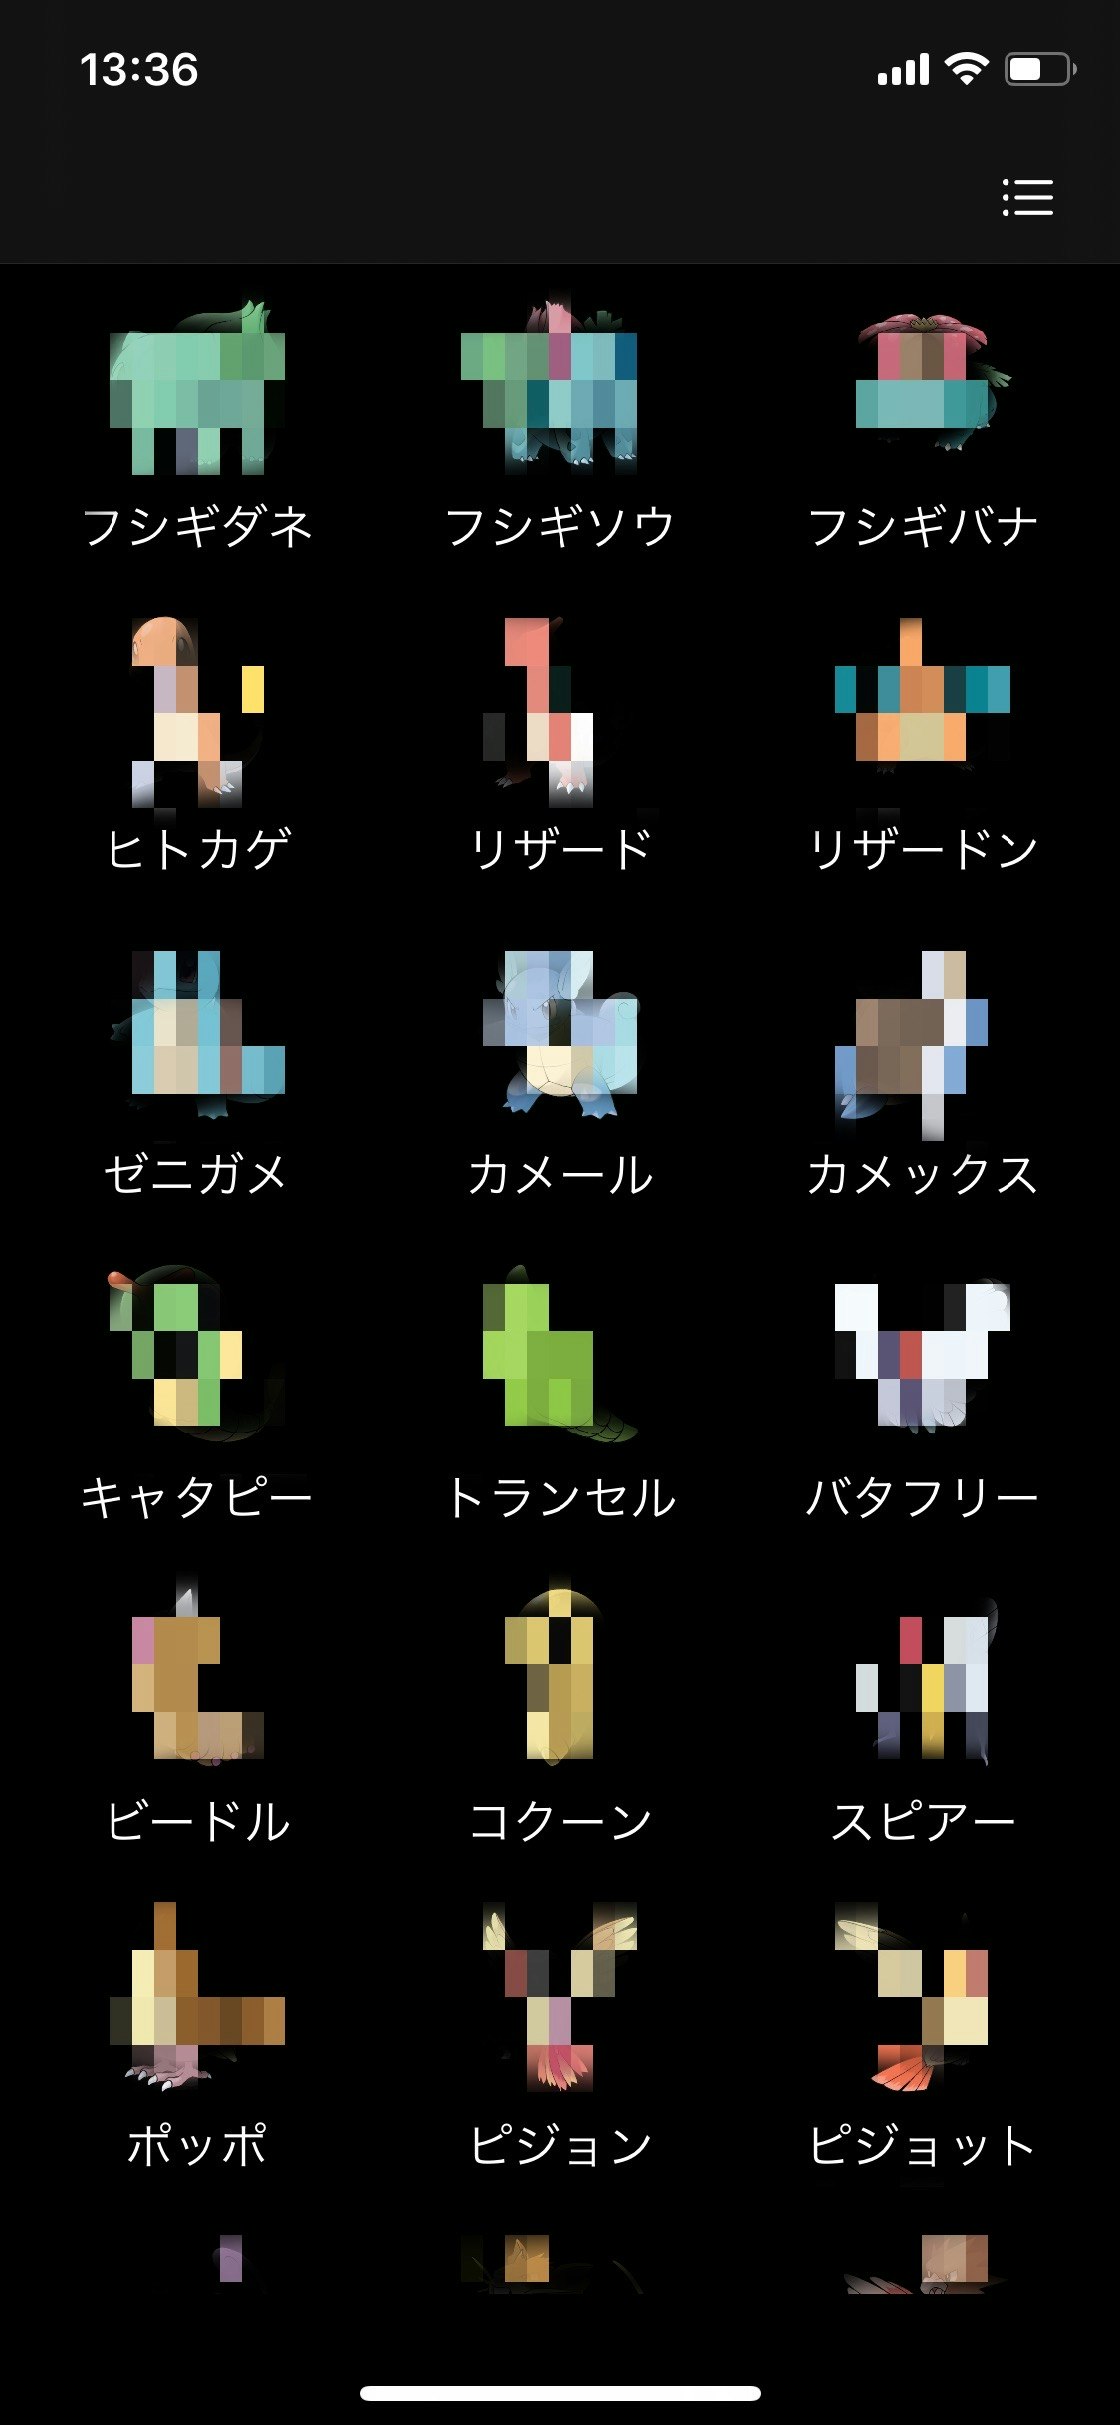
Gridで表示するView
SwiftUIでのGrid表示はCollectionViewのようなコンポーネントがないので、
QGrid: https://github.com/Q-Mobile/QGrid
というライブラリを使います。
たったこれだけのコードでGrid表示ができちゃいます
struct GridView: View {
    var body: some View {
        QGrid(pokemonData, columns: 3, vSpacing: 20) { pokemon in
            NavigationLink(destination: DetailView(pokemon: pokemon)) {
                GridCell(pokemon: pokemon)
            }
            .buttonStyle(PlainButtonStyle())
        }
    }
}

struct GridCell: View {
    var pokemon: Pokemon
    var body: some View {
        VStack {
            pokemon.image
                .resizable()
                .frame(width: 60, height: 60)
            Text(pokemon.name)
        }
    }
}
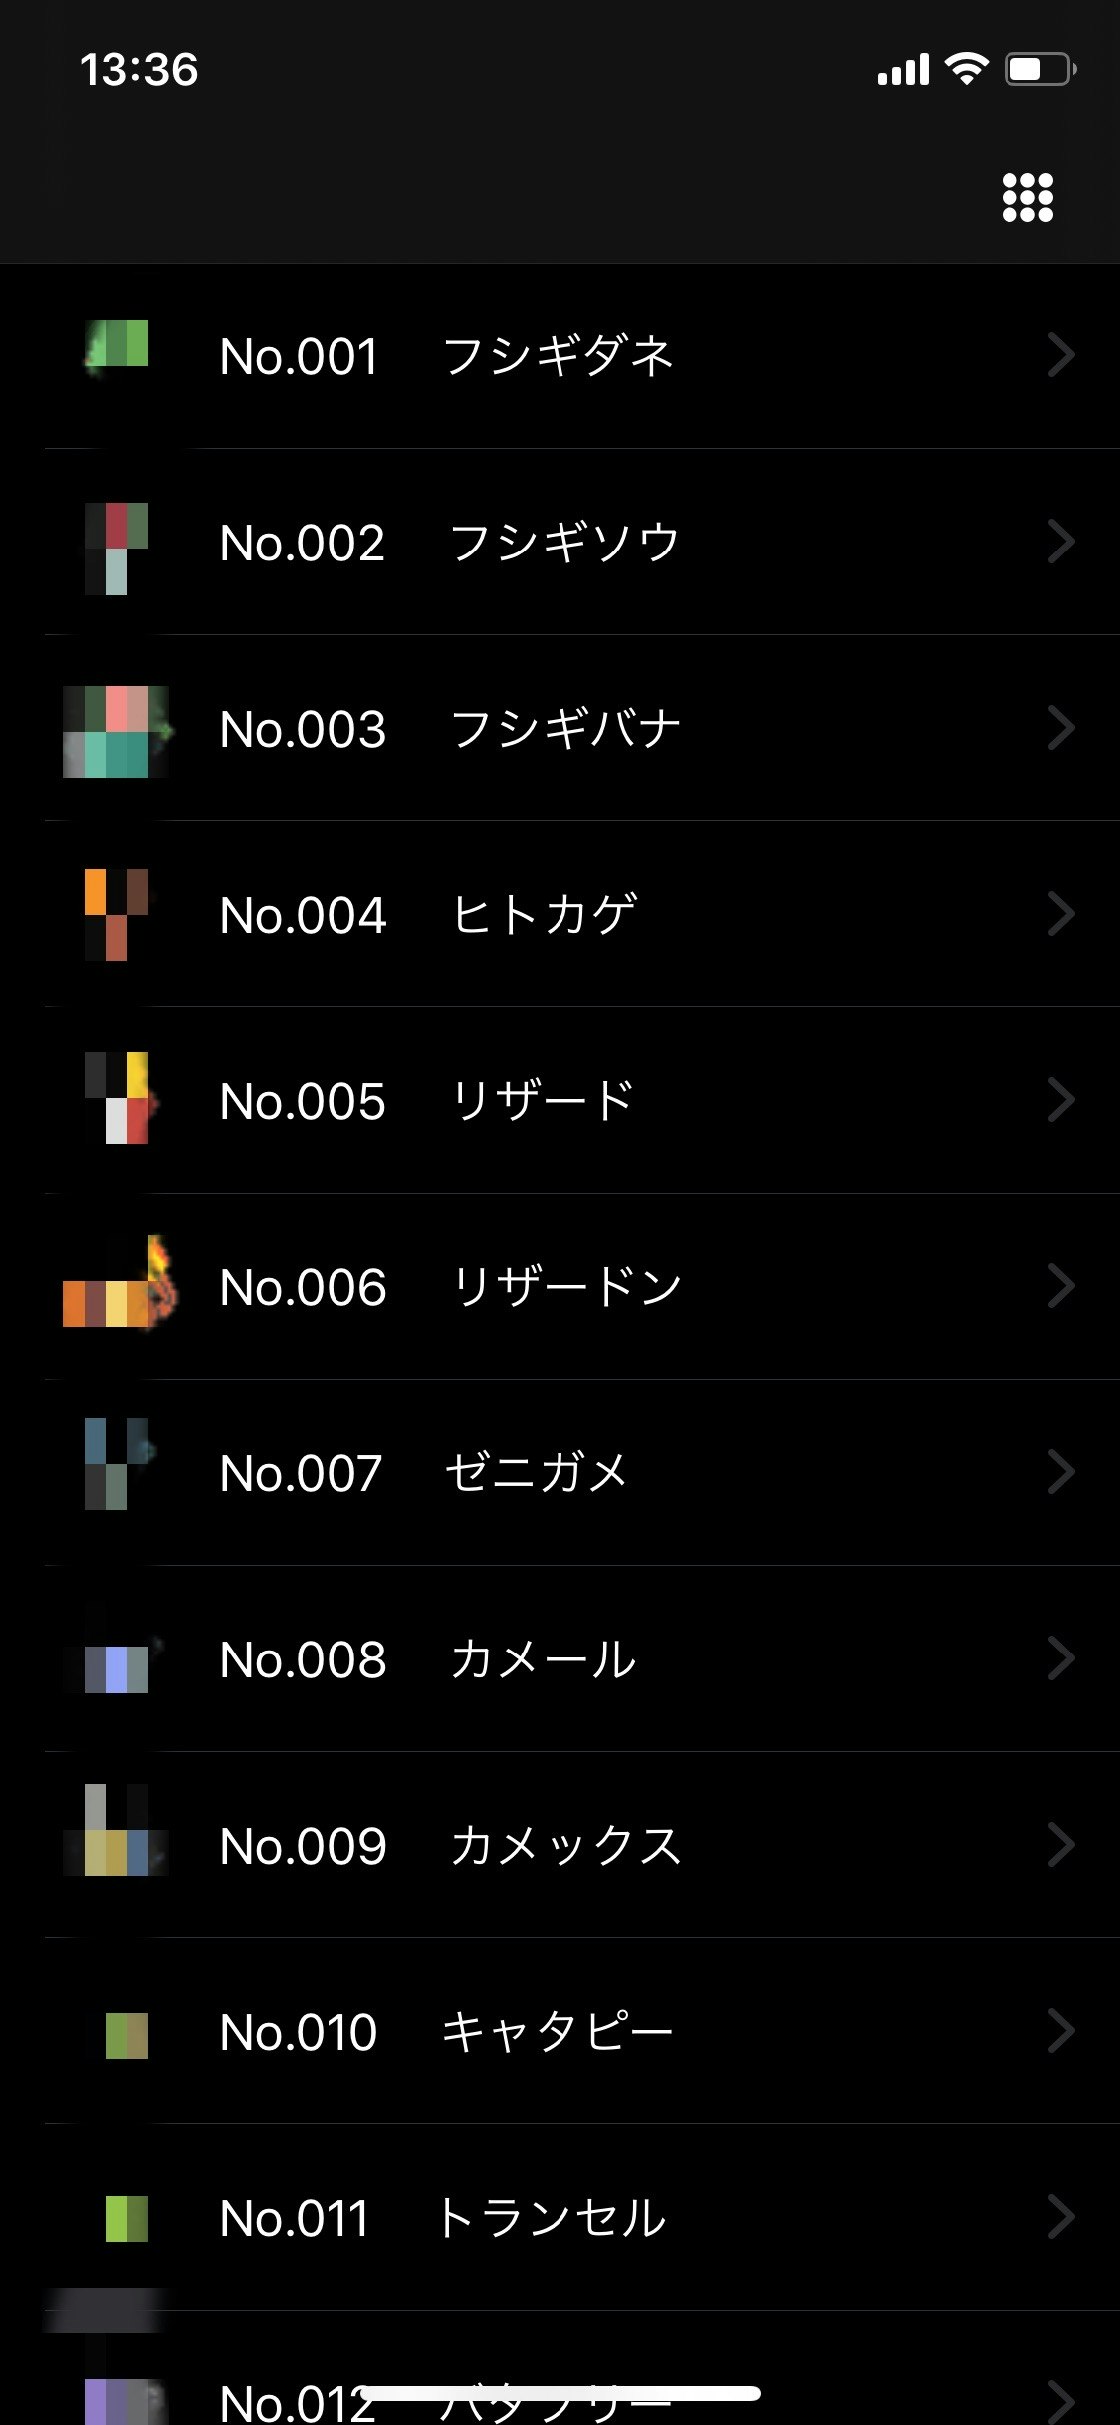
Listで表示するView
List表示は標準コンポーネントのListを使いましょう
struct ListView: View {
    var body: some View {
        List {
            ForEach(pokemonData) { pokemon in
                NavigationLink(destination: DetailView(pokemon: pokemon)) {
                    ListCell(pokemon: pokemon)
                }
            }
        }
    }
}

struct ListCell: View {
    var pokemon: Pokemon
    var body: some View {
        HStack(spacing: 0) {
            pokemon.spriteImage
                .resizable()
                .frame(width: 50, height: 50)
                .padding(.trailing, 8
            Text("No.\(String(format: "%03d", pokemon.id))")
                .fixedSize(horizontal: true, vertical: false)
                .padding(.trailing, 20)
            Text(pokemon.name)
        }
    }
}
ListとGridでの表示を管理するView
ListとGridでの表示切り替えを管理するViewです
@State var isGrid: Bool = false
で表示の切り替えを管理します
struct ContentView: View {

    @State private var isGrid: Bool = false

    private var gridButton: some View {
        Button(action: {
            self.isGrid.toggle()
        }) {
            Image(systemName: self.isGrid ? "list.bullet" : "circle.grid.3x3.fill")
                .frame(width: 30, height: 30)
        }
        .buttonStyle(PlainButtonStyle())
    }

    var body: some View {
        NavigationView {
            if self.isGrid {
                GridView()
                    .navigationBarItems(trailing: self.gridButton)
                    .navigationBarTitle("", displayMode: .inline)
            } else {
                ListView()
                    .navigationBarItems(trailing: self.gridButton)
                    .navigationBarTitle("", displayMode: .inline)
            }
        }
    }
}
詳細画面
1画面だけだと寂しいので申し訳程度の詳細画面をさっくと作ります
struct DetailView: View {
    var pokemon: Pokemon
    var body: some View {
        VStack {
            HStack {
                self.pokemon.spriteImage
                    .resizable()
                    .frame(width: 40, height: 40)
                Text("No.\(String(format: "%03d", self.pokemon.id))")
                Text(self.pokemon.name)
            }
            self.pokemon.image
                .resizable()
                .frame(width: 150, height: 150)
            HStack {
                ForEach(self.pokemon.type, id: \.self) { type in
                    Text(type.title)
                        .font(.system(size: 15))
                        .fixedSize(horizontal: true, vertical: false)
                        .padding()
                        .background(type.color)
                        .cornerRadius(8)
                }
            }.padding(.vertical, 20)

            VStack(spacing: 8) {
                Text("   HP:   \(self.pokemon.status.hp)")
                Text("こうげき:   \(self.pokemon.status.attack)")
                Text("ぼうぎょ:   \(self.pokemon.status.spAttack)")
                Text("とくこう:   \(self.pokemon.status.defense)")
                Text("とくぼう:   \(self.pokemon.status.spDefense)")
                Text("すばやさ:   \(self.pokemon.status.speed)")
            }
            .fixedSize(horizontal: true, vertical: false)
            .padding(.vertical, 20)
            .padding(.horizontal, 40)
            .overlay(
                RoundedRectangle(cornerRadius: 10)
                    .stroke(Color.white, lineWidth: 1)
            )
            .padding(.horizontal, 80)
        }
    }
}
できたもの
こんな感じになりました!(大人の事情でモザイクをしています![]() )
)
ぜひみなさんもポケモン図鑑を作りながら楽しくSwiftUIを学んでみてください!