今回の資料
Webシステムで、ユーザIDとパスワードの入力って、古いと言うか、減りましたよね。 Webシステムでの認証というと、SAML等オープンソースで簡単に利用環境が準備できる状況です。
今回は、AzureのEntraIDで認証して、認証された情報を画面へ表示するプログラムを見てみましょう。 (※プログラムは、dotnetのblazorを使います)
環境構築(Azure)
EntraIDの設定を行いましょう。「Microsoft Entra ID」を起動します。
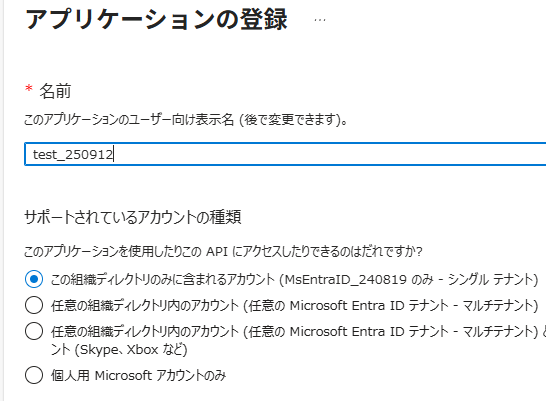
「追加」から「アプリを登録」で設定作業をします。

「名前」を適当に入力し、「シングルテナント」を選択して登録します。
登録したアプリの概要の画面右側「リダイレクト URI を追加する」のリンクをクリック。
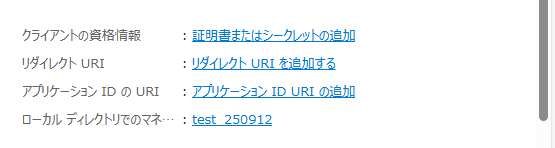
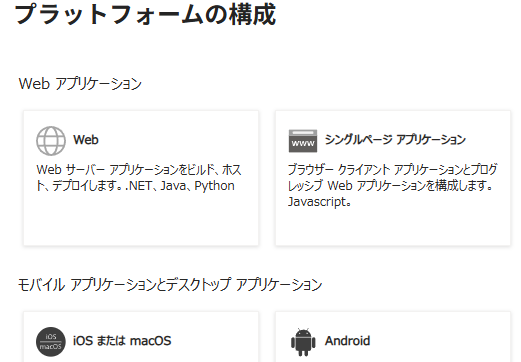
「プラットフォームと追加」の設定へ進みます。
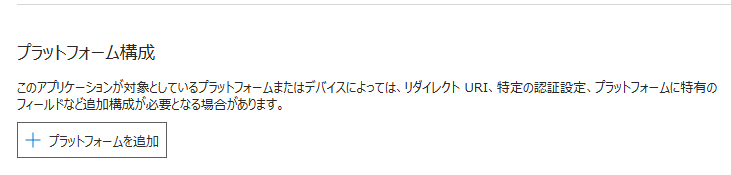
今回の追加は、「Web」です。
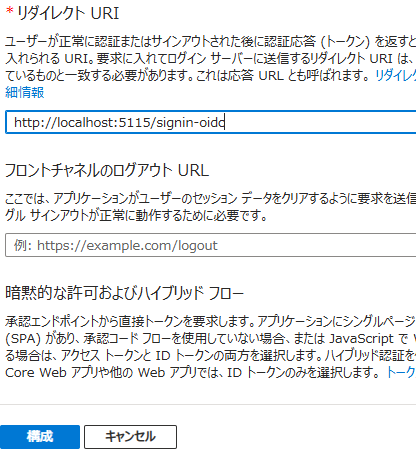
「リダイレクトURI」に、Blazorのパスに、「/signin-oidc」を指定して「構成」ボタンです。「/signin-oidc」コレは何?と思うのですが、ASP.NET Core によって内部的に使われるURLとの事なので、「御作法」と覚えてしまえば良いのかと思います。
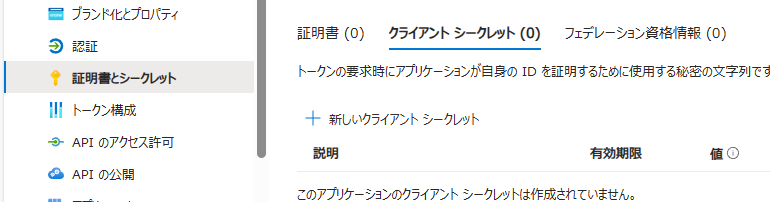
次に、左メニューの中の、「証明書とシークレット」に移動しましょう。
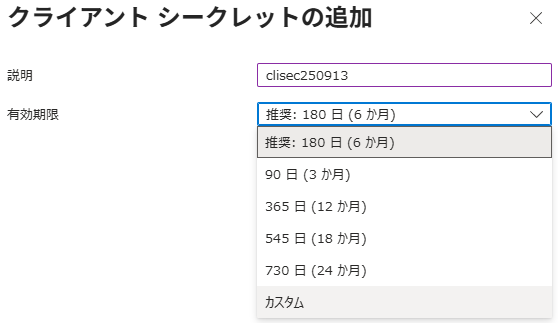
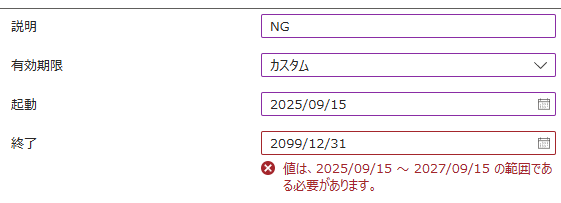
「新しいクライアント シークレット」を設定します。
カスタムを含め、有効期限が2年でしか設定できないようでした。
登録されたら、「値」の所の値を、クライアントシークレットとしてプログラムで利用するので、記憶しておきましょう。
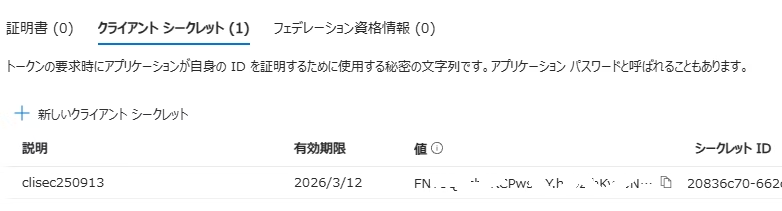
※少しモザイク入れてます
左メニューから「概要」を選択します。
画面内の「テナントID」「クライアントID」はプログラムで利用するので、記憶しておきましょう。
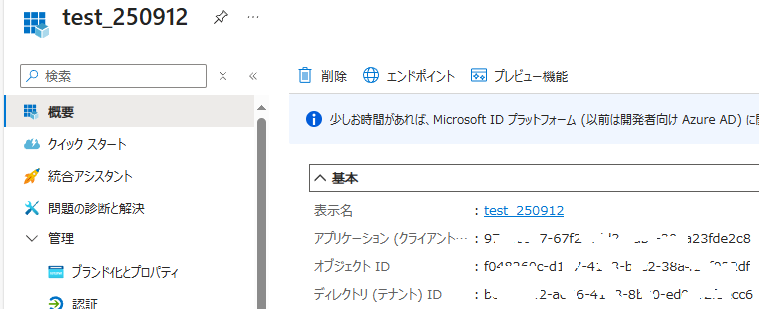
※少しモザイクしています
環境構築(dotnet:Blazor)
プロジェクトを作成し、パッケージを追加します。 (dotnet 8.0)
dotnet new webapi --output "d:\test\pj\blazor80"
dotnet add package Microsoft.AspNetCore.Authentication.OpenIdConnect --version 8.0.5
dotnet add package Microsoft.Identity.Web
dotnet add package Microsoft.Identity.Web.UI
テンプレートのプログラムを修正します。
(Azure で記憶した値を埋めていきます)
{
  "AzureAd": {
    "Instance": "https://login.microsoftonline.com/",
    "TenantId": "■ テナントID ■",
    "ClientId": "■ クライアントID ■",
    "ClientSecret": "■ クライアントシークレットの値 ■",
    "ResponseType": "code"
  },
  "Logging": {
    "LogLevel": {
      "Default": "Information",
      "Microsoft.AspNetCore": "Warning"
    }
  },
  "AllowedHosts": "*"
}
Azure の利用宣言を実装します。
using blazor80.Components;
using Microsoft.AspNetCore.Authentication.OpenIdConnect;
using Microsoft.Identity.Web;
using Microsoft.Identity.Web.UI;

var builder = WebApplication.CreateBuilder(args);

// Azure AD を使った認証設定
builder.Services.AddAuthentication(OpenIdConnectDefaults.AuthenticationScheme).AddMicrosoftIdentityWebApp(builder.Configuration.GetSection("AzureAd"));

// ログイン・ログアウトなどの認証関連ページを提供する Microsoft Identity UI を追加
builder.Services.AddRazorPages().AddMicrosoftIdentityUI();

// Blazor Server 機能を追加
builder.Services.AddRazorComponents()
    .AddInteractiveServerComponents();

var app = builder.Build();

// エラー処理やセキュリティ設定
if (!app.Environment.IsDevelopment())
{
    app.UseExceptionHandler("/Error", createScopeForErrors: true);
    app.UseHsts();
}

// ミドルウェア設定
app.UseHttpsRedirection();
app.UseStaticFiles();
app.UseAntiforgery();

// ルーティング
app.MapRazorComponents<App>().AddInteractiveServerRenderMode();
app.MapControllers();

app.Run();
EntraID による、ログイン と ログオフ のリンクを準備します。
<div class="top-row ps-3 navbar navbar-dark">
    <div class="container-fluid">
        <a class="navbar-brand" href="">BlazorEntraIDApp1</a>
    </div>
</div>
<input type="checkbox" title="Navigation menu" class="navbar-toggler" />
<div class="nav-scrollable" onclick="document.querySelector('.navbar-toggler').click()">
    <nav class="flex-column">
        <div class="nav-item px-3">
            <NavLink class="nav-link" href="" Match="NavLinkMatch.All">
                <span class="bi bi-house-door-fill-nav-menu" aria-hidden="true"></span> Home
            </NavLink>
        </div>
        <div class="nav-item px-3">
            <NavLink class="nav-link" href="counter">
                <span class="bi bi-plus-square-fill-nav-menu" aria-hidden="true"></span> Counter
            </NavLink>
        </div>
        <div class="nav-item px-3">
            <NavLink class="nav-link" href="weather">
                <span class="bi bi-list-nested-nav-menu" aria-hidden="true"></span> Weather
            </NavLink>
        </div>
        @*EntraIDログイン*@
        <div class="nav-item px-3">
            <a href="MicrosoftIdentity/Account/SignIn" class="nav-link">ログイン</a>
        </div>
        @*EntraIDログアウト*@
        <div class="nav-item px-3">
            <a href="MicrosoftIdentity/Account/SignOut" class="nav-link">ログアウト</a>
        </div>
    </nav>
</div>
EntraID による認証から取得可能な情報を画面に表示します。
@page "/"
@using Microsoft.AspNetCore.Components.Authorization
@inject AuthenticationStateProvider AuthenticationStateProvider

<PageTitle>ユーザー情報</PageTitle>
<h1>ようこそ!</h1>

@if (isAuthenticated)
{
    <p><strong>ユーザー名:</strong> @userName</p>
    <p><strong>認証済みメール:</strong> @email</p>
    <h3>クレーム一覧:</h3>
    <ul>
        @foreach (var claim in userClaims)
        {
            <li><strong>@claim.Type:</strong> @claim.Value</li>
        }
    </ul>
}
else
{
    <p>ログインしていません。</p>
}

@code {
    private bool isAuthenticated = false;
    private string userName = "";
    private string email = "";
    private List<System.Security.Claims.Claim> userClaims = new();

    protected override async Task OnInitializedAsync()
    {
        var authState = await AuthenticationStateProvider.GetAuthenticationStateAsync();
        var user = authState.User;
        isAuthenticated = user.Identity?.IsAuthenticated ?? false;
        if (isAuthenticated)
        {
            userName = user.Identity?.Name ?? "不明";
            email = user.FindFirst(c => c.Type == System.Security.Claims.ClaimTypes.Email)?.Value ?? "取得できませんでした";
            userClaims = user.Claims.ToList();
        }
    }
}
実行して確認しよう
起動してみます。テンプレートの Blazor にメニューが追加された状態です。
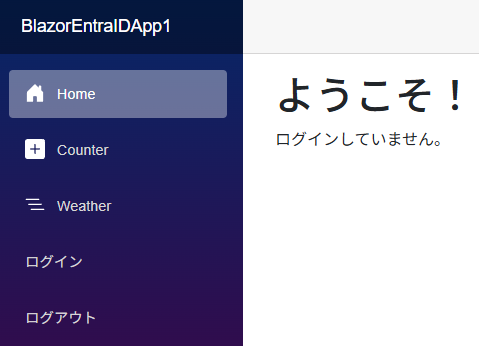
ログインしてみます。初回はユーザ選択等が表示されますが、記憶させれば次回から、そのまま認証されます。
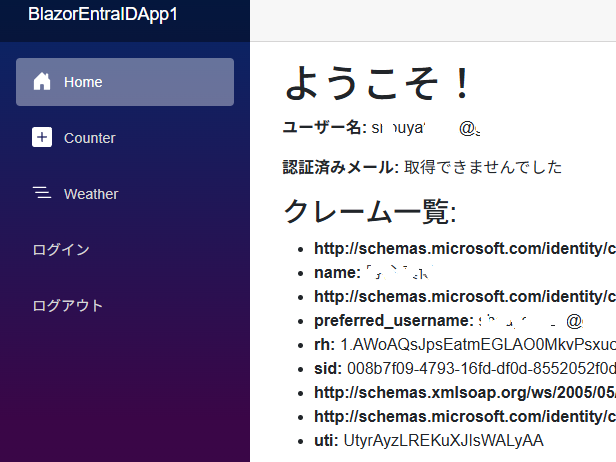
※少しモザイクしています
環境構築(証明書を使う)
Azure の推奨となりますが、下記の記載があります。

要するに、シークレットな文字列ではなく、証明書を使うことで、更に機密性が高くなると。 (一般的なご指摘ですね)
証明書となると、本番稼働を想定するなら、購入が一般的で、期限も2年と言わず、もう少し長く設定が出来そうですね。
さて、開発用には、お高い証明書は、懐が痛むので、PowerShellでサクっと作りたいと思います。
New-SelfSignedCertificate `
-Subject "CN=YourAppName" `
-KeyExportPolicy Exportable `
-KeySpec Signature `
-KeyUsage DigitalSignature `
-NotAfter (Get-Date).AddYears(1) `
-CertStoreLocation "Cert:\CurrentUser\My"
-Subject: 証明書の件名(CN=Common Name)です。アプリケーション名などを指定します。
-KeySpec Signature: この証明書は、デジタル署名用です。
-KeyUsage DigitalSignature: キーの使用目的としてデジタル署名のみ、有効にします。
-CertStoreLocation "Cert:\CurrentUser\My" 現在のユーザに対して証明書が設定されます。
   PSParentPath: Microsoft.PowerShell.Security\Certificate::CurrentUser\My
Thumbprint                                Subject
----------                                -------
9A54787634CF41C4665CE54E82B7EB4663C4B0AF  CN=YourAppName
この「Thumbprint」の値は、プログラムでも利用するので覚えておきましょう。
ファイル名を指定して実行で、「certmgr.msc」を実行すると、現在のユーザの証明書を確認できます。

続けて、公開鍵の証明書をエクスポートし、Entra IDにアップロードする必要があります。
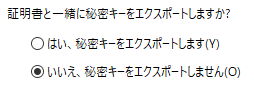
証明書を右クリックで、「すべてのタスク」から「エクスポート」を選択します。
秘密鍵は不要です。 (バックアップしておく事は御勧めします)
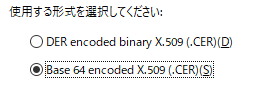
ファイル形式は「Base 64」を選択しましょう。
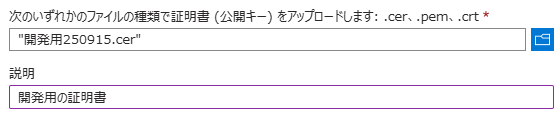
次に、Azure へ証明書をアップロードしていきます。前述のEntraIDのアプリ設定では「クライアントシークレット」を設定しましたが、今回は「証明書」を選択し「証明書のアップロード」を行います。
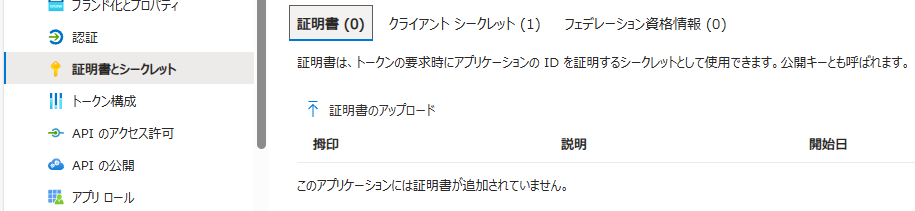
証明書を指定してアップロードします。
プロジェクトにパッケージを追加して、プログラムを修正します。
dotnet add package Microsoft.IdentityModel.Tokens
dotnet add package System.IdentityModel.Tokens.Jwt
「クライアント シークレット」から「証明書」の情報に変更します。
{
  "AzureAd": {
    "Instance": "https://login.microsoftonline.com/",
    "TenantId": "■ テナントID ■",
    "ClientId": "■ クライアントID ■",
    "ResponseType": "code"
    "ClientCertificates": [
      {
        "SourceType": "StoreWithThumbprint",
        "StoreLocation": "CurrentUser",
        "StoreName": "My",
        "Thumbprint": "■ 証明書作成時の「Thumbprint」の値 ■"
      }
    ]
  },
  "Logging": {
    "LogLevel": {
      "Default": "Information",
      "Microsoft.AspNetCore": "Warning"
    }
  },
  "AllowedHosts": "*"
}
Proguram.cs も「証明書」用に修正が必要です。
using blazor80.Components;
using Microsoft.AspNetCore.Authentication.OpenIdConnect;
using Microsoft.Identity.Web;
using Microsoft.Identity.Web.UI;
using Microsoft.IdentityModel.Tokens;
using System.IdentityModel.Tokens.Jwt;
using System.Security.Claims;
using System.Security.Cryptography.X509Certificates;

var builder = WebApplication.CreateBuilder(args);

// アプリに認証機能(Azure Entra ID/OpenID Connect)を追加
builder.Services.AddAuthentication(OpenIdConnectDefaults.AuthenticationScheme).AddMicrosoftIdentityWebApp(options =>
    {
        builder.Configuration.GetSection("AzureAd").Bind(options);

        // 証明書を読み込み、client_assertion を生成
        var cert = LoadCertificateFromStore(builder.Configuration["AzureAd:ClientCertificates:0:Thumbprint"]);
        var assertion = CreateClientAssertion(options.ClientId, options.TenantId, cert);

        // トークン取得時に client_assertion を追加
        options.Events ??= new OpenIdConnectEvents();
        options.Events.OnAuthorizationCodeReceived = async context =>
        {
            context.TokenEndpointRequest.ClientAssertion = assertion;
            context.TokenEndpointRequest.ClientAssertionType =
                "urn:ietf:params:oauth:client-assertion-type:jwt-bearer";
        };
    });

// Razor PagesとMicrosoft Identity UIをサービスへ追加
builder.Services.AddRazorPages().AddMicrosoftIdentityUI();
builder.Services.AddRazorComponents().AddInteractiveServerComponents();
var app = builder.Build();

// エラーハンドリングとセキュリティ設定
if (!app.Environment.IsDevelopment())
{
    app.UseExceptionHandler("/Error", createScopeForErrors: true);
    app.UseHsts();
}

// ルーティングとミドルウェアの有効化
app.UseHttpsRedirection();
app.UseStaticFiles();
app.UseAntiforgery();
app.UseAuthentication();
app.UseAuthorization();
app.MapRazorComponents<App>().AddInteractiveServerRenderMode();
app.MapControllers();
app.Run();


// 証明書読み込み関数
static X509Certificate2 LoadCertificateFromStore(string thumbprint)
{
    using var store = new X509Store(StoreName.My, StoreLocation.CurrentUser);
    store.Open(OpenFlags.ReadOnly);
    var certs = store.Certificates.Find(X509FindType.FindByThumbprint, thumbprint, validOnly: false);
    return certs.Count > 0 ? certs[0] : throw new Exception("証明書が見つかりません");
}

// JWT生成関数(sub クレーム追加済み)
static string CreateClientAssertion(string clientId, string tenantId, X509Certificate2 cert)
{
    var now = DateTime.UtcNow;
    var tokenHandler = new JwtSecurityTokenHandler();
    var claims = new[]
    {
        new Claim("sub", clientId)
    };
    var descriptor = new SecurityTokenDescriptor
    {
        Issuer = clientId,
        Subject = new ClaimsIdentity(claims),
        Audience = $"https://login.microsoftonline.com/{tenantId}/v2.0",
        NotBefore = now,
        Expires = now.AddMinutes(10),
        SigningCredentials = new X509SigningCredentials(cert)
    };
    var token = tokenHandler.CreateToken(descriptor);
    return tokenHandler.WriteToken(token);
}
最後に
アクセスするだけで認証されて、ユーザ固有の情報(メールアドレス等)が取得できていれば、後の処理は、ソコを起点に膨らませば何とかなりますよね。
他にも Microsoft Graph というのがあり、ユーザ固有の情報を色々と取り出せるようになるようです。
以上、お疲れさまでした~。