はじめに
いやー、流行っちゃってますね、 3D Gaussian splatting(3DGS)。最近私もsplatしているわけですが、いくつかオープンソースの3DGSを試してみたりしていますが、データによってはなかなかいい精度で収束してくれませんね。
そんな中、closed sourceで有料ではありますが、やはり有料だけあってPostshotは優秀です。ボタン一つでビデオから高精度な3DGSを行ってくれます。
さて、Postshotは強力なGaussian Splattingツールですが、GUIでの操作は時間がかかりますし、複数のデータセットを連続で処理したり、自動化したりするには、コマンドラインインターフェース(CLI)の使用が不可欠です。
しかし、Postshot CLIはStudioライセンスが必要であり、実行のたびに認証情報(--login と --password)を求められるため、そのままでは使い勝手が良くありません。
この記事では、Postshot CLIの利用に必要な契約(ライセンス)の確認から、パスワードを一度設定するだけで、次回以降は安全かつ自動で認証できるPowerShellスクリプトのセットアップ方法、そして私たちが直面した全てのエラーと、その最終的な解決策までを「Postshot CLIガイド」として解説します。
A. 手順全体概要
手っ取り早く手順を知りたい人のために以下に簡潔にまとめました。
ステップ1: PowerShellを「管理者として実行」
C:\Users フォルダなどへの書き込み権限エラー (is not writeable) を防ぐため、PowerShellを「管理者として実行」します。
- スタートメニューで
powershellと検索。 - 「Windows PowerShell」を右クリックし、 「管理者として実行」 を選択します。
ステップ2: 【初回のみ】実行ポリシーを変更
開いた「管理者」PowerShellウィンドウで、以下のコマンドを実行し、スクリプトの実行を許可します。
Set-ExecutionPolicy RemoteSigned -Scope CurrentUser
ステップ3: run_postshot.ps1 スクリプトの作成
後述の「C. run_postshot.ps1 スクリプト(完全版)」のコードをコピーし、run_postshot.ps1 という名前で保存します。(例: C:\Users\your_name\scripts\run_postshot.ps1)
ステップ4: 【初回のみ】認証情報の設定
「管理者」PowerShellで、run_postshot.ps1 を保存したディレクトリに移動し(例: cd C:\Users\your_name\scripts)、簡単なコマンド(--help など)でスクリプトを実行します。
.\run_postshot.ps1 --help
ターミナル上でEメールとパスワードの入力を求められるので、Postshot Studioライセンスの認証情報を入力します。Credentials securely saved と表示されれば成功です。
ステップ5: Postshotの実行
postshot-cli.exe の代わりに .\run_postshot.ps1 を使ってコマンドを実行します。スクリプトが自動で認証情報を付加します。オプション名はオリジナルのpostshot-cli.exeと同じです。
例1: 動画から .psht を訓練
.\run_postshot.ps1 train -i ..\data\my_video.mp4 -o ..\result\scene.psht
例2: .psht から .ply を書き出し
.\run_postshot.ps1 export -i ..\result\scene.psht -o ..\result\scene.ply
B. Postshot CLI ワークフロー
1. 必要なライセンス
Postshot CLI (postshot-cli.exe) を使用するには、Postshot Studio ライセンスの契約が必要です。
Free(無料)ライセンスやIndieライセンスでは、CLIを実行しようとすると Postshot Studio license required というエラーが表示され、使用することができません。 Jawset (Postshot) のウェブサイトでご自身のアカウント(例: sample@example.com)が Studio ライセンスであることを確認してください。
2. 基本的な実行フロー (2ステップ方式)
Postshot CLIでは、「訓練(Train)」と「書き出し(Export)」は別々のコマンドです。
ステップ 1: train コマンド
train コマンドは、インプット(動画、画像、COLMAPプロジェクト)から .psht プロジェクトファイルを作成します。-oで指定するのは*.pshtのファイル名なのでお間違えなく。
動画から訓練:
.\run_postshot.ps1 train -i C:\data\my_video.mp4 -o C:\result\scene.psht
COLMAPプロジェクトから訓練: (注意: -i には images や sparse の親であるルートフォルダを指定します)
.\run_postshot.ps1 train -i C:\colmap_project_root -o C:\colmap_project_root\scene.psht
ステップ 2: export コマンド
export コマンドは、ステップ1で作成した .psht プロジェクトファイルを読み込み、.ply ファイルなどの形式に変換します。
.\run_postshot.ps1 export -i C:\result\scene.psht -o C:\result\scene.ply
train コマンド実行時に --export-splat-ply のようなフラグを同時につけても、The following argument was not expected: エラーとなり、動作しません。
ステップ 3: 結果の確認
Postshotで.pshtファイルをダブルクリックして開くだけで結果が確認できます。下図は結果の一例です。一部切り出したのできれいではありませんが、全体はもっときれいにできるはずです。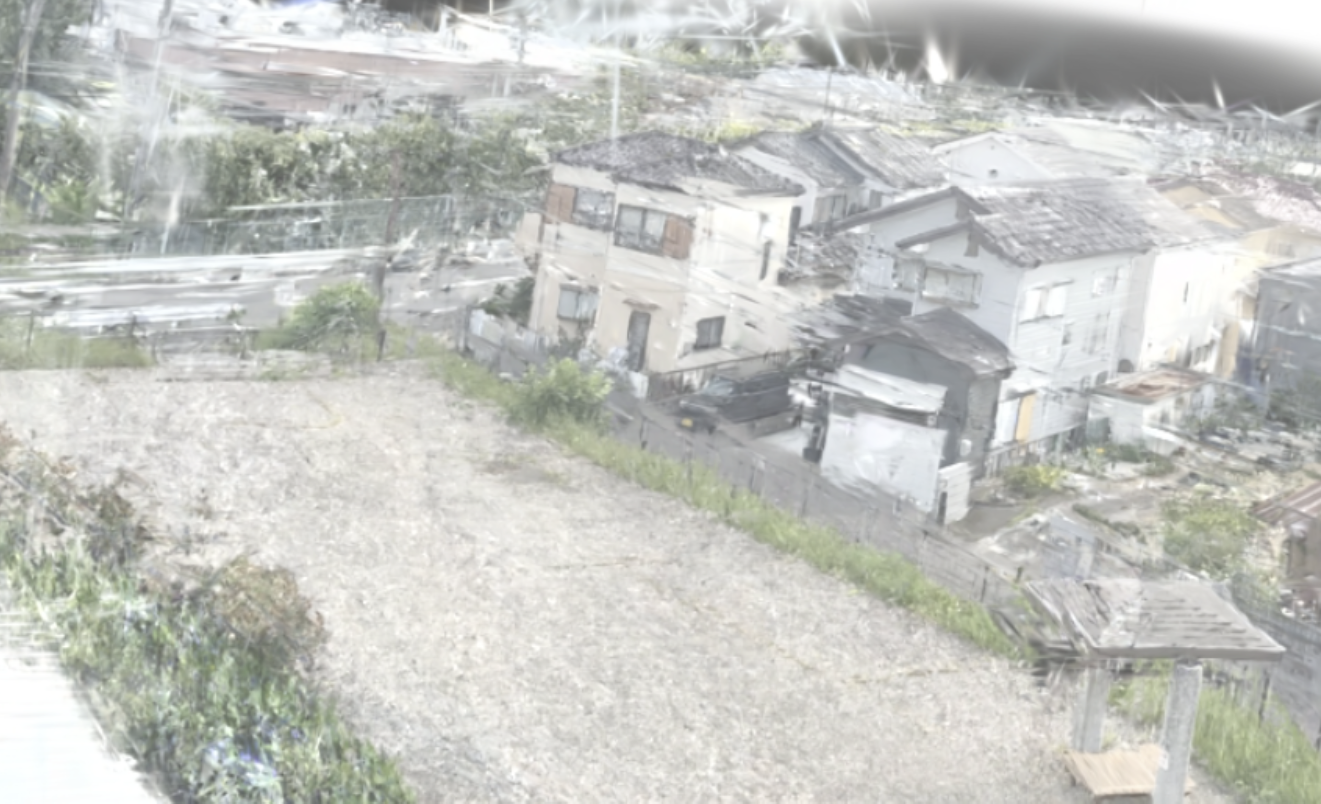
C. run_postshot.ps1 スクリプト(完全版)
このMarkdownファイルとは別に、run_postshot.ps1 というファイル名で以下のコードを保存してください。
<#
.SYNOPSIS
    A wrapper script to securely run the Postshot CLI.
    This handles Postshot CLI credentials securely.

.DESCRIPTION
    This script securely manages authentication for the Postshot CLI.
    - On the first run, it prompts for your Postshot email and password *in the console*
      (using Read-Host) and creates an encrypted credential file.
    - On subsequent runs, it automatically loads credentials from that file.
    - It forwards all arguments (e.g., 'train', '--import') directly to 'postshot-cli.exe'.
    - It securely adds login info to the command and clears the password from memory immediately.
    - It provides custom help and argument validation (e.g., checks for '.psht' in output).

.EXAMPLE
    # --- Example 1: Run with a video file ---
    # (Same command as postshot-cli.exe, but starts with '.\run_postshot.ps1')
    .\run_postshot.ps1 train --import "C:\data\drone_video.mp4" --output "C:\data\drone_scene.psht"

.EXAMPLE
    # --- Example 2: Run with COLMAP data (images + poses) ---
    # Note: Point -i to the *root* of the COLMAP project (the parent of 'images' and 'sparse')
    .\run_postshot.ps1 train --import "C:\colmap_project_root" --output "C:\colmap_project_root\scene.psht"

.EXAMPLE
    # --- Example 3: Get help ---
    .\run_postshot.ps1 --help
#>
#
# This script does not define its own parameters.
# Instead, it passes all arguments ($args) directly to the Postshot CLI.
#

# Stop script on errors
$ErrorActionPreference = 'Stop'

# --- 1. SET PATHS ---
# Define where the Postshot CLI is and where to store credentials.

# Path to the Postshot CLI executable
$PostshotCLI = "$env:ProgramFiles\Jawset Postshot\bin\postshot-cli.exe"

# Directory to store credentials (in %APPDATA%)
$CredentialDir = "$env:APPDATA\PostshotScript"
# Full path to the credential file
$CredentialFile = "$CredentialDir\postshot_creds.xml"

# Check if Postshot CLI exists
if (-not (Test-Path $PostshotCLI)) {
    Write-Error "Postshot CLI not found at: $PostshotCLI"
    Write-Error "Please ensure Postshot is installed correctly."
    return # Exit script
}

# --- 2. SHOW WRAPPER HELP ---
# If '--help' is requested, show our custom help first, then the real one.
if (($args -contains '--help') -or ($args -contains '-h')) {
    Write-Host "`n--- PowerShell Wrapper Help (run_postshot.ps1) ---" -ForegroundColor Cyan
    Write-Host "This script is a wrapper for 'postshot-cli.exe' that handles secure password storage."
    Write-Host "`nUsage:"
    Write-Host "  .\run_postshot.ps1 [Postshot Subcommand] [Options...]"
    Write-Host "`nCommon Commands:"
    Write-Host "  (This script auto-adds --login and --password for you)"
    Write-Host "`n  ★ Run Training (Video):"
    Write-Host "    .\run_postshot.ps1 train -i C:\data\my_video.mp4 -o C:\data\my_scene.psht"
    Write-Host "`n  ★ Run Training (COLMAP Project):"
    Write-Host "    # Note: Point -i to the *root* of the COLMAP project (the parent of 'images' and 'sparse')"
    Write-Host "    .\run_postshot.ps1 train -i C:\colmap_project_root -o C:\colmap_project_root\scene.psht"
    Write-Host "`n  ★ ★ Export a .PLY file (TWO-STEP PROCESS):"
    Write-Host "    # Step 1: Train and save the .psht project file."
    Write-Host "    .\run_postshot.ps1 train -i ..\data\my_video.mp4 -o ..\result\scene.psht"
    Write-Host "    # Step 2: Export the .psht file to a .ply file (using the 'export' command)."
    Write-Host "    .\run_postshot.ps1 export -i ..\result\scene.psht -o ..\result\scene.ply"
    Write-Host "`n  ★ Reset Credentials:"
    Write-Host '    Remove-Item "$env:APPDATA\PostshotScript\postshot_creds.xml"'
    Write-Host "`n--- Showing Postshot's built-in help below ---`n" -ForegroundColor Cyan
    # (The script will continue and run the command with --help)
}

# --- 3. CHECK ARGUMENTS (Before attempting login) ---
if ($args.Count -gt 0 -and $args[0] -eq 'train') {
    # Find the value after -o or --output
    $OutputArg = $null
    for ($i = 0; $i -lt $args.Length; $i++) {
        if (($args[$i] -eq '-o' -or $args[$i] -eq '--output') -and ($i + 1) -lt $args.Length) {
            $OutputArg = $args[$i + 1]
            break
        }
    }

    # Check if the output argument is missing or doesn't end in .psht
    if ($OutputArg) {
        if (-not $OutputArg.EndsWith('.psht')) {
            # THIS IS A FATAL ERROR, NOT A WARNING
            Write-Error "
----------------------------------------------------------------
FATAL ERROR: The output path does not end in '.psht'.
  Your Path: $OutputArg

  The 'train' command *must* output a project file (e.g., 'scene.psht').
  You cannot specify only a folder.

  Please correct the -o (or --output) argument.
----------------------------------------------------------------
"
            return # <-- STOPS THE SCRIPT
        }
    } else {
        # -o or --output flag was not found
        Write-Host "----------------------------------------------------------------" -ForegroundColor Yellow
        Write-Host "WARNING: The 'train' command was run without an '--output' ('-o') flag." -ForegroundColor Yellow
        Write-Host "  Postshot will likely train but not save the resulting .psht file."
        Write-Host "----------------------------------------------------------------"
        # (This is just a warning, so the script continues)
    }
}

# --- 4. GET/STORE CREDENTIALS ---
# Check if the credential file exists.
# If not: Prompt the user and save the file securely.
# If yes: Load credentials from the file AND verify them.

if (-not (Test-Path $CredentialFile)) {
    Write-Host "Postshot credentials not found. Let's set them up one time." -ForegroundColor Yellow

    $Cred = $null

    # Use console-based Read-Host to avoid GUI pop-up issues.

    Write-Host "Please enter your Postshot.com credentials (for CLI login)"
    $UserName = Read-Host -Prompt "  Enter your Postshot.com email"
    $Password = Read-Host -Prompt "  Enter your Postshot.com password (input will be hidden)" -AsSecureString

    # Manually create the PSCredential object
    $Cred = New-Object System.Management.Automation.PSCredential($UserName, $Password)

    # Check if the user entered a null or empty password
    if ($null -eq $Cred -or $null -eq $Cred.Password -or $Cred.Password.Length -eq 0) {
        Write-Host "No password was entered. Exiting script. Please run again and provide a password." -ForegroundColor Red
        return # Exit script without saving
    }

    # Create the directory if it doesn't exist
    if (-not (Test-Path $CredentialDir)) {
        New-Item -ItemType Directory -Path $CredentialDir | Out-Null
    }

    # Export the credentials (encrypted) to the XML file
    $Cred | Export-CliXml -Path $CredentialFile
    Write-Host "Credentials securely saved for future runs." -ForegroundColor Green

} else {
    # File exists, so we load and verify it.
    $Cred = Import-CliXml -Path $CredentialFile
    Write-Host "Securely loaded credentials for: $($Cred.UserName)"

    # VALIDITY CHECK (for existing files)
    if ($null -eq $Cred -or $null -eq $Cred.Password -or $Cred.Password.Length -eq 0) {

        Write-Host "Failed to load credentials, or password is null or empty." -ForegroundColor Red

        # Delete the corrupt credential file
        if (Test-Path $CredentialFile) {
            Remove-Item -Path $CredentialFile -Force
            Write-Host "Removed corrupt or empty credential file. Please re-run the script to set new credentials." -ForegroundColor Yellow
        }
        return # Exit script
    }
}

# --- 5. SECURELY CONVERT PASSWORD & RUN ---

# If we reached this point, $Cred is populated AND validated
# (either from the popup or the file)

# We must convert the SecureString to plain text *in memory*
# This is required to pass it to postshot-cli.exe

# Simplified the static class calls to avoid parser errors
$MarshalType = [System.Runtime.InteropServices.Marshal]
$BSTR = $MarshalType::SecureStringToBSTR($Cred.Password)
$PlainTextPassword = $MarshalType::PtrToStringAuto($BSTR)

try {
    Write-Host "Building Postshot command..."

    # Argument order: Login flags must come *before* the subcommand (e.g., 'train').
    $CliArgs = @(
        '--login', $Cred.UserName,
        '--password', $PlainTextPassword
    ) + @($args) # <-- User arguments are at the end

    Write-Host "Starting Postshot CLI. This may take a long time..."
    Write-Host "Command: $PostshotCLI --login $($Cred.UserName) --password [REDACTED] $($args -join ' ')"

    # Execute the Postshot CLI with the combined arguments
    & $PostshotCLI $CliArgs

    Write-Host "Postshot CLI execution finished." -ForegroundColor Green

} # <--- 'try' block ends here
finally { # <--- 'finally' block starts here
    # ★ SECURITY ★
    # Whether the 'try' block succeeded or failed, this 'finally' block
    # will *always* run to clear the plain text password from memory.
    if ($PlainTextPassword) {
        # Note: Use $MarshalType variable from above
        $MarshalType::ZeroFreeBSTR($BSTR)
        Write-Host "Cleared plain text password from memory."
    }
}
D. トラブルシューティング & エラー対策
私たちが直面した実際のエラーと、その解決策です。
Q1. エラー: is not writeable. Aborting
原因: これが最も重要なエラーです。postshot-cli.exe が指定された出力先フォルダ(例: C:\Users\your_name\...)に書き込む権限を持っていないことが原因です。
これは、Windowsの「ランサムウェア対策(Controlled folder access)」などのセキュリティ機能が、C:\Program FilesにあるプログラムがC:\Users フォルダに書き込むのをブロックするために発生します。
解決策 (必須): PowerShellを**「管理者として実行」**してください。(A. 概要 ステップ1を参照)
「管理者として実行」することで、postshot-cli.exe はOSのセキュリティ制限をバイパスし、指定されたフォルダに書き込む権限を得ます。
Q2. エラー: The following argument was not expected: ..\result\
原因: train コマンドの -o (--output) に、ファイル名(例: scene.psht)ではなく、フォルダ名(例: ..\result\)を指定したためです。Postshot CLIは不親切にも Run with --help としか返してくれません。
解決策: train コマンドの -o には、必ず .psht で終わるファイル名を指定してください。 (現在の run_postshot.ps1 は、この間違いを検知すると実行前に FATAL ERROR を表示するように修正されています)
-
間違い:
-o ..\result\ -
正しい:
-o ..\result\my_scene.psht
Q3. エラー: The following argument was not expected: ..\result\closeup.psht
原因: これは、train コマンドと --export-splat-ply フラグを同時に使用したために発生しました。train コマンドは .ply を直接エクスポートできません。
解決策: 「B. Postshot CLI ワークフロー」で解説した通り、train と export を2つのステップに分けて実行してください。
.\run_postshot.ps1 train -i (インププット) -o (アウトププット.psht).\run_postshot.ps1 export -i (インプット.psht) -o (アウトププット.ply)
Q4. エラー: PlyReader: unsupported element type 'face'
原因: train コマンドのインプット(-i)で指定したフォルダ内に、画像だけでなく .ply ファイルも含まれています。 さらに、その .ply ファイルが、Postshotがサポートする「点群(Vertex)」ではなく、サポートしていない「メッシュ(Face)」を含んでいたためです。
解決策: インプットフォルダ(-i)から、メッシュデータ(face 要素を持つ .ply ファイル)を削除するか、一時的に別の場所に移動させてください。Postshotが train 時に読み取れるのは、画像(または点群)のみです。
Q5. エラー: Postshot Studio license required...
原因: Postshot CLIが、あなたの認証情報(Eメールとパスワード)を使ってサーバーに確認した結果、「Studioライセンスが見つからない」と判断しました。
解決策A(パスワード間違い): 初回入力したパスワードが間違っていた可能性があります。以下のコマンドで保存された認証情報を削除し、スクリプトを再実行して認証情報を入力し直してください。
Remove-Item "$env:APPDATA\PostshotScript\postshot_creds.xml"
解決策B(ライセンス違い): あなたのEメールアカウントが Studio ライセンスではありません。Jawsetのウェブサイトで契約内容を確認してください。
Q6. エラー: このシステムではスクリプトの実行が無効に...
原因: PowerShellの実行ポリシーが、スクリプトの実行をブロックしています。
解決策: 「A. 概要 ステップ2」で解説した通り、以下のコマンドを(できれば「管理者」PowerShellで)実行してください。
Set-ExecutionPolicy RemoteSigned -Scope CurrentUser