概要
フロント:Nuxt
バックエンド:Django REST Framework(以下DRF)
で新しいプロジェクトなどを立ち上げた時に設定などをいちいち調べるのがめんどくさくなったため、まとめておきます。
ただ、設定ファイルだけを書くのでは個人的に記事として物足りない。
なので、ついでに基本的な操作であるAPIを叩いてCRUDを行い、会員登録を実装するところまで書く予定です。
なお、今回はDBはSQLiteを使います。PostgreSQLやMySQLなど他のRDBが使いたい場合はDRF側のDBの設定を書きかえるだけなので、そちらの設定は各自よろしくお願いいたします。
ひとまずこの記事では、NuxtからDRFで作ったAPIを叩いてデータベースの内容をアップデート、及びデリートするところまでです。
ソースコードはこちらにあるのでわからないところは適宜見てください。
また、Twitterかこの記事のコメント欄でわからないところを聞いていただけると答えられます。
前回
Nuxt&Django REST FrameworkでCRUD POST編
更新箇所
バックエンド
前回と同じようにviewとurlを追加します。
# 商品を編集・削除するためのview
class ItemEditView(generics.RetrieveUpdateDestroyAPIView):
    serializer_class = ItemSerializer
    queryset = Item.objects.all()
前回触れなかったのですが、私は使いやすいのでgenericsのviewを使っています。
今回使っているgenerics.RetrieveUpdateDestroyAPIViewは情報をGET、PUT、DELETEすることのできるviewです。
このviewを使う場面としては、今回のような商品の編集と削除画面を一つにしたいときでしょう。
なお、今回は編集する時にどこを変えるのかわかりやすいように元の登録されているデータを表示するためにGETもできるこちらを使っています。
viewの使い方や一覧等はこちらを見てください。
.....
path('items/<int:pk>/edit',ItemEditView.as_view()),
前回もそうでしたが、これで設定は完了です。
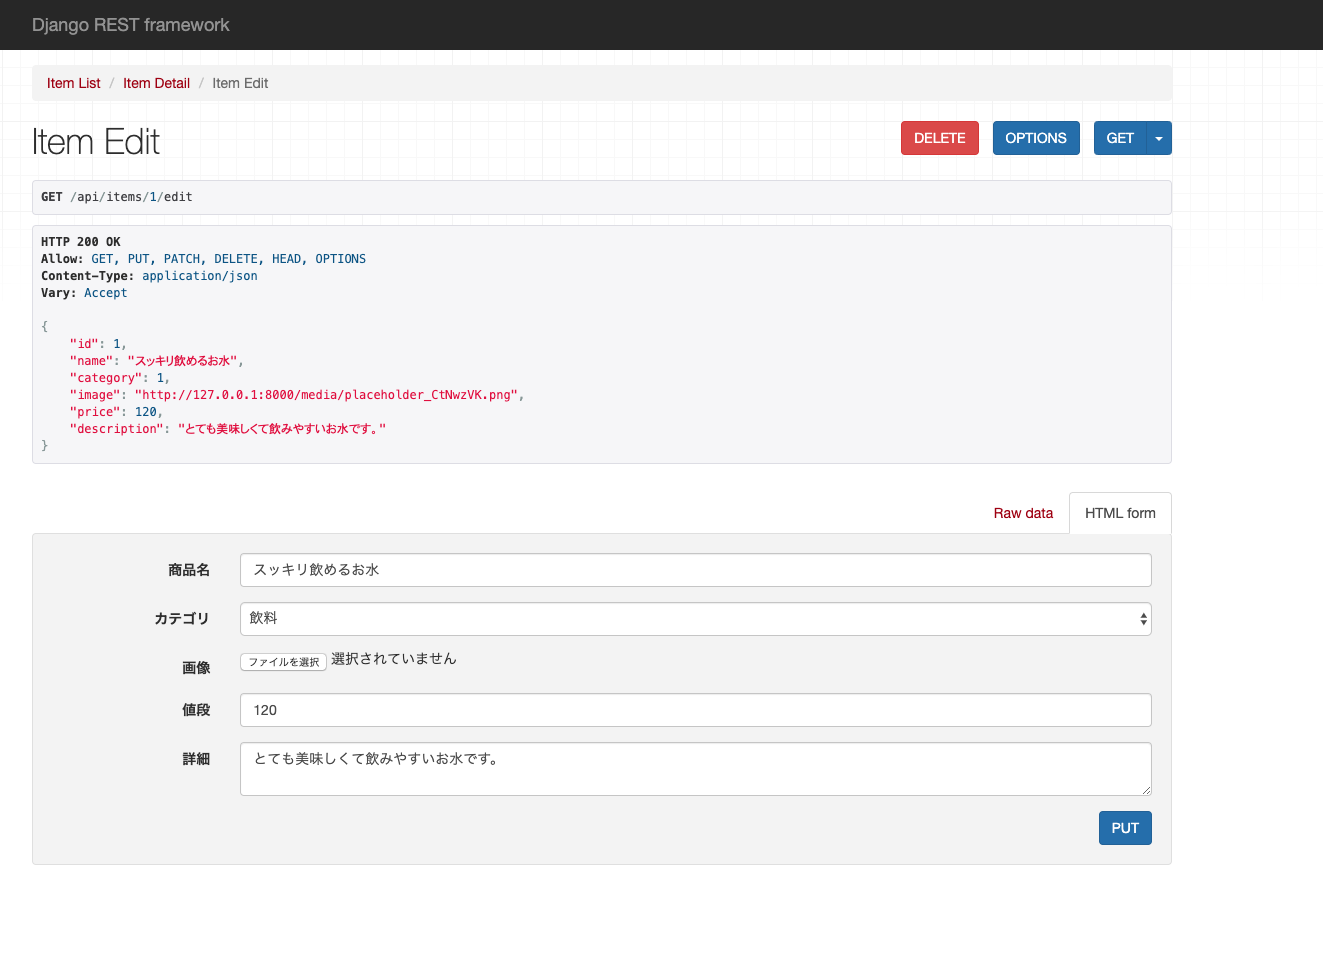
にアクセスしてみましょう。
以上のようにidが1の商品の情報を表示し、かつPUTもDELETEもできるようになっていますね。
ではフロントエンドに移りましょう。
フロントエンド
今回は_idフォルダの中にedit.vueを作ります。
<template>
<v-card
    light
    :loading="isUpdating"
  >
    <div id="app">
    <v-app id="inspire">
    <v-container>
    <div class="col-12 text-center my-3">
        <h3 class="mb-3 display-4 text-uppercase">
          {{ item.name }}
        </h3>
      </div>
      <div class="col-md-6 mb-4">
        <img
          class="img-fluid"
          style="width: 400px; border-radius: 10px; box-shadow: 0 1rem 1rem rgba(0,0,0,.7);"
          :src="item.image"
          alt
        >
      </div>
    <div class="col-md-6">
        <div class="item-details">
          <h4>カテゴリー</h4>
          <p>{{ item.category }}</p>
          <h4>値段</h4>
          <p>{{ item.price }}</p>
          <h4>説明</h4>
          <p>{{ item.description }}</p>
          </div>
          </div>
          </v-container>
    <v-form @submit.prevent="editItem">
      <v-container>
        <v-row>
          <v-col
            cols="12"
            md="4"
          >
            <v-text-field
              v-model="item.name"
              label="商品名"
              required
            ></v-text-field>
          </v-col>

          <v-col
            cols="12"
            md="4"
          >
            <v-text-field
              v-model="item.category"
              :counter="10"
              label="カテゴリー"
              required
            ></v-text-field>
          </v-col>

          <v-col
            cols="12"
            md="4"
          >
            <v-text-field
              v-model="item.price"
              label="値段"
              required
            ></v-text-field>
          </v-col>

          <v-col
            cols="12"
            md="4"
          >
            <v-text-field
              v-model="item.description"
              label="商品説明"
              required
            ></v-text-field>
          </v-col>
          <v-col
            cols="12"
            md="4"
          >
           <v-file-input
           v-model="item.image"
           label="商品画像"
           filled
           prepend-icon="mdi-camera"
           ></v-file-input>
          </v-col>
          <v-card-actions>
      <v-spacer />
      <v-btn
        class="btn-primary"
        :loading="isUpdating"
        color="primary"
        depressed
        @click="isUpdating = true"
        type="submit"
      >
        <v-icon left>
          mdi-post
        </v-icon>
        商品を更新
      </v-btn>
    </v-card-actions>
        </v-row>
      </v-container>
    </v-form>
    <v-form @submit.prevent="deleteItem">
    <button class="btn btn-sm btn-danger">
          削除
    </button>
    </v-form>
  </v-app>
</div>
</v-card>
</template>

<script>
export default {
    async asyncData ({ $axios, params }) {
    try {
      const item = await $axios.$get(`/items/${params.id}`)
      return { item }
    } catch (e) {
      return { item: [] }
    }
  },
  data () {
    return {
      item: {
        name: '',
        category: '',
        image: '',
        price: '',
        description: '',
      },
      preview: '',
      autoUpdate: true,
      isUpdating: false,
      title: '商品編集',
  }
  },
  watch: {
    isUpdating (val) {
      if (val) {
        setTimeout(() => (this.isUpdating = false), 3000)
      }
    }
  },
  methods: {
    createImage (file) {
      const reader = new FileReader()
      const vm = this
      reader.onload = (e) => {
        vm.preview = e.target.result
      }
      reader.readAsDataURL(file)
    },
    async deleteItem () { // eslint-disable-line
      try {
        const deleteditem = this.item
        await this.$axios.$delete(`/items/${deleteditem.id}/edit`) // eslint-disable-line
        const newItems = await this.$axios.$get('/items/')
        this.items = newItems
        this.$router.push('/items')
      } catch (e) {
        console.log(e)
      }
    },
    async editItem () {
      const editeditem = this.item
       //if (editeditem.image.includes('http://)') !== -1) {
        //delete editeditem.image
      //}
      const config = {
        headers: { 'content-type': 'multipart/form-data' }
      }
      const formData = new FormData()
      for (const data in editeditem) {
        formData.append(data, editeditem[data])
      }
      try {
        const response = await this.$axios.$patch(`/items/${editeditem.id}/edit`, formData, config) // eslint-disable-line
        this.$router.push('/items')
      } catch (e) {
        console.log(e)
      }
    }
  }
}
</script>
すると、自動的に
へのルーティング設定が生成されます。
そして、既存のページから動的に遷移できるように
_id/index.vue
以下のように更新します、
<template>
  <main class="container my-5">
    <div class="row">
      <div class="col-12 text-center my-3">
        <h2 class="mb-3 display-4 text-uppercase">
          {{ item.name }}
        </h2>
      </div>
      <div class="col-md-6 mb-4">
        <img
          class="img-fluid"
          style="width: 400px; border-radius: 10px; box-shadow: 0 1rem 1rem rgba(0,0,0,.7);"
          :src="item.image"
          alt
        >
      </div>
      <div class="col-md-6">
        <div class="item-details">
          <h4>カテゴリー</h4>
          <p>{{ item.category }}</p>
          <h4>値段</h4>
          <p>{{ item.price }}</p>
          <h4>説明</h4>
          <p>{{ item.description }}</p>
          <h3>編集</h3>
          <nuxt-link :to="`/items/${item.id}/edit`" class="btn btn-info">
            商品を編集する
            </nuxt-link>
        </div>
      </div>
    </div>
  </main>
</template>
<script>
export default {
  async asyncData ({ $axios, params }) {
    try {
      const item = await $axios.$get(`/items/${params.id}`)
      return { item }
    } catch (e) {
      return { item: [] }
    }
  },
  data () {
    return {
      item: {
      id:'',
      name:'',
      category:'',
      image:'',
      price:'',
      description:'',
      }
    }
  },
  head () {
    return {
      title: '商品詳細'
    }
  }
}
</script>
<style scoped>
</style>
主な変更点として、
nuxt-link :to ~
追加されました。動的なルーティングをnuxt-linkで行う場合はtoの前にコロン(:)がないとエラーになってしまう点に注意してください。
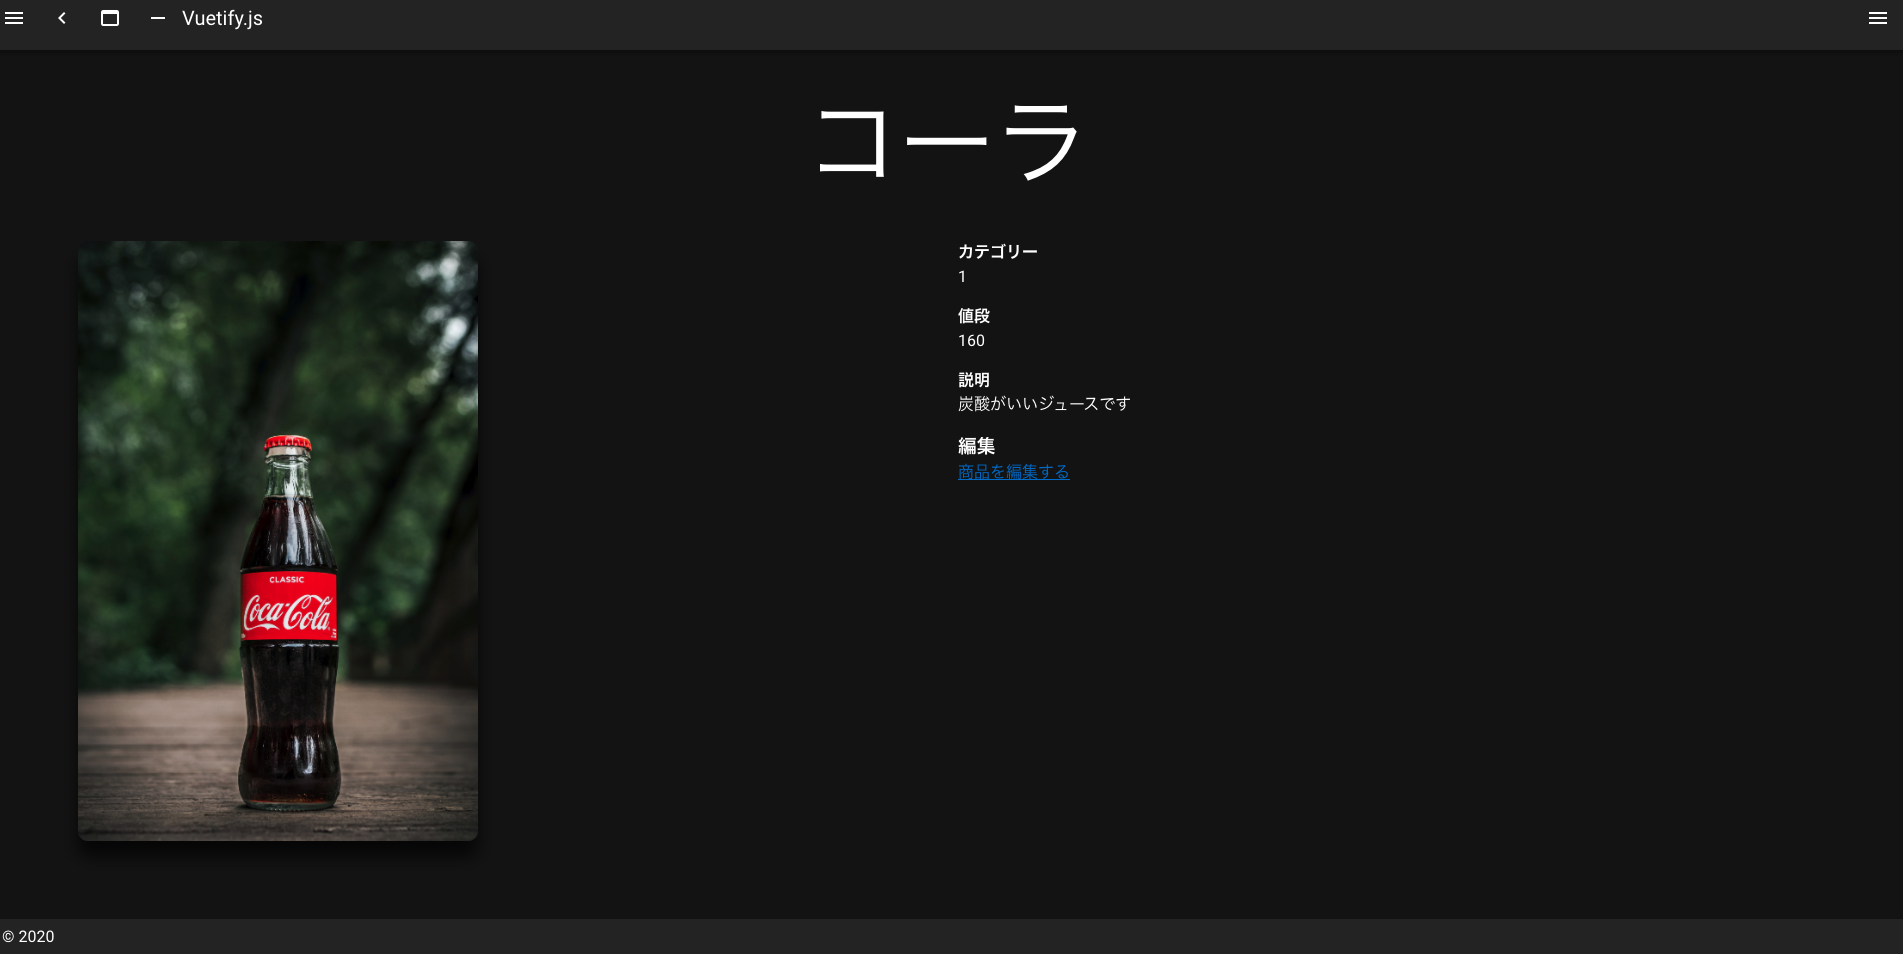
詳細ページに商品編集ページが追加され、
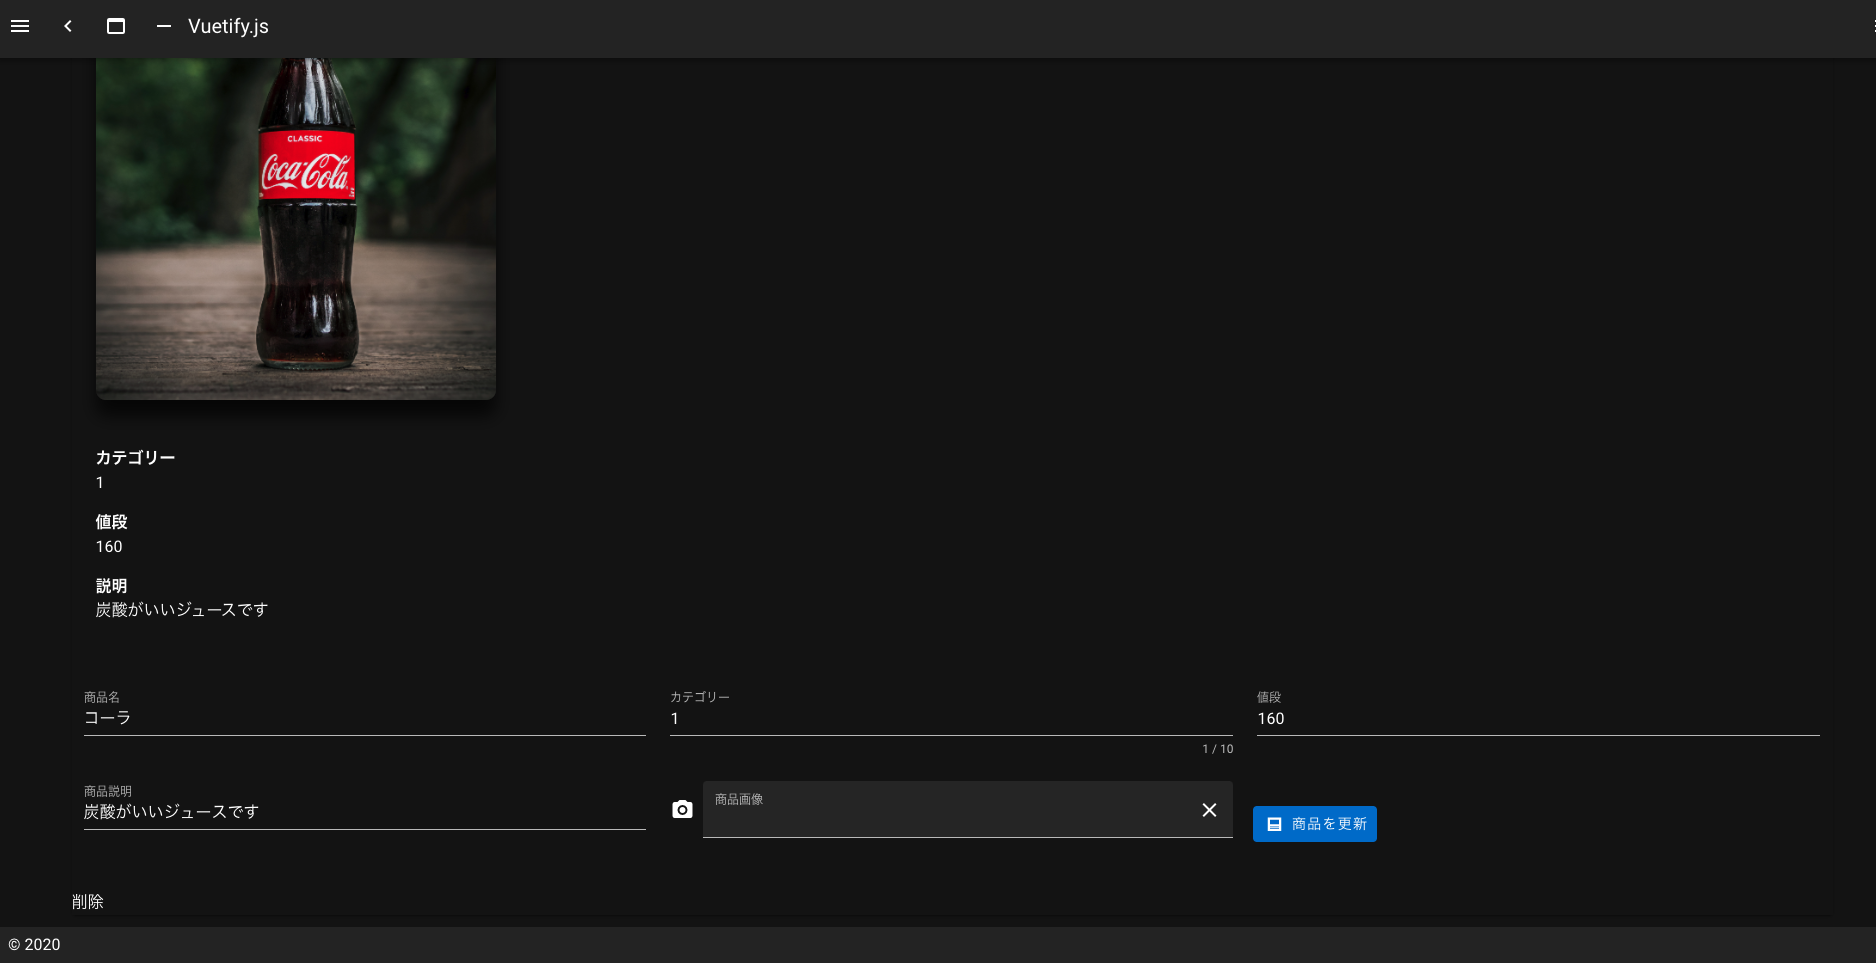
そのリンクをクリックすると、以下のようなフォームをもった商品編集ページとなります。
きちんと更新と消去の欄があり、かつこちらでしっかりと動作を確認しました。
お疲れ様です!
これにより、好きなようにCRUD処理ができるようになりました!
きちんと処理が理解できていればある程度Nuxt/DRFでWebアプリを自由に作れるようになりましたね。
次回は誰にでも投稿できるようにするのではなく、権限を管理するために会員登録などの認証周りについての実装を行います。


