目次
- 共通の設定
- Googleアカウントでの認証機能
- Facebookアカウントでの認証機能
1. 共通の設定
ライブラリをインストールします。
$ pip install social-auth-app-django
settings.pyを編集します。
SOCIAL_AUTH_GOOGLE_OAUTH2_KEY = '[クライアントID]'  👈これを追加。
SOCIAL_AUTH_GOOGLE_OAUTH2_SECRET = '[クライアント シークレット]' 👈これを追加。

INSTALLED_APPS = [
    ...省略...
    'social_django',  👈これを追加。
]

MIDDLEWARE_CLASSES = [
    ...省略...
    'social_django.middleware.SocialAuthExceptionMiddleware',  👈これを追加。
]

TEMPLATES = [
    {
        'BACKEND': 'django.template.backends.django.DjangoTemplates',
        'DIRS': [
            PROJECT_DIR.child('templates'),
        ],
        'APP_DIRS': True,
        'OPTIONS': {
            'context_processors': [
                ...省略...
                'social_django.context_processors.backends',  👈これを追加。
                'social_django.context_processors.login_redirect', 👈これを追加。
            ]
        },
    },
]
マイグレーションを実行します。
$ python manage.py migrate

Operations to perform:
  Apply all migrations: admin, auth, contenttypes, sessions, social_django
Running migrations:
  Applying social_django.0001_initial... OK
  Applying social_django.0002_add_related_name... OK
  Applying social_django.0003_alter_email_max_length... OK
  Applying social_django.0004_auto_20160423_0400... OK
  Applying social_django.0005_auto_20160727_2333... OK
  Applying social_django.0006_partial... OK
...
プロジェクト全体を管理する、urls.pyを編集します。
urlpatterns = [
    ...省略...
    path('oauth/', include('social_django.urls', namespace='social')),   👈これを追加
]
2. Googleアカウントでの認証機能
クライアントキーとクライアントシークレットを取得する為、Goolge Developers Consoleへアクセスし「プロジェクトを作成」を選択します。

「プロジェクト名」に適当な名称を入力し、「作成」を押下します。

「認証情報」を選択します。
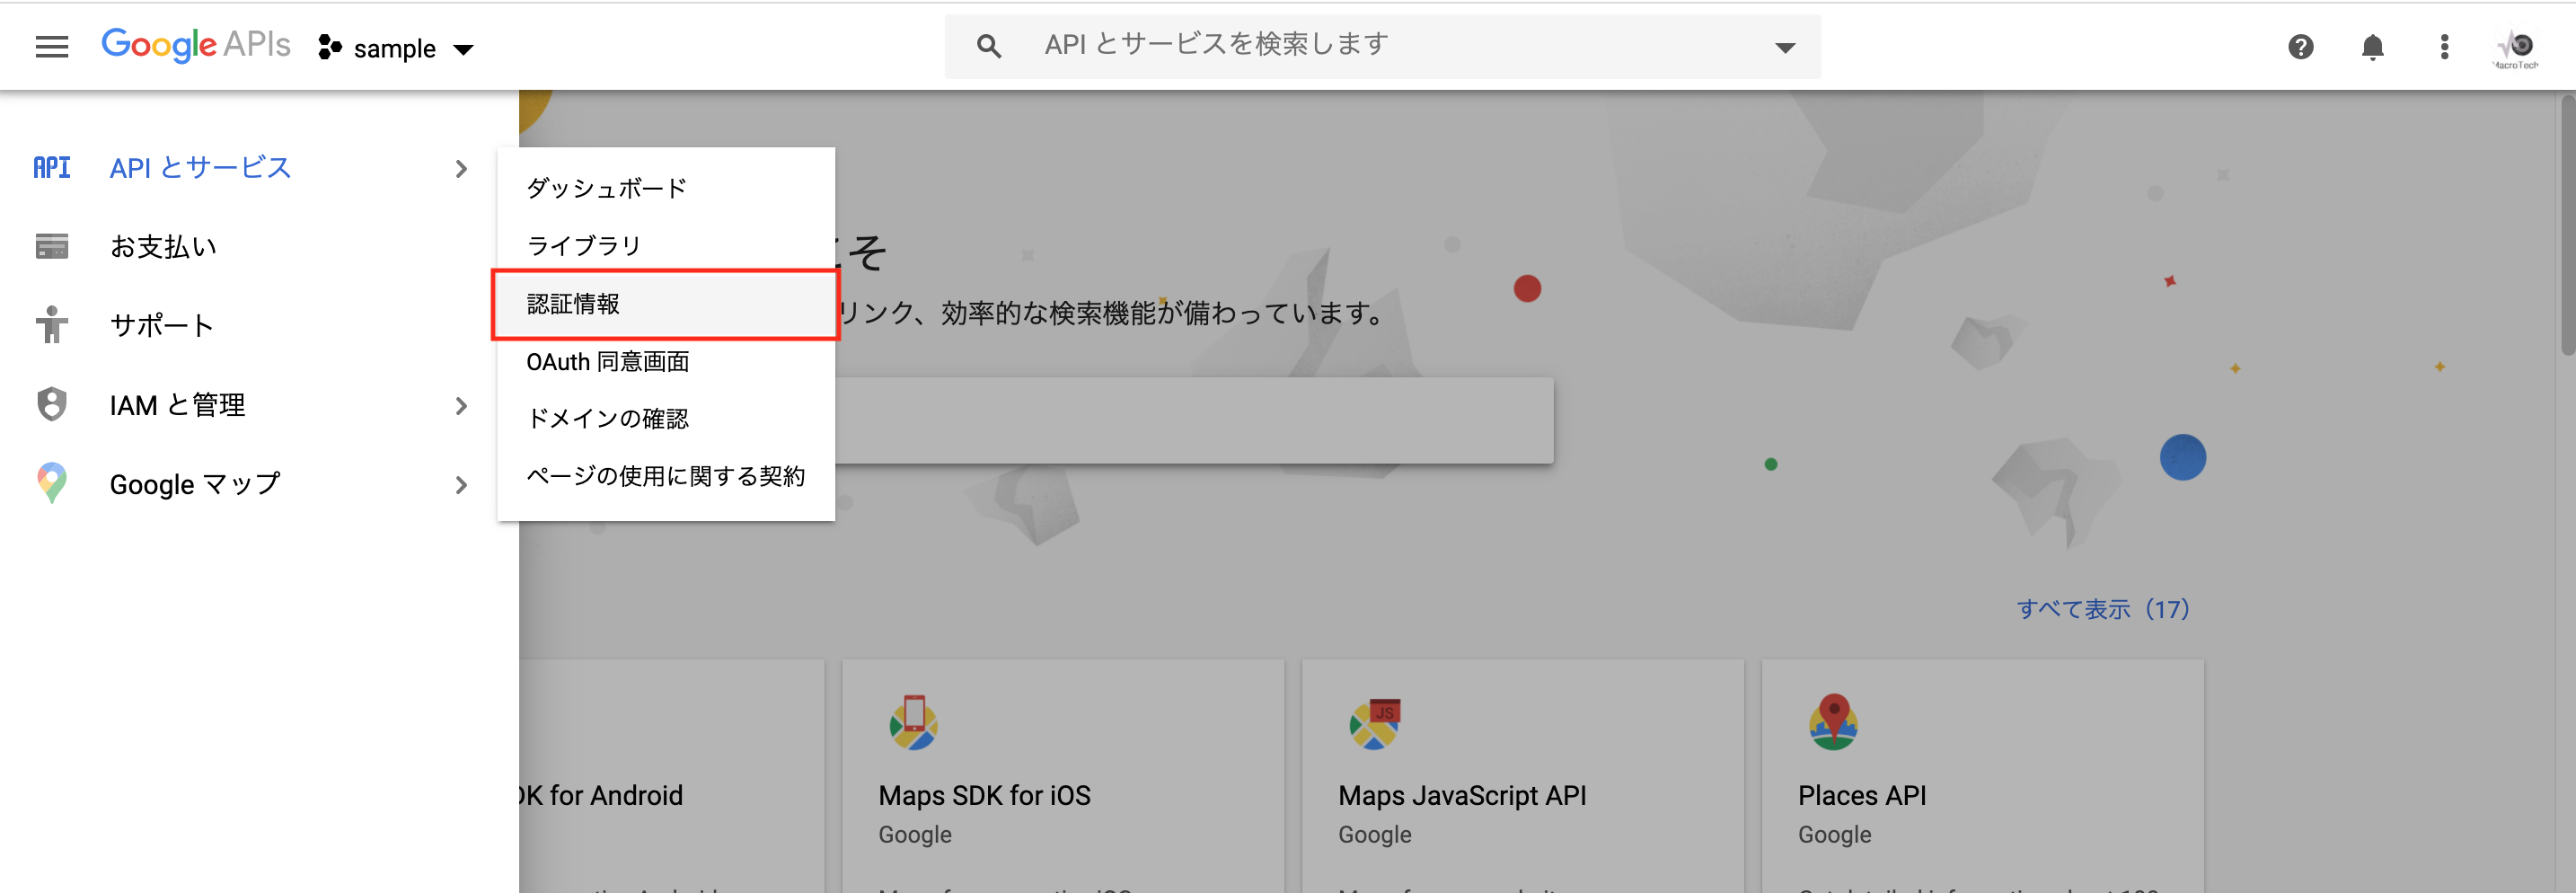
「同意画面を構成」を選択します。
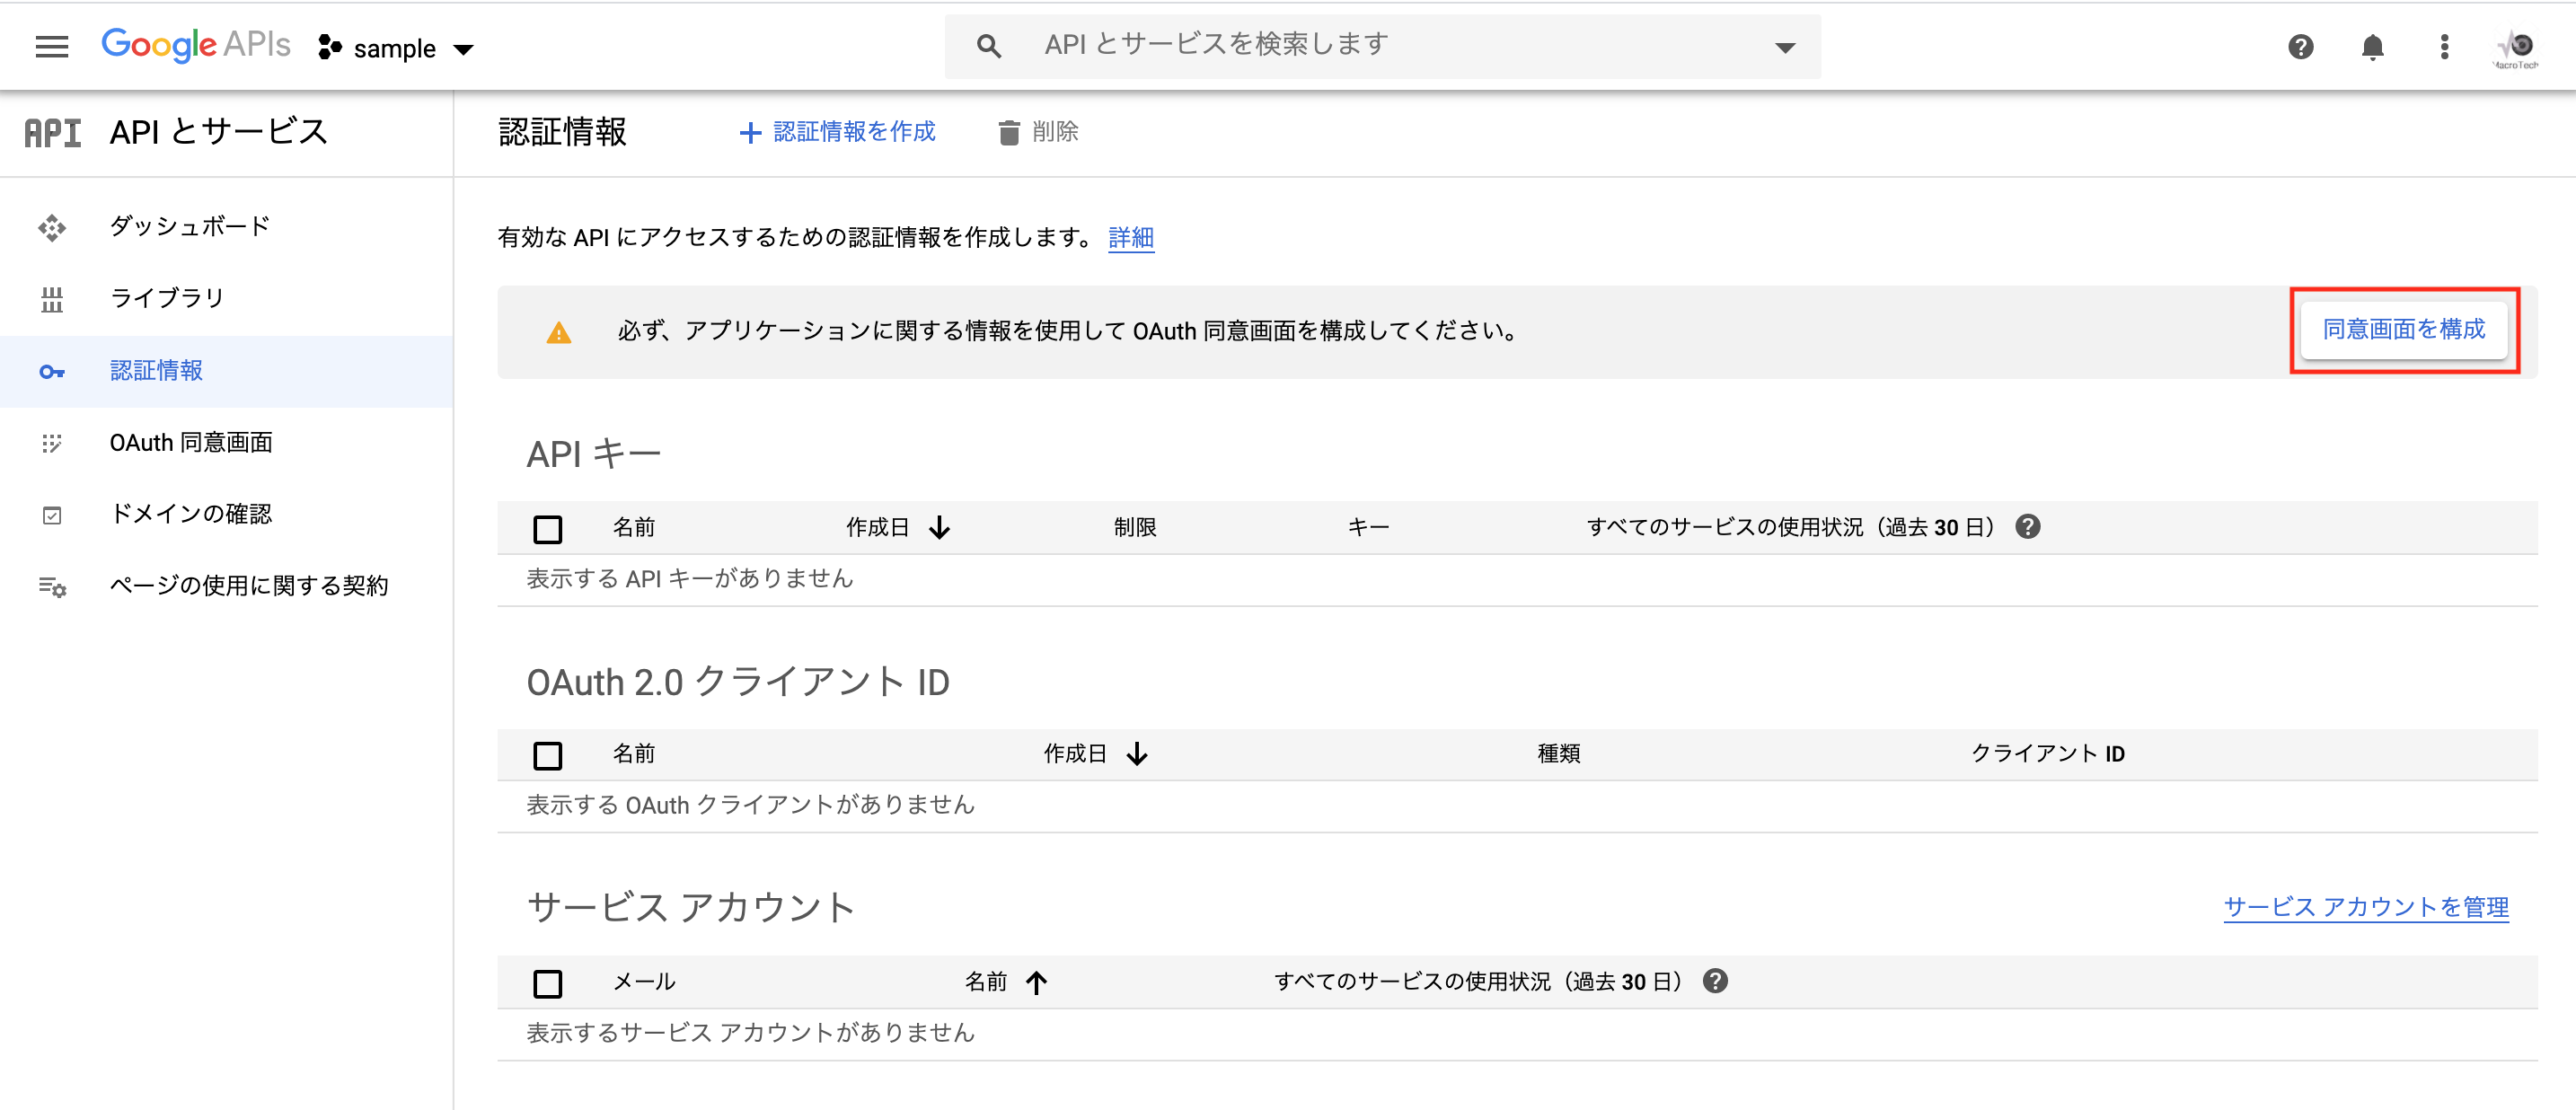
UserTypeを「内部」又は「外部」を選択し、「作成」をクリックします。
テスト環境では「内部」、本番環境では「外部」がいいかと思います。(特に理由はないです笑)
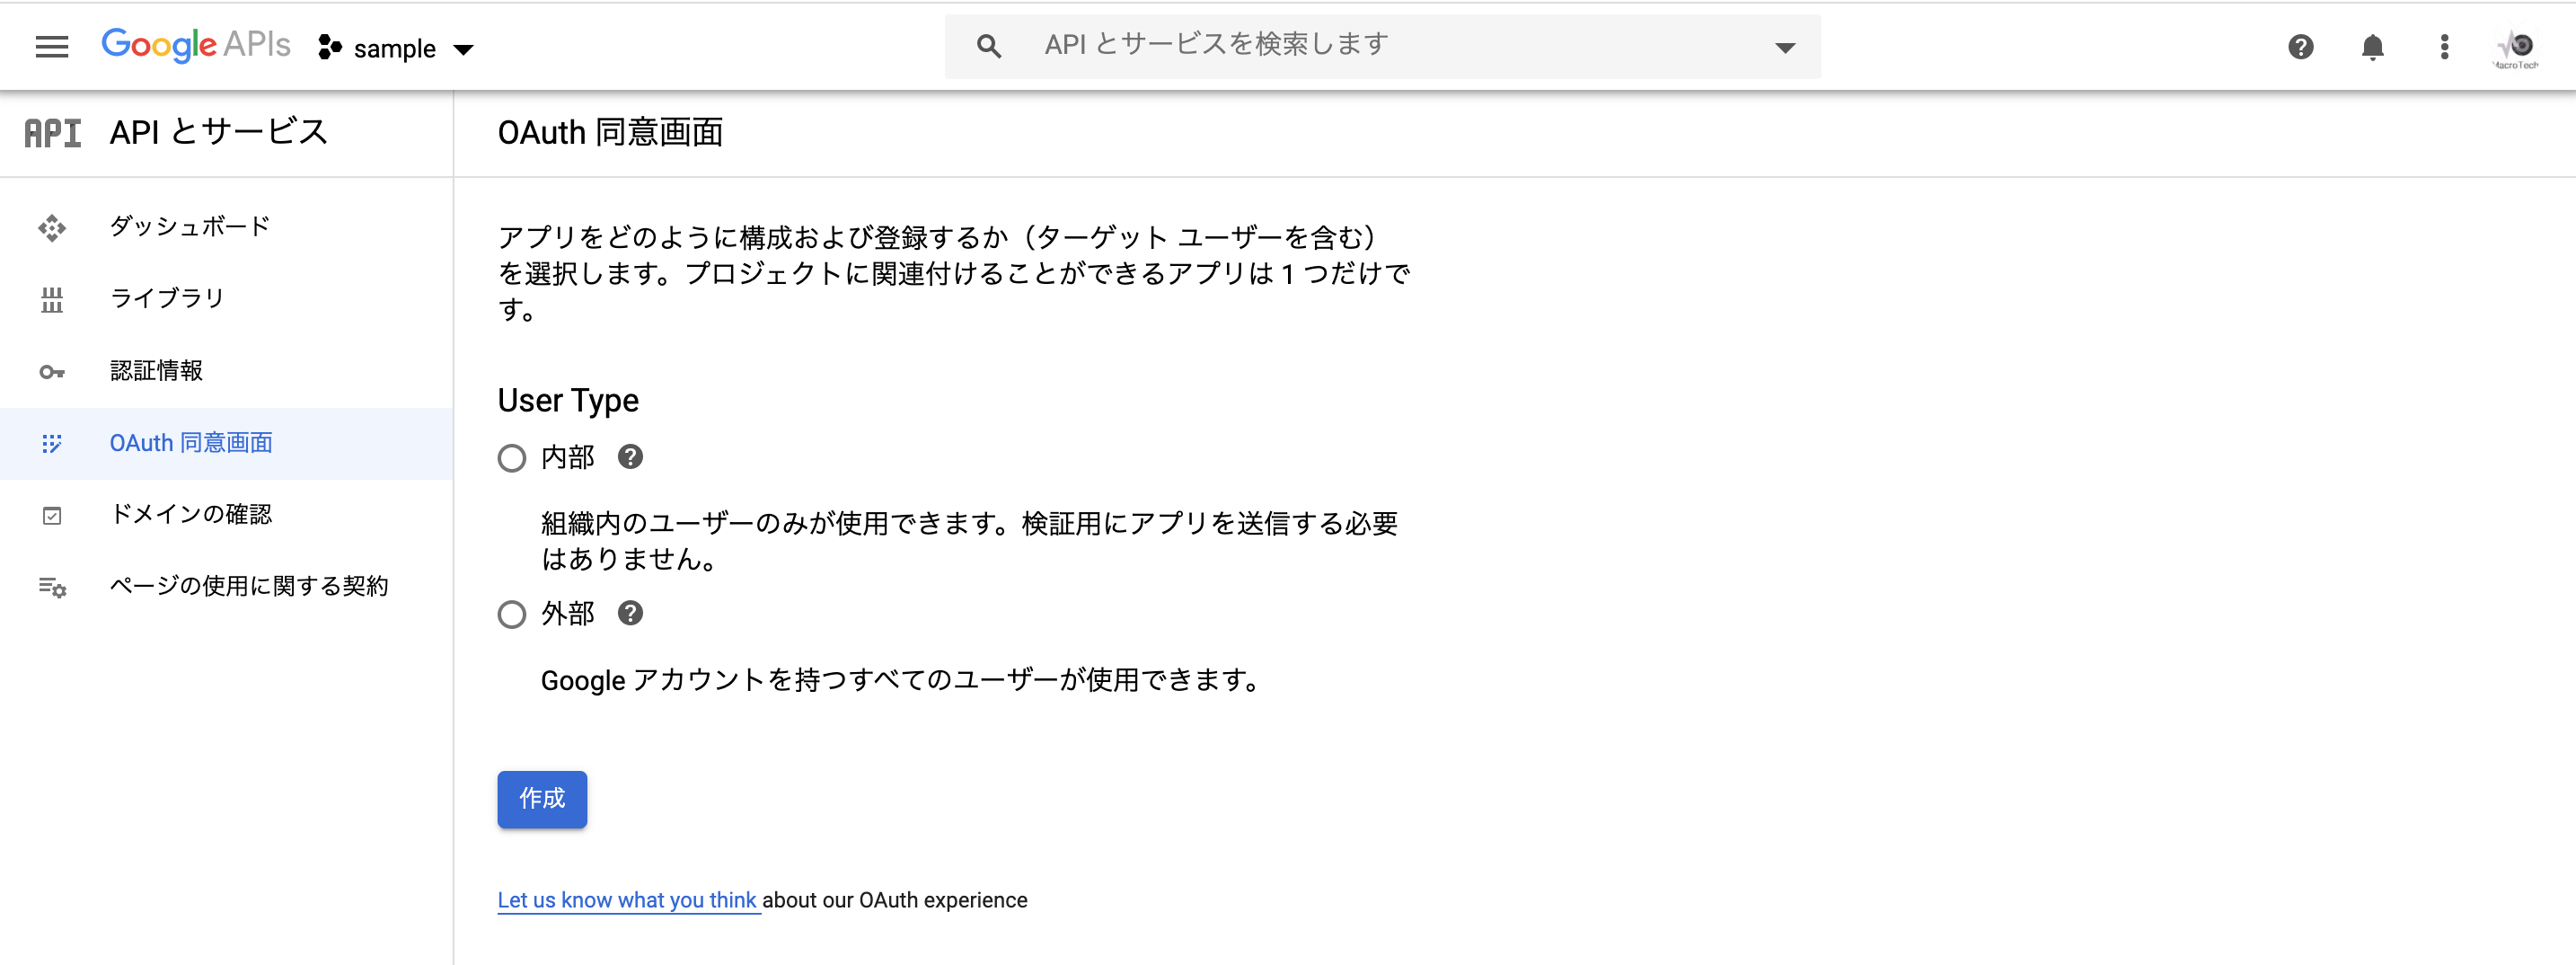
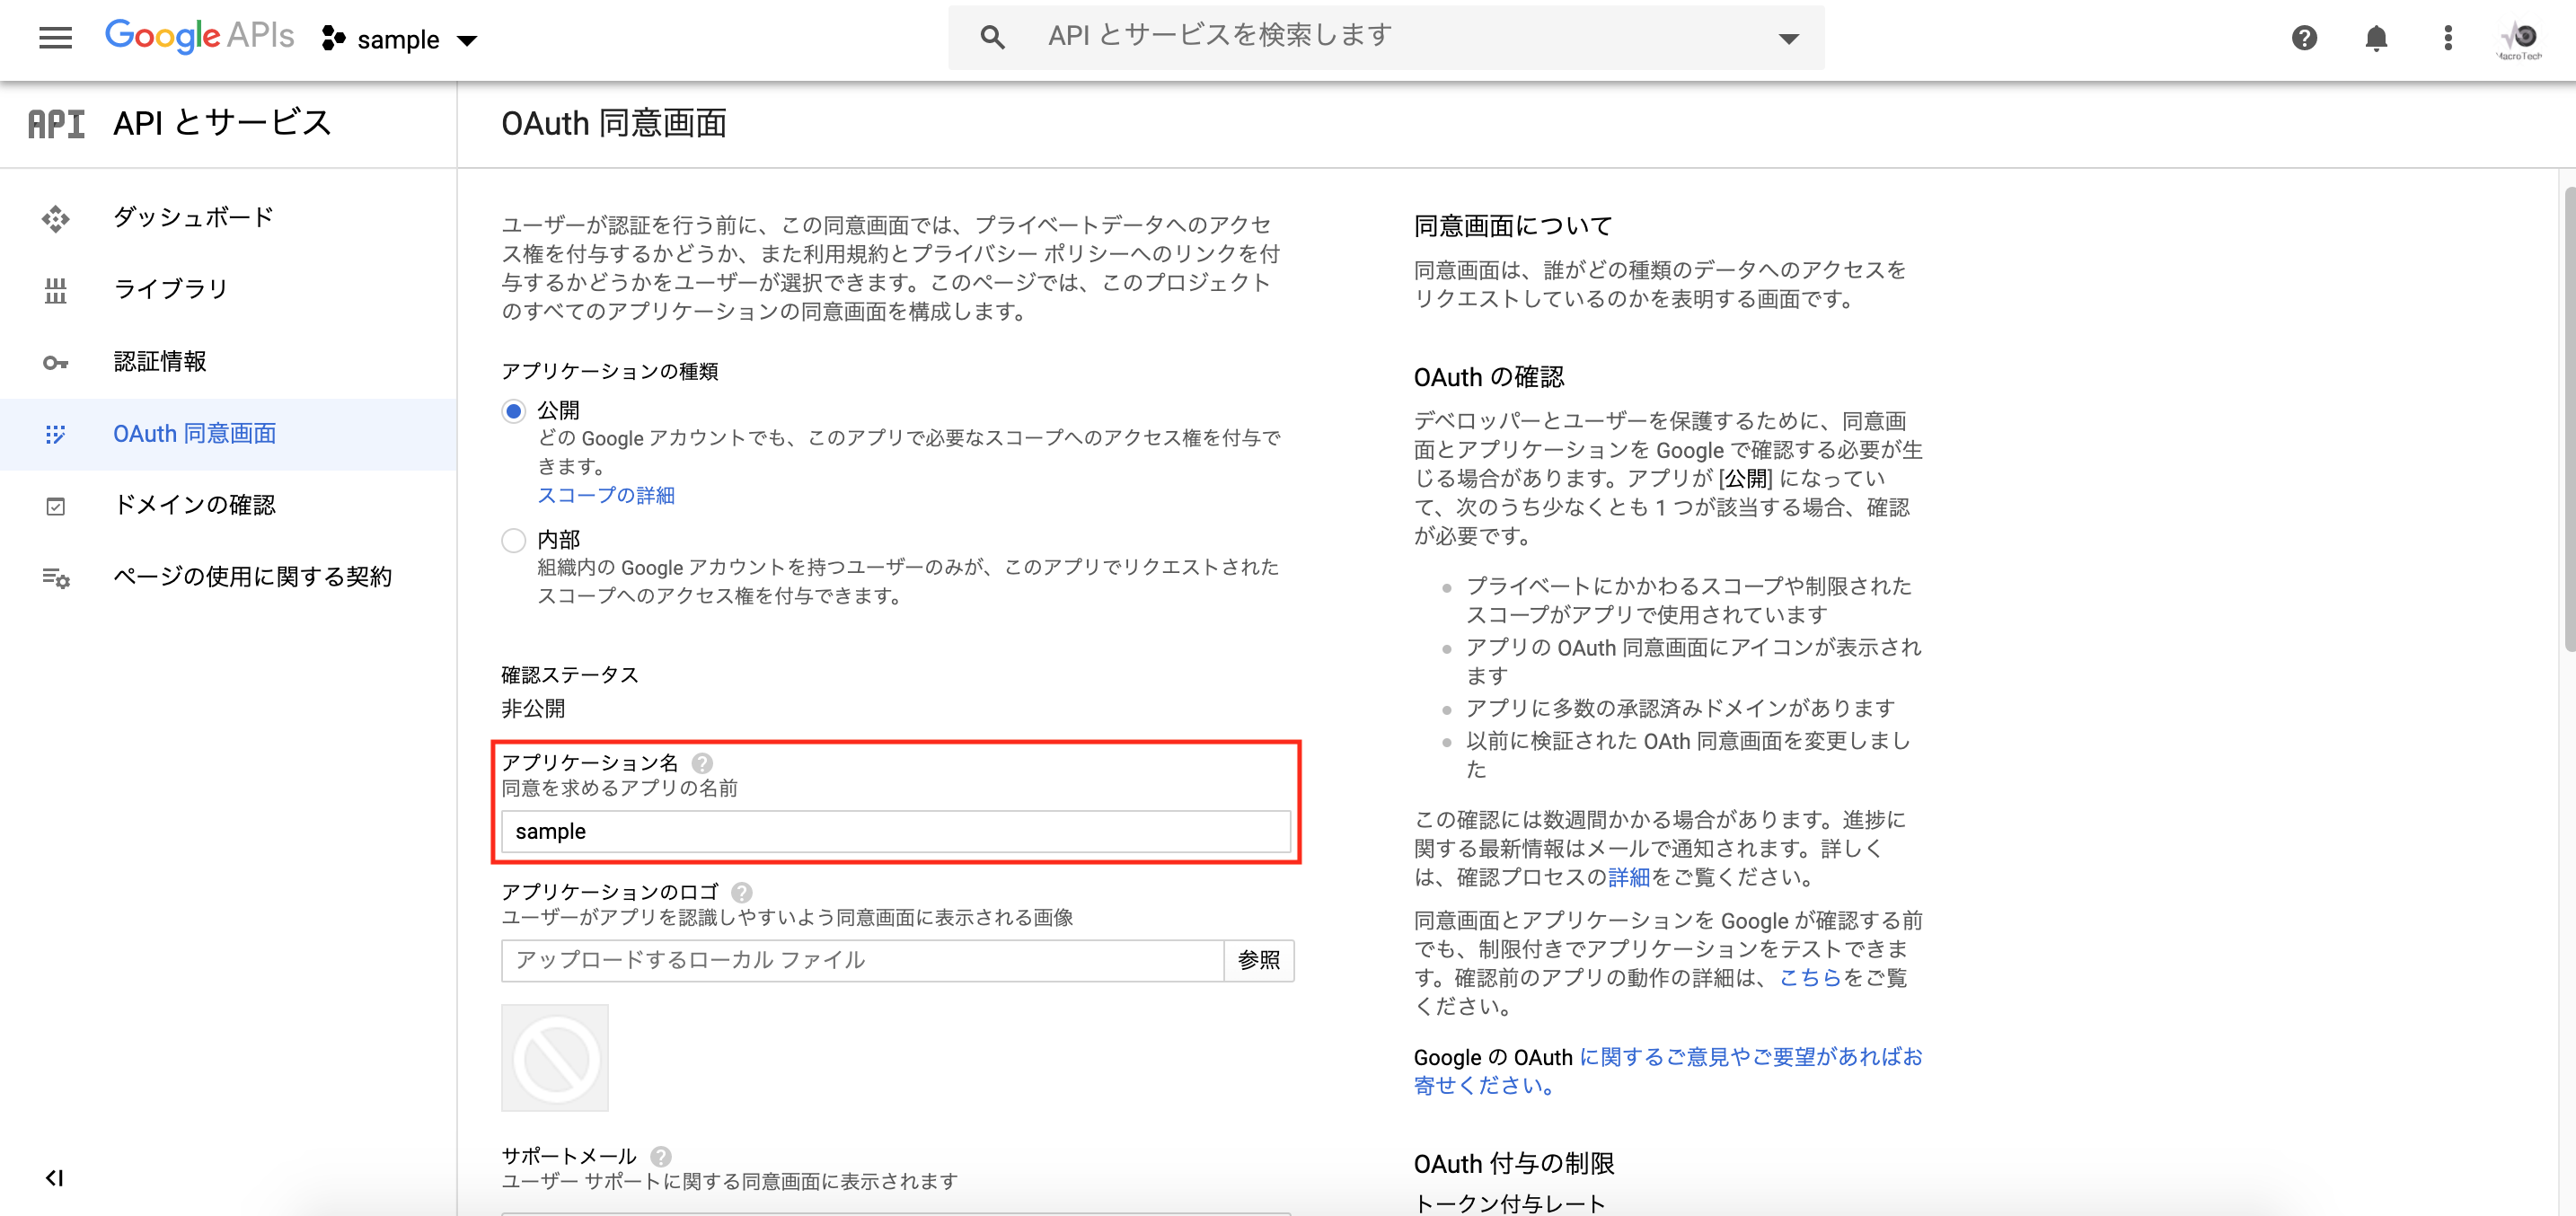
「アプリケーション名」に適当な値を入力し、「作成」をクリックします。
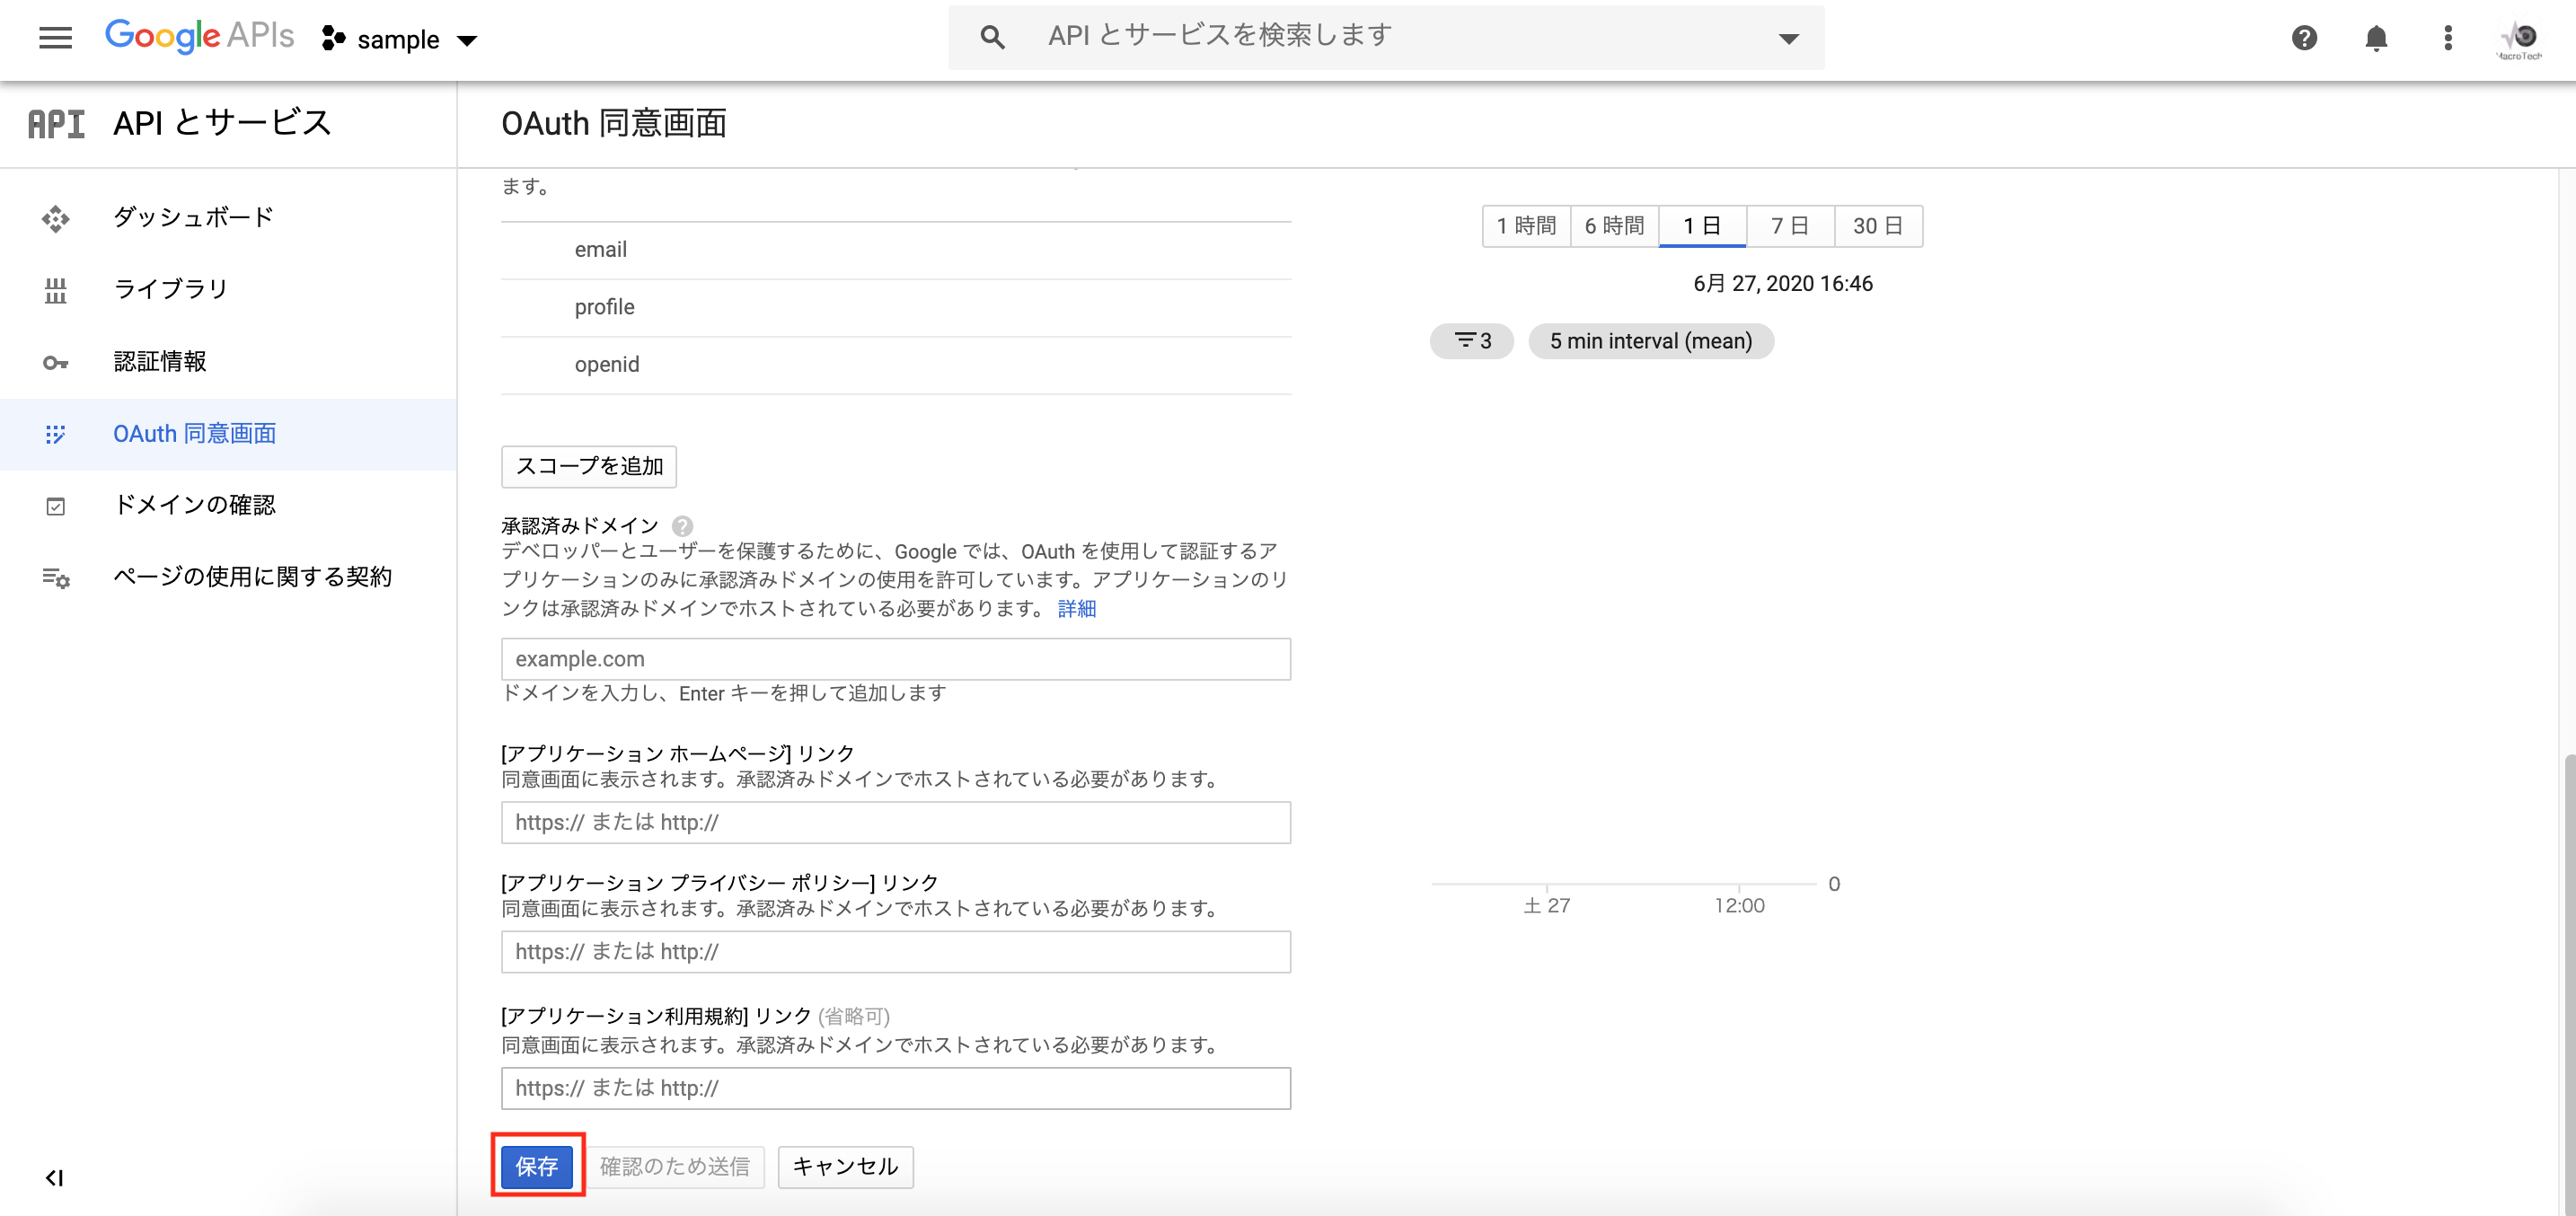
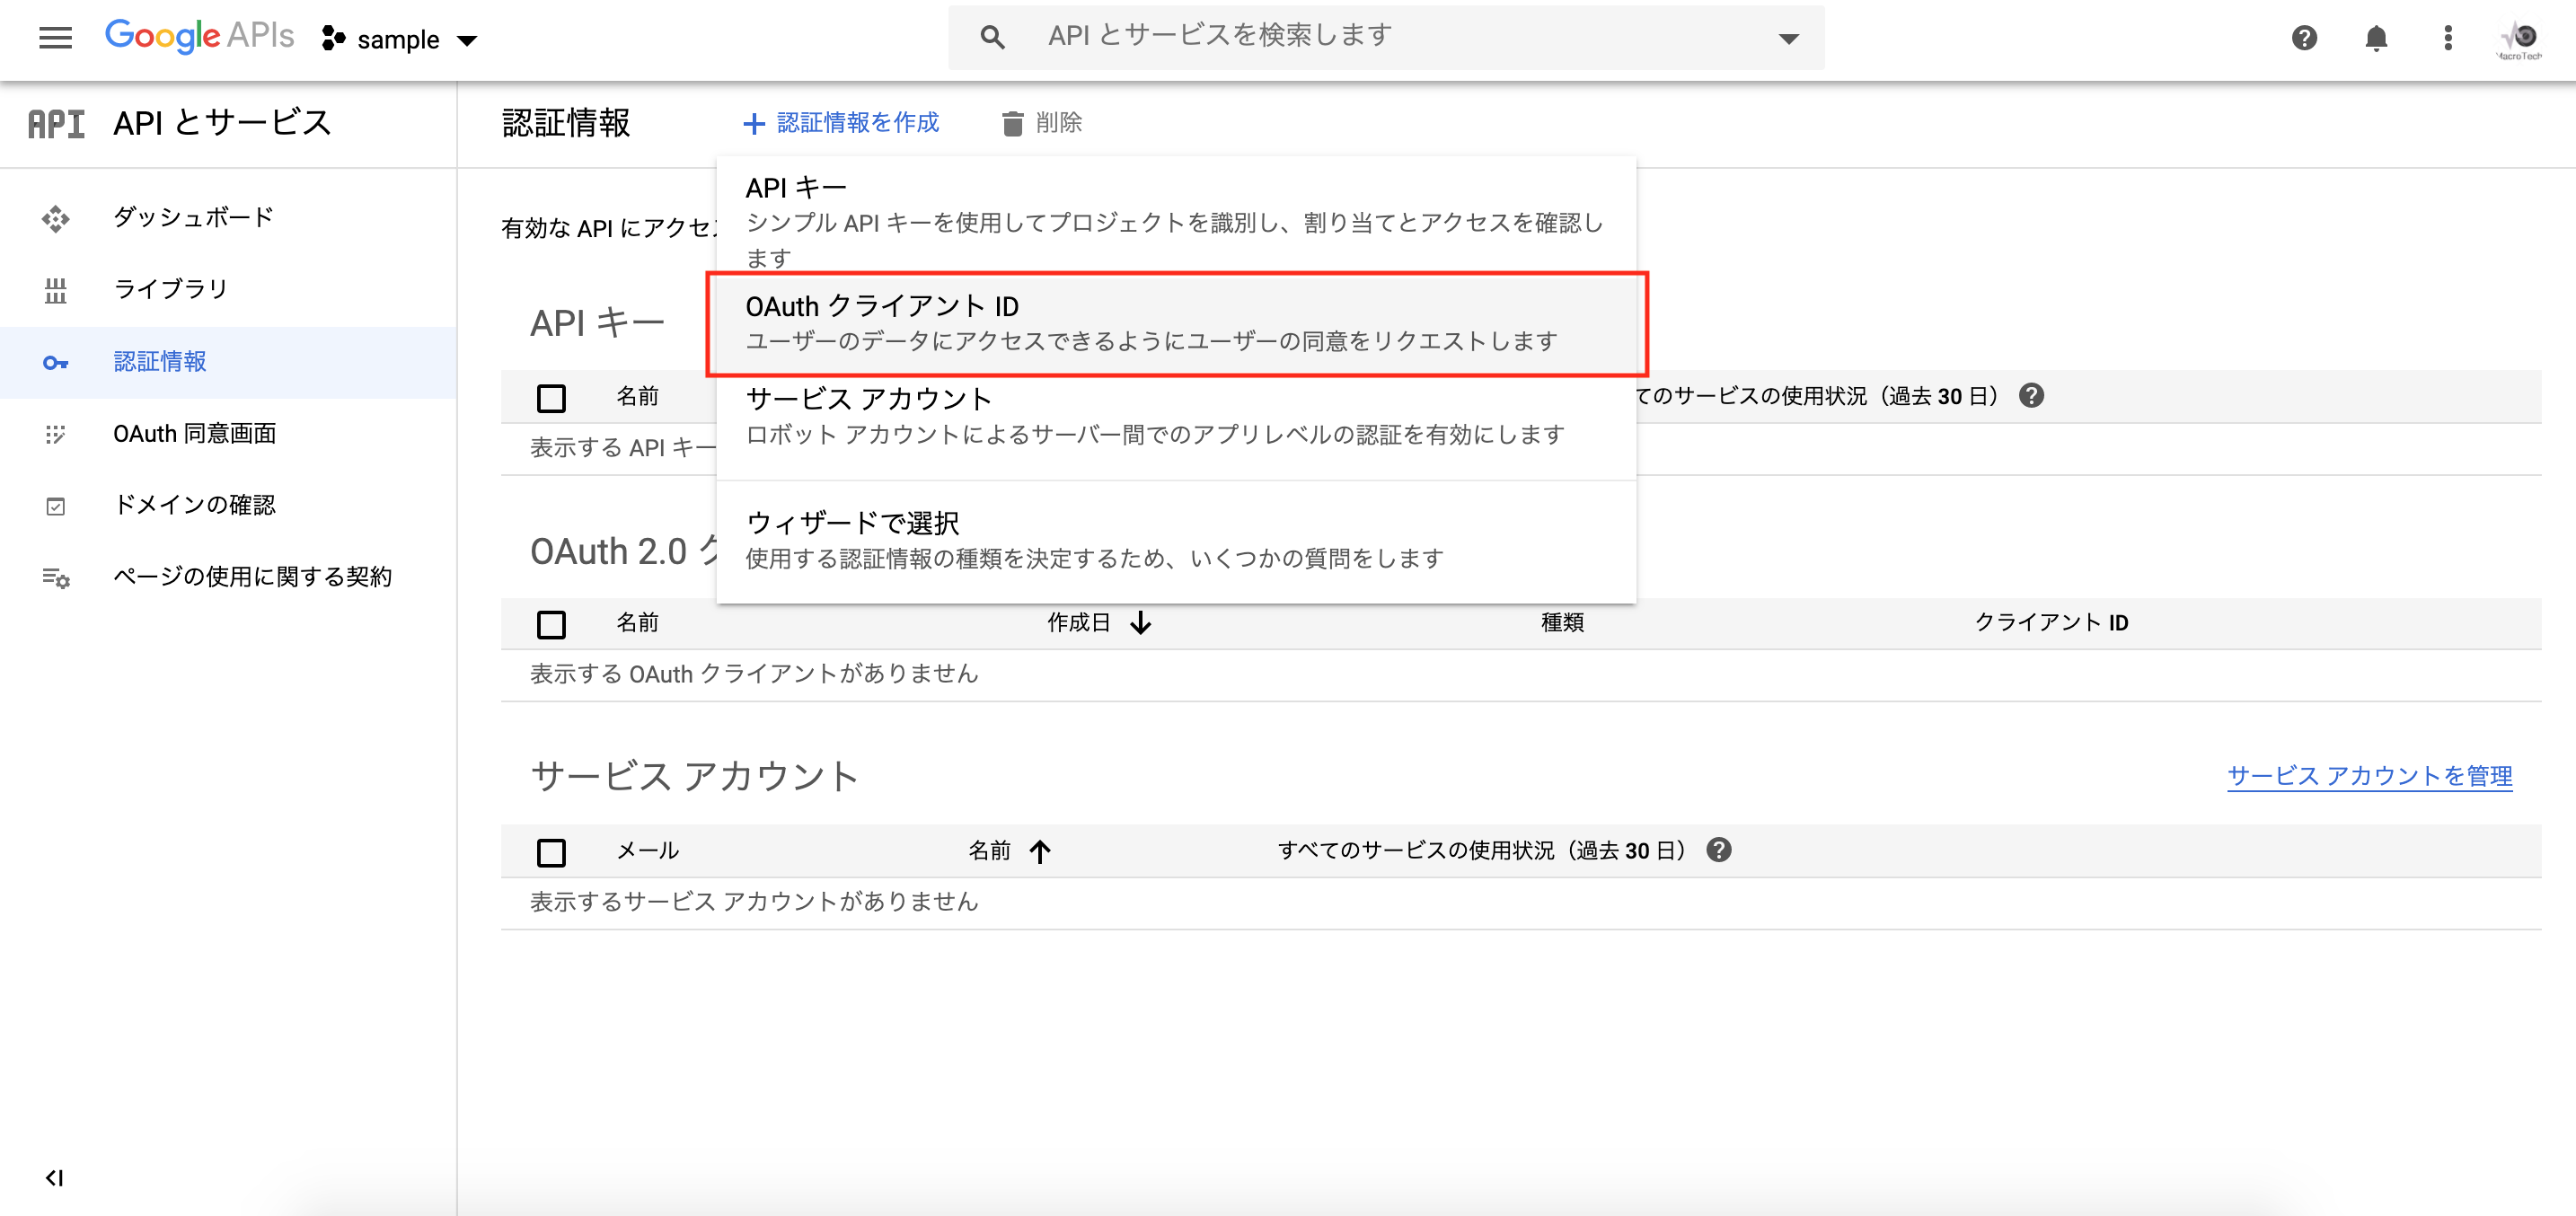
「認証情報を作成」をクリックし、「OAuthクライアントID」を選択します。
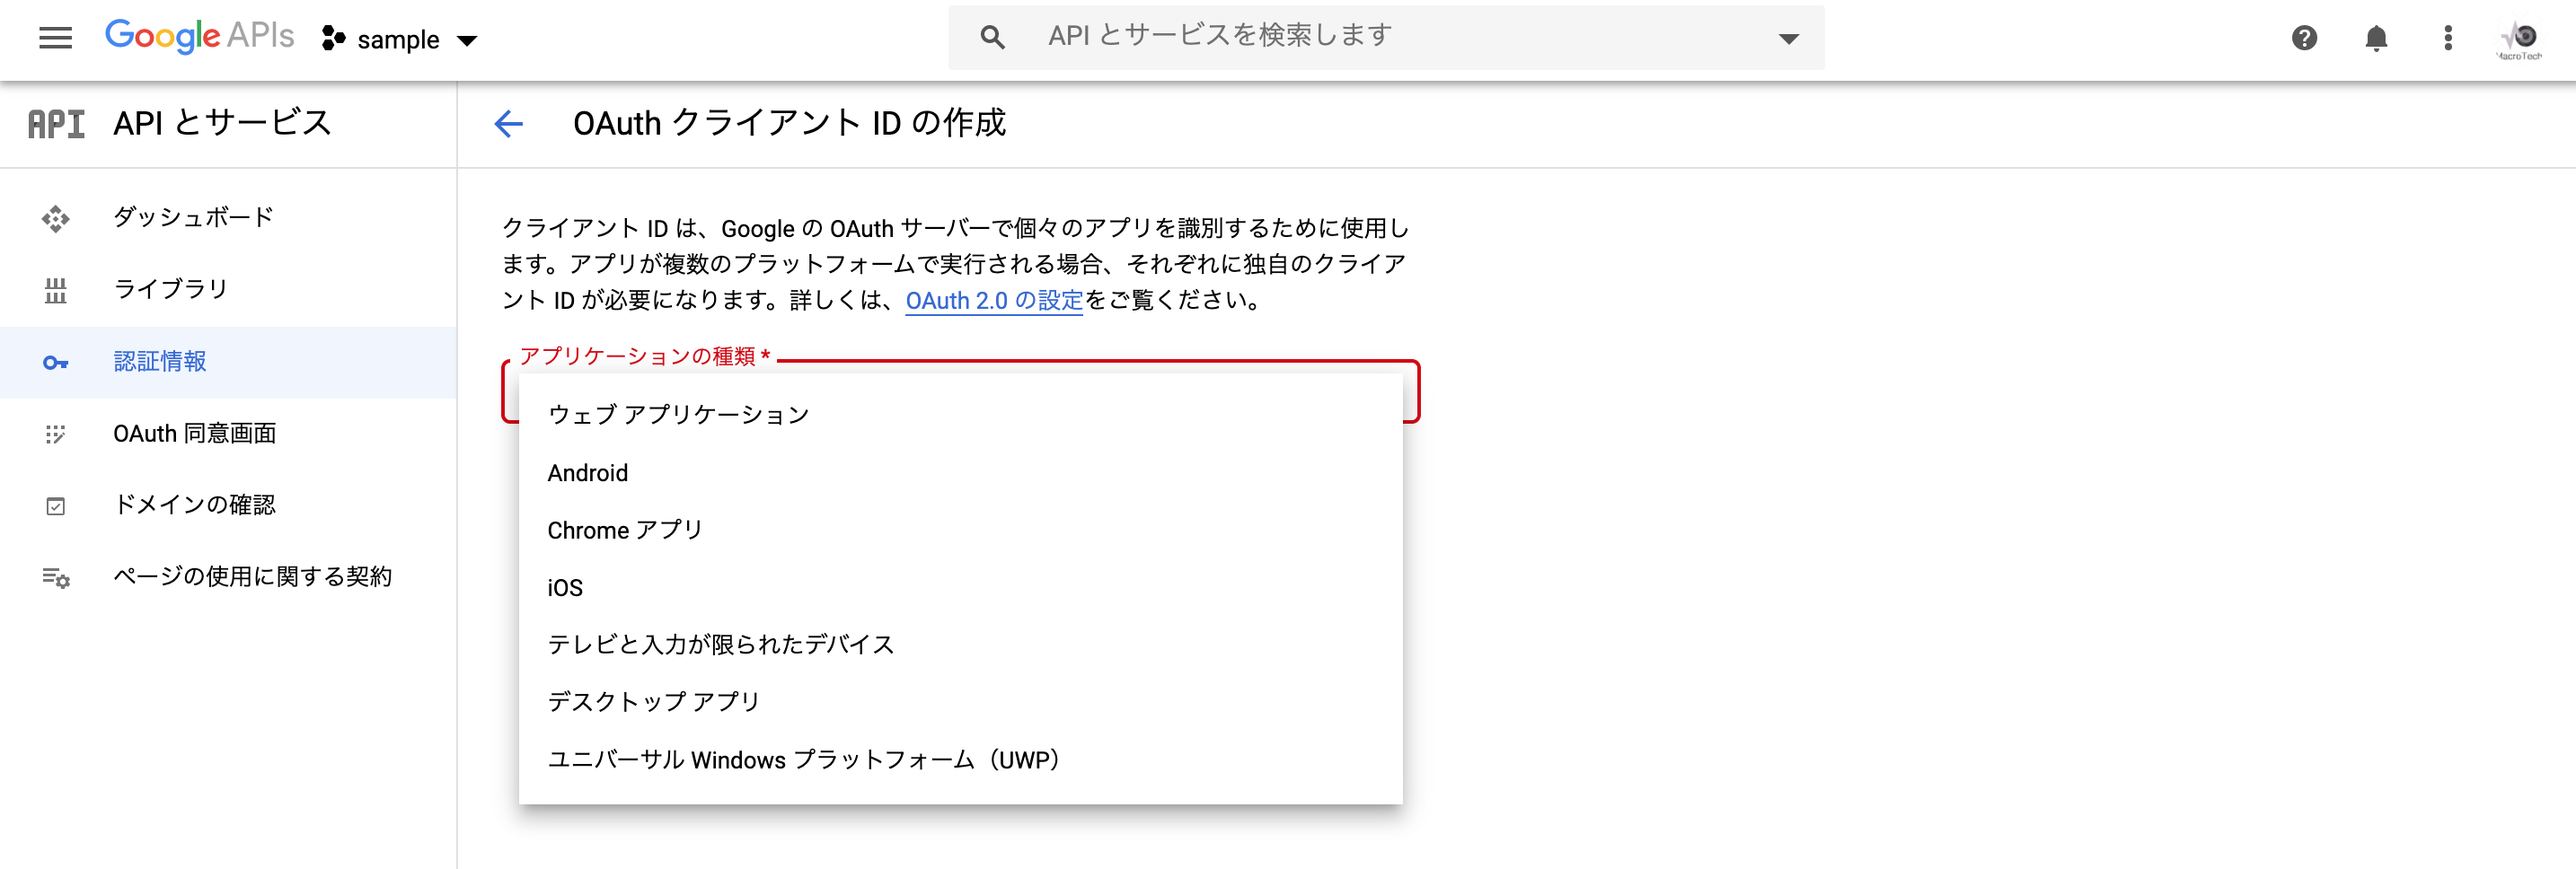
「アプリケーションの種類」から「ウェブアプリケーション」を選択します。
※使用用途によって適当なアプリケーションを選択します。
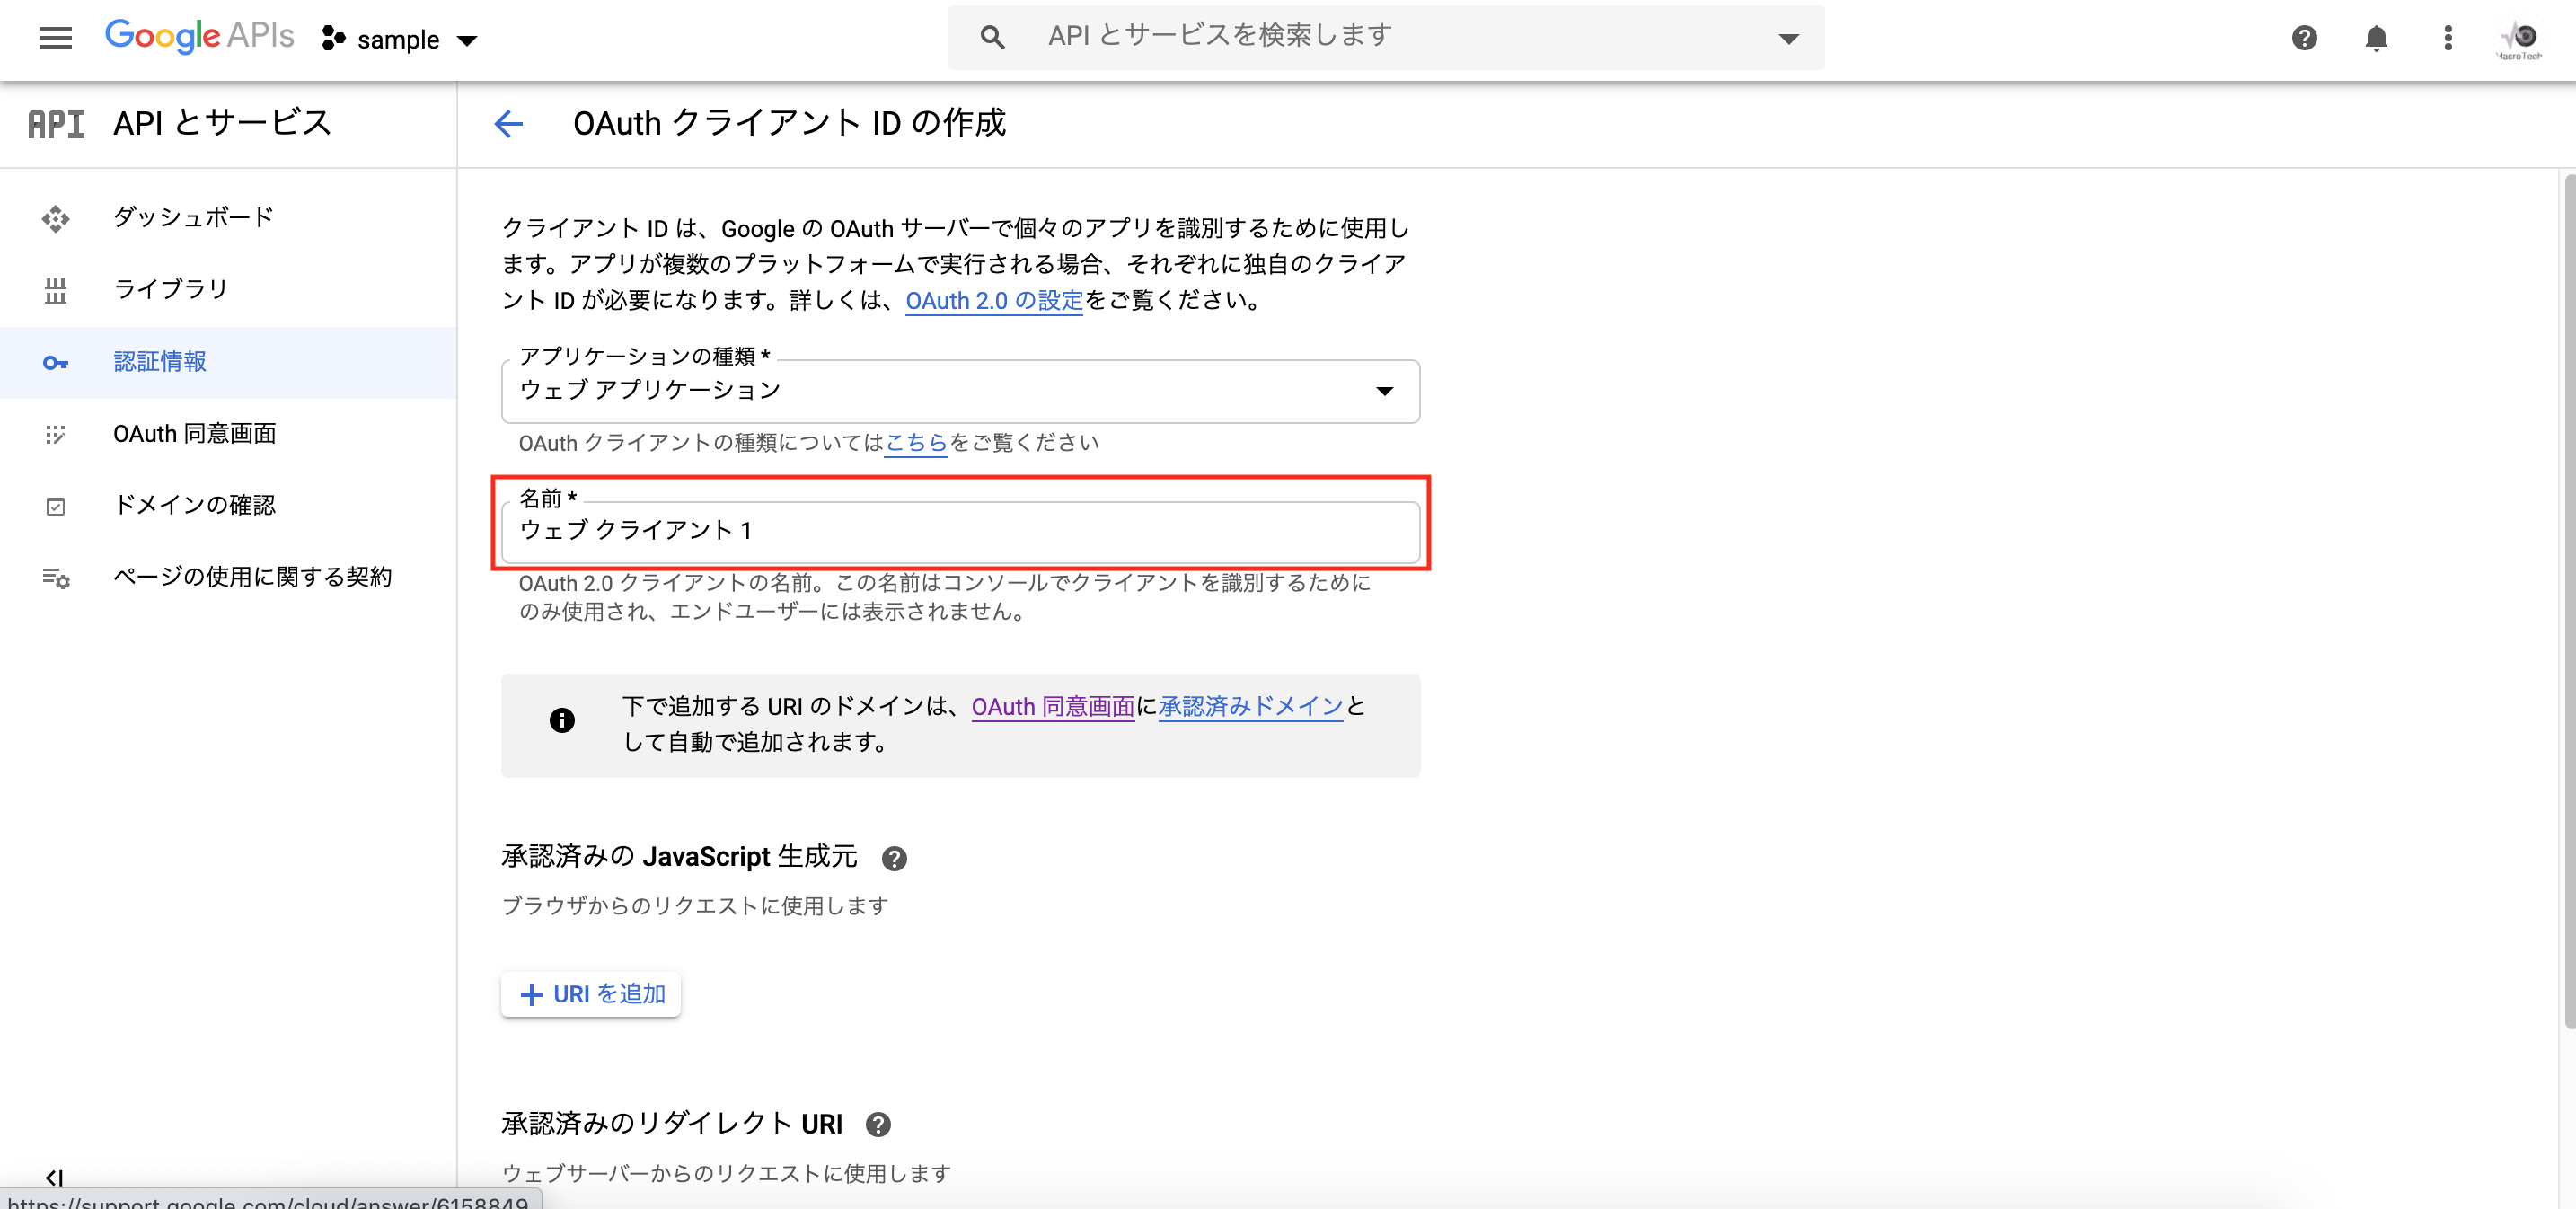
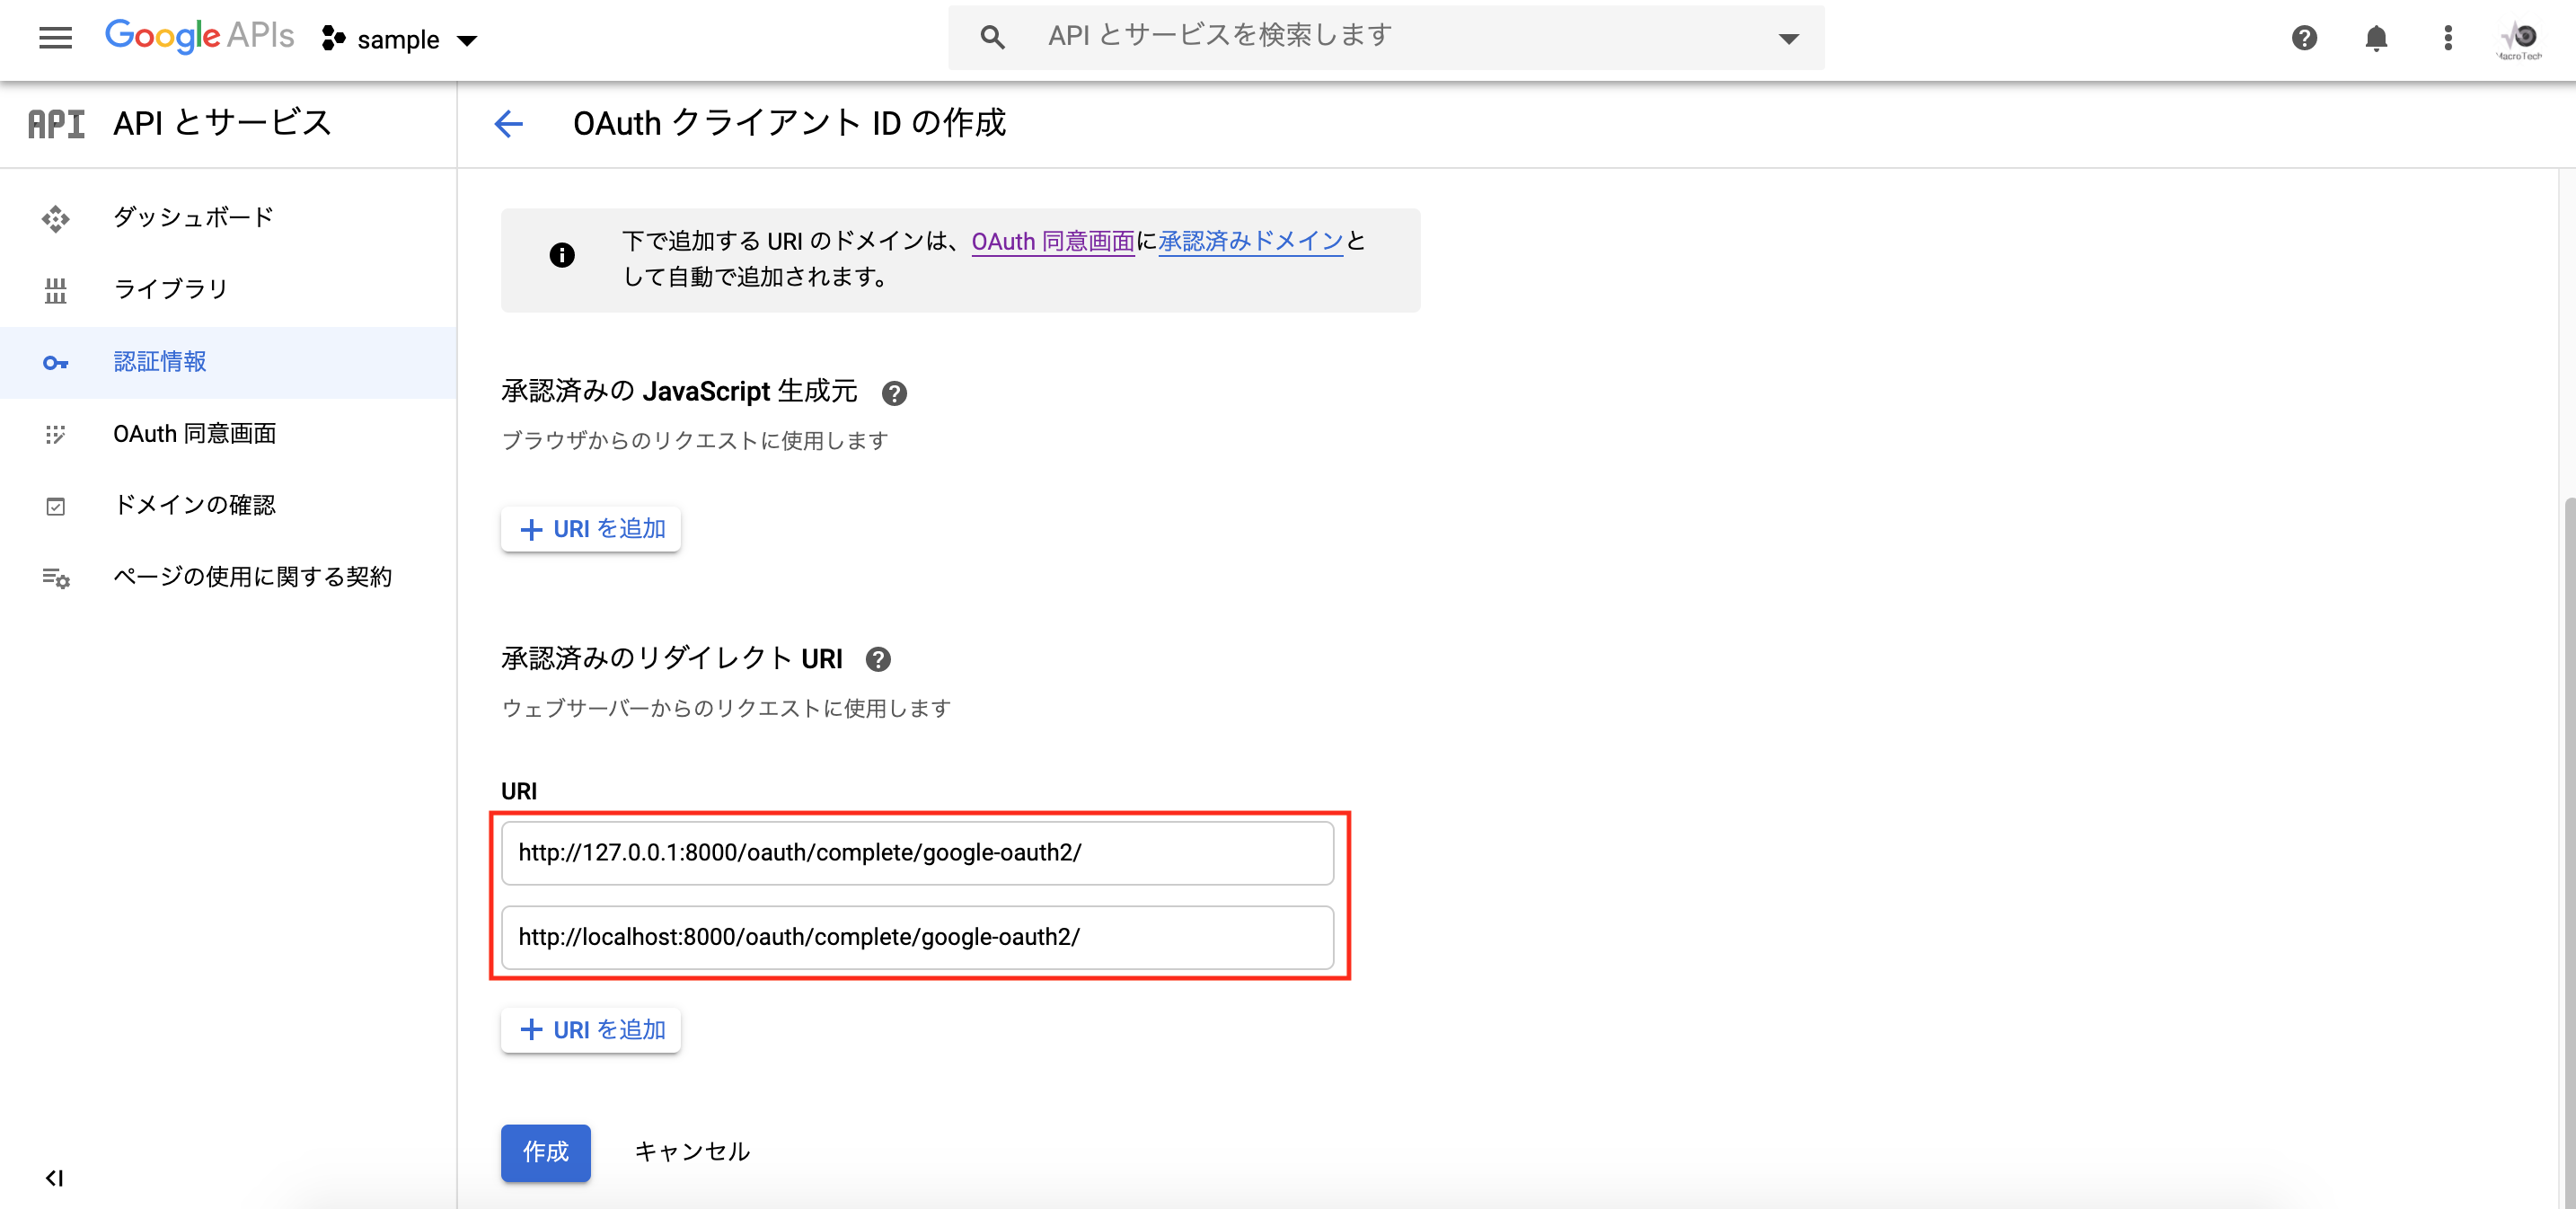
「名前」に適当な値を入力、承認済みのリダイレクトURIに以下のURLを追加し、「作成」をクリックします。
・http://127.0.0.1:8000/oauth/complete/google-oauth2/
・http://localhost:8000/oauth/complete/google-oauth2/
「クライアントID」と「クライアントシークレット」を、settings.pyに設定します。
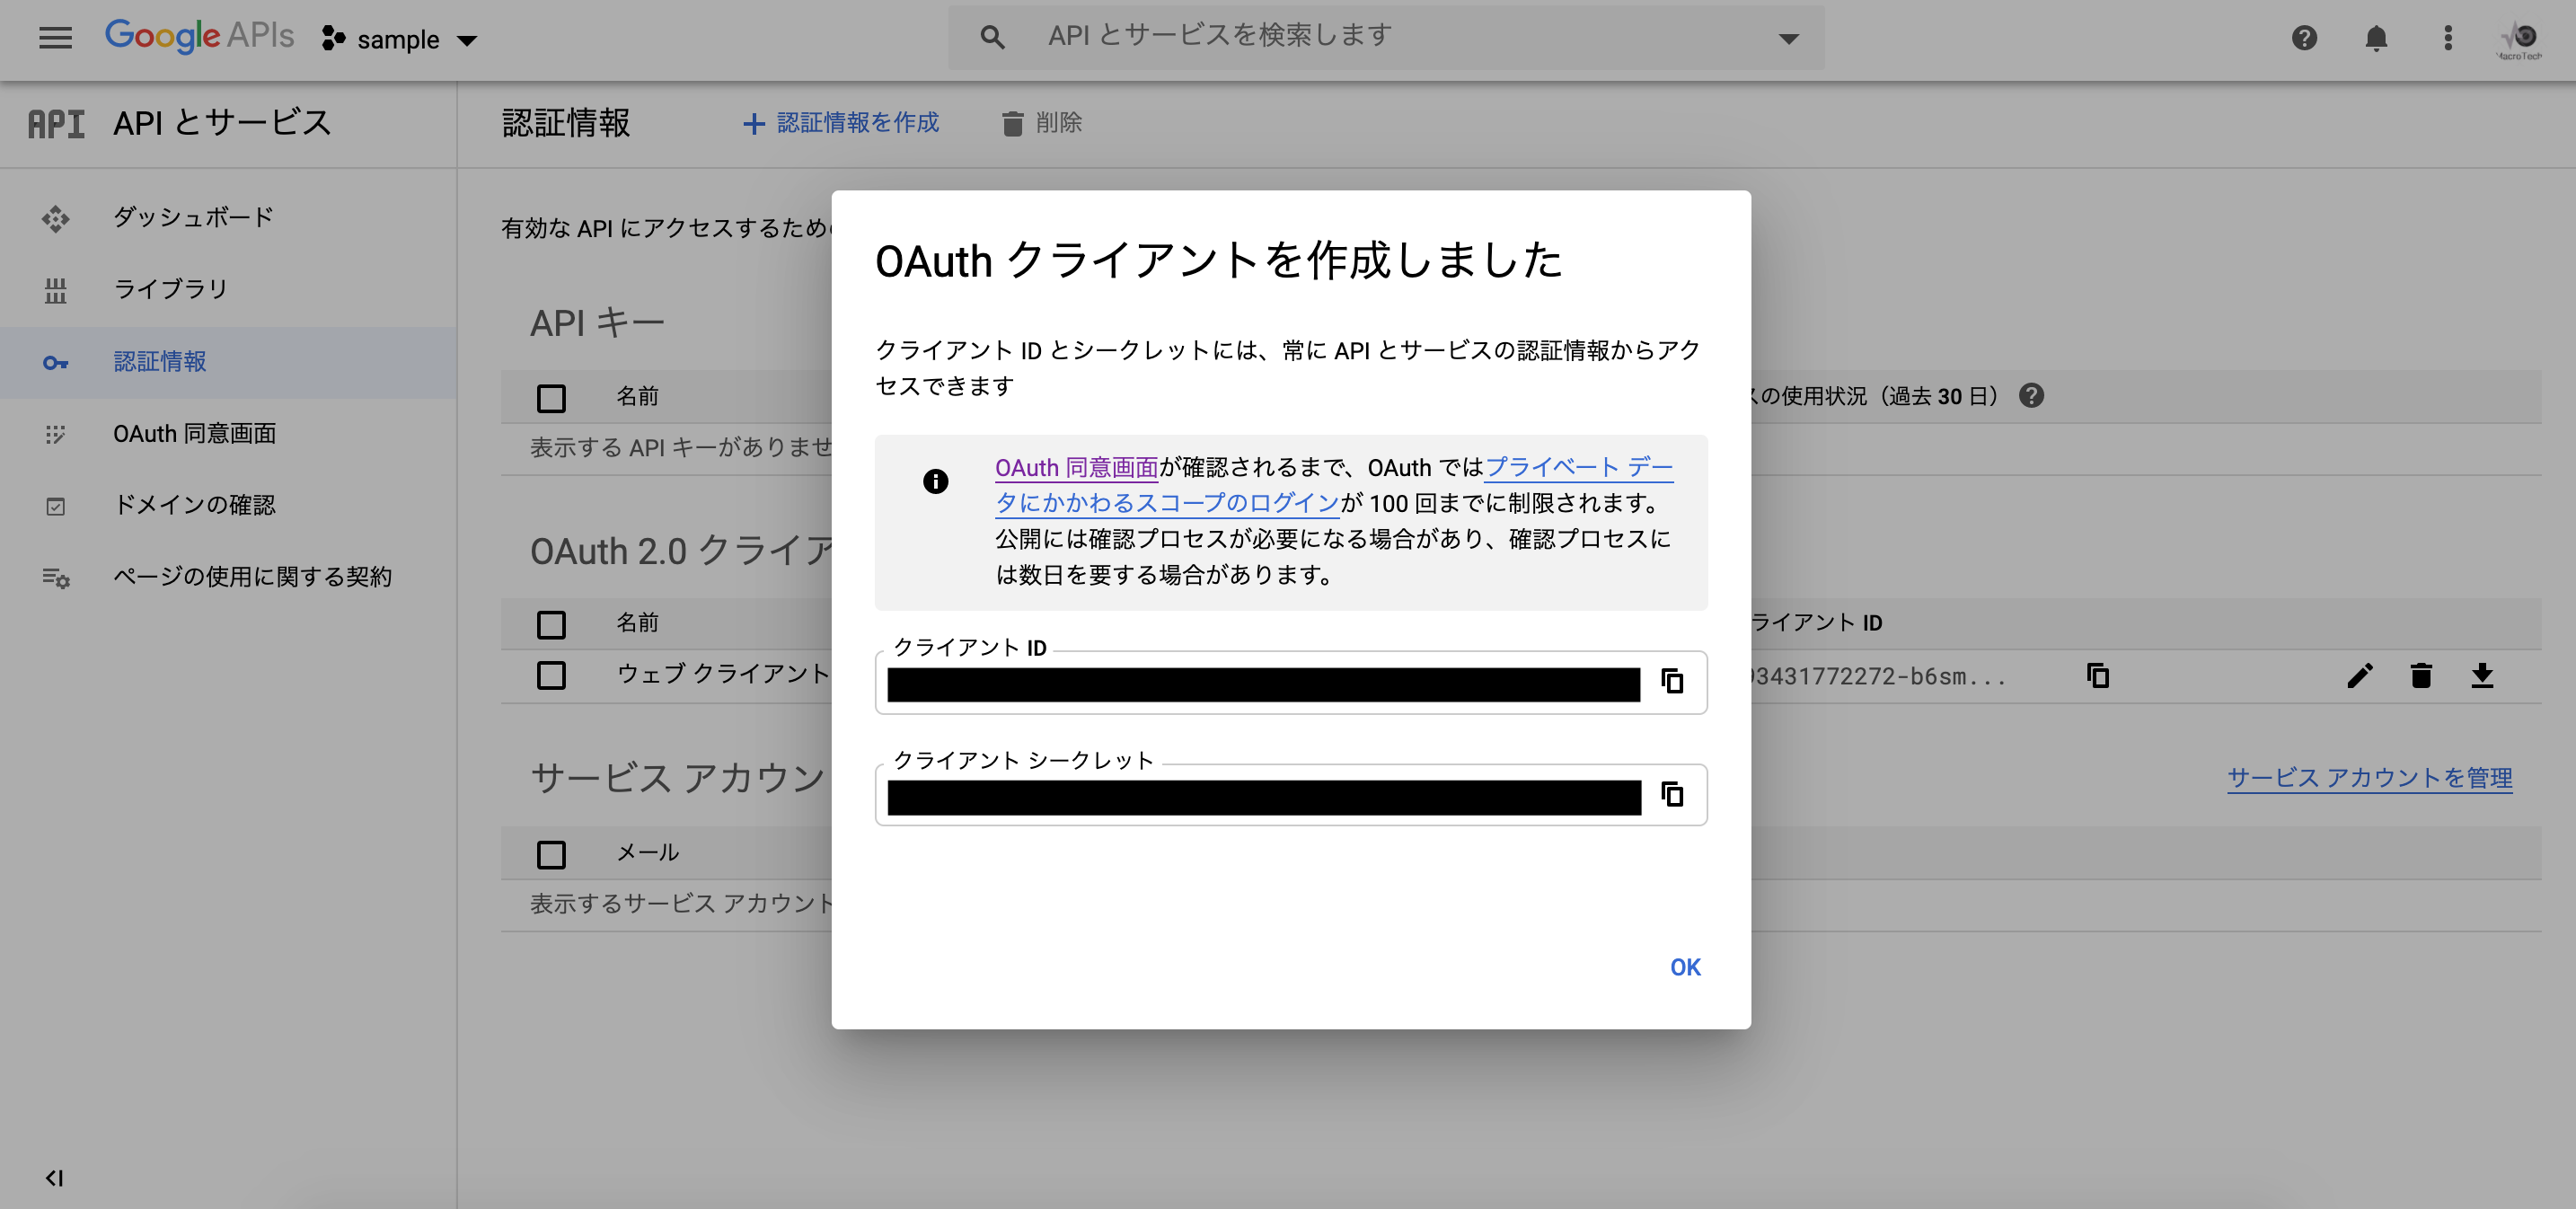
SOCIAL_AUTH_GOOGLE_OAUTH2_KEY = ''  👈ここにクライアントIDを追加。
SOCIAL_AUTH_GOOGLE_OAUTH2_SECRET = '' 👈ここにクライアントシークレットを追加。
...省略...
AUTHENTICATION_BACKENDS = (
    'social_core.backends.open_id.OpenIdAuth',  👈これを追加。
    'social_core.backends.google.GoogleOpenId',  👈これを追加。
    'social_core.backends.google.GoogleOAuth2',  👈これを追加。
    'django.contrib.auth.backends.ModelBackend',  👈これを追加。
)
htmlでの、ログインリンクは以下のように作成することができます。
...省略...
<a href="{% url 'social:begin' 'google-oauth2' %}">Googleでログイン</a>
...省略...
3. Facebookアカウントでの認証機能
現在、作成中。(実装中の為、後に追加します)