■はじめに
今回は電卓を作りながらイベント登録の仕方を学びます。
コントロールに名前を付けず、コードビハインド側で一括してイベント登録します。
キーワード:子コントロール取得, イベント登録, プロセス起動, スタイル, PowerShell
[注意]
これまでの回で説明済みの操作方法等は、説明を省略したり簡略化している場合があります。
■開発環境
- Windows 10
- Visual Studio Community 2017
- .NET Framework 4.x
■作ってみる
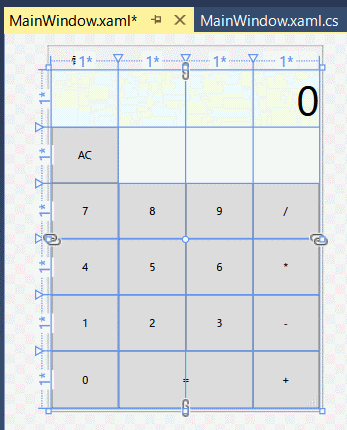
◇画面作成
新しいプロジェクトで Visual C# - Windows デスクトップ - WPF アプリで任意の名前でプロジェクトを作成し、
以下のように画面を作成します。
MainWindow.xaml
<Window x:Class="PoorCalc.MainWindow"
        xmlns="http://schemas.microsoft.com/winfx/2006/xaml/presentation"
        xmlns:x="http://schemas.microsoft.com/winfx/2006/xaml"
        xmlns:d="http://schemas.microsoft.com/expression/blend/2008"
        xmlns:mc="http://schemas.openxmlformats.org/markup-compatibility/2006"
        xmlns:local="clr-namespace:PoorCalc"
        mc:Ignorable="d"
        Title="電卓"
        Height="400" Width="300" MinHeight="300" MinWidth="300"
        ResizeMode="CanResizeWithGrip">
    <Window.Resources>
    </Window.Resources>
    <Grid>
        <Grid.ColumnDefinitions>
            <ColumnDefinition/>
            <ColumnDefinition/>
            <ColumnDefinition/>
            <ColumnDefinition/>
        </Grid.ColumnDefinitions>
        <Grid.RowDefinitions>
            <RowDefinition/>
            <RowDefinition/>
            <RowDefinition/>
            <RowDefinition/>
            <RowDefinition/>
            <RowDefinition/>
        </Grid.RowDefinitions>

        <TextBlock Grid.ColumnSpan="4" Background="Honeydew"/>
        <Viewbox Grid.ColumnSpan="4" HorizontalAlignment="Right">
            <TextBlock x:Name="formula" Text="0"/>
        </Viewbox>

        <Button Grid.Row="1" Grid.Column="0" Content="AC" IsCancel="True"/>
        <Button Grid.Row="2" Grid.Column="0" Content="7"/>
        <Button Grid.Row="2" Grid.Column="1" Content="8"/>
        <Button Grid.Row="2" Grid.Column="2" Content="9"/>
        <Button Grid.Row="2" Grid.Column="3" Content="/"/>
        <Button Grid.Row="3" Grid.Column="0" Content="4"/>
        <Button Grid.Row="3" Grid.Column="1" Content="5"/>
        <Button Grid.Row="3" Grid.Column="2" Content="6"/>
        <Button Grid.Row="3" Grid.Column="3" Content="*"/>
        <Button Grid.Row="4" Grid.Column="0" Content="1"/>
        <Button Grid.Row="4" Grid.Column="1" Content="2"/>
        <Button Grid.Row="4" Grid.Column="2" Content="3"/>
        <Button Grid.Row="4" Grid.Column="3" Content="-"/>
        <Button Grid.Row="5" Grid.Column="0" Content="0"/>
        <Button Grid.Row="5" Grid.Column="1" Grid.ColumnSpan="2" Content="="/>
        <Button Grid.Row="5" Grid.Column="3" Content="+"/>
    </Grid>
</Window>
ボタンスタイルの作成と適用をします。
MainWindow.xaml
<Window.Resources>
    <!-- ベースとなるボタンのスタイル -->
    <Style x:Key="BaseButtonStyle" TargetType="Button">
        <Setter Property="FontFamily" Value="Segoe UI"/>
        <Setter Property="FontSize" Value="30"/>
        <Setter Property="Margin" Value="1"/>
    </Style>
    <!-- クリアボタンのスタイル -->
    <Style x:Key="ButtonStyleClear" TargetType="Button" BasedOn="{StaticResource BaseButtonStyle}">
        <Setter Property="Background" Value="OrangeRed"/>
        <Setter Property="Foreground" Value="White"/>
    </Style>
    <!-- 数字ボタンのスタイル -->
    <Style x:Key="ButtonStyleNum" TargetType="Button" BasedOn="{StaticResource BaseButtonStyle}">
        <Setter Property="Background" Value="Black"/>
        <Setter Property="Foreground" Value="White"/>
    </Style>
    <!-- 計算ボタンのスタイル -->
    <Style x:Key="ButtonStyleCalc" TargetType="Button" BasedOn="{StaticResource BaseButtonStyle}">
        <Setter Property="Background" Value="Gray"/>
        <Setter Property="Foreground" Value="White"/>
    </Style>
</Window.Resources>
MainWindow.xaml
<Button Grid.Row="1" Grid.Column="0" Content="AC" IsCancel="True" Style="{StaticResource ButtonStyleClear}"/>
<Button Grid.Row="2" Grid.Column="0" Content="7" Style="{StaticResource ButtonStyleNum}"/>
<Button Grid.Row="2" Grid.Column="1" Content="8" Style="{StaticResource ButtonStyleNum}"/>
<Button Grid.Row="2" Grid.Column="2" Content="9" Style="{StaticResource ButtonStyleNum}"/>
<Button Grid.Row="2" Grid.Column="3" Content="/" Style="{StaticResource ButtonStyleCalc}"/>
<Button Grid.Row="3" Grid.Column="0" Content="4" Style="{StaticResource ButtonStyleNum}"/>
<Button Grid.Row="3" Grid.Column="1" Content="5" Style="{StaticResource ButtonStyleNum}"/>
<Button Grid.Row="3" Grid.Column="2" Content="6" Style="{StaticResource ButtonStyleNum}"/>
<Button Grid.Row="3" Grid.Column="3" Content="*" Style="{StaticResource ButtonStyleCalc}"/>
<Button Grid.Row="4" Grid.Column="0" Content="1" Style="{StaticResource ButtonStyleNum}"/>
<Button Grid.Row="4" Grid.Column="1" Content="2" Style="{StaticResource ButtonStyleNum}"/>
<Button Grid.Row="4" Grid.Column="2" Content="3" Style="{StaticResource ButtonStyleNum}"/>
<Button Grid.Row="4" Grid.Column="3" Content="-" Style="{StaticResource ButtonStyleCalc}"/>
<Button Grid.Row="5" Grid.Column="0" Content="0" Style="{StaticResource ButtonStyleNum}"/>
<Button Grid.Row="5" Grid.Column="1" Grid.ColumnSpan="2" Content="=" Style="{StaticResource ButtonStyleCalc}"/>
<Button Grid.Row="5" Grid.Column="3" Content="+" Style="{StaticResource ButtonStyleCalc}"/>
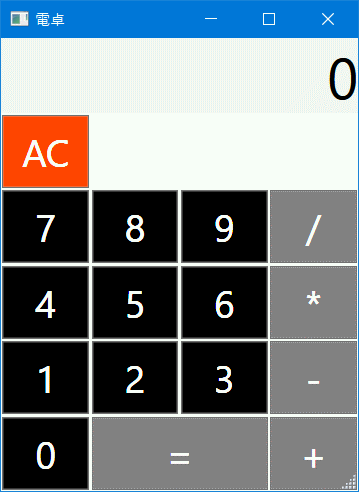
一度実行してみます。
◇ボタンクリック時の処理作成
グリッドに名前を付けます。
MainWindow.xaml
 :
</Window.Resources>
<Grid x:Name="rootGrid">
    <Grid.ColumnDefinitions>
 :
グリッド配下のボタンにクリックイベントを登録する処理を作ります。
MainWindow.xaml.cs
/// <summary>
/// 計算失敗メッセージ
/// </summary>
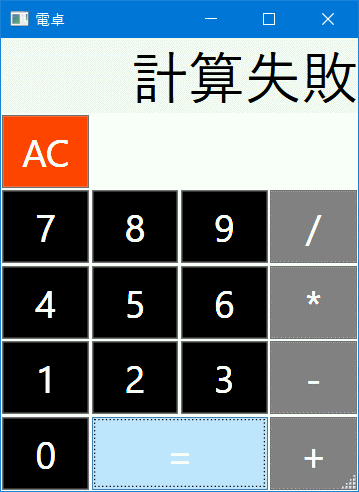
static readonly string CalcFailMessage = "計算失敗";
/// <summary>
/// 計算式最大長
/// </summary>
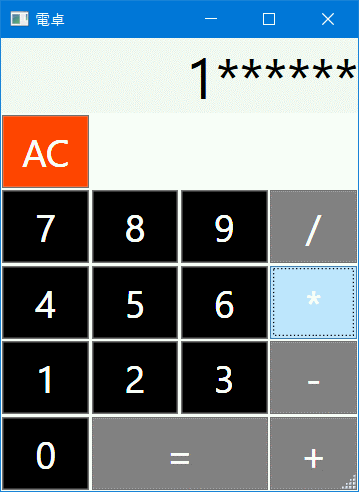
static readonly int MaxFormulaLength = 16;
/// <summary>
/// コンストラクタ
/// </summary>
public MainWindow()
{
InitializeComponent();
// イベント初期化
InitEvents();
}
/// <summary>
/// イベント初期化
/// </summary>
private void InitEvents()
{
// rootGrid配下のコントロールを探す
foreach (var ctrl in LogicalTreeHelper.GetChildren(rootGrid))
{
// ボタン以外は無視
if (!(ctrl is Button))
{
continue;
}
// ボタンがクリックされたときの処理を登録
(ctrl as Button).Click += (sender, e) =>
{
string inKey = (sender as Button).Content.ToString();
switch (inKey)
{
case "AC":
// クリア
formula.Text = "0";
break;
case "=":
if (formula.Text == CalcFailMessage)
{
formula.Text = "0";
}
else
{
// 計算結果表示
formula.Text = Calculate(formula.Text);
}
break;
default:
if (formula.Text.Length >= MaxFormulaLength)
{
break;
}
else if (formula.Text == "0" &&
(inKey != "/" && inKey != "*" &&
inKey != "-" && inKey != "+"))
{
// 0が表示されていて数字が入力されたらその値を設定
formula.Text = inKey;
}
else if (formula.Text == CalcFailMessage)
{
// 計算失敗メッセージが表示されていたら入力された値を設定
formula.Text = inKey;
}
else
{
// 入力された値を式に追加
formula.Text += inKey;
}
break;
}
};
}
}
/// <summary>
/// 計算実行
/// </summary>
/// <param name="formula">計算式</param>
/// <returns>計算結果</returns>
private string Calculate(string formula)
{
return ""; // とりあえず枠だけ用意
}
◇計算処理作成
計算する部分を作成します。
ロジックは計算式をPowerShellに丸投げして結果を取得するだけです。
MainWindow.xaml.cs
private string Calculate(string formula)
{
    try
    {
        var p = new System.Diagnostics.Process();

        // システムフォルダを取得
        string systemFolder = Environment.GetFolderPath(Environment.SpecialFolder.System);
        // PowerShellのフルパスを組み立て
        string powerShellFullPath = System.IO.Path.Combine(systemFolder, @"WindowsPowerShell\v1.0\powershell.exe");

        // 実行するファイル
        p.StartInfo.FileName = powerShellFullPath;
        // パラメータ(計算式)
        p.StartInfo.Arguments = "-Command " + formula;

        // 標準入力リダイレクトしない
        p.StartInfo.RedirectStandardInput = false;
        // 標準出力リダイレクトする
        p.StartInfo.RedirectStandardOutput = true;

        // シェル機能使用しない
        p.StartInfo.UseShellExecute = false;
        // ウィンドウ開かない
        p.StartInfo.CreateNoWindow = true;

        // 実行
        p.Start();
        // 結果を一行読む
        string calcResult = p.StandardOutput.ReadLine();

        p.WaitForExit();
        p.Close();

        if (string.IsNullOrEmpty(calcResult))
        {
            // 計算結果なし(計算失敗)
            return CalcFailMessage;
        }
        else
        {
            // 計算結果を返す
            return calcResult;
        }
    }
    catch
    {
        return CalcFailMessage;
    }
}
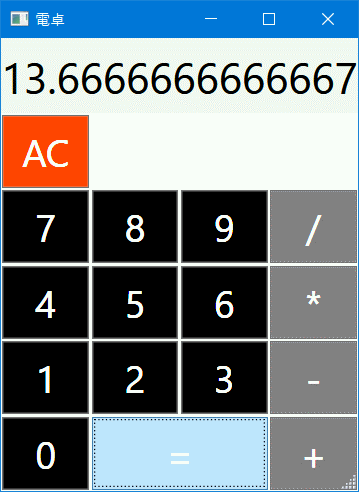
■動かしてみる
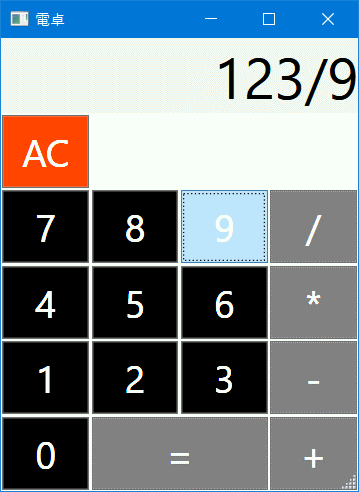
PowerShellを起動しているため、少し時間がかかります。
おしまい