はじめに
laravelとvue-routerが入っている前提としての記事になります。
もしvue-routerをインストールされていない方がいましたら
こちらの記事を参照ください。
https://qiita.com/KARENN/items/48334437eb06628b78fc
今回は実際にvue-routerで指定したURLに、vueファイルで記述した内容を画面に表示できるようにする方法になります。
今回使用するファイル構成
projectName
 ↳resorces
  ↳js
   ↳components
    ↳index.vue
    ↳detail.vue
  ↳views
   ↳index.blade.php
router.jsの内容
import Vue from 'vue'
import VueRouter from 'vue-router'

Vue.use(VueRouter);

import index from './components/index.vue';
import detail from './components/detail.vue';

export default new VueRouter({
    mode: 'history',
    routes: [
        {
            path: '/',
            name: index
            component: index
        },
        {
            path: '/detail',
            name: detail,
            component: detail
        }
    ]
});
vue-routerの中身がこのようになっていることが前提となります。
index.blade.php
index.blade.php
<!doctype html>
<head>
    <script src="{{ asset('js/app.js') }}" defer></script>
</head>
<body>
    <div id="app">
       <router-view />
    </div>
</body>
</html>
headの中身に必ずコンパイルしたjsを使用するようにしてください。
idをapp.jsで指定した内容を記述して¸router-viewを呼ぶようにすると
router.jsの中身を見るようになります。
ここまでがbladeに記述する内容になります。
vue内の記述
では実際ここからはvue-router を使用したvue.jsの内容です。
index.vue
<template>
    <div>
        index.vueの中身になります。
        <router-link to="/detail">detail.vueに遷移</router-link>
    </div>
</template>
URLに/を入力するとrouter.jsで指定したindex.vueの中身が表示されます。
この場合、画面に下記のように表示されます。
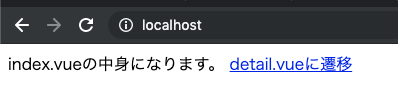
detail.vueに遷移を押下するとdetail.vueの内容が表示されます。
detail.vue
<template>
    <div>
        detail.vueに遷移しました。
    </div>
</template>
実際の画面ではこのようになります。

これでvue-routerを使用した画面遷移になります。