この記事は筆者のソロ Advent Calendar 2022 1日目の記事です。
普段はKotlinを業務で使っており、テストに関してはKotestを使用していますが、テストの書きやすさなどでSpockを使用しているという方もいるようで気になっていたためKotlinプロジェクトにSpockを導入してみました。
KotlinでSpock入門[基礎編] <- 今ここ
KotlinでSpock入門[基礎編2]
KotlinでSpock入門[Data Driven Testを学んでデータ駆動テストを使い倒す]
KotlinでSpock入門[Data Driven Testを学んでデータ駆動テストを使い倒す2]
KotlinでSpock入門[mock編]
KotlinでSpock入門[Spring boot実践編]
記事作成で使用したサンプルコードはこちら
Spcok is 何?
SpockはJava, GroovyなどのJVMアプリケーション向けのテスティングフレームワークです。テストコードはGroovyで記述し、given・when・thenブロックでそれぞれの処理を書いていくため見やすく、綺麗なテストコードが書け、それ自体が仕様書の役割を果たせます。
対象読者
- Java, Kotlinで開発している人
- Java, Kotlinでテストを書いている人
- Spockを聞いたことはあるけど触ったことない人
- テストについて興味がある人
setup
とりあえず適当なディレクトリでkotlinプロジェクトを作成します。
gradle init
作成が完了したらbuild.gradle.ktsにSpockを追加します。
import java.net.URI

/*
 * This file was generated by the Gradle 'init' task.
 *
 * This generated file contains a sample Kotlin application project to get you started.
 * For more details take a look at the 'Building Java & JVM projects' chapter in the Gradle
 * User Manual available at https://docs.gradle.org/7.5/userguide/building_java_projects.html
 */

plugins {
    // Apply the org.jetbrains.kotlin.jvm Plugin to add support for Kotlin.
    id("org.jetbrains.kotlin.jvm") version "1.6.21"

    // Apply the application plugin to add support for building a CLI application in Java.
    application

+    groovy
}

repositories {
    // Use Maven Central for resolving dependencies.
    mavenCentral()
+    maven { url = URI("https://jitpack.io") }
}

dependencies {
    // Align versions of all Kotlin components
    implementation(platform("org.jetbrains.kotlin:kotlin-bom"))

    // Use the Kotlin JDK 8 standard library.
    implementation("org.jetbrains.kotlin:kotlin-stdlib-jdk8")

    // This dependency is used by the application.
    implementation("com.google.guava:guava:31.0.1-jre")

    // Use the Kotlin test library.
    //衝突してエラーになるのでコメントアウト
//    testImplementation("org.jetbrains.kotlin:kotlin-test")

    // Use the Kotlin JUnit integration.
    testImplementation("org.jetbrains.kotlin:kotlin-test-junit")

+    testImplementation("org.spockframework.spock:spock-core:spock-2.3")
}

application {
    // Define the main class for the application.
    mainClass.set("spocktest.AppKt")
}

tasks.withType<Test> {
    useJUnitPlatform()
}
完了したらHelloクラスを作成して動作確認。
package spocktest

class Hello {
    fun hello() = "hello"
}
テストはgroovyフォルダを作成しその下に作成します。
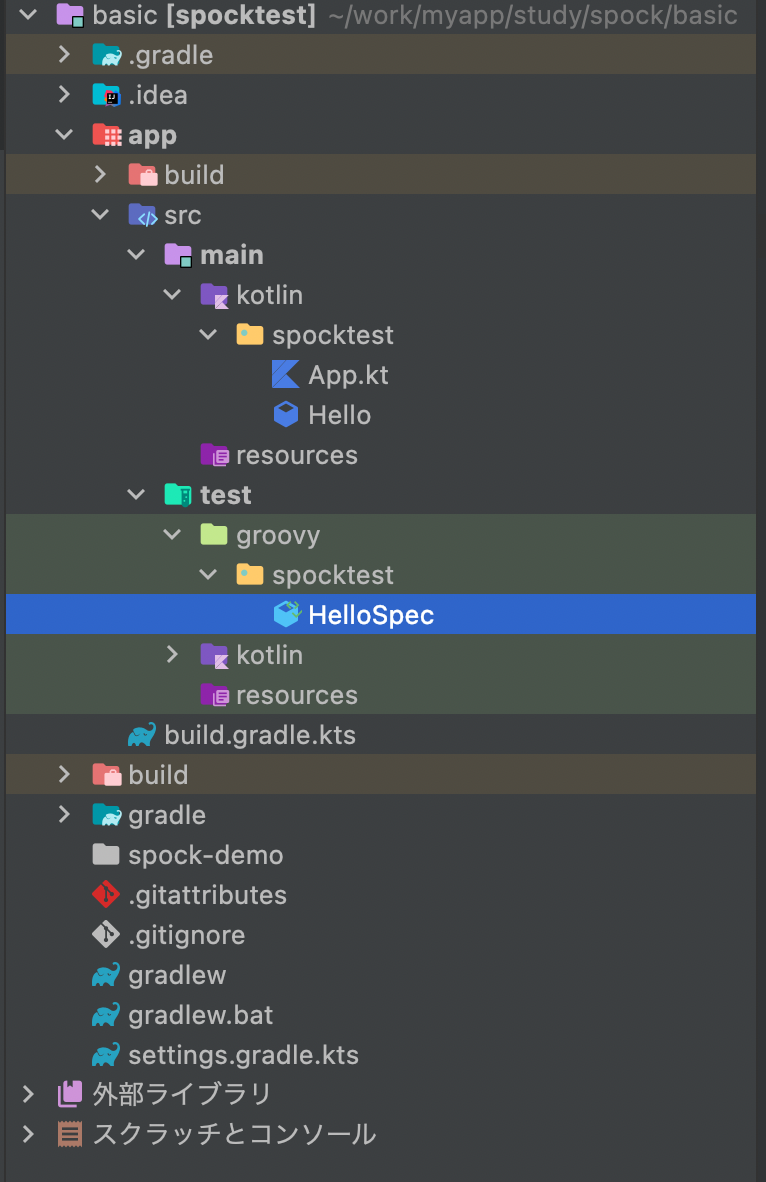
ファイル名はxxxSpec.groovyのように作成するのがお作法のようです。
package spocktest

import spock.lang.Specification

class HelloSpec extends Specification {
    def "helloが返されること"() {
        given: "Helloインスタンスがある"
            def hello = new Hello()
        when: "hello()を呼び出す"
            def result = hello.hello()
        then: "resultがhello文字列であること"
            result == "hello"
    }
}
テストはSpecificationを継承したテストクラスを作成し、given, when, thenブロックに適切な処理を書いていく。
以下で実行してみる。
./gradlew test

BUILD SUCCESSFUL in 1s
4 actionable tasks: 1 executed, 3 up-to-date
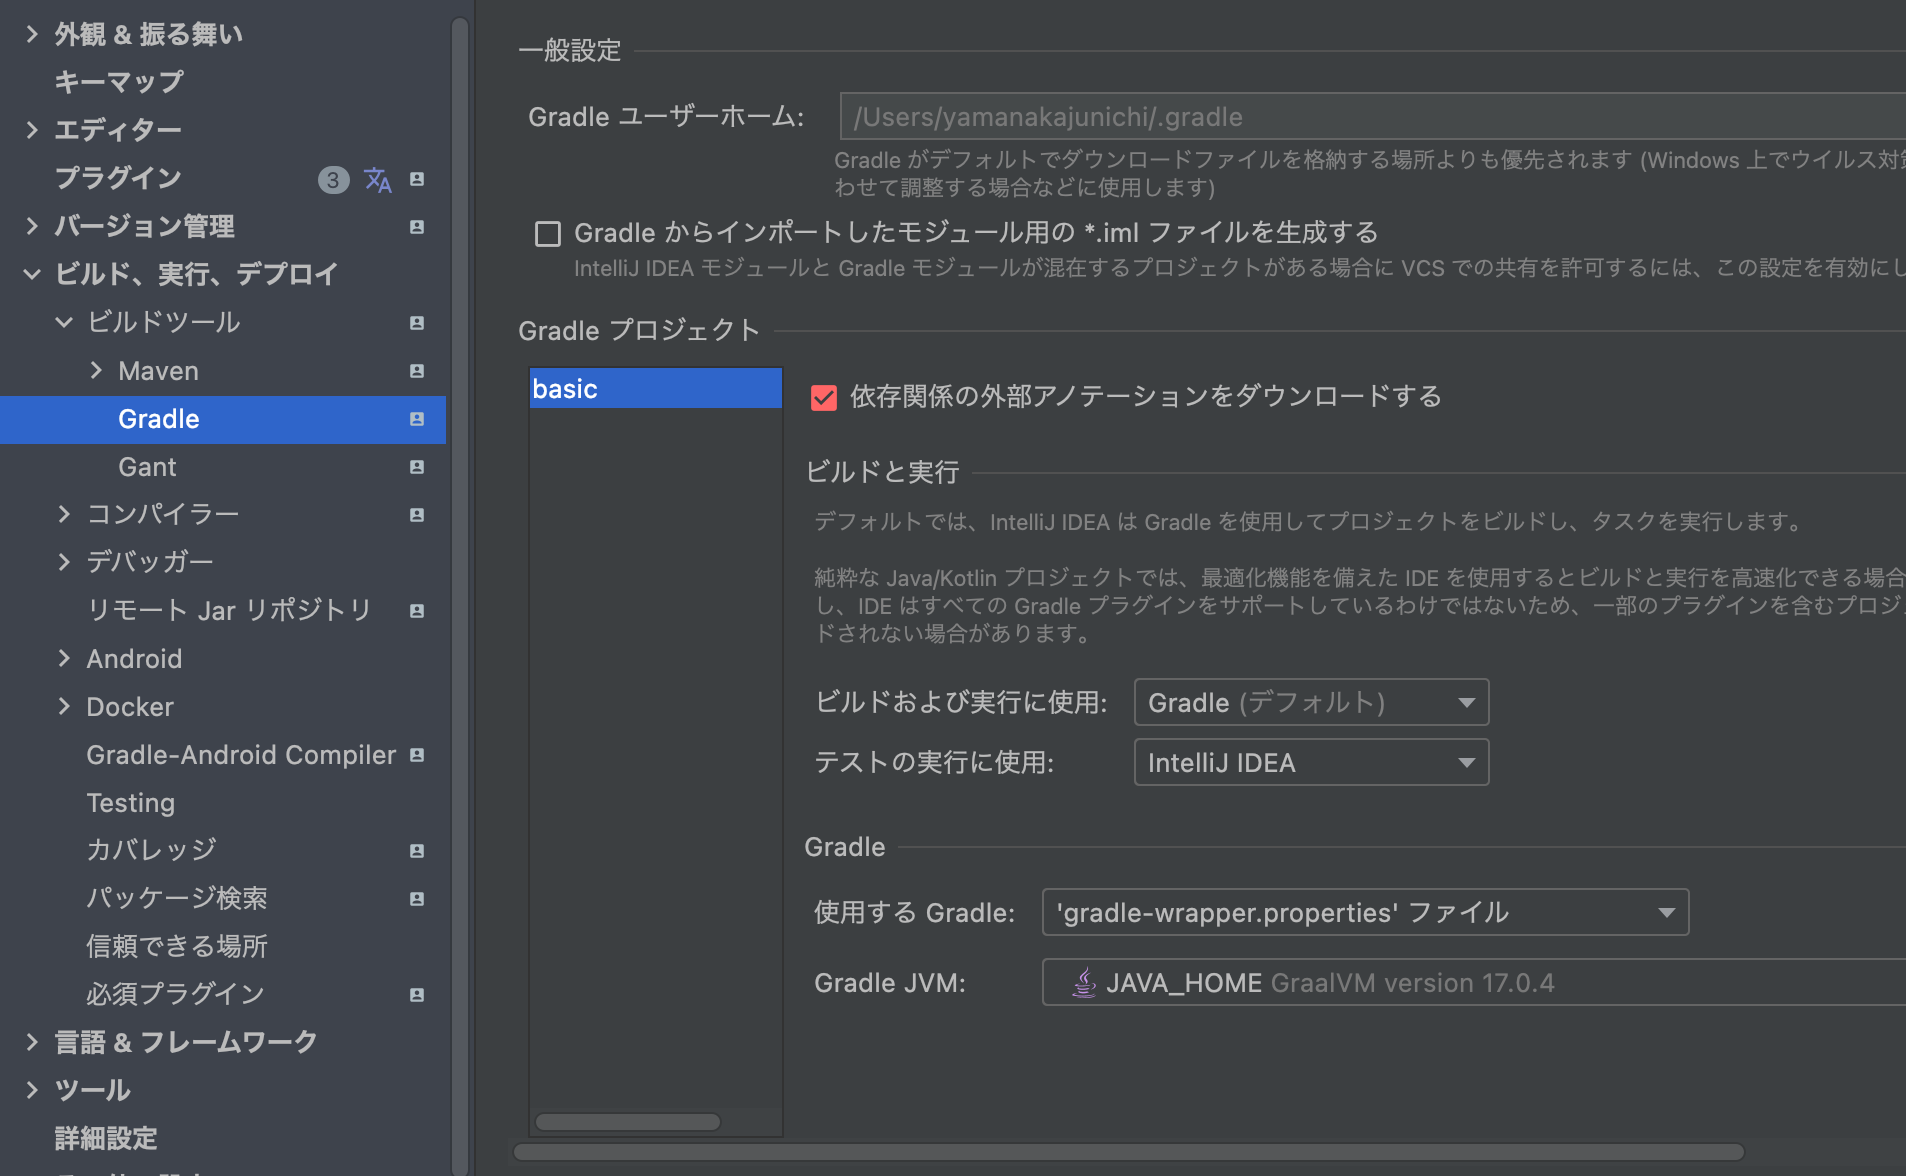
intelliJでテストを実行した時にエラーが出た場合は
設定 > ビルド、実行、デプロイ > Gradle > テストの実行に使用 をIntelliJ IDEAに設定する。
基本的なテストの書き方
Spockでは下記のようなfeatureメソッドにテストを記述していきます。メソッド名は文字列で書く。
def "pushing an element on the stack"() {
  // blocks go here
}
featureメソッドの中には下図にあるような6つのブロックを記述することができ、各ブロックごとに適切な処理を書いていく。
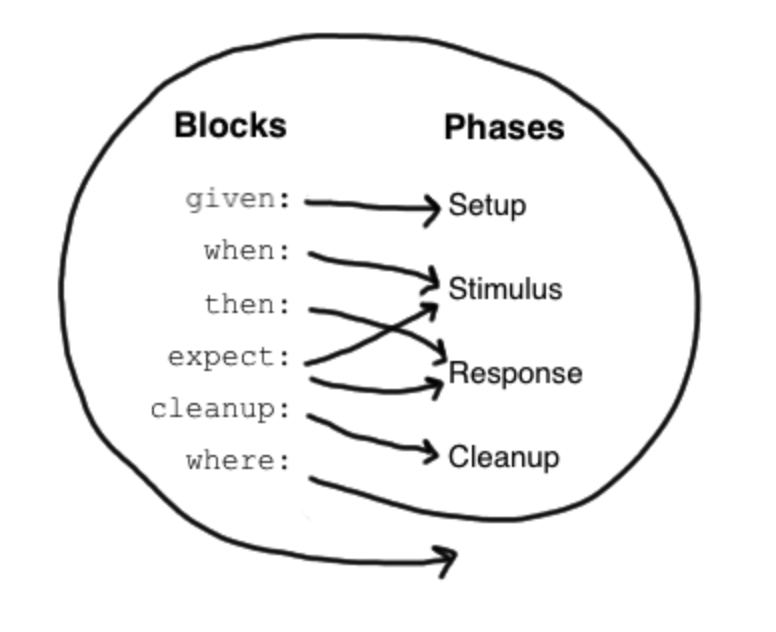
givenブロック
機能のセットアップなどを行うブロック。主に変数宣言やインスタンス化を行うブロック。省略可能。
given:
def stack = new Stack()
def elem = "push me"
when - thenブロック
whenとthenブロックは常に一緒に使用します。whenブロックが任意のコードを含むことができるのに対し、thenブロックは条件、例外条件、相互作用、変数定義に限定される。thenブロックには真偽値を返すような評価式を書くくらいの認識で大丈夫。
class StackSpec extends Specification {
    def "test Stack"() {
        given:
            def stack = new Stack<String>()
        when:
            stack.push("test")
        then:
            !stack.isEmpty()
            stack.size() == 1
            stack.get(0) == "test"
    }
}
thenブロックとexpectブロックには、条件が不可欠ですが、これらのブロック以外の場所で条件を使用するにはGroovyのassertキーワードで条件を指定する必要がある。
def setup() {
  stack = new Stack()
  assert stack.empty
}
whenブロックで例外を期待する場合には以下のようにthrownメソッドを記述する。
    def "throw exceptioon"() {
        given:
            def stack = new Stack<String>()
        when:
            stack.get(0)
        then:
            thrown(IndexOutOfBoundsException)
            stack.isEmpty()
    }
発生した例外インスタンスを使用したい場合は以下のようにできる。
    def "throw exceptioon2"() {
        given:
            def stack = new Stack<String>()
        when:
            stack.get(0)
        then:
            def e = thrown(IndexOutOfBoundsException)
            //IndexOutOfBoundsException e = thrown() でも可
            e.message == "Index 0 out of bounds for length 0"
    }
逆に例外が発生しないことをテストしたい場合には以下のように記述できる。
def "HashMap accepts null key"() {
  given:
  def map = new HashMap()

  when:
  map.put(null, "elem")

  then:
  notThrown(NullPointerException)
}
expectブロック
when-thenブロックと使用方法は同じだが、条件と変数定義のみを含むことができるという点では限定的。例えば、以下の例では意味合い的には一緒である。
when:
def x = Math.max(1, 2)

then:
x == 2
expect:
Math.max(1, 2) == 2
ガイドライン的には副作用のない純粋な関数のテストを記載する時にはexpectブロックの方が意味合いが明確で推奨されているよう。
cleanupブロック
リソースの解放などが必要な場合はclenupブロックを使用する。whenブロックで例外が発生した場合でも必ず実行される。
given:
def file = new File("/some/path")
file.createNewFile()

// ...

cleanup:
file.delete()
whereブロック
whereブロックは常にメソッドの最後に位置し、繰り返されることはない。これは、データ駆動型のメソッドを書くために使用される。
def "computing the maximum of two numbers"() {
  expect:
  Math.max(a, b) == c

  where:
  a << [5, 3]
  b << [1, 9]
  c << [5, 9]
}
a=5, b=1の時cは5というテストとa=3, b=9の時c=9というテスト。
Fixtureメソッド
以下のようなsetupとclenupメソッドが用意されている。
def setupSpec() {}    // runs once -  before the first feature method
def setup() {}        // runs before every feature method
def cleanup() {}      // runs after every feature method
def cleanupSpec() {}  // runs once -  after the last feature method
- setupSpec テストクラスの実行前に1度だけ実行される
- setup 各テストメソッドが実行される前に毎回実行される
- cleanupSpec テストクラスの実行後に1度だけ実行される
- cleanup 各テストメソッドが実行された後に毎回実行される。cleanupブロックとの使い分けは全てのテストメソッドのcleanup処理が必要な場合はcleaulメソッドを使用し、それ以外はcleanupブロックを使用すると良い。
まとめ
- KotlinプロジェクトにSpockを導入する方法を紹介しました。
- Spockを使用した基本的なテストの書き方を紹介しました。
- Spockにおける6つのブロックの役割と使い方を紹介しました。
- テストの前後処理を書く方法を紹介しました。
まだ、紹介しきれていない機能やmockの導入などあるため次回以降に書いていきたいと思います。以上!