概要
- macOS Development for Beginnersシリーズを読み、SwiftのmacOSアプリの基礎を学びました。
- 学んだことの実践として、上記シリーズのEggTimerを参考にポモドーロタイマーを作成しました。
- ポモドーロタイマーの概要は以下の通りです
- 今回はタスク・休憩・長めの休憩の周期をもつタイマー機能に絞った実装をしています
ポモドーロ・テクニック:世界が実践する時間管理術はこうして生まれた
ステップ1:実行するタスクを決める。
ステップ2:タイマーを25分に設定。
ステップ3:タイマーが鳴るまでタスクを行う。
ステップ4:タイマーが鳴ったら作業を終了し、「今日やること」シートにチェックマークを付ける。
ステップ5:5分間の休憩を取る(その際、深呼吸したり、瞑想したり、コーヒーを飲むなど、仕事とはまったく関係のないことをして脳を休ませる)。
ステップ6:ポモドーロを4回した後に長い休憩(20〜30分)を取る(次のポモドーロで新しいタスクができるように完全に脳を休ませる)。
外観
タイマー

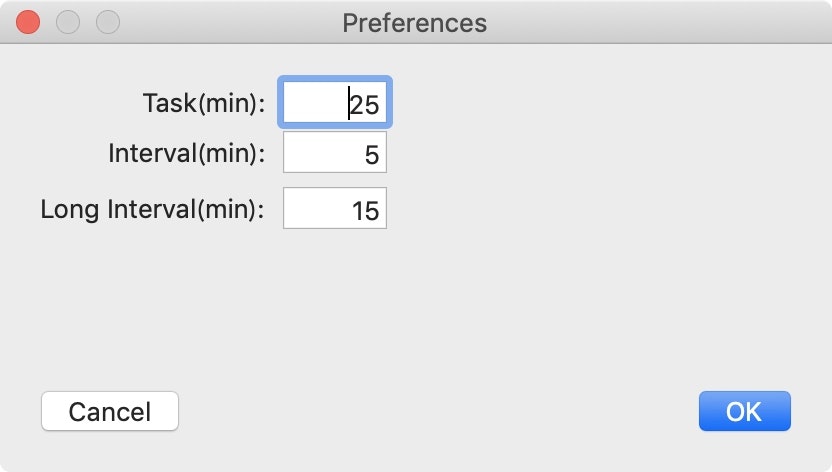
設定画面
GitHub
解説
- キモのタイマー部分は元記事かコードを参照下さい(下手に説明するよりは、step by stepで実装したほうが理解が早そうです)
2つあるボタンの動作の遷移
- メイン画面にはボタンが2つしかなく、これらの表示を切り替えていくつかの動作を割り当てています。
- 動作は以下のアプリの動きを参考にしました
-
()はdisableの意
ポモドーロ中
| 左ボタン | 右ボタン | |
|---|---|---|
| 計測前 | 開始 | (停止) |
| 計測中 | 一時停止 | 停止 |
| 一時停止 | 再開 | 完了 |
休憩中
| 左ボタン | 右ボタン | |
|---|---|---|
| 計測前 | 開始 | (停止) |
| 計測中 | 一時停止 | スキップ |
| 一時停止 | 再開 | スキップ |
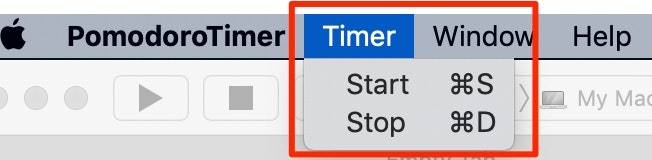
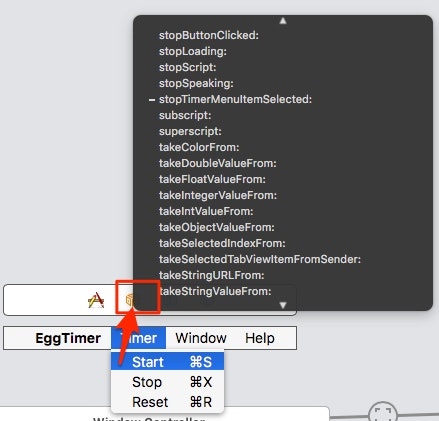
メニューバーへのタイマー機能実装
class AppDelegate: NSObject, NSApplicationDelegate {

    @IBOutlet weak var leftTimerMenuItem : NSMenuItem!
    @IBOutlet weak var rightTimerMenuItem: NSMenuItem!
    func configureMenus(leftTitle: String, rightTitle: String) {
        leftTimerMenuItem.title  = leftTitle
        rightTimerMenuItem.title = rightTitle
    }
-
AppDelegateにアウトレットとメソッドを宣言している
if let appDel = NSApplication.shared.delegate as? AppDelegate {
    appDel.configureMenus(leftTitle: leftButton.title, rightTitle: rightButton.title)
}
- ただし呼び出すのは
ViewControllerからである。
// MARK: - IBActions - menus

@IBAction func startTimerMenuItemSelected(_ sender: Any) {
    leftButtonClicked(sender)
}

@IBAction func stopTimerMenuItemSelected(_ sender: Any) {
    rightButtonClicked(sender)
}
- メニューアイテムのアクションも
ViewControllerから呼んでいる。 - メニューアイテムのアウトレットが
ViewControllerから呼び出せないのだろうか。
タイマー完了時の通知
- NSUserNotificationを使用する
-
【Swift】Dateの王道 【日付】
- NSNotificationのidentifierに日付を使用
-
User Notifications in macOS
- パッと見delegateの設定の記述がないようなので注意
-
NSUserNotificationを使って、通知のポップアップを表示する - Qiita
- Objective-Cですけどやっていることは同じです。
extension ViewController: NSUserNotificationCenterDelegate {

    // MARK: - Finish Notification
-
NSUserNotificationCenterDelegate用のextention内に記述する
    func postCompletingNotification() {
        let notification = NSUserNotification()
        notification.identifier = createNotificationIdentifier()
        switch pomodoroTimer.timerMode {
        case .interval, .longInterval:
            notification.title    = "Complete working!"
            notification.subtitle = "It's time to break"
        case .task:
            notification.title    = "Finish interval!"
            notification.subtitle = "It's time to work"
        }
        notification.soundName = NSUserNotificationDefaultSoundName

        // Manually display the notification
        let notificationCenter = NSUserNotificationCenter.default
        notificationCenter.delegate = self
        notificationCenter.deliver(notification)
    }
    func userNotificationCenter(_ center: NSUserNotificationCenter, didDeliver notification: NSUserNotification) {
        print("通知を受け取りました。")
    }

    func userNotificationCenter(_ center: NSUserNotificationCenter, didActivate notification: NSUserNotification) {
        center.removeDeliveredNotification(notification)
        print("通知を削除しました")
    }

    // アクティブ時にも通知を行いたい場合にコメントアウトする
//    func userNotificationCenter(_ center: NSUserNotificationCenter, shouldPresent notification: NSUserNotification) -> Bool {
//        return true
//    }
    // 通知用のidentifierを作成する
    // e.g. ikeh1024_2019/12/11 14:11:32
    func createNotificationIdentifier() -> String {
        let f = DateFormatter()
        f.timeStyle = .medium
        f.dateStyle = .medium
        f.locale = Locale(identifier: "ja_JP")
        let now = Date()
        return "ikeh1024_\(f.string(from: now))"
    }
}
ここから実用化する際に追加したい機能
- タスク名の入力と管理
- SNS共有機能
- 週月別の統計で管理できる機能
- トマトのイメージなどおしゃれなUI
- メニューバーアイコンを実装してに残り時間を表示する
macOS Development for Beginners:シリーズのメモ
macOS Development for Beginners: Part 1 | raywenderlich.com
- いわゆるHello,Worldアプリ
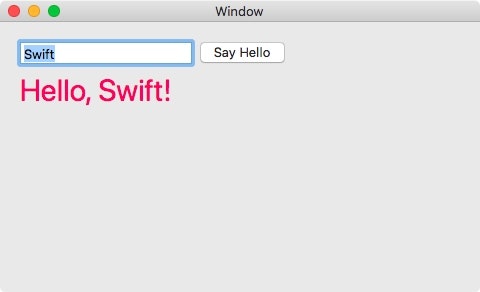
- 基本のキ
ViewController.swift
import Cocoa

class ViewController: NSViewController {

    @IBOutlet weak var nameField: NSTextField!
    @IBOutlet weak var helloLabel: NSTextField!

    override func viewDidLoad() {
        super.viewDidLoad()

        // Do any additional setup after loading the view.
    }

    override var representedObject: Any? {
        didSet {
        // Update the view, if already loaded.
        }
    }

    @IBAction func sayButtonClicked(_ sender: Any) {
        var name = nameField.stringValue
        if name.isEmpty {
            name = "Hello"
        }
        let greeting = "Hello, \(name)!"
        helloLabel.stringValue = greeting
    }

}
macOS Development for Beginners: Part 2
- AutoLayoutは色々と見返す価値がある。
- またStackViewの作り方は参考に。
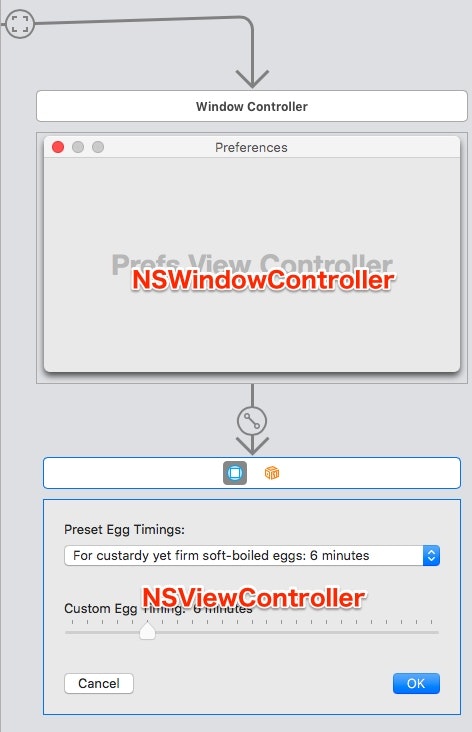
- Storyboardで扱う際は
NSWindowControllerとNSViewControllerがあることが差異かな?
macOS Development for Beginners: Part 3
- いきなりコードがババン!とでてきて落差がつらいぞ!
- 初見だと今何やっているか分からなくなりそう。
- こういうバインディングのやり方があるのか…?
-
Preferencesが複数クラスで共有されている。 - それぞれ別のPreferencesを持つが、シングルトンの
NSUserDefaultsで情報交換をしているので、データとしては同じとなる。
Now PrefsViewController has a prefs object and so does ViewController - is this a problem? No, for a couple of reasons.
Preferences is a struct, so it is value-based not reference-based. Each View Controller gets its own copy.
The Preferences struct interacts with UserDefaults through a singleton, so both copies are using the same UserDefaults and getting the same data.