3
4

Delete article

Deleted articles cannot be recovered.

Draft of this article would be also deleted.

Are you sure you want to delete this article?

More than 5 years have passed since last update.

ポートを開放してXAMMP環境でテスト環境設定をする

Last updated at Posted at 2017-09-07

概要

開発がいい感じになり、テストがしたい。しかし、検証環境がない、、、どうしよう、、、
その辺にあるWindowsPCをWEBサーバに見立てて検証すればいいじゃん?そこに役割分担してアクセスしてテストすればいいじゃん!

環境

  • OS windows10
  • XAMPP Apache port=80(デフォルト)

一番簡単な手段で構築するため、XAMMPを使用します。
インストール時間を除けば5分あればできます。

手順

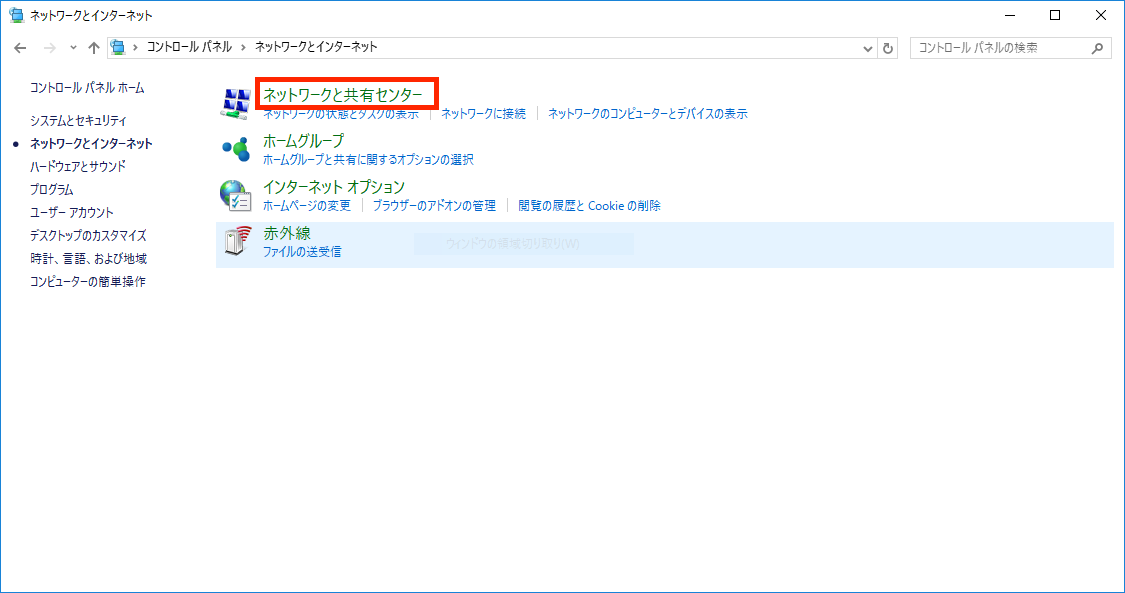
1.ポート開放

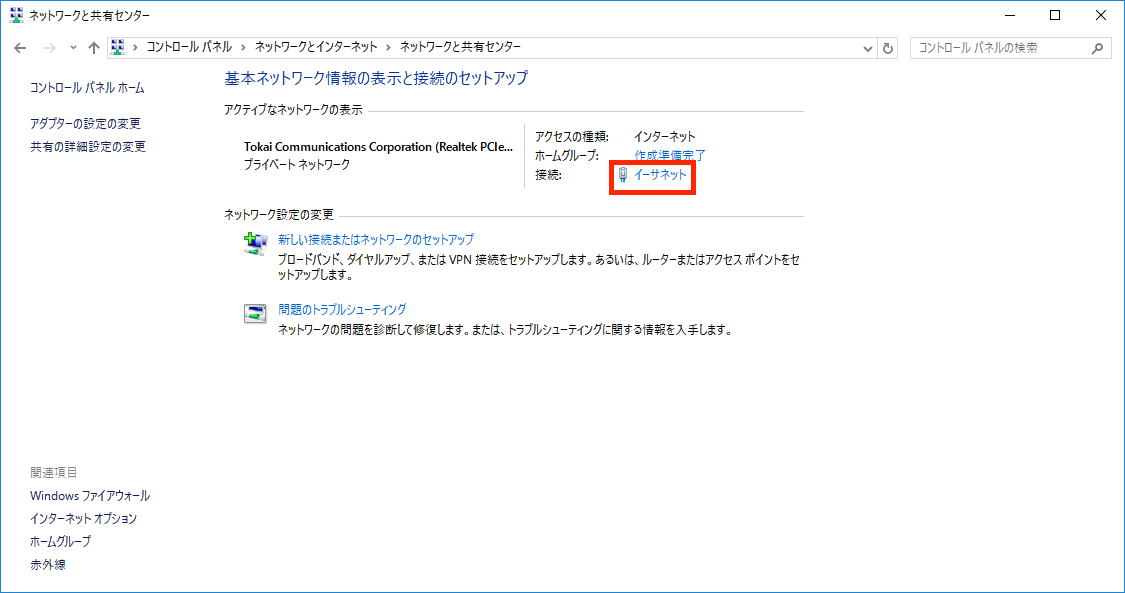
1-1.ネットワークと共有センター

1.PNG

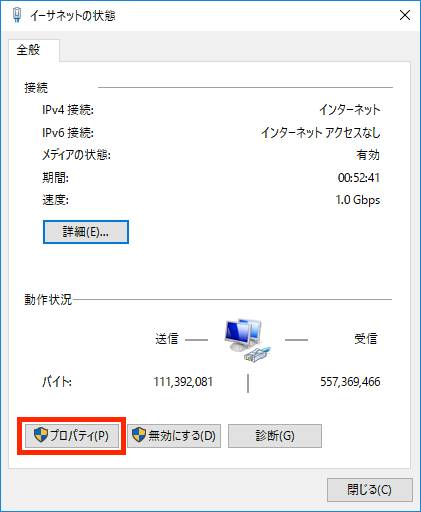
1-2.接続:イーサネット

2.PNG

1-3.プロパティ

3.PNG

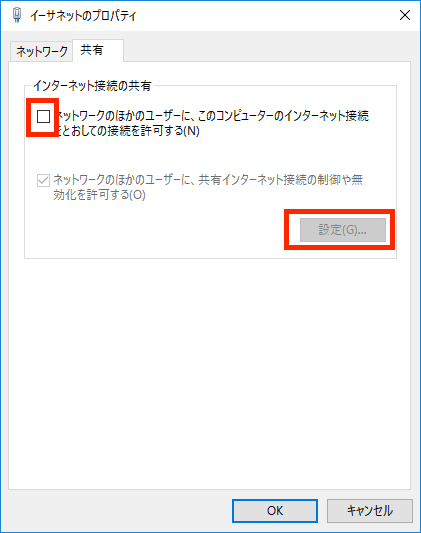
1-4.インターネット接続の共有

1.共有(タブ)をクリック
2.「インターネット接続の共有」 「ネットワークのほかのユーザに、このコンピュータのインターネット接続を通しての接続を許可する」にチェックを入れる
3.設定をクリック

5.PNG

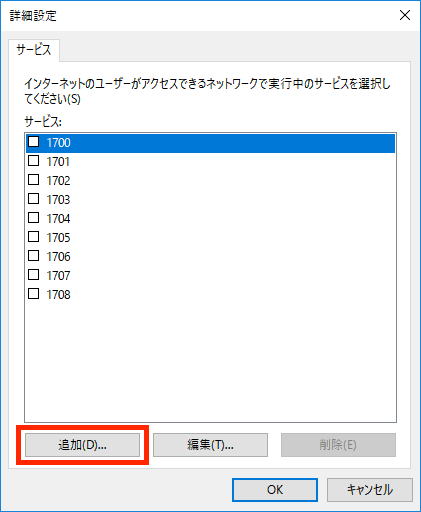
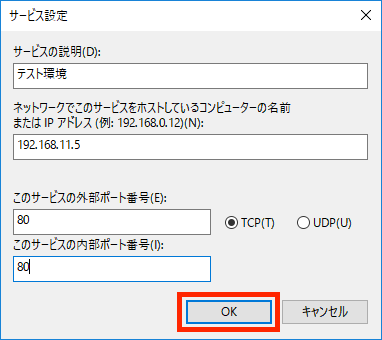
1-5.設定の追加

任意のポートを設定。このときApache Port=80, 外部ポート8080など変えることも可能。

7.PNG

8.PNG

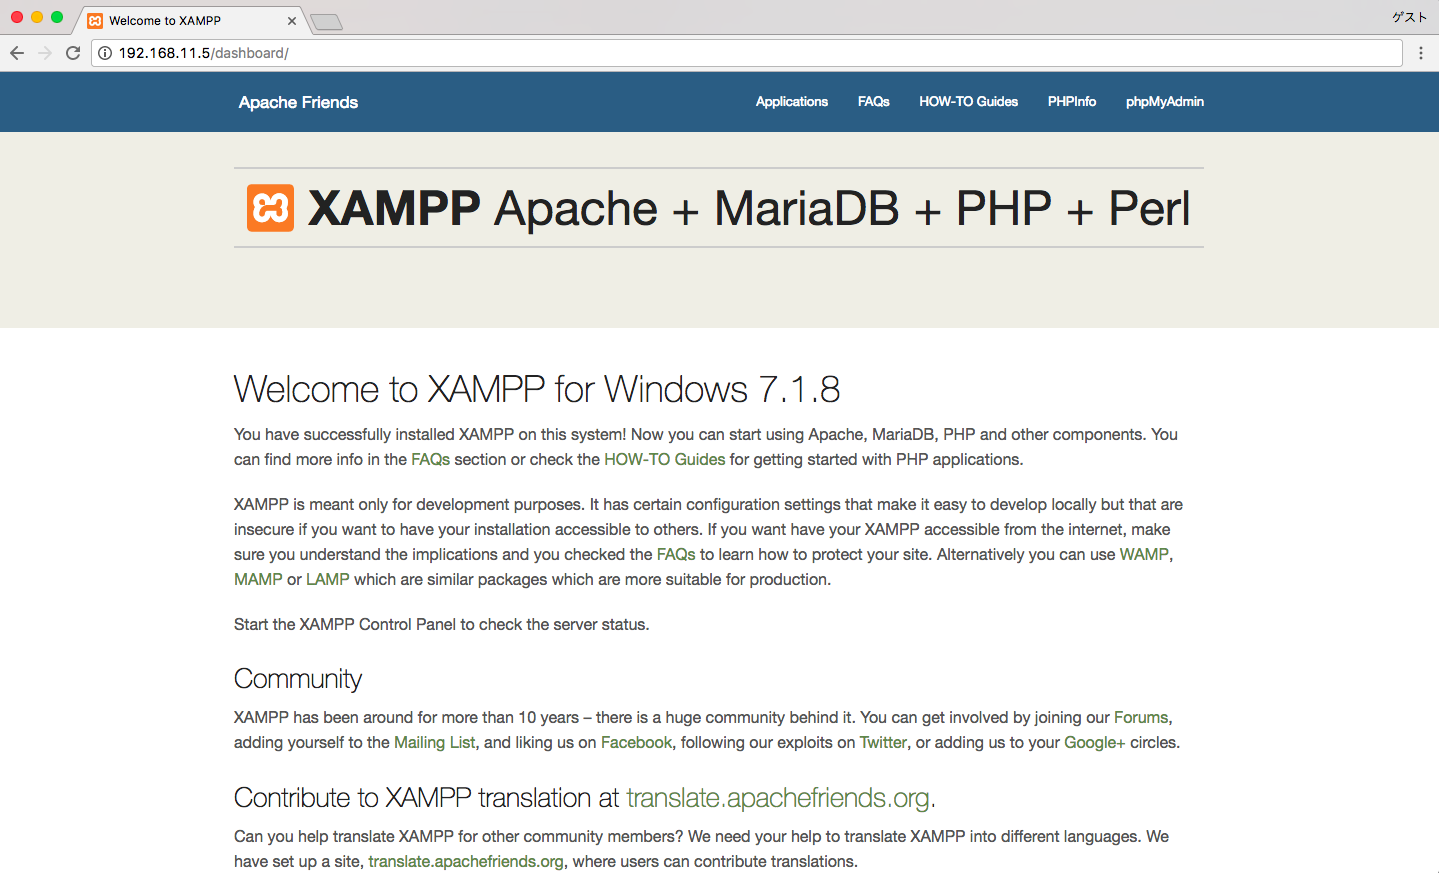
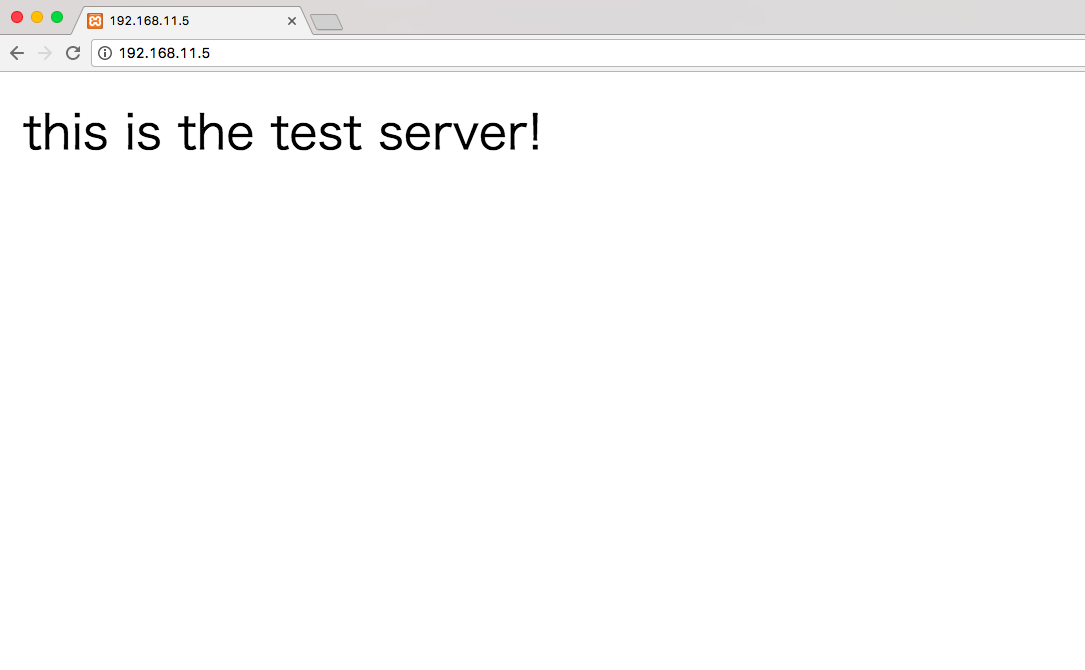
1-6.ポートが開放できているか確認

別の端末からhttp://192.168.11.5/へアクセス。IPはXAMMPを入れた環境、各自読み替え。
以下画像が表示されれば、ポートの設定は完了。

スクリーンショット 2017-09-07 23.35.33.png

2.Apacheのドキュメントルートの変更

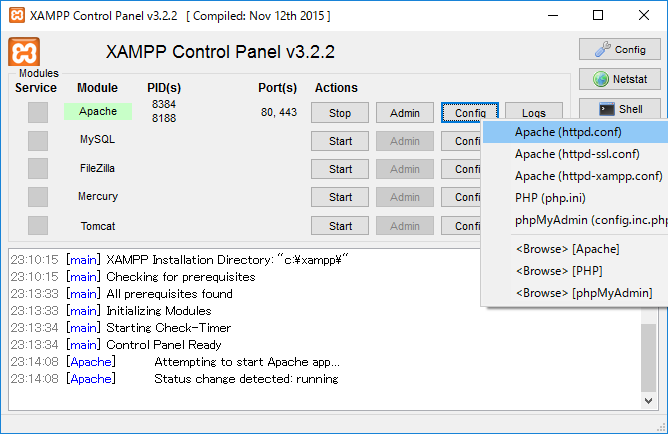
2-1.Apache(http.comf)を開く

13.PNG

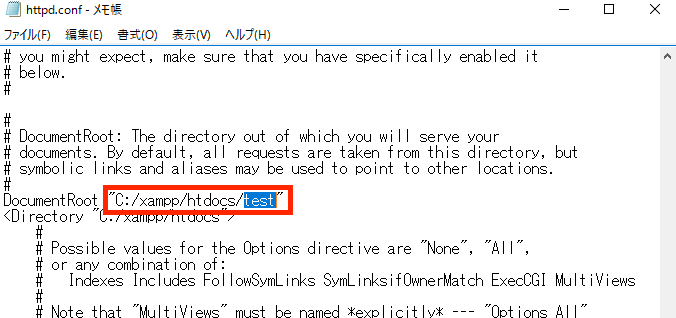
2-2.ドキュメントルートの変更

今回は xammp > htdocs > test > index.php を作成し、そこにアクセスさせます。
※ 変更はApacheを再起動しないと反映されません。

14-1.png

2-3.index.phpの内容

index.php
<?php echo "this is the test server!";
2-4.別端末から接続

スクリーンショット 2017-09-07 23.50.37.png

3
4
0

Register as a new user and use Qiita more conveniently

  1. You get articles that match your needs
  2. You can efficiently read back useful information
  3. You can use dark theme
What you can do with signing up
3
4

Delete article

Deleted articles cannot be recovered.

Draft of this article would be also deleted.

Are you sure you want to delete this article?