はじめに
これは POV-Rayによる数学お絵かき入門 Advent Calendar 2017 の8日目の記事です.
前回までに予告していたように, 今回はカメラの設定について書きます.
公式ドキュメントでは以下が近いです.
http://www.povray.org/documentation/3.7.0/r3_4.html#r3_4_2
カメラの構文
POV-Rayでのカメラの幾何的なパラメータは, POV-Rayの設定項目の中でもややこしい方だと思います.
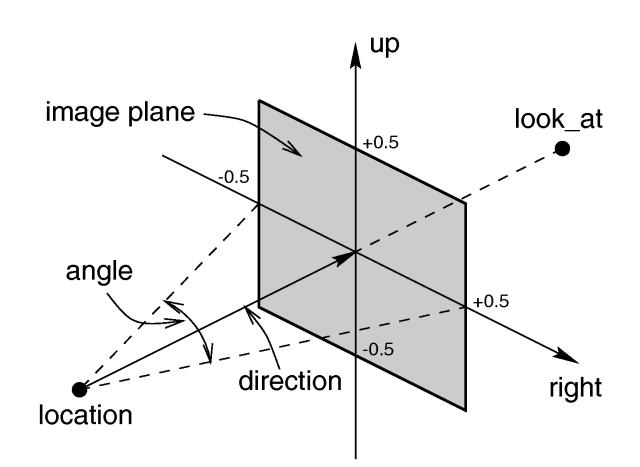
次にカメラの設定パラメータの図を示しましょう.
実はこれらのパラメータは一意的ではないため, カメラのパラメータを設定する際には重複定義とならないように設定パラメータを選ぶ必要があります.
(例えばlocation, look_atが与えられればdirectionが定まります)
さらに, 実際的にカメラの位置を調整する際にはlocationを直接書き下さずに緯度経度で表す方が楽な場合が殆どです.
以上を踏まえ, 本記事ではカメラの設定項目に深入りせずに「扱いやすいカメラの書き方」に主眼をおいて解説します.
扱いやすいカメラの書き方
設定項目を以下の6つとしましょう.
- カメラの経度(
Lng) - カメラの緯度(
Lat) - カメラの傾き(
Tilt) - カメラの注視点(
LookAt) - カメラの倍率(
Zoom) - カメラのパースの度合い(
Pers)
球面座標
カメラの位置を定義するために, 緯度経度から球面上の点への写像を次で定義します.
# macro SCS(lng,lat)
	<cos(radians(lat))*cos(radians(lng)),cos(radians(lat))*sin(radians(lng)),sin(radians(lat))>
# end
カメラに合わせた正規直交系基底
次で定義するX, Y, Zはベクトルであり, Zは画面垂直方向, Xは画面右方向, Yが画面上方向を向いています.
# declare Z=SCS(Lng,Lat);
# declare X=vaxis_rotate(<-sin(radians(Lng)),cos(radians(Lng)),0>,Z,Tilt);
# declare Y=vcross(Z,X);
カメラの位置
注視点との位置関係を考えて次のようにカメラの位置を与えます.
# declare Loc=LookAt+SCS(Lng,Lat)/(Zoom*Pers);
カメラと光源の設定
上で定義したX, Y, Z, Locを用いてcamera, light_sourceを次のように書きます.
影の入り方を考慮して光源を配置するのは面倒なので, ここではカメラと同じ位置に光源を配置しています.
この設定ではimage_width, image_heightを参照しており, これらのパラメータをright, upに与える事で以前述べた問題が解決されています.
また, デフォルトで左手系だったカメラが$z$軸を鉛直方向として右手系として設定されています.
# declare AspectRatio=image_width/image_height;
camera{
	perspective
	location Loc
	right -2*X*sqrt(AspectRatio)/Zoom
	up 2*Y/(sqrt(AspectRatio)*Zoom)
	direction Z/(Zoom*Pers)
 	sky Y
	look_at LookAt
}
light_source{
	Loc
	color rgb<1,1,1>
}
background{rgb<1,1,1>}
解説
さて, LngからPersまでの予め与えたパラメータの影響について述べましょう.
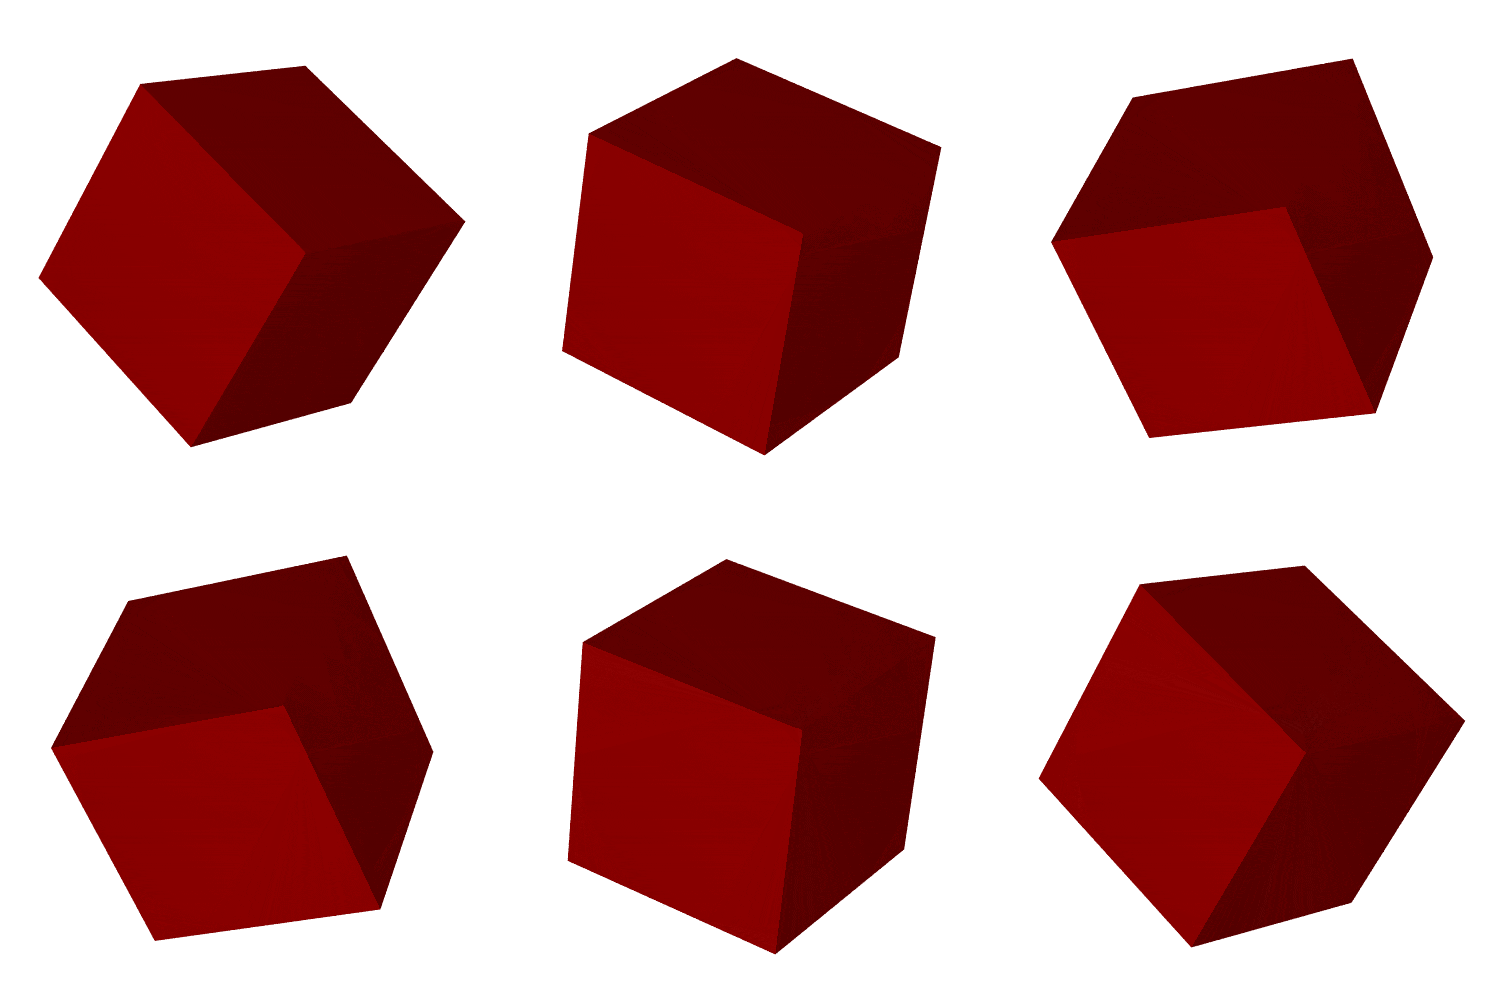
出力画像が各パラメータによって変化する様子を次に示します.
上のようなアニメーションの作り方は次回に述べる事とします.
ガンマ値の設定
さて, これまで作成した画像は全体的に暗いものでした.
次が適当な明るさでしょう.
これの調整をするための設定がガンマ値です.
POV-Rayでガンマ値を調整するには次を書きます.
global_settings{assumed_gamma 1.0}
ここではこれ以上詳しく述べませんが, POV-Rayにおけるガンマ値に関する公式ドキュメントは次です.
http://www.povray.org/documentation/3.7.0/r3_4.html#r3_4_1_3
まとめ
以上で断片的にカメラの設定を述べました.
次にカメラの設定のコードの全体を示します.
最初の6つの#declareが設定パラメータです.
global_settings{assumed_gamma 1.0}

# declare Lng=30;
# declare Lat=30;
# declare Tilt=0;
# declare Pers=0.1;
# declare Zoom=1;
# declare LookAt=<0,0,0>;

# macro SCS(lng,lat) <cos(radians(lat))*cos(radians(lng)),cos(radians(lat))*sin(radians(lng)),sin(radians(lat))> #end
# declare AspectRatio=image_width/image_height;
# declare Z=SCS(Lng,Lat);
# declare X=vaxis_rotate(<-sin(radians(Lng)),cos(radians(Lng)),0>,Z,Tilt);
# declare Y=vcross(Z,X);
# if(Pers)
	#declare Loc=LookAt+SCS(Lng,Lat)/(Zoom*Pers);
	camera{
		perspective
		location Loc
		right -2*X*sqrt(AspectRatio)/Zoom
		up 2*Y/(sqrt(AspectRatio)*Zoom)
		direction Z/(Zoom*Pers)
	 	sky Y
		look_at LookAt
	}
	light_source{
		Loc
		color rgb<1,1,1>
	}
# else
	#declare Loc=SCS(Lng,Lat);
	camera{
		orthographic
		location Loc*100
		right -2*X*sqrt(AspectRatio)/Zoom
		up 2*Y/(sqrt(AspectRatio)*Zoom)
	 	sky Y
		look_at LookAt
	}
	light_source{
		SCS(Lng,Lat)
		color rgb<1,1,1>
		parallel
		point_at 0
	}
# end
background{rgb<1,1,1>}

cylinder{<0,0,0>,<1,0,0>,0.1 pigment{rgb<1,0,0>}}
cylinder{<0,0,0>,<0,1,0>,0.1 pigment{rgb<0,1,0>}}
cylinder{<0,0,0>,<0,0,1>,0.1 pigment{rgb<0,0,1>}}
上では省略しましたが, Persが0である場合は平行投影となるような設定を書き加えています.
このレンダリング結果を次に示します.
最後のcylinderの色が鮮やかになり, $z$軸(青色)を鉛直方向とする右手系になっている事が確認できます.


