VSCodeでM5stack開発環境構築(後編)
この記事ではVSCodeでM5Stack開発環境構築を行った手順を示します.
動作環境
Windows 11
M5Stack BASIC
4. Visual Studio Code の導入
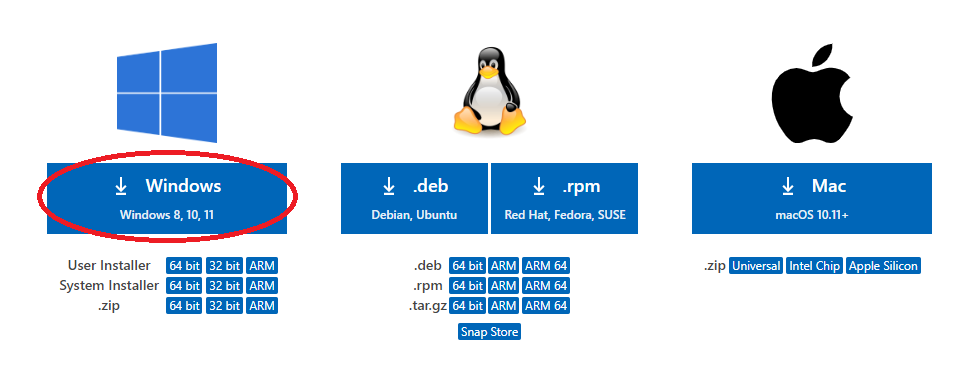
- このページからVisual Studio Codeをインストールしてください.
-
Installerがダウンロードされたら,起動して特に何もいじらずNext等を選択してインストールを完了させてください.
その後,必要であれば日本語に変更したり,配色テーマを変更したりしてください.
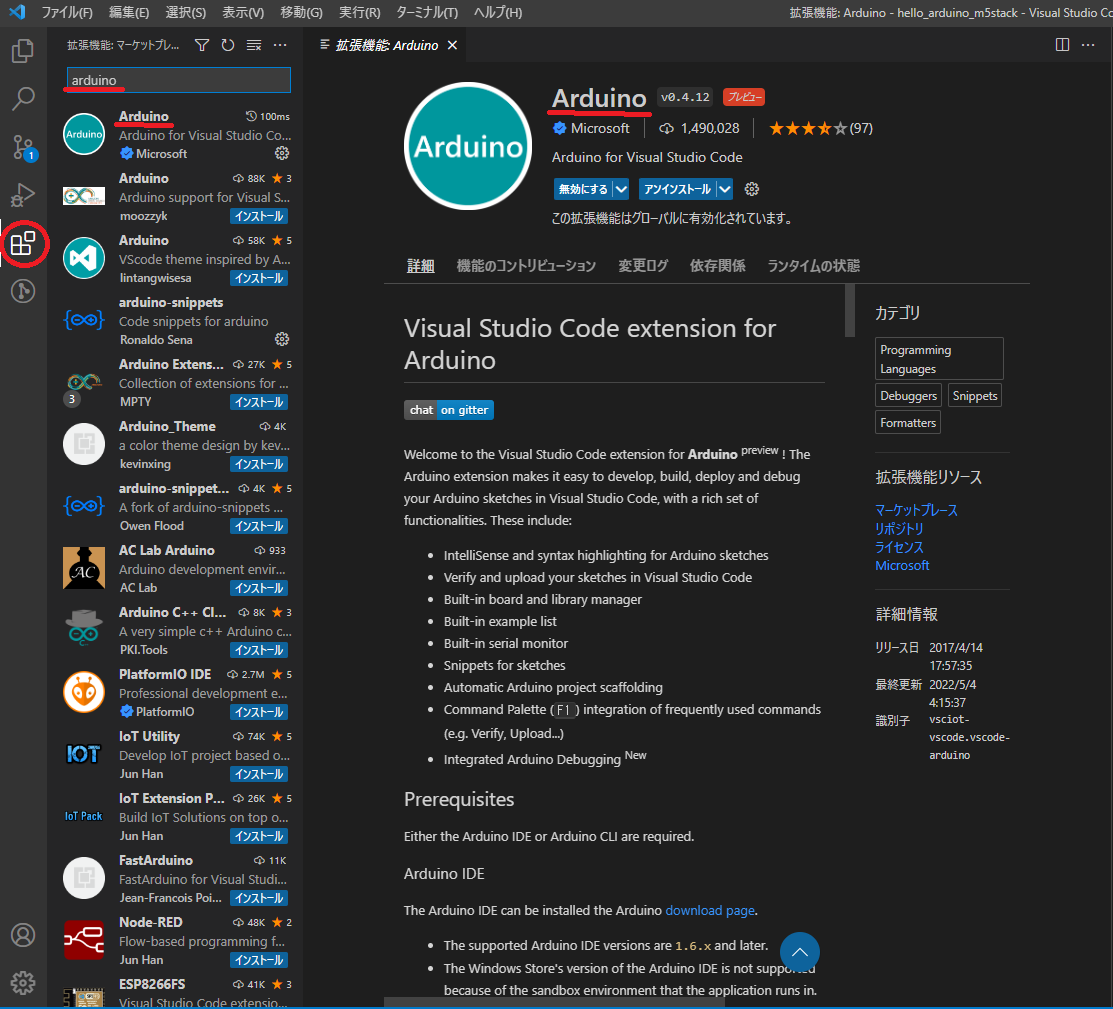
5. Arduino機能の拡張
-
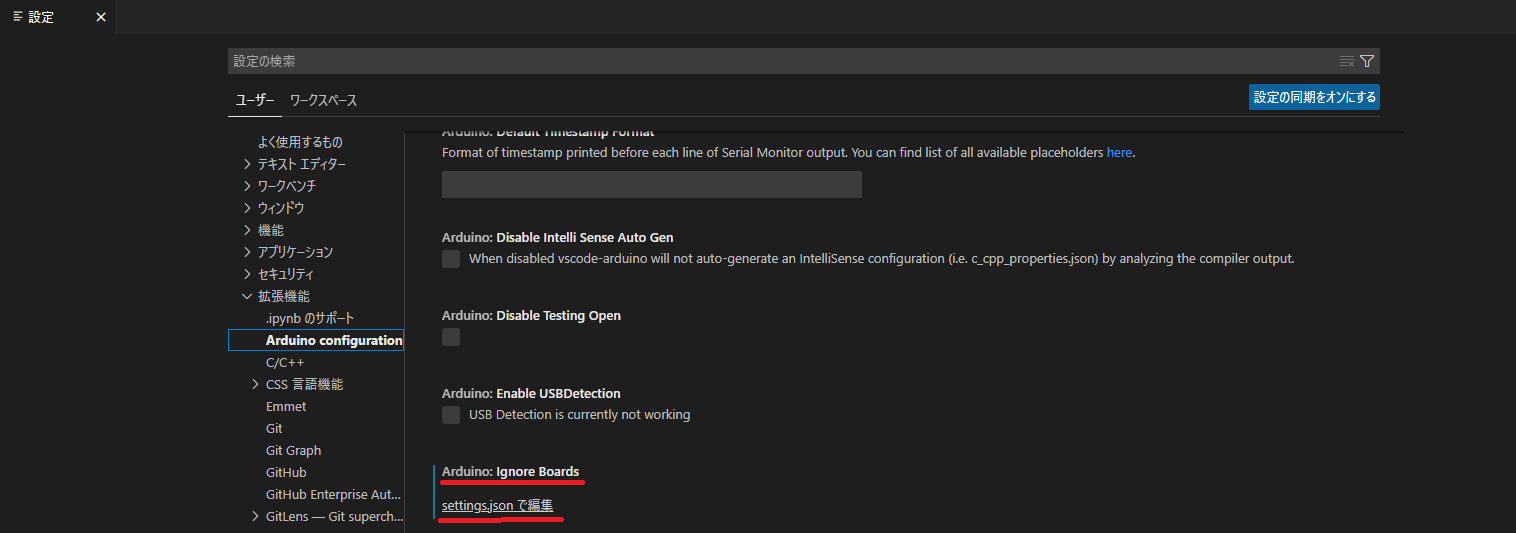
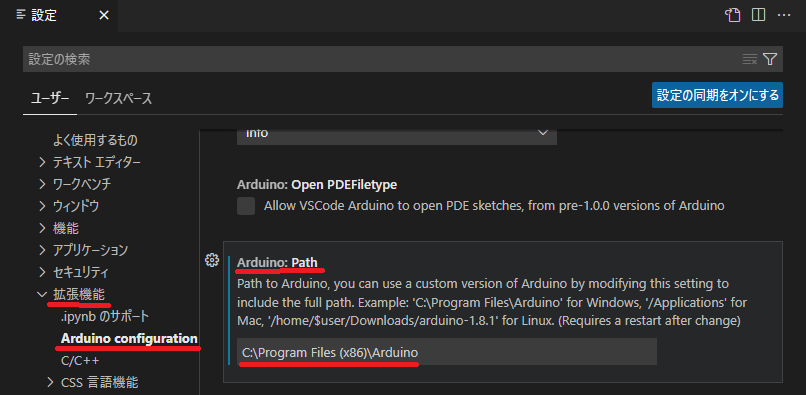
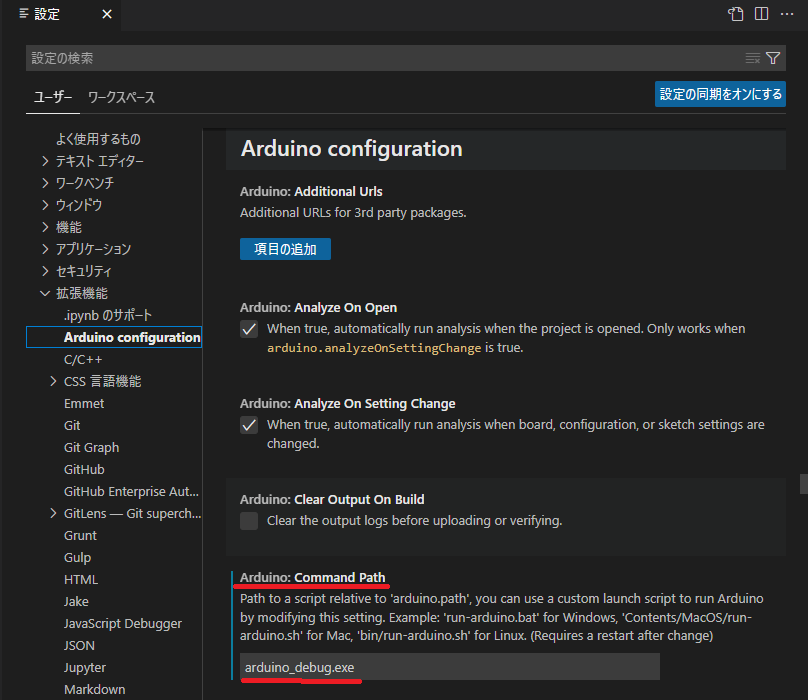
「ファイル→ユーザ設定→設定」を選択してください.そして,設定から「拡張機能→Arduino configuration」からArduino:Pathを探してください.そこに
Arduinoがインストールされているパス[C:\Program Files (x86)\Arduino]を指定します.念のためPCのエクスプローラーにそのフォルダが存在するか確認することを勧めます.さらに,Arduino:Command Path探して[arduino_debug.exe]を指定します.
-
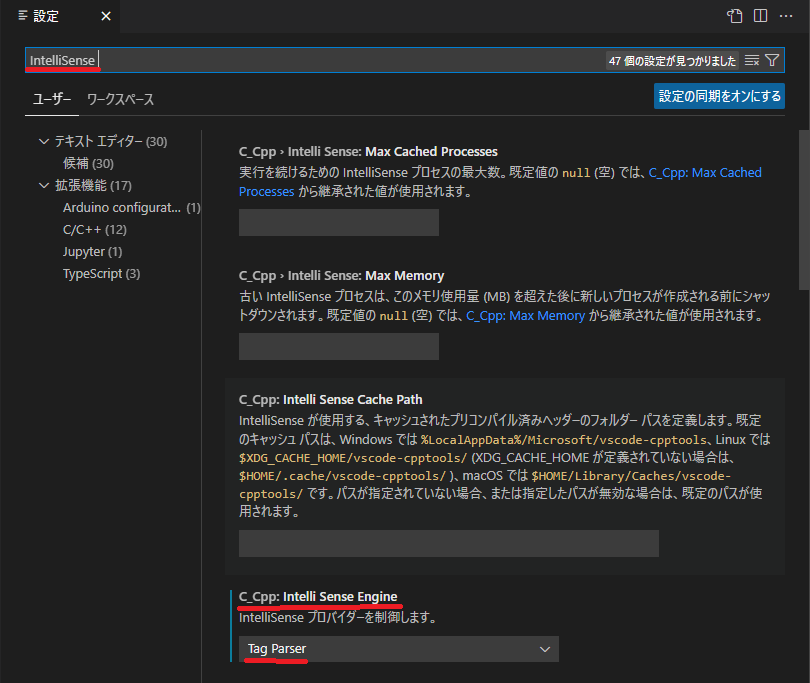
先ほどの設定の検索窓にIntelliSense engineと入力してください.そして,
IntelliSenseの設定をDefaultからTag Parserへ変更します.
-
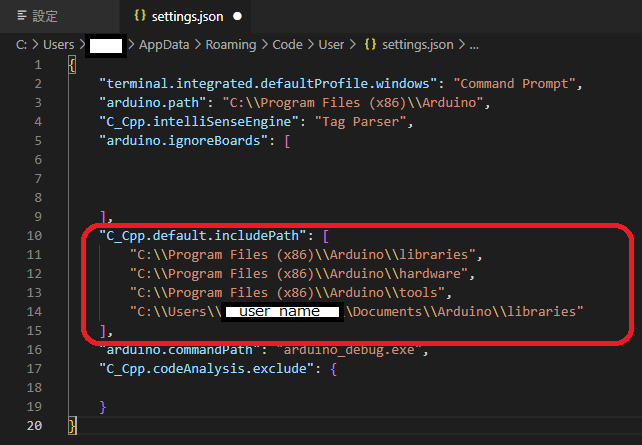
VSCodeのIntelliSenseを機能させるためには,利用するインクルードパスを指定する必要があります.中編のArduino IDEの設定で確認したンストールしたライブラリの場所と他のパスをjsonファイルに追記する必要があります.settings.jsonで編集を選択して以下のパスを追加してください.
"C_Cpp.default.includePath": [
    "C:\\Program Files (x86)\\Arduino\\libraries",
    "C:\\Program Files (x86)\\Arduino\\hardware",
    "C:\\Program Files (x86)\\Arduino\\tools",
    "C:\\Users\\user_name\\Documents\\Arduino\\libraries"
]
- ターミナルのコンパイル出力文字化け対策のために特定の
JavaScriptをコメントアウトします.そのファイルが保存されているパス[C:\Users\user_name.vscode\extensions\vsciot-vscode.vscode-arduino-0.4.12\out\src\common]に移動してutil.jsをエディタで開いてください.その中の以下のコードをコメントアウトしてください.
- codepage = chcp.toString().split(":").pop().trim();
+ // codepage = chcp.toString().split(":").pop().trim();
5. サンプルプログラムを実行する
M5Stackをお使いのPCに接続してください.
- 以下のコマンドで適当な場所にパッケージをクローンしてください.(フォルダとファイルを自作しても可)
$ git clone https://github.com/HHorimoto/hello_arduino_m5stack.git
-
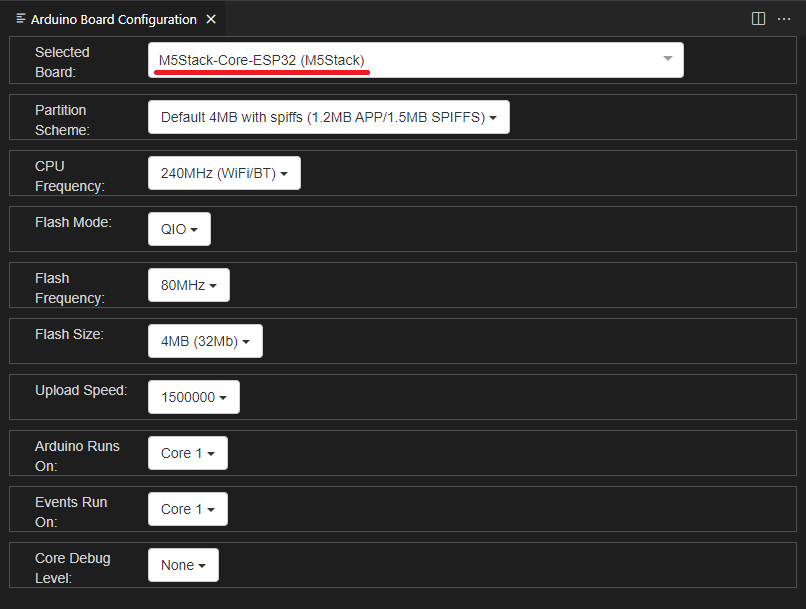
「Ctrl+Shift+P」で検索欄を開きArduino: Board Configを選択してください.そして「Selected Board:」のM5Stack-Core-ESP32 (M5Stack)を選択して少し待つと
Flash ModeやFlash Frequency等の項目が自動で設定されます.
-
同じく「Ctrl+Shift+P」で検索欄を開きArduino: Select Serial Portを選択してください.そして,前編のシリアル通信のドライバインストールのところでタスクマネージャーで確認したポート番号を選択してください.

-
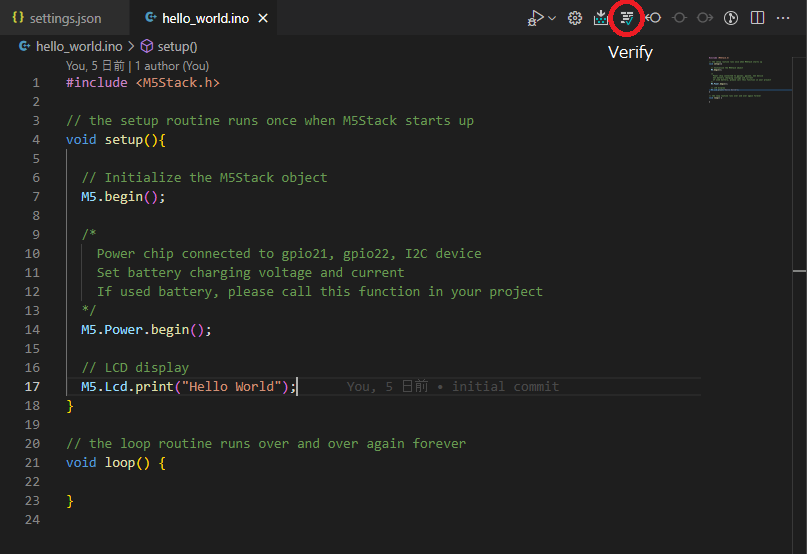
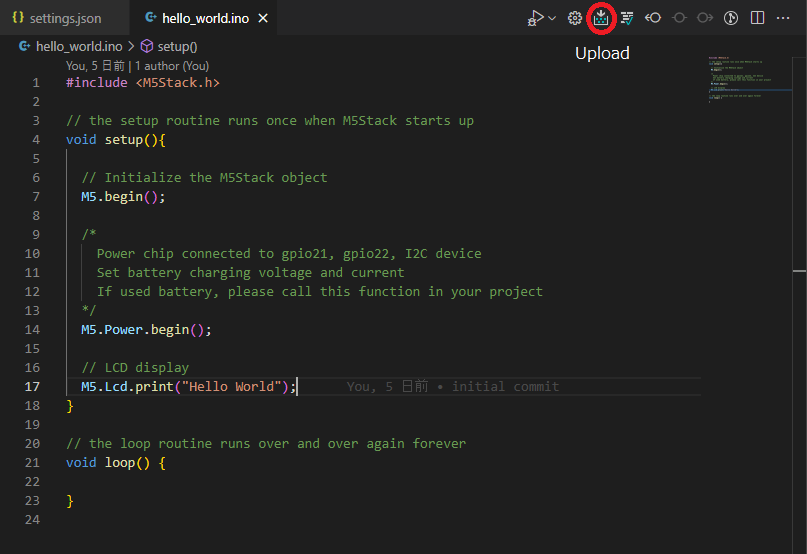
M5Stackに書き込みます.Verifyアイコンを選択するとコンパイルが始まります.また,Uploadボタンを選択すると書き込みが行われます.
-
M5Stackの画面上にHello Worldと表示されたら成功です.お疲れ様でした.
