CentOS 7にGitLab Runnerをインストールし、静的解析と単体テストを自動化する
Gitlab Runner とは?
GitLab CI / CD は、GitLab の一機能であり、GitLab のプロジェクトで管理している特定のブランチの更新やマージをトリガーとして、ビルドジョブやテストジョブを呼び出すことができます。
GitLab Runner は GitLab CI / CD 上から指示されたスクリプトを実行したり、一時的にDocker コンテナを生成してジョブを実行したりするプロセスです。
GitLab とは何ぞや?という方は、下記をご一読いただければと思います。
作成するに至った経緯
- GitLab Runner のインストール方法と設定をアウトプットとして残したかったため。
- GitLab Runner の動作確認をしたかったため。
対象読者
- CentOS 7 にGitLab Runner をインストールしたい方
- GitLab Runner を使用して、Python の静的解析( pylint )を自動化を試したい方
- GitLab Runner を使用して、Python の単体テスト( pytest )を自動化を試したい方
- ※ 今回Pythonを使用したのは、GitLab Runnerを試す敷居が低いと感じたためです。
前提条件
- GitLab はインストール済みであるとする
- Docker はインストール済みであるとする
- Webブラウザはインストール済みであるとする
- 今回は、proxy 環境下ではないものとする
GitLab をインストールされていない場合は、下記を参照してインストール願います。
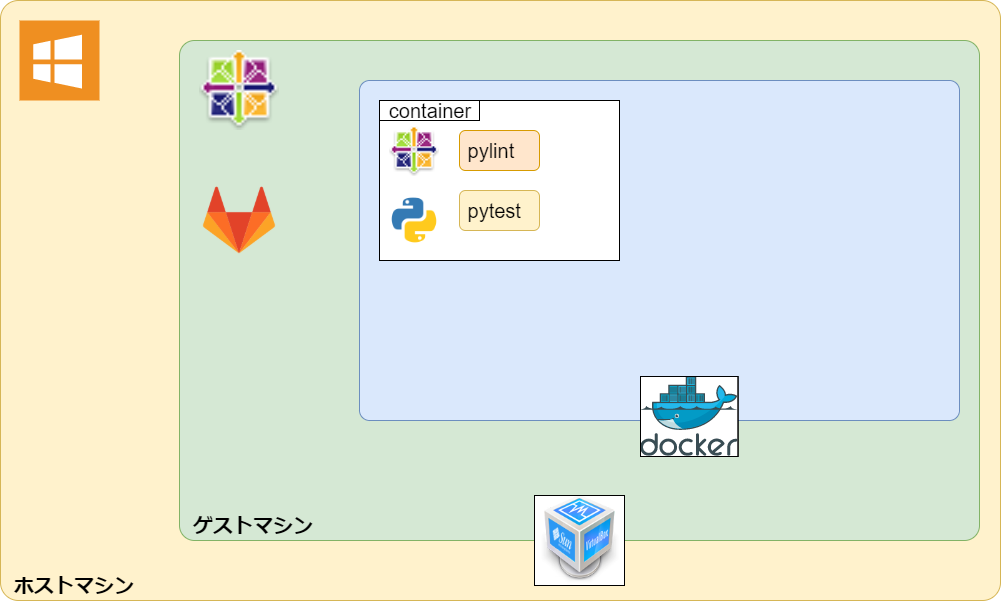
構成図のイメージ
実行環境
# cat /etc/redhat-release
CentOS Linux release 7.7.1908 (Core)
# gitlab-rake gitlab:env:info

GitLab information
Version:	12.5.2
Revision:	49482945d28
Directory:	/opt/gitlab/embedded/service/gitlab-rails
DB Adapter:	PostgreSQL
DB Version:	10.9
URL:		http://gitlab.example.com
HTTP Clone URL:	http://gitlab.example.com/some-group/some-project.git
SSH Clone URL:	git@gitlab.example.com:some-group/some-project.git
Using LDAP:	no
Using Omniauth:	yes
Omniauth Providers:
GitLab Runner の導入
1.1. GitLab Runner の動作確認用のプロジェクトの登録
GitLab Runner インストールの前に、動作確認用のサンプルプロジェクトを下記のイメージのように登録しておきます。
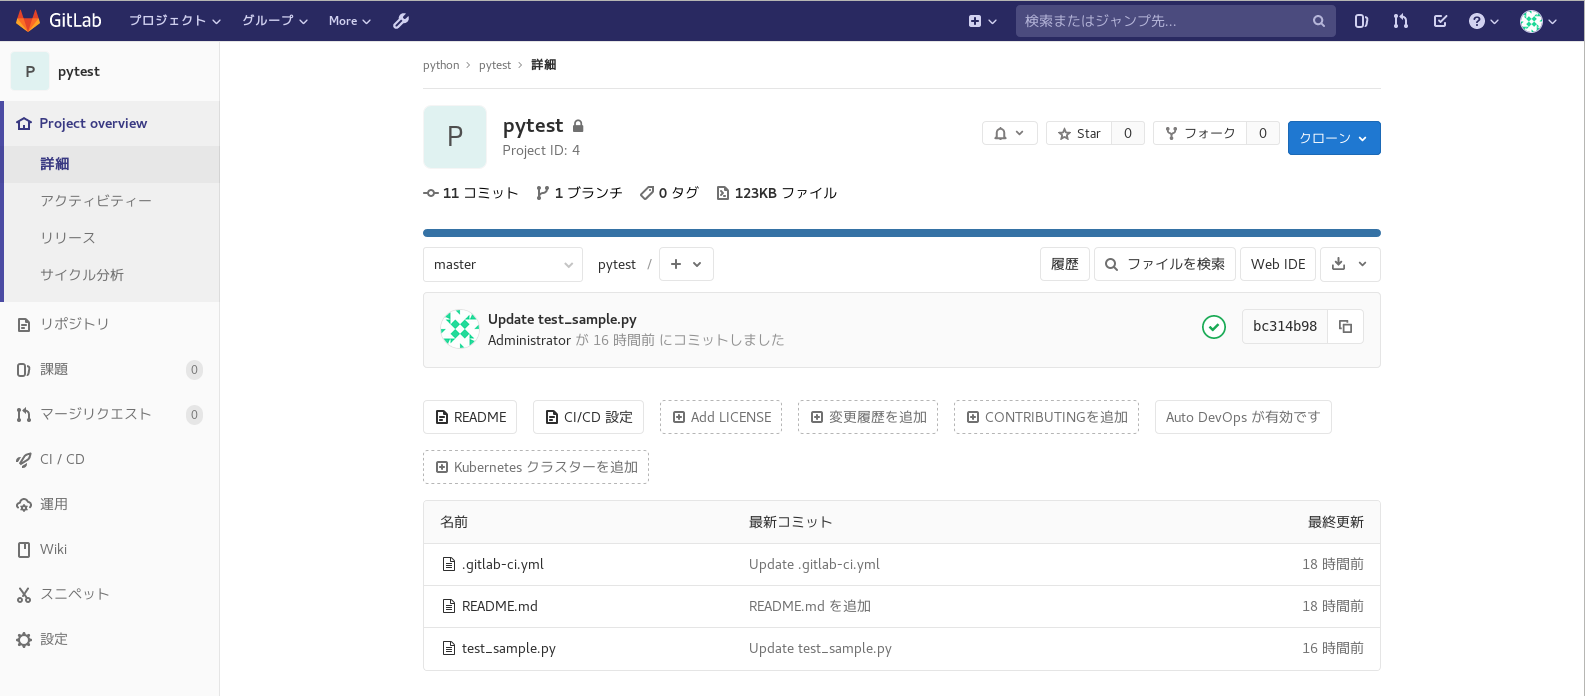
test_sample.py の中身は下記の通りです。以下のサイトから流用しております。
pylint や pytest 実行時に怒られないようにコメントをつけたり、値を変更したりしております。
.gitlab-ci.yml については、後程触れますので、ここでは解説を割愛いたします。
# content of test_sample.py
"""This is a test program."""
def func(var_x):
    """This is a test function."""
    return var_x + 1

def test_answer():
    """This is a test function."""
    assert func(3) == 4
1.2. GitLab Runner のインストール
下記のコマンドを実行し、GitLab Runner をインストールします。
# curl -L https://packages.gitlab.com/install/repositories/runner/gitlab-runner/script.rpm.sh | sudo bash
# yum install -y gitlab-runner
1.3. GitLab Runner の登録情報の確認
次にGitLab CI / CD への登録を行います。そのために登録情報が必要となります。
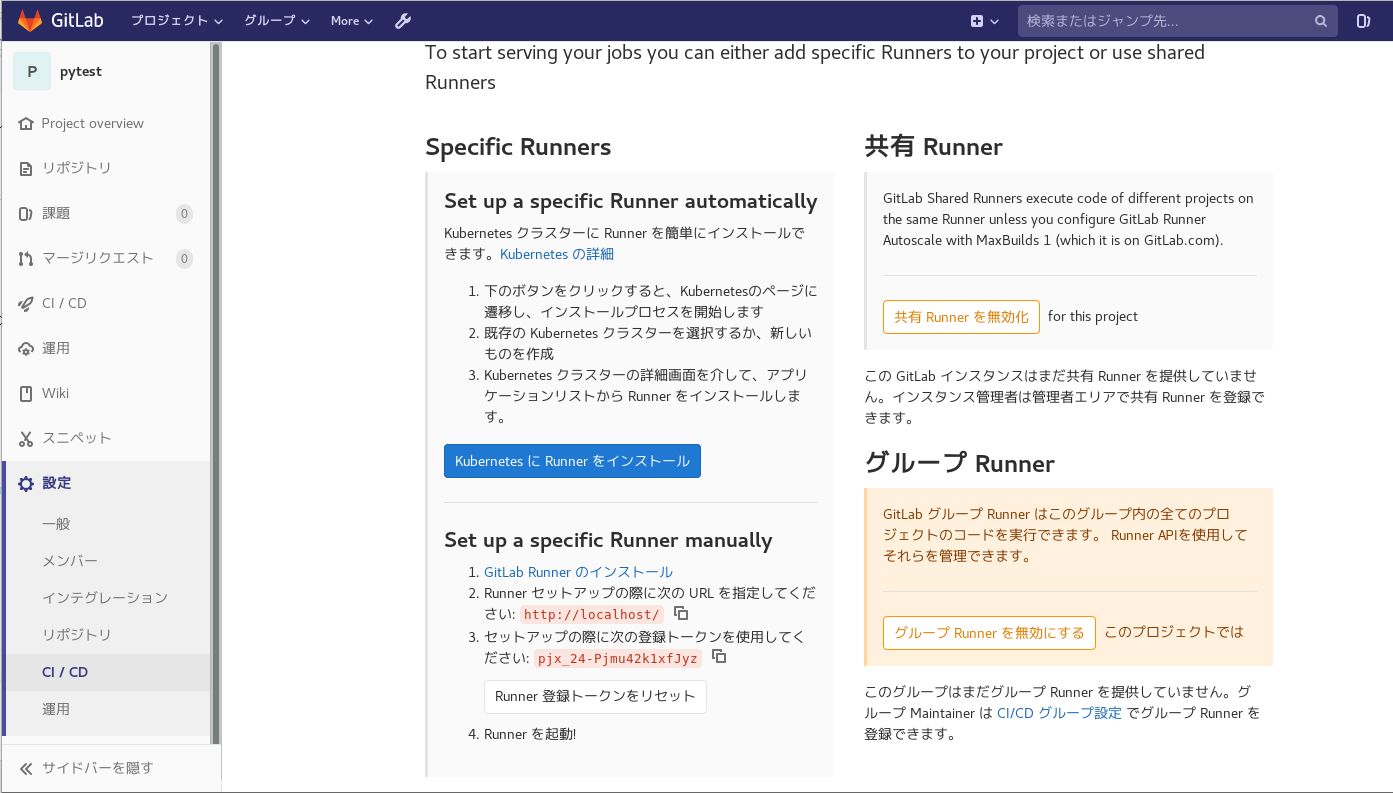
Webブラウザ上で、GitLab のプロジェクトの画面にて下記の順でクリックし、登録情報を表示します。
[$プロジェクト名]
  ┗ [設定]
    ┗ [CI/CD]
        ┗ [Runner]
            ┗ [展開]
                ┗ [Set up a specific Runner manually]
1.4. GitLab CI/CD への Runner 登録
下記のコマンドを実行し、GitLab CI/CD への Runner 登録を行います。
# gitlab-runner register
| 設定項目 | 入力内容 |
|---|---|
| Please enter the gitlab-ci coordinator URL (e.g. https://gitlab.com/): | Set up a specific Runner manually の 2. に表示されているURL を入力 |
| Please enter the gitlab-ci token for this runner: | Set up a specific Runner manually の 3. に表示されている登録トークン を入力 |
| Please enter the gitlab-ci description for this runner: | Runner に関する内容を入力 |
| Please enter the gitlab-ci tags for this runner (comma separated): | Runner に関するタグを入力(タグなしも可) |
| Please enter the executor: | Execcuter の種類を選択。今回は Docker |
| Please enter the default Docker image (e.g. ruby:2.6): | Dockerのコンテナに使用するイメージを選択。今回は centos:centos7 |
Runtime platform                                    arch=amd64 os=linux pid=5622 revision=577f813d version=12.5.0
Running in system-mode.

Please enter the gitlab-ci coordinator URL (e.g. https://gitlab.com/):
http://localhost/
Please enter the gitlab-ci token for this runner:
pjx_24-Pjmu42k1xfJyz
Please enter the gitlab-ci description for this runner:
[localhost.localdomain]: CI example
Please enter the gitlab-ci tags for this runner (comma separated):

Registering runner... succeeded                     runner=pjx_24-P
Please enter the executor: docker, docker-ssh, shell, ssh, docker-ssh+machine, custom, parallels, virtualbox, docker+machine, kubernetes:
docker
Please enter the default Docker image (e.g. ruby:2.6):
centos:centos7
Runner registered successfully. Feel free to start it, but if it's running already the config should be automatically reloaded!
これにてGitLab CI/CD への Runner 登録が完了しました。
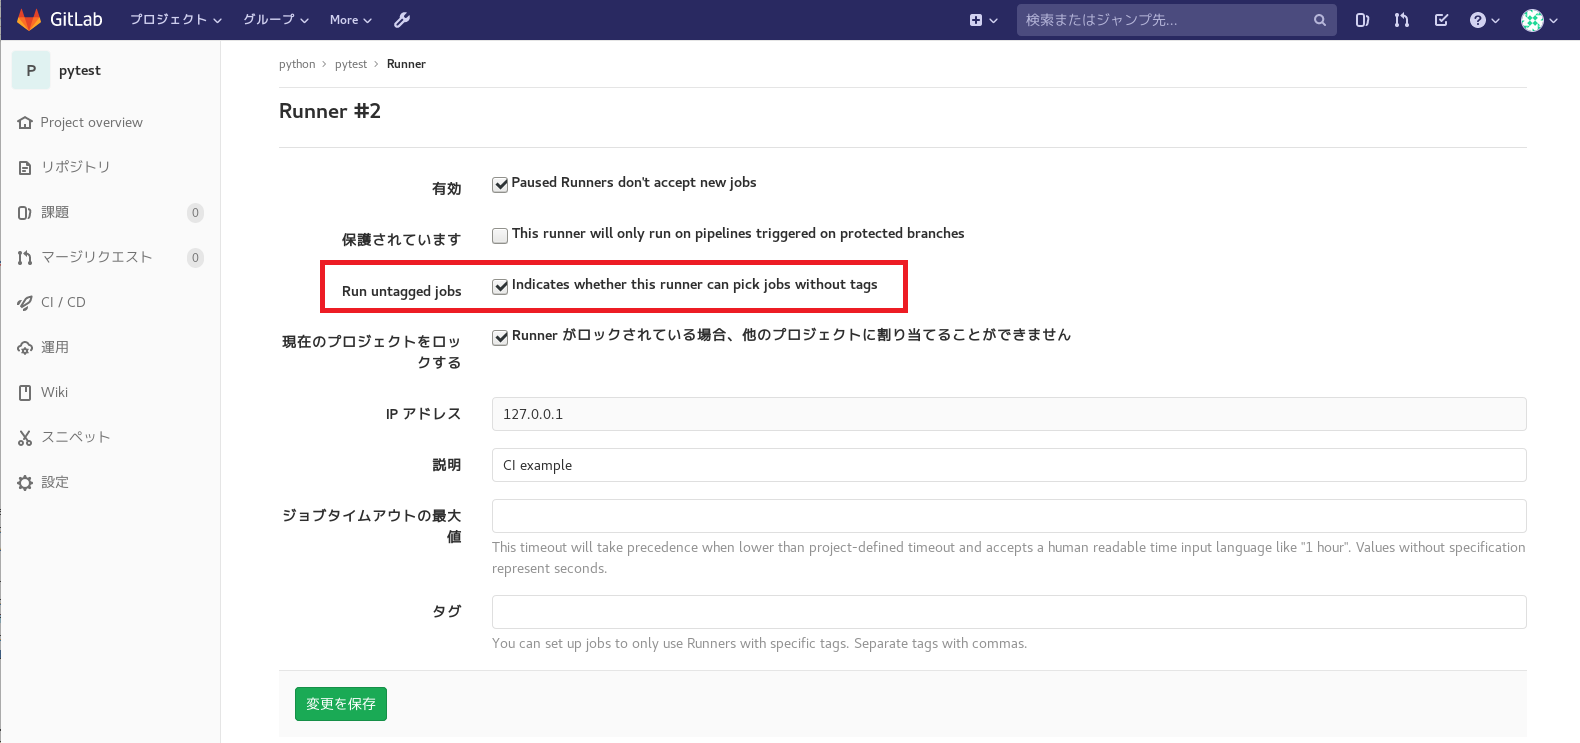
1.3. GitLab Runner の登録情報の確認で開いていたページを更新すると、このプロジェクトに紐づいたRunner が表示されます。
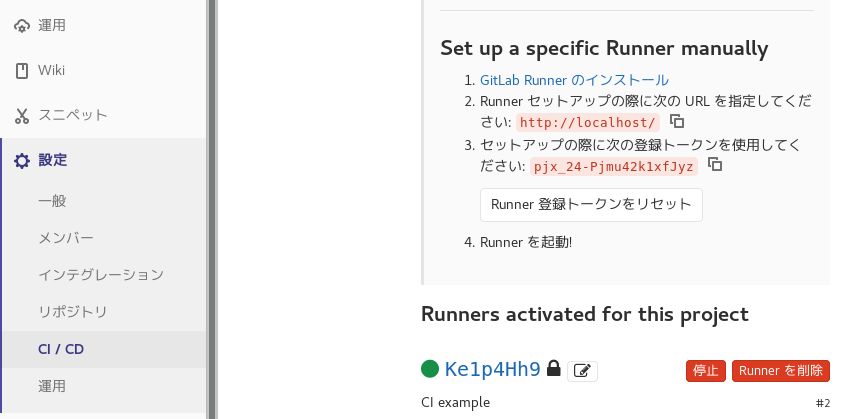
Runner 横のRun untagged jobs にチェックが入っていることを確認します。
チェックが入っていない場合は、チェックを入れて [ 変更を保存 ] をクリックしておきましょう。
1.5. config.toml の設定
GitLab のリポジトリへのアクセス時に、名前解決ができるように設定をします。
# vi /etc/gitlab-runner/config.toml
concurrent = 1
check_interval = 0

[session_server]
  session_timeout = 1800

[[runners]]
  name = "CI example"
  url = "http://localhost/"
  token = "Ke1p4Hh96ZzohrcRS3nn"
  executor = "docker"
  [runners.custom_build_dir]
  [runners.docker]
    tls_verify = false
    image = "centos:centos7"
    privileged = false
    disable_entrypoint_overwrite = false
    oom_kill_disable = false
    disable_cache = false
    volumes = ["/cache"]
    shm_size = 0
    extra_hosts = ["gitlab.example.com:10.0.2.15"]  ★ 設定箇所
  [runners.cache]
    [runners.cache.s3]
    [runners.cache.gcs]
1.6. GitLab Runnerの再起動
下記のコマンドを実行し、GitLab Runnerの再起動します。
# systemctl restart gitlab-runner
2. GitLab CI / CD Jobs の設定
2.1. ジョブの定義
GitLab CI / CD におけるジョブは、.gitlab-ci.yml という設定ファイルに定義します。これをプロジェクトリポジトリのトップディレクトリに隠しファイル形式でコミットすることによって、動的にジョブが登録される仕組みになっています。書き方につきましては、下記を参考願います。
それでは、.gitlab-ci.yml に実行するジョブを下記のように定義し、コミットします。
image: centos:centos7
stages:
  - pylint
  - pytest
pylint:
  stage: pylint
  script:
    - yum update -y
    - yum install -y https://centos7.iuscommunity.org/ius-release.rpm
    - yum install -y python36u python36u-libs python36u-pip python36u-devel
    - pip3.6 install --upgrade pip
    - pip install pylint
    - pylint test_sample.py
pytest:
  stage: pytest
  script:
    - yum update -y
    - yum install -y https://centos7.iuscommunity.org/ius-release.rpm
    - yum install -y python36u python36u-libs python36u-pip python36u-devel
    - pip3.6 install --upgrade pip
    - pip install pytest
    - pytest test_sample.py
3. GitLab Runner の動作確認
コミットが終わったら、Webブラウザ上でGitLab のプロジェクトの画面にて下記の順でクリックし、実行されているジョブのログを表示します。
[$プロジェクト名]
  ┗ [CI/CD]
      ┗ [ジョブ]
          ┗ [実行中]
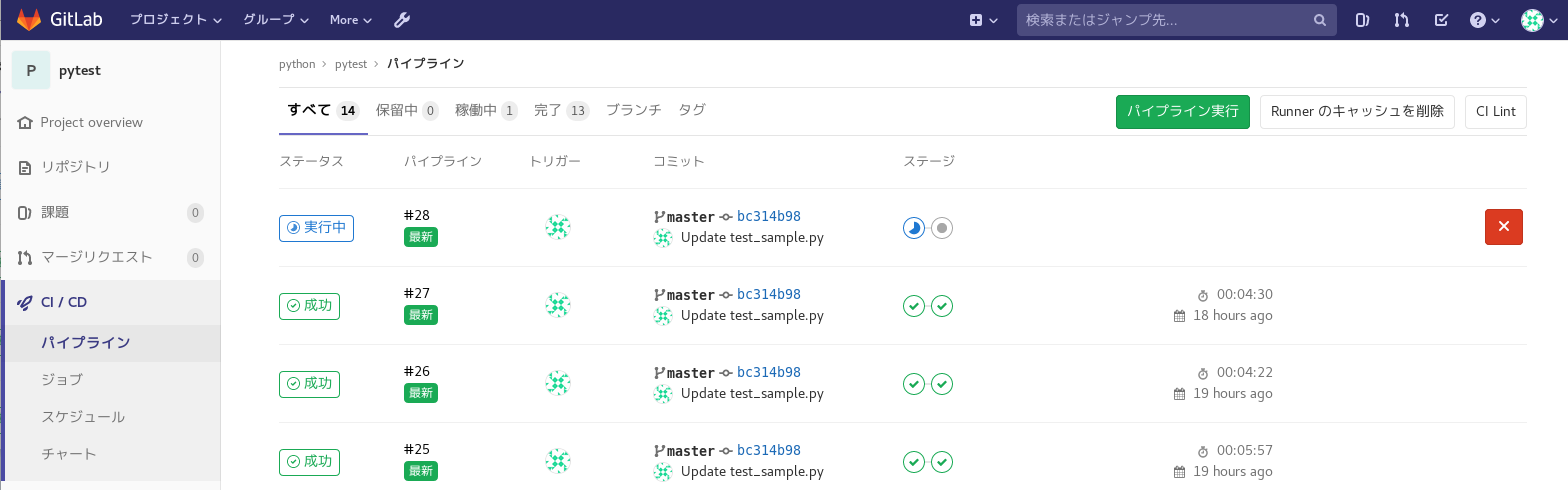
.gitlab-ci.yml に記述した内容が上から順に実行されていきます。
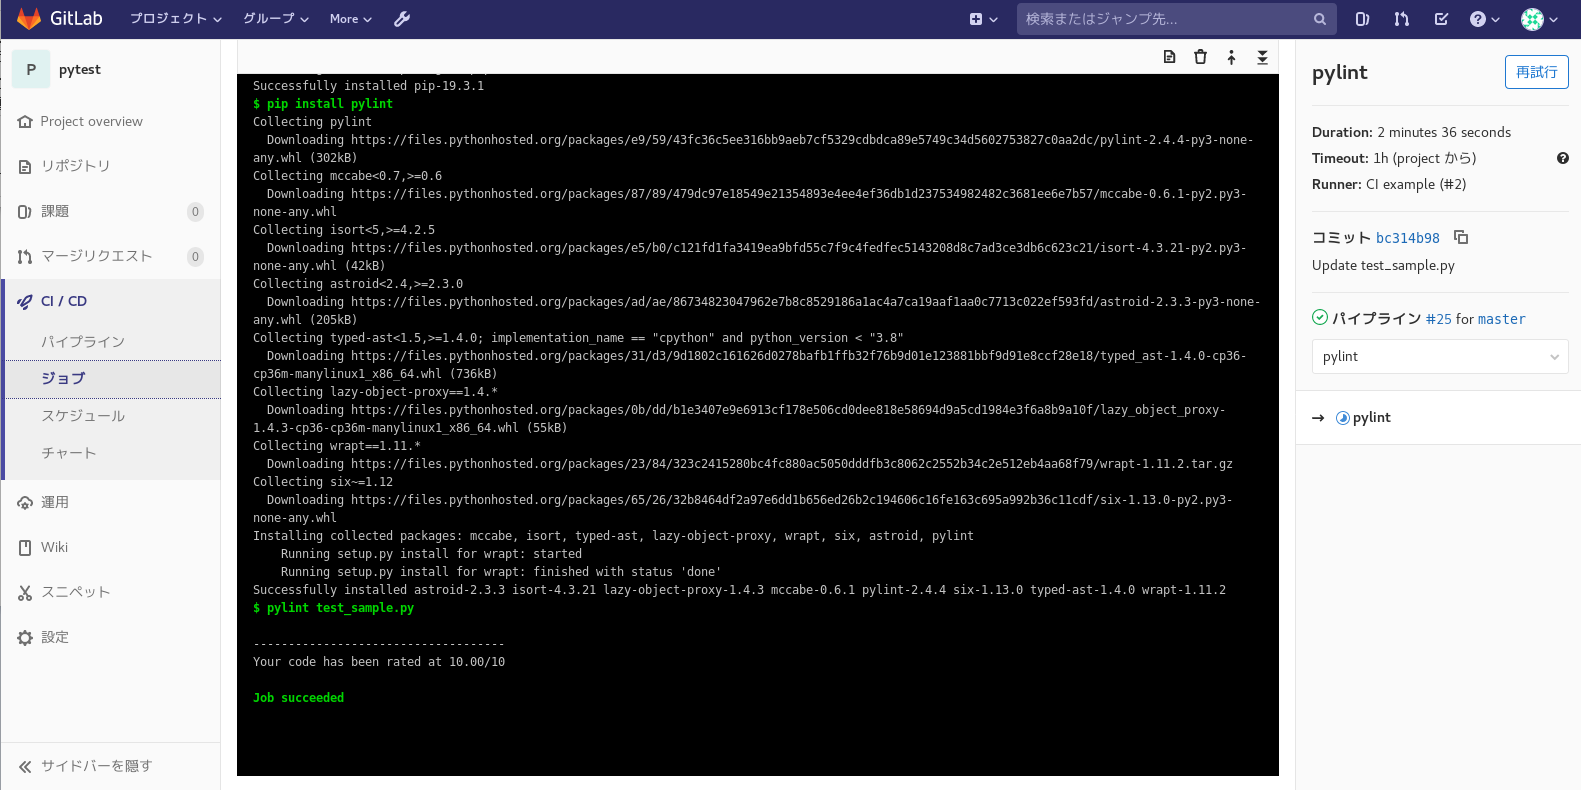
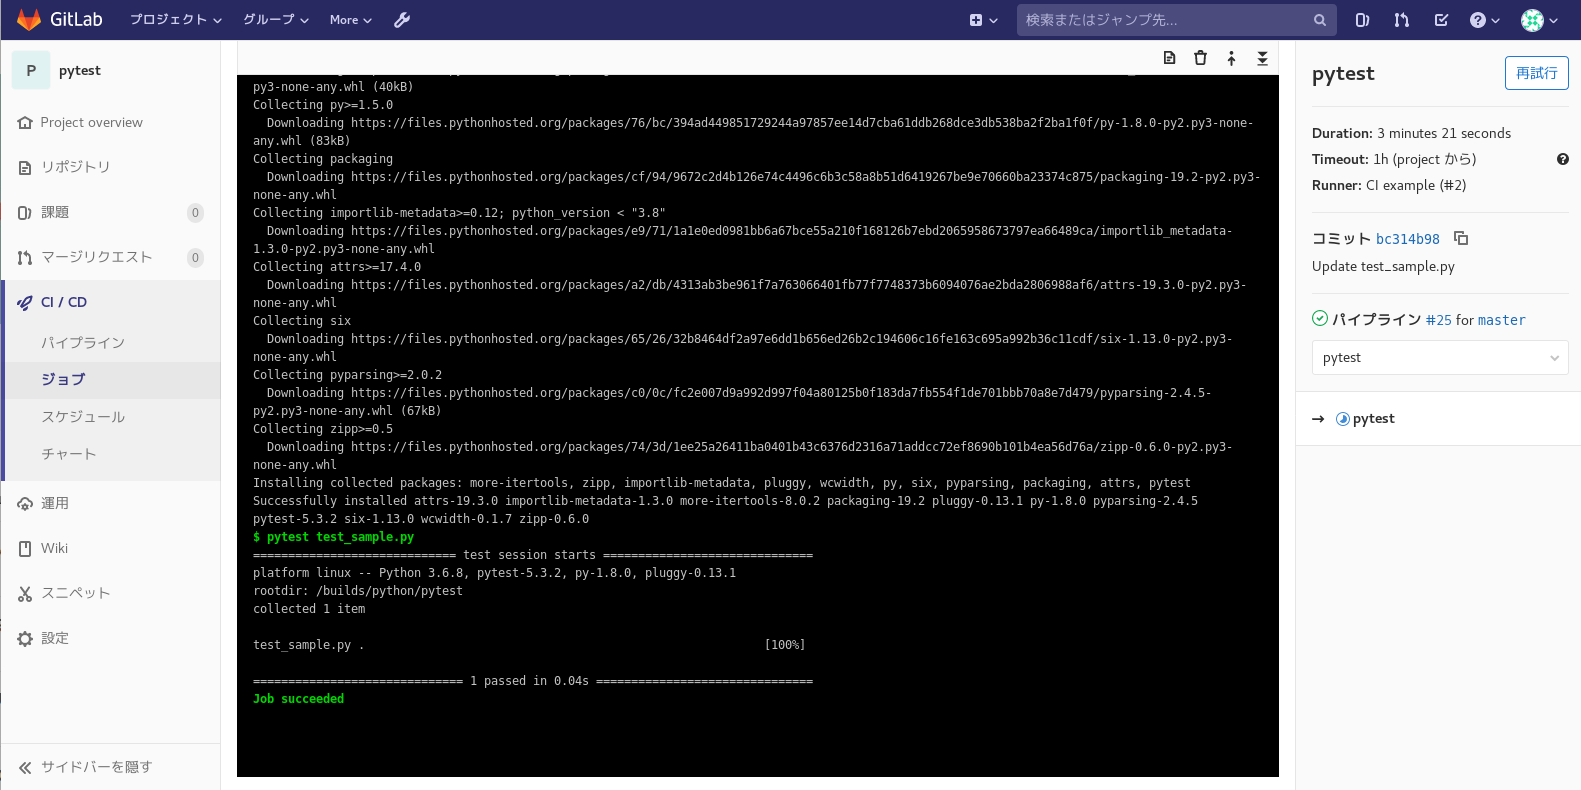
下記のように、Job succeeded と表示されたら、pylint と pytest のジョブがそれぞれ正常に完了したことになります。
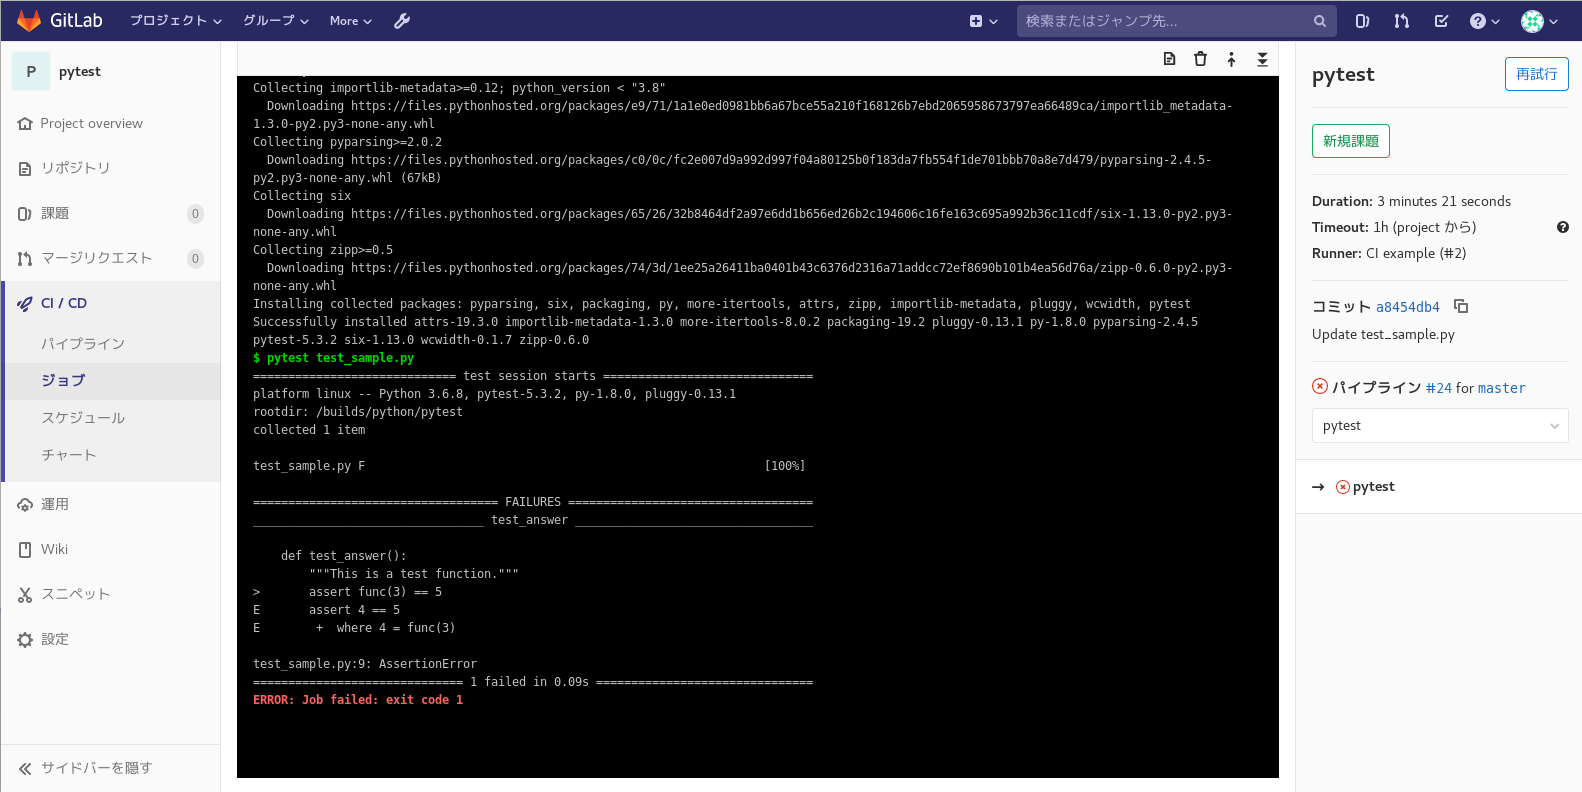
ちなみに test_sample.py を元の値のままにすると、下記のようにJob failed となり、pytest のジョブが失敗します。
この失敗したことを、[ 新規課題 ] をクリックして、課題チケットとして発行することもできるようです。
また、スケジュール設定をすることで、指定した日時にジョブを実行することも可能です。
他にも、.gitlab-ci.yml に ** artifacts** パラメータを指定することで、実行結果をファイルとして保存することも可能です。
これらの機能も活用して、楽していきたいですね。
まとめ
CentOS 7にGitLab Runnerをインストールし、静的解析と単体テストを自動化することができました。
今回は、動作確認が容易なPythonで実行してみましたが、他の言語も自動化確認してみたいです。
proxy が絡むと設定しなければいけない点が増えますので、環境設定が大変になりそうです。
Docker Hub にあるイメージでは、ジョブがこけてしまう場合は、自分でDockerfile 作成して、専用のイメージを作成しないといけないかもしれないです。個人的にJava with Maven なんかは特に大変そうです(´・ω・`)。
自動化を進めていってできた時間をまた、別のことに費やして、どんどん楽していきたいですね。
参考URL
- Install GitLab Runner using the official GitLab repositories
- GitLab CI/CD Pipeline Configuration Reference
- GitLabのgitlab-runnerを使えるようにするまでの備忘録
- 【docs.pytest.org】Installation and Getting Started
- gitlab-ciでCouldn't resolve hostがでるとき
- CentOS7でdocker buildでyumが失敗する