GitLabでGitLab Runner(GitLabでCI/CD)を使えるようにするまでの備忘録です。
簡単なCIをして動作確認もしてみたいと思います。
1. 環境
| 項目 | バージョン |
|---|---|
| OS | CentOS7.5 |
| GitLab | GitLab Community Edition 11.3.5 |
2. 準備
2-1. 必要なパッケージをインストール
GitLabのCIはDockerを使うのでDockerをインストールします。
[root@localhost ~]# yum -y install docker
もし、Dockerイメージをpullする時にProxyを通す場合は以下を参考にして設定してください。
http://docs.docker.jp/engine/articles/systemd.html#http-proxy
2-2. Docker起動
Dockerを起動します。
[root@localhost ~]# systemctl start docker
[root@localhost ~]# systemctl enable docker
2-3. GitLab Runnerをインストール
リポジトリの登録をします。
[root@localhost ~]# curl -L https://packages.gitlab.com/install/repositories/runner/gitlab-runner/script.rpm.sh | bash
https://docs.gitlab.com/runner/install/linux-repository.html
GitLab Runnerをインストールします。
[root@localhost ~]# yum -y install gitlab-runner
GitLab Runnerの設定をします。
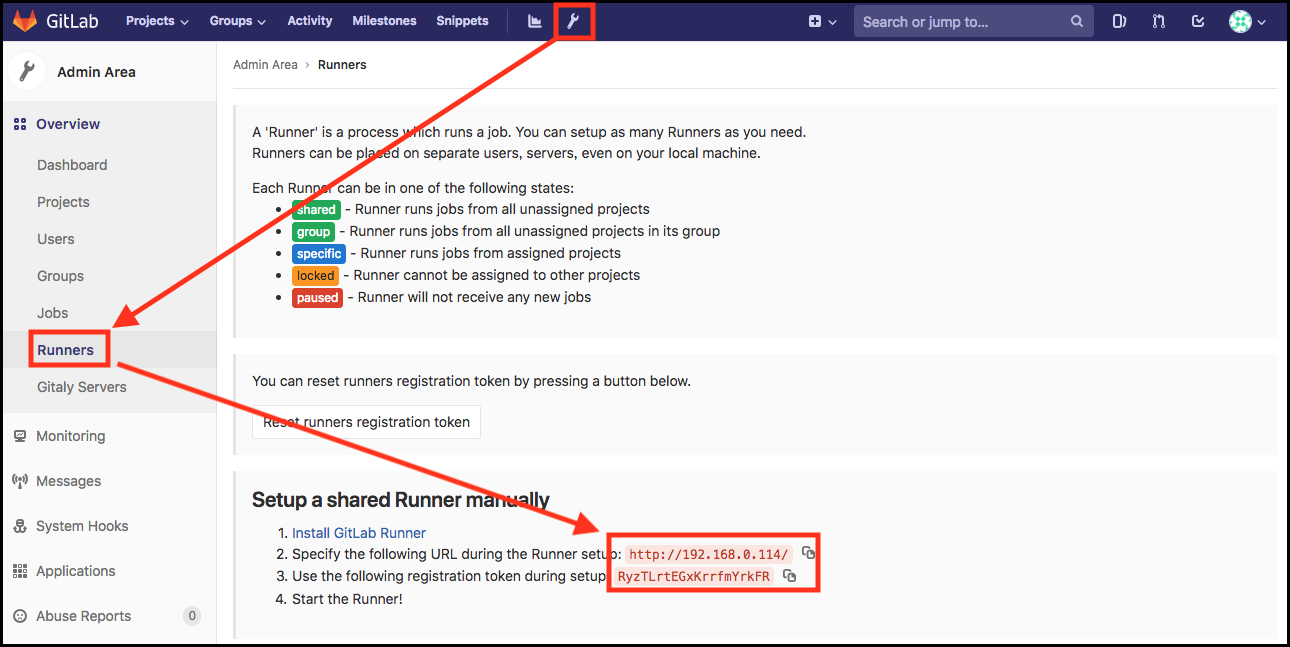
設定するURLとTokenをGitLabの管理画面から確認します。
プロジェクト毎にRunnerを設定する事もできますが、ここでは全プロジェクトでシェアできるようにします。
確認するには Admin area をクリックして Runners をクリックします。
そのページに表示されている赤枠部分が必要なパラメーターになります。
[root@localhost ~]# gitlab-runner register
Running in system-mode.

Please enter the gitlab-ci coordinator URL (e.g. https://gitlab.com/):
http://192.168.0.114/ <- 管理画面で表示されたアドレスを入力します。
Please enter the gitlab-ci token for this runner:
RyzTLrtEGxKrrfmYrkFR <- 管理画面で表示されたTokenを入力します。
Please enter the gitlab-ci description for this runner:
[localhost.localdomain]: CI example <- CIの説明を入力します。
Please enter the gitlab-ci tags for this runner (comma separated):
 <- タグを設定します。必須ではありません。
Registering runner... succeeded                     runner=RyzTLrtE
Please enter the executor: docker, shell, virtualbox, kubernetes, docker-ssh, parallels, ssh, docker+machine, docker-ssh+machine:
docker
Please enter the default Docker image (e.g. ruby:2.1):
centos:centos7 Runner registered successfully. Feel free to start it, but if it's running already the config should be automatically reloaded!
GitLab Runnerを起動します。
[root@localhost ~]# systemctl start gitlab-runner
[root@localhost ~]# systemctl enable gitlab-runner
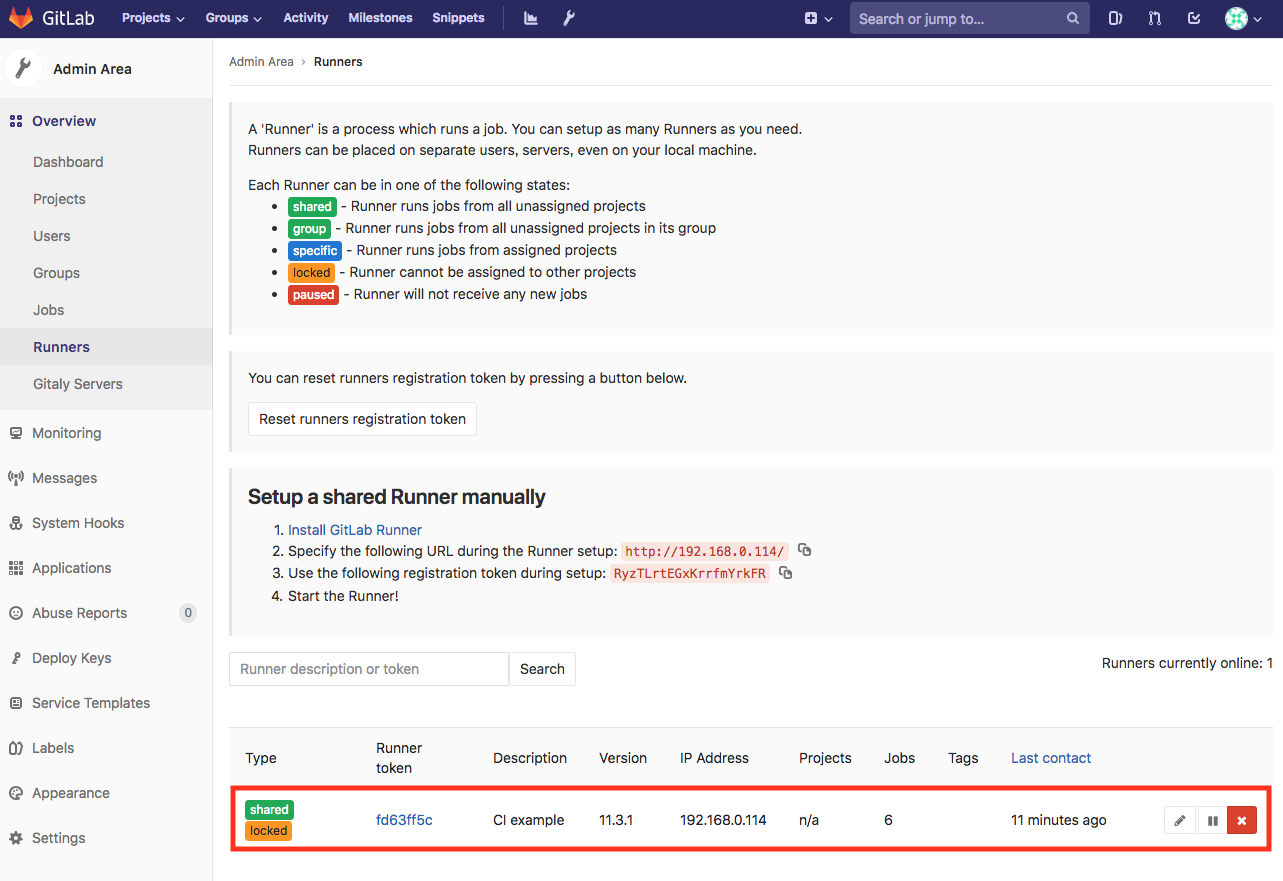
きちんと登録された確認します。
3. 動作確認
ここでは、まず簡単な動作確認をしてみます。
単純に ls コマンドだけ実行するCIファイルを作って成功するか失敗するかを確認してみます。
.gitlab-ci.yml の詳細は以下のページを参照ください。
https://docs.gitlab.com/ce/ci/yaml/README.html
image: centos:centos7
stages:
    - test
example:
    stage: test
    script:
        - ls
ここでは example リポジトリの master ブランチにpushして実行してみます。
pushしたディレクトリ構造です。
[root@localhost ~]# tree -a example/ -L 1
example/
├── .git
└── .gitlab-ci.yml

ls が問題無く完了したことがわかります。
標準だとpushしたりマージしたりする度にCIが実行されてしまいますが only を使うことでCIを実行するブランチが制御できます。
以下の場合は devel ブランチにpushしたらCIが実行されますが master へマージリクエストを出してマージされてもCIは実行されません。
image: centos:centos7
stages:
    - test
example:
    stage: test
    script:
        - ls
    only:
        - devel
次は以下のようなパイプラインを実行してみます。
スクリプトの文法をチェックして問題がなければ実行してみます。
image: centos:centos7
stages:
    - syntax_check
    - run_script
example_syntax_check:
    stage: syntax_check
    script:
        - curl https://bootstrap.pypa.io/get-pip.py | python
        - pip install flake8
        - flake8 .
    only:
        - master

example_run_script:
    stage: run_script
    script:
        - python hello.py
    only:
        - master
リポジトリ構造は以下のようになっています。
[root@localhost ~]# tree example/ -L 1 -a
example/
├── .git
├── .gitlab-ci.yml
└── hello.py
hello.py の中身は以下のようになっています。
# !/usr/bin/python
def main():
    print("Hello World!!")


if __name__ == "__main__":
    main()
実行してみます。

文法チェックで問題がない場合は次のスクリプト実行まで通っていることが確認できました。
4. 最後に
GitLabのGitLab Runnerのインストールおよび使い方について簡単にまとめました :)
テストの自動化ってやっぱり便利ですね :)