Cloud Spanner エミュレータ
https://cloud.google.com/spanner/docs/emulator?hl=ja
これをコンテナ化して、別のコンテナからアクセスできることを試します。
環境
Windows 10 Pro
Docker for Windows(Version:2.2.0.5、Engine:19.03.08)
Kubernetesを有効にする(v1.15.5)
Windowsのコマンドプロンプトで設定切替しておく
kubectl config use-context docker-for-desktop
私はコンテナレジストリにGCPのContainer Registryを使いました。
DockerのRegistryでもできると思います。
https://docs.docker.com/registry/
Spannerコンテナを作る
まずファイルを準備
gcloud-spanner-emulator/
 ┣ config/
 ┃ ┣ startup.sh
 ┃ ┣ spanner_instance.sh
 ┃ ┗ test.sql
 ┣ spanner-cli
 ┗ Dockerfile
startup.sh
コンテナ起動時に実行させるシェルです。
# !/bin/sh

gcloud components install beta --quiet
gcloud components update --quiet
gcloud beta emulators spanner start
spanner_instance.sh
コンテナ起動後に実行させるシェルです。
Spannerインスタンスの作成とテスト用のDB・テーブル作成を行います。
インスタンス名:test-instance
DB名:test-database
# !/bin/sh

sleep 60
gcloud config configurations create emulator
gcloud config set auth/disable_credentials true
gcloud config set project [your project name]
gcloud config set api_endpoint_overrides/spanner http://localhost:9020/
gcloud spanner instances create test-instance --config=emulator-config --description="Test Instance" --nodes=1
gcloud spanner databases create test-database --instance=test-instance
spanner-cli -p [your project name] -i test-instance -d test-database -f /config/test.sql
spannerが使える状態になるのを待つよい方法が思いつかなかったので
とりあえず sleep 60 で待つようにしました。
test.sql
テスト用のSQLです。テーブル作成とデータ挿入を試します。
ここにアプリケーション開発に必要なテーブルとデータを作成するためのSQL一式書いておけば
コンテナ起動するたびに毎回手動でデータ登録しないでよくなる…はず。
CREATE TABLE test (id INT64 NOT NULL,text STRING(64)) PRIMARY KEY (id);
INSERT INTO test(id, text)VALUES(1, 'text') ;
spanner-cli
ここから拾ってくる。
https://github.com/cloudspannerecosystem/spanner-cli
DBの接続して対話式で操作ができます。
アプリケーションからの接続には必要ありませんが、テストする際に便利です。
Dockerfile
FROM google/cloud-sdk:slim

ENV DEBIAN_FRONTEND noninteractive
ENV DEBCONF_NOWARNINGS yes

RUN apt-get update \
    && apt-get install -y google-cloud-sdk google-cloud-sdk-spanner-emulator

COPY spanner-cli /usr/local/bin/spanner-cli
ADD config /config
RUN chmod +x /usr/local/bin/spanner-cli \
    && chmod +x /config/startup.sh \
    && chmod +x /config/spanner_instance.sh

CMD ["/config/startup.sh"]
Container Registryに登録
Dockerfileがあるディレクトリで以下のコマンドを実行する。
# GCP
gcloud builds submit --tag=gcr.io/[your project name]/gcloud-spanner-emulator .

# Docker Registry
docker image tag gcloud-spanner-emulator:latest localhost:5000/gcloud-spanner-emulator
docker push localhost:5000/gcloud-spanner-emulator
接続テスト用のGoコンテナを作る
Dockerfile
FROM google/cloud-sdk:slim

ENV DEBIAN_FRONTEND noninteractive
ENV DEBCONF_NOWARNINGS yes
ENV GOPATH=/go

RUN apt-get update \
    && apt-get install -y --no-install-recommends gcc g++ make \
    && apt-get install -y vim golang google-cloud-sdk \
    && apt-get purge -y --auto-remove gcc g++ make
Container Registryに登録
Dockerfileがあるディレクトリで以下のコマンドを実行する。
# GCP
gcloud builds submit --tag=gcr.io/[your project name]/gke-golang .

# Docker Registry
docker image tag golang:latest localhost:5000/gke-golang
docker push localhost:5000/gke-golang
kubernetesでコンテナを起動する
ファイル一式作成できたらkubernetesでコンテナを起動します。
KubernetesのPodには複数のコンテナを入れることができるので、1つPodにGoとSpannerのコンテナをいれてしまいます。
nginxとかmysqlとかnodeとか必要なものを全部突っ込むことも可能です。
docker-compose的な使い方?になるのかな。
Spannerコンテナには localhost:9010 で接続できます。
image、hostPath、default-tokenは個人の環境に合わせて書き換えてください。
apiVersion: v1
kind: Pod
metadata:
  name: spanner-test
spec:
  imagePullSecrets:
    - name: "gcp-gcrio"
  volumes:
    - name: spanner-config
      hostPath:
        path: /host_mnt/d/docker/gcloud-spanner-emulator/config/
        type: Directory
    - name: default-token-qxc8g
      secret:
        secretName: default-token-qxc8g
        defaultMode: 420
  containers:
    - name: golang
      image: 'gcr.io/[your project name]/gke-golang:latest'
      ports:
        - name: golang
          containerPort: 8081
          protocol: TCP
      env:
        - name: SPANNER_EMULATOR_HOST
          value: 'localhost:9010'
      imagePullPolicy: Always
      securityContext:
        capabilities:
          add:
            - SYS_PTRACE
      stdin: true
      tty: true
    - name: spanner
      image: 'gcr.io/[your project name]/gcloud-spanner-emulator:latest'
      ports:
        - name: spanner
          containerPort: 9010
          protocol: TCP
        - name: spanner-rest
          containerPort: 9020
          protocol: TCP
      env:
        - name: SPANNER_EMULATOR_HOST
          value: 'localhost:9010'
      volumeMounts:
        - name: spanner-config
          mountPath: /etc/spanner/
      lifecycle:
        postStart:
          exec:
            command:
              - /bin/sh
              - '-c'
              - /etc/spanner/spanner_instance.sh
      imagePullPolicy: Always
      securityContext:
        capabilities:
          add:
            - SYS_PTRACE
      stdin: true
      tty: true
kubernetesダッシュボード
インストール&起動
kubectl apply -f https://raw.githubusercontent.com/kubernetes/dashboard/v2.0.1/aio/deploy/recommended.yaml
kubectl proxy
ブラウザで以下のURLにアクセス
http://localhost:8001/api/v1/namespaces/kubernetes-dashboard/services/https:kubernetes-dashboard:/proxy/#/login
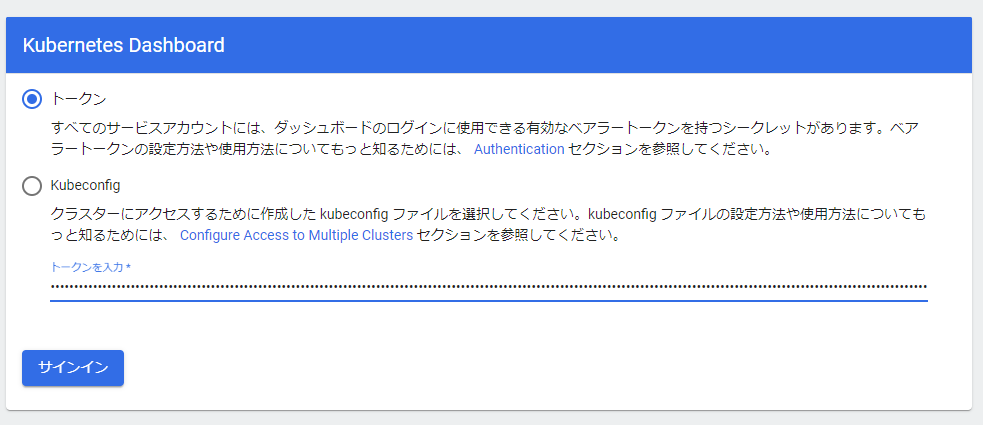
トークンが必要なのでsecretを調べて取得
# kubernetes-dashboard-token-xxxxxという名前が存在するので調べる
kubectl -n kubernetes-dashboard get secret

# 調べた名前に差し替えて実行
kubectl -n kubernetes-dashboard describe secret kubernetes-dashboard-token-xxxxx
token: に表示される文字列をコピーしてkubernetesダッシュボードにログインする

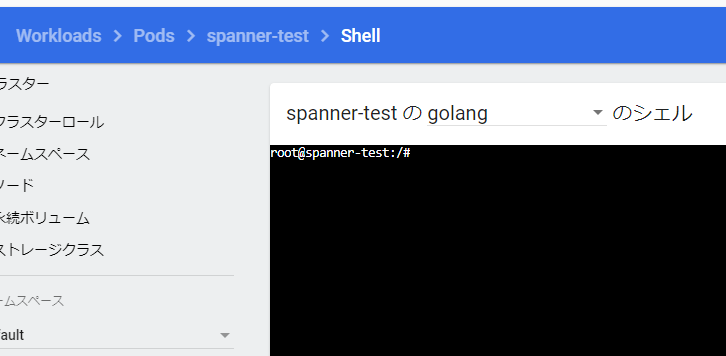
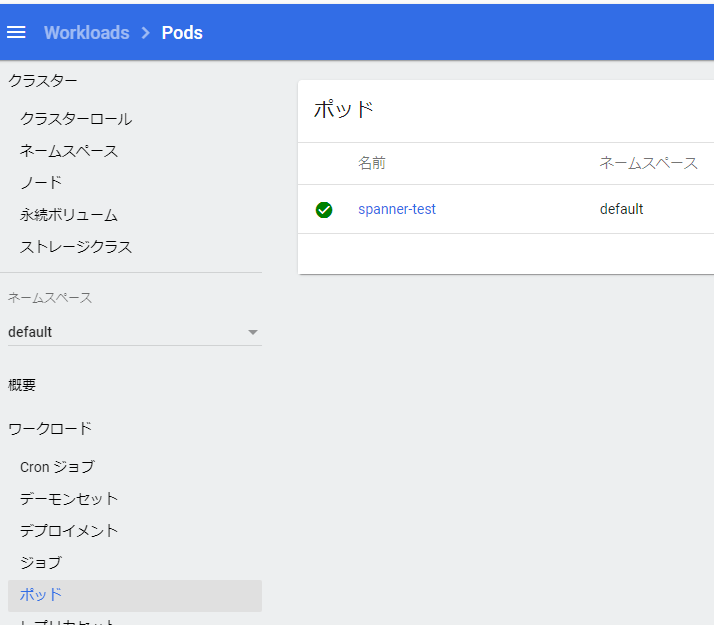
シェルが開くのでここで作業する。
プルダウンで他コンテナのシェルに切り替えできます。

公式ドキュメントのサンプルでDBとテーブル作成をテスト
https://cloud.google.com/spanner/docs/getting-started/go/
$ export GOPATH=/go

$ go get -u github.com/GoogleCloudPlatform/golang-samples/spanner/...

$ export GCLOUD_PROJECT=[MY_PROJECT_ID]

$ cd $GOPATH/src/github.com/GoogleCloudPlatform/golang-samples/spanner/spanner_snippets

$ go run snippet.go createdatabase projects/$GCLOUD_PROJECT/instances/test-instance/databases/example-db
Created database [projects/[your project name]/instances/test-instance/databases/example-db]

$ go run snippet.go dmlwrite projects/$GCLOUD_PROJECT/instances/test-instance/databases/example-db
4 record(s) inserted.
プルダウンでspannerコンテナに切り替えてデータを確認する。
$ spanner-cli -p $GCLOUD_PROJECT -i test-instance -d example-db
Connected.
spanner> show tables;
+-----------------------+
| Tables_in_example-db2 |
+-----------------------+
| Singers               |
| Albums                |
+-----------------------+
2 rows in set (0.00 sec)

spanner> select * From Singers;
+----------+------------+----------+------------+
| SingerId | FirstName  | LastName | SingerInfo |
+----------+------------+----------+------------+
| 13       | Russell    | Morales  | NULL       |
| 15       | Dylan      | Shaw     | NULL       |
| 12       | Melissa    | Garcia   | NULL       |
| 14       | Jacqueline | Long     | NULL       |
+----------+------------+----------+------------+
4 rows in set (214.381us)
goとspannerを別々のコンテナにした状態で使えることが確認できました。
まだベータ版ですし制約事項もあるので開発環境にするのは難しいかもしれませんね。

