先日作ったAMPのページを、PWA(Progressive Web Apps)にも対応させてみたいと思います。
1. PWAとは?
PWAとは特定の技術を指すものではなく、より良いユーザー体験を実現するためのベストプラクティス集のようなものと言われています。
- [はじめてのプログレッシブ ウェブアプリ]
(https://developers.google.com/web/fundamentals/codelabs/your-first-pwapp/?hl=ja) - 「改めまして、Progressive Web Appsと申します」── Web UXの新たな基準を考える
では、どのような体験を実現することが出来るのでしょうか?
実装できる主な機能はこちら。
- オフライン対応
- ホーム画面へのアイコン追加
- プッシュ通知
- 自動ログイン
どれも使い方によってはメリデメがありますが、まずは上記の中から**ホーム画面へのアイコン追加(Add to Homescreen、A2HS)**を、AMPのページに実装してみようと思います。
2. ServiceWorkerのインストール
ServiceWorkerをインストールするのには、2つのソースコードの記述が必要です。
※どちらもAMPページ用の記述ためご注意ください
<script async custom-element="amp-install-serviceworker"
  src="https://cdn.ampproject.org/v0/amp-install-serviceworker-0.1.js">
</script>
<amp-install-serviceworker
  src="/serviceworker.js"
  layout="nodisplay">
</amp-install-serviceworker>
上記で読み込ませているsevicewoker.js内の記述です。
importScripts('https://storage.googleapis.com/workbox-cdn/releases/3.3.1/workbox-sw.js');

self.addEventListener('fetch', function(event) {});
3. manifest.jsonの作成
ボタン設置用の設定ファイルを作成します。
ServiceWorkerにおける各種設定ファイルを作成するのには、Workboxを利用するのが便利と聞きましたが、manifest.jsonの設定だけであれば、下記をオススメします。
[Web App Manifest Generator](https://app-
manifest.firebaseapp.com)

必要項目を入力後、ホームボタン用の画像をアップロードして[GENERATE ZIP]ボタンを押せば、jsonファイルとサイズ展開されたアイコン画像が自動で生成されます。
※manifest.jsonの中身はこんな感じです
{
  "name": "ホームボタンの名前",
  "theme_color": "#2196f3",
  "background_color": "#2196f3",
  "display": "standalone",
  "Scope": "/",
  "start_url": "https://ホーム画面から遷移するURL",
  "icons": [
    {
      "src": "images/icons/icon-72x72.png",
      "sizes": "72x72",
      "type": "image/png"
    },
    {
      "src": "images/icons/icon-96x96.png",
      "sizes": "96x96",
      "type": "image/png"
    },
    {
      "src": "images/icons/icon-128x128.png",
      "sizes": "128x128",
      "type": "image/png"
    },
    {
      "src": "images/icons/icon-144x144.png",
      "sizes": "144x144",
      "type": "image/png"
    },
    {
      "src": "images/icons/icon-152x152.png",
      "sizes": "152x152",
      "type": "image/png"
    },
    {
      "src": "images/icons/icon-192x192.png",
      "sizes": "192x192",
      "type": "image/png"
    },
    {
      "src": "images/icons/icon-384x384.png",
      "sizes": "384x384",
      "type": "image/png"
    },
    {
      "src": "images/icons/icon-512x512.png",
      "sizes": "512x512",
      "type": "image/png"
    }
  ],
  "splash_pages": null
}
4. manifest.jsonを読み込ませる
上記で作成したjsonファイルをHTML内で読み込ませます。
<link rel="manifest" href="/manifest.json">
5. 動作テスト
それでは、ChromeのDevToolsを使って動作確認を行います。
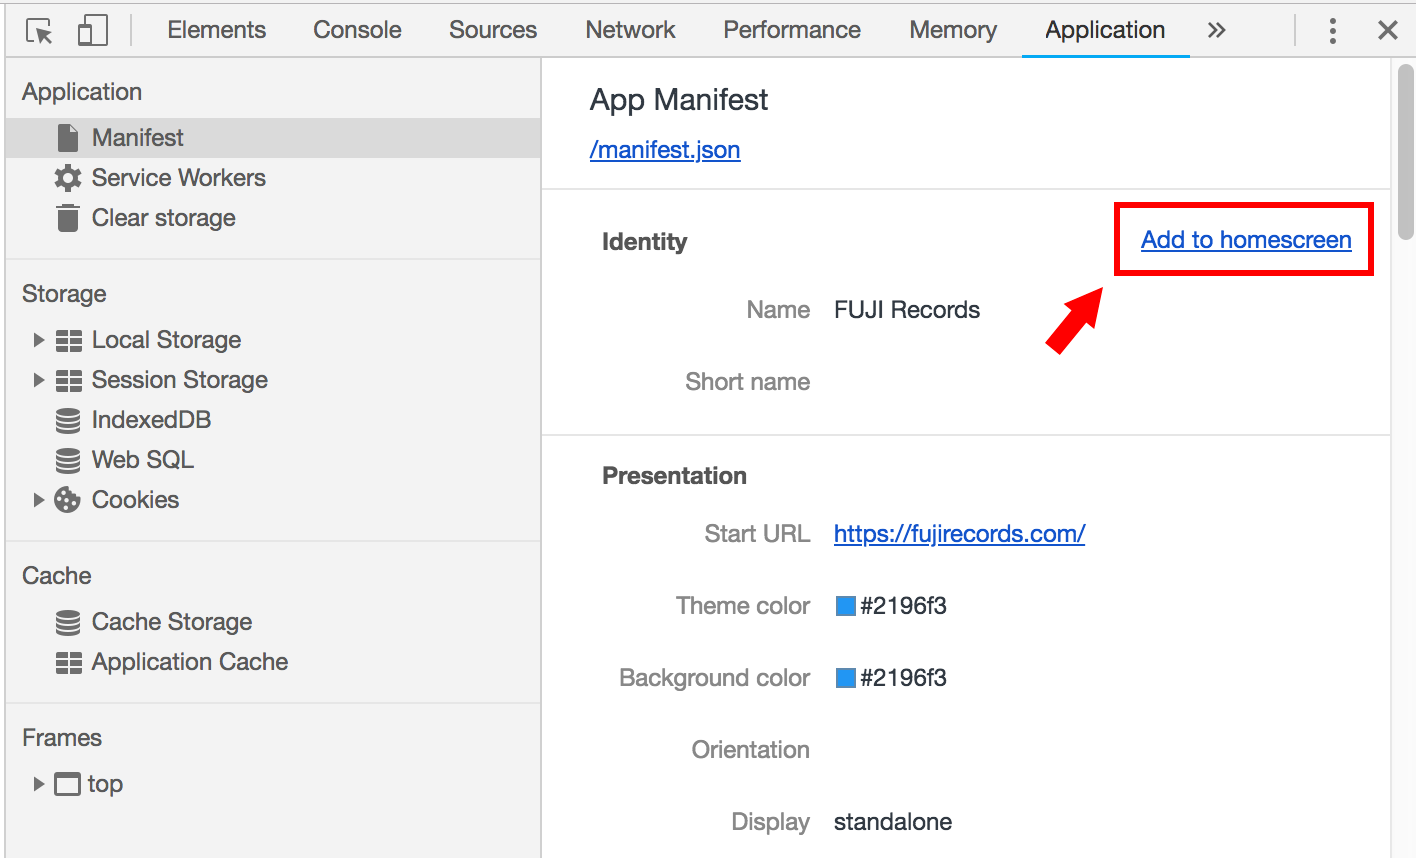
DevToolsの[Application]を開くと、App Manifest内にmanifest.jsonで設定した項目が表示されます。[Add to homescreen]を書かれたリンクをクリックしてみましょう。

アドレスバーの下に「このサイトをシェルフに追加するといつもで使えるようになります」という表示が出てきたら、設定は成功です!

Android端末のお持ちの方は、是非実機で試してみてください。
以上で、AMPページにおけるPWA対応の第一段階(ホーム画面へのアイコン追加)は完了です。
今日はここまで。