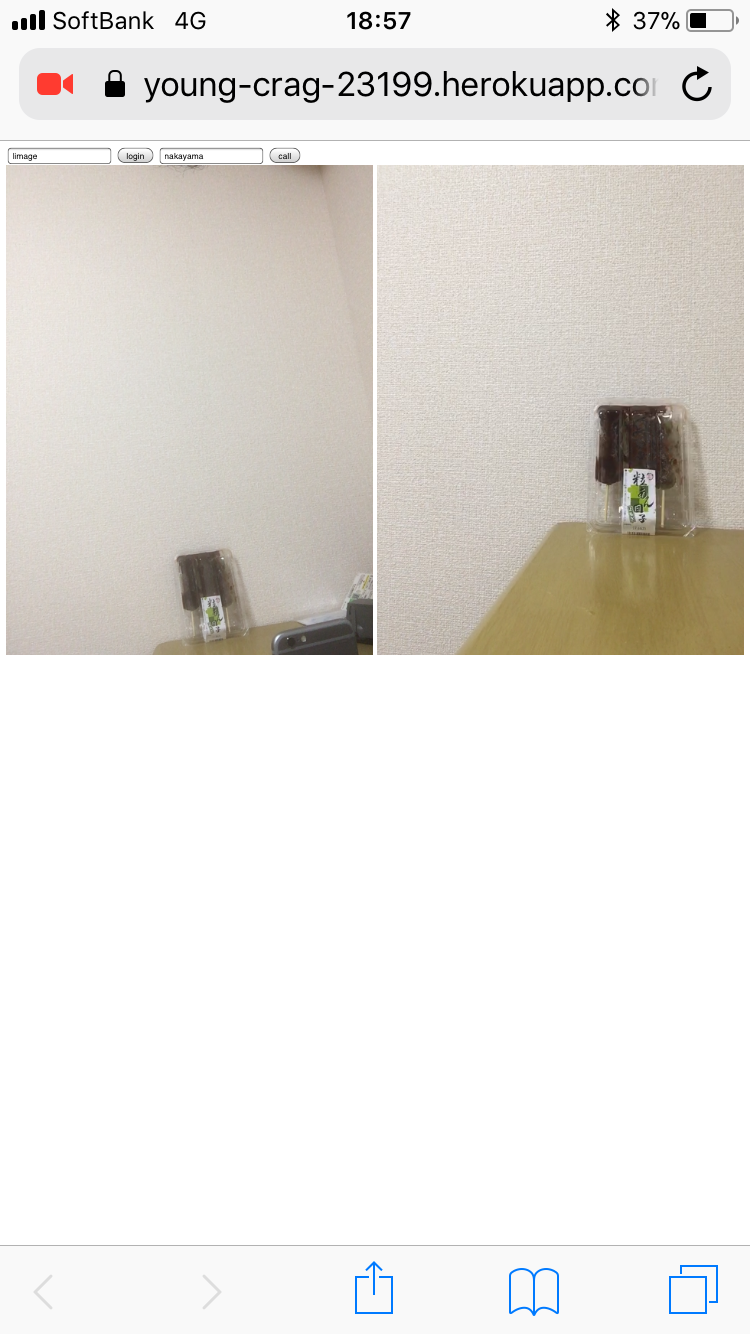
Safari11でWebRTCが対応されたのでブラウザで通話できるアプリケーションを作ってみました。
ただSSL対応しているサイトでないとAPIが使えないので今回はHerokuにデプロイして試してみます。
WebRTCとは
一言で言うとブラウザ同士でリアルタイム通信を行う技術です。
ビデオ通信・音声通信ができるほか、テキストやファイルもP2Pで送れます。
作るもの
iPhoneのSafariでビデオ通話をするWebアプリケーション

構成
- Webサーバー(静的ファイル) Node.js
- シグナリングサーバー Node.js
- デプロイ環境 Heroku
 ## ファイル構成
```
express-webrtc-app/
┣ server.js
┣ package.json
┣ node_modules/
┗ public/
┣ index.html
┗ main.js
```
# プロジェクト作成
$ mkdir express-webrtc-app; cd $_
$ npm init
各項目の値を対話形式で聞かれます。エントリーポイントはserver.jsとしてください。(npm startコマンドがデフォルトでserver.jsを実行するため)
entry point: (index.js) server.js
サーバーサイドスクリプト
https://github.com/peers/peerjs-server
を使いました。
ここで使うモジュールをインストールします
$ npm install express peer http --save-exact
var express = require("express");
var app = express();
var ExpressPeerServer = require("peer").ExpressPeerServer;

// herokuにデプロイするため環境変数PORTの値を取れるようにしておく
app.set("port", process.env.PORT || 9000);
// ルートへのアクセスでpublicフォルダ以下を返す
app.use("/", express.static(__dirname + "/public"));

// 以下シグナリングサーバの宣言
var options = {
  debug: true
};

var server = require("http").createServer(app);
var peerServer = ExpressPeerServer(server, options);
app.use("/peerjs", peerServer);

// ピア接続ができたときのイベント
peerServer.on("connection", id => {
  console.log("on connection", id);
});

// ピア接続が切れた時のイベント
peerServer.on("disconnect", id => {
  console.log("on disconnect", id);
});

// app.set('port')でセットしたポート番号を解放
server.listen(app.get("port"), () => {
  console.log("listen port", app.get("port"));
});
フロントエンド
<!DOCTYPE html>
<html>

<head>
  <title>WebRTC App</title>
</head>

<body>
  <div>
    <input id="user-id" placeholder="userId" />
    <button id="login-button">login</button>
    <input id="partner-id" placeholder="partnerId" />
    <button id="call-button">call</button>
  </div>

  <video id="user-video" autoplay playsinline muted></video>
  <video id="partner-video" autoplay playsinline></video>

  <script src="https://webrtc.github.io/adapter/adapter-latest.js"></script>
  <script src="https://cdnjs.cloudflare.com/ajax/libs/peerjs/0.3.14/peer.min.js"></script>
  <script src="main.js"></script>
</body>

</html>
videoタグのplaysinline属性はiOSのsafariでインライン(フルスクリーンでない)動画を再生するために必要です。ハウリングを防ぐために自分の動画を再生するVideoタグにはmuted属性をつけました。
また、全て通信はSSL対応させるのでpeerjsのCDNもhttpsで提供されているものを利用します。
var peer;
var userId;
const userVideo = document.getElementById("user-video");
const partnerVideo = document.getElementById("partner-video");

const loginButton = document.getElementById("login-button");
loginButton.addEventListener("click", login);

const callButton = document.getElementById("call-button");
callButton.addEventListener("click", call);

function login(event) {
  userId = document.getElementById("user-id").value;

  // シグナリングサーバとPeer(WebSocket)接続
  peer = new Peer(userId, {
    host: "~~~.herokuapp.com", // Heroku domain
    port: 443,
    path: "/peerjs",
    secure: true
  });

  // Peer接続に成功したら呼ばれるイベント
  peer.on("open", id => {
    console.log("opened", id);

    // ユーザーのカメラ映像・音声取得
    const constraints = { audio: true, video: true };
    navigator.mediaDevices
      .getUserMedia(constraints)
      .then(stream => {
        window.stream = stream;
        userVideo.srcObject = stream;
      })
      .catch(err => {
        console.error("failed getUserMedia", err);
      });

    // callされたら呼ばれるイベント
    peer.on("call", call => {
      console.log("catch call");
      call.answer(window.stream);

      // 相手のストリーム(映像・音声)が来たら呼ばれるイベント
      call.on("stream", stream => {
        console.log("catch stream");
        partnerVideo.srcObject = stream;
      });
    });
  });
}

function call(event) {
  const partnerId = document.getElementById("partner-id").value;
  const mediaConnection = peer.call(partnerId, window.stream);

  mediaConnection.on("stream", stream => {
    console.log("catch stream");
    partnerVideo.srcObject = stream;
  });
}
login関数でシグナリングサーバとピア接続し、各種peerイベントのリスナーを呼びます。
call関数でpartner-idに入っている値をIDとするPeerに向けてオファーをします。
今回はオファーを受けたら"call"イベントが呼ばれ、そのままアンサーを返すので勝手に繋がります。
ピア接続する際のホストドメインは~~~.herokuapp.comとなってますがここには後でHerokuが作ってくれるサーバのドメインを入力します。SSL対応させるのでポート番号は443です。
Herokuのセットアップ
HerokuはローカルのGitリポジトリをプッシュすると自動でデプロイしてくれるプラットフォームです。
Herokuのアカウントを持っていなかったらアカウントを作ります。
ここからHerokuのCLIをインストールします。
https://devcenter.heroku.com/articles/getting-started-with-nodejs#set-up
デプロイする
express-webrtc-appをGitリポジトリにします。
$ git init
Heroku上にリモートリポジトリ・実行環境を作成
$ heroku create
リモートリポジトリの作成が終わるとデプロイされるURLが帰ってきます。(https://~~~.herokuapp.com/) のドメイン部分をmain.js内のPeerコンストラクタのhostプロパティに入力します。
コミットする
.gitignoreファイルを作成するのをお忘れなく。
node_modules/
$ git add .
$ git commit -m "initial commit"
プッシュして自動デプロイ
$ git push heroku master
デプロイされたURL(https://~~~.herokuapp.com/)にアクセスします
最初の画像のように繋がればOKです! 少し感動...
最後に
今回は最短でWebRTC on iOS-Safariを試したかっただけなのでOSSのPeerJS+Herokuで作りましたが、WebRTCでちゃんとWebサービスを作りたい場合はWebRTCのPaaSを提供しているSkyWayなどを利用するのが無難だと思います。
GitHubに上げました