本稿は続きものです。
前回⇒昼飯データベースを作りたい 【EP1-2】はじめてのDjango勉強編
前々回⇒昼飯データベースを作りたい 【EP1-1】はじめてのDjango勉強編
初回のもの書き⇒昼飯データベースを作りたい!【EP.0】
前回までのおさらい
Djangoのチュートリアルに沿って、投票アプリケーションの作成を行いながらDjangoの基礎に触れてきました。
前回のラストでTemplateを用いた画面表示を作るところまで来ました。
今回はTemplateの続きからです。
Formの作成
前回、index.htmlの編集が終わりました。今回はdetail.htmlにForm機能を搭載していくところから始めていきます。
<h1>{{ question.question_text }}</h1>

{% if error_message %}<p><strong>{{ error_message }}</strong></p>{% endif %}

<form action="{% url 'polls:vote' question.id %}" method="post">
{% csrf_token %}
{% for choice in question.choice_set.all %}
    <input type="radio" name="choice" id="choice{{ forloop.counter }}" value="{{ choice.id }}">
    <label for="choice{{ forloop.counter }}">{{ choice.choice_text }}</label><br>
{% endfor %}
<input type="submit" value="Vote">
</form>
エラーメッセージを受け取り表示する{% if error_message %}~と<form ...>タグ以下が追加文です。
<form>タグについての解説は⇒HTMLクイックリファレンス
<input type="radio">タグでラジオボタンを作り、<input type="submit">タグで投票ボタンを作ることができます。
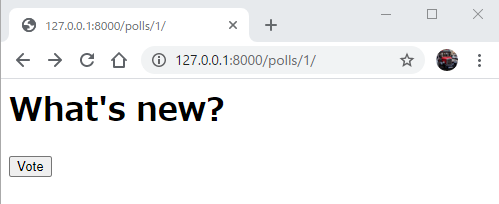
現時点ではラジオボタンの作成に用いる選択肢を作っていないので投票ボタンのみ見ることができます。

投票ボタンに機能を持たせる
前々回で一応の作成を行ったvote()関数をきちんと作っていきます。
def vote(request, question_id):
# ここでQuestionオブジェクトを取得
    question = get_object_or_404(Question, pk=question_id)
# ここでQuestionのChoiceを取得
    try:
        selected_choice = question.choice_set.get(pk=request.POST['choice'])
    except (KeyError, Choice.DoesNotExist):
        return render(request, 'polls/detail.html', {
            'question':question,
            'error_message':"You didn't select a choice"
        })
# エラーがキャッチされずにこれた時
    else:
# ここで票の追加を行う
        selected_choice.votes += 1
        selected_choice.save()
        return HttpResponseRedirect(reverse('polls:results', args=(question_id,)))
ここで私は一つ突っかかりました。
choice_set👈誰やねんお前
それもそのはず、前回の部分で私は選択肢作りをすっ飛ばしてしまったのだから。
それで先ほどの画面にも選択肢が出ないわけです。
以下Djangoの対話シェルです。
>>> from polls.models import Choice, Question
>>> q=Question.objects.get(pk=1)
>>> q.choice_set.all()
<QuerySet []>
>>> q.choice_set.create(choice_text='Not much', votes=0)
<Choice: Not much>
>>> q.choice_set.create(choice_text='The sky', votes=0)
<Choice: The sky>
ここらへんです。この後、もう一つchoiceをセットしますが結局deleteするので割愛しました。
ここでchoice_setが何の前触れもなく登場しています。
これ実はDjangoのmetaclassのRelatedManagerというのがなんやかんやしているみたいです。
端的に言うとmodels.pyでChoiceに設定したForeignkeyのおかげでQuestionとChoiceのデータベースに関係性を持たせることができ、それを対話シェルではchoice_setの形で扱うことができるというわけです。
詳しい解説を探してみたら英語しかいいのがヒットしませんでした。
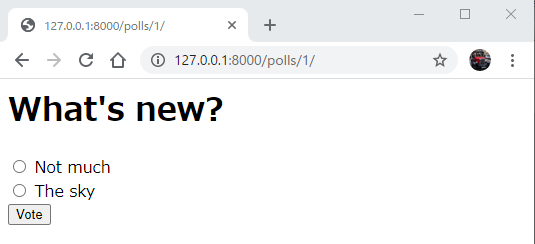
ですがこれで選択肢が表示されるようになりました。
こんな感じで

あと、戻って確認しているときに書き忘れがありました。
class Question(models.Model):
    question_text = models.CharField(max_length=200)
    pub_date = models.DateTimeField('date published')
    def __str__(self) -> str:
        return self.question_text
# 以下書き忘れ
    def was_published_recently(self):
        return self.pub_date >= timezone.now() - datetime.timedelta(days=1)
was_published_recently()についてを完全に逃していました。APIでのいじりを端折ったせいで思わぬところで引っかかってしまいました。やっぱりチュートリアルはきちんと流れに沿って流していくのが吉です。
投票結果を見れるようにする
投票を行うための機能を付けたので、その結果を見れる機能も載せます。
templateフォルダの下に新たにresults.htmlという結果を表示するためのhtmlファイルを追加します。
<h1>{{ question.question_text }}</h1>

<ul>
{% for choice in question.choice_set.all %}
    <li>{{ choice.choice_text }} -- {{ choice.votes }} vote{{ choice.votes|pluralize }}</li>
{% endfor %}
</ul>

<a href="{% url 'polls:detail' question.id %}">Vote again?</a>
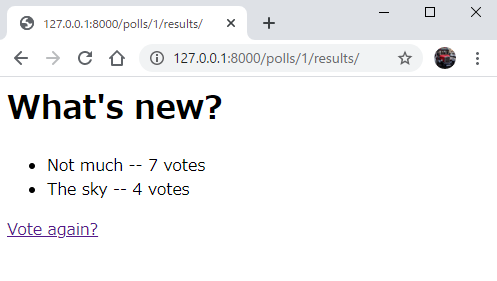
ここの{{ question.question_text }}で選択されている質問が表示され、その後の{{ choice.choice_text }}で選択肢の文を表示、{{ choice.votes }}でその時点の投票数を表示してくれます。
こんな感じで

汎用ビューを使う
django.views.genericを使ってコードを簡単なものに書き直していきます。これでコードの冗長な部分を減らすことができます。
ですが、初めからこの汎用ビューを使うのは得策ではないようです。今の状況は使うのに適した状況化の吟味は必要ということですね。
汎用ビューを使うにあたりurls.py, views.pyを修正します。
urlpatterns = [

    path('', views.IndexView.as_view(), name='index'),

    path('<int:pk>/', views.DetailView.as_view(), name='detail'),

    path('<int:pk>/results/', views.ResultsView.as_view(), name='results'),

    path('<int:question_id>/vote/', views.vote, name='vote'),
]
urlpatternsのindex, detail, resultsのPathのところと表示する内容のところをそれぞれいじっています。
IndexView, DetailView, ResultsView はまだ作成していないのでこの後views.pyに書きます。
ここではこれらクラスを足すときに古いindex, detail, resultsのビューを消します。
class IndexView(generic.ListView):
    template_name = 'polls/index.html'
    context_object_name = 'latest_question_list'

    def get_queryset(self):
        """Return the last five published questions."""
        return Question.objects.order_by('-pub_date')[:5]

class DetailView(generic.DetailView):
    model = Question
    template_name = 'polls/detail.html'

class ResultsView(generic.DetailView):
    model = Question
    template_name = 'polls/results.html'
ここでもas_view()という定義してないメソッドを使っていますが例のごとくDjangoのものなので、ちゃんと使えます。
as_viewについてはこちら
んでこれまでスルーしてきたんですが、pkって何でしょうか。
pkとはPrimary Keyの略です。それでPrimary Keyはデータを一意に特定できるもののことです。
一意に特定するというのは、各々のデータでForeign Keyなど他所から引いてきている値や重複のあるものではなく、その値から導かれるデータが一つしか存在しないものを指します。(だいたいは固有のidを持たせることがほとんどかと)
汎用ビューができたら早速確認しましょう
テストをする
ここまでで投票システムとしては完成したかのように思われますが、テストを行うことでより素晴らしいものにすることができます。
初めてのテスト
今まで書いてきたコードになんとバグがあるらしいってことで、まずはチェックしていきます。
>>> import datetime
>>> from django.utils import timezone
>>> from polls.models import Question
>>> future_question = Question(pub_date=timezone.now() + datetime.timedelta(days=30))
>>> future_question.was_published_recently()
True
このコードでpub_dateに未来の日時を入れています(timezone.now()にさらに30日足しています)がwas_published_recently()ではTrueが帰ってきてしまいます。未来のことなのに!
というわけで今対話シェルで行ったことをスクリプトに書きます。
import datetime

from django.test import TestCase
from django.utils import timezone

from .models import Question


class QuestionModelTests(TestCase):

    def test_was_published_recently_with_future_question(self):

        time = timezone.now() + datetime.timedelta(days=30)
        future_question = Question(pub_date=time)
        self.assertIs(future_question.was_published_recently(), False)
行ったことを書くといいましたが、こうしてみると結構違いますね。
まずTestCaseをインポートしてなんかインスタンス作ってますね。
このインスタンスがテストを行ってくれます。インスタンス内のtest_was_published_recently_with_future_question()長いメソッドが未来の日時を入れたときのpub_dateの検証を行ってくれます。
Test Caseについての詳細はこちら
このtests.pyを作ったら動かしてテストをしてみましょう。
(Django) C:\User\mysite>python manage.py test polls
これでtests.pyが動くあたりやっぱりDjangoすごいです。
そしてこれは以下の形で失敗となります。
Creating test database for alias 'default'...
System check identified no issues (0 silenced).
F
======================================================================
FAIL: test_was_published_recently_with_future_question (polls.tests.QuestionModelTests)
was_published_recently() returns False for questions whose pub_date
----------------------------------------------------------------------
Traceback (most recent call last):
  File "D:\yushi\Study\Hirumeshi\mysite\polls\tests.py", line 18, in test_was_published_recently_with_future_question
    self.assertIs(future_question.was_published_recently(), False)
AssertionError: True is not False

----------------------------------------------------------------------
Ran 1 test in 0.002s

FAILED (failures=1)
Destroying test database for alias 'default'...
無事?AssertionErrorが検出されましたね、めでたしめでたし。
では、直していきます。
今回、問題となっているのは未来の日時を入れてもTrueを返してしまうところでした。
ということは過去の日付が入っているときにのみTrueを返してくれるようになればいい感じです。
def was_published_recently(self):
    now = timezone.now()
    return now - datetime.timedelta(days=1) <= self.pub_date <= now
これでpub_dateが昨日以上今以下の日時であるときにTrueを返してくれるようになります。
こうしてテストをしてみると以下のように成功するはずです。
Creating test database for alias 'default'...
System check identified no issues (0 silenced).
.
----------------------------------------------------------------------
Ran 1 test in 0.001s

OK
Destroying test database for alias 'default'...
とりあえず目下のバグの修正ができました。
また長くなってきたんで今回はここまでにします。
次回、テスト完了+はじめてのDjango勉強編最終回になります。
