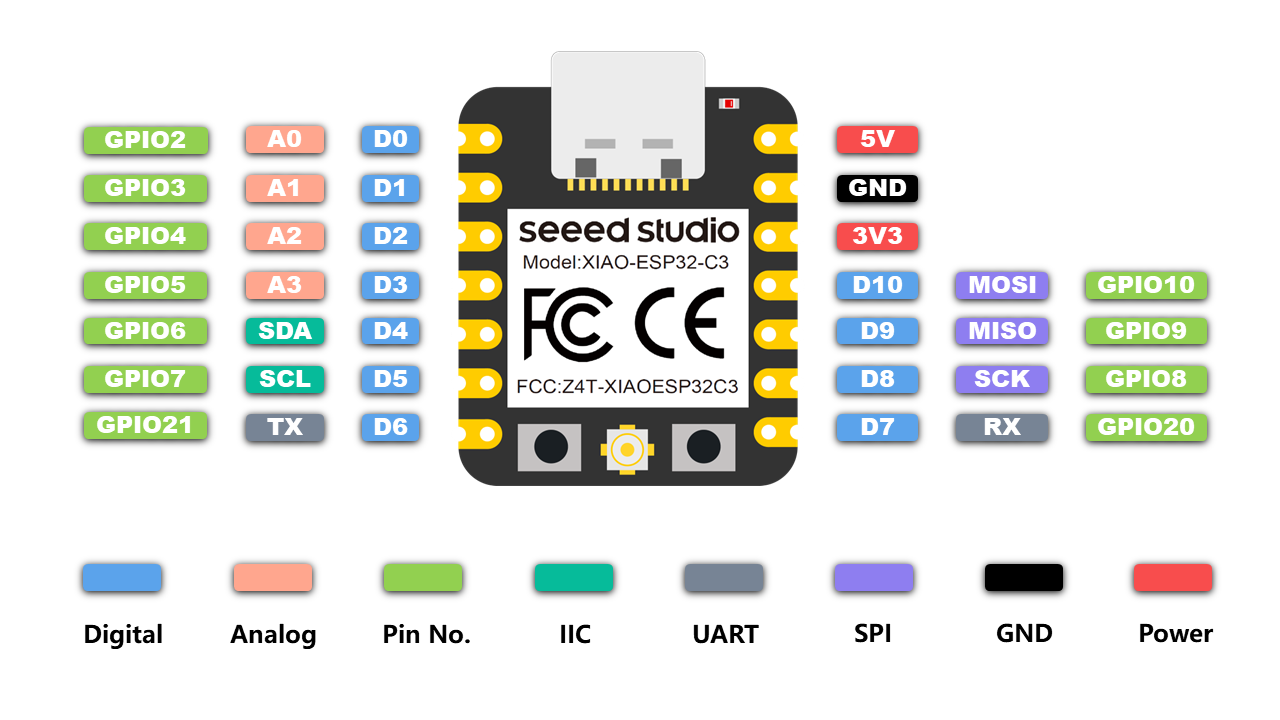
久しぶりに秋葉原に出てみたところ、秋月さんでXIAO ESP32C3というボートを見つけました。
https://files.seeedstudio.com/wiki/XIAO_WiFi/board-pic.png
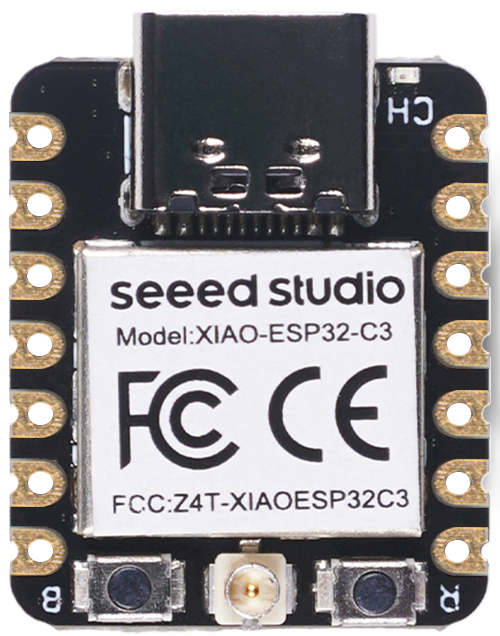
このシリーズ、サイズ感とお値段がいい感じなので好きなのです。もちろん購入。
まずはPlatformIOで動かせるのかを確認してみることにしました。
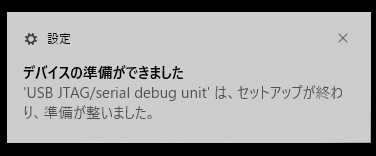
XIAO ESP32C3をUSBでWindowsに接続したところ自動的にデバイスを認識し、準備ができましたとのメッセージが表示されました。
そのままPlatformIOを立ち上げて、BoardのところにXIAO ESP32C3と入力してみたところ、あっさり見つかりました。

プロジェクトを作成し、まずはそのままLチカを試してみたところ、ビルドは通るのですがLチカしません。Serialからも音沙汰無しです。
コンソールのメッセージを見ると wait usb download 的なメッセージが出ていたので、XIAO ESP32C3を抜き差ししてみたところLチカが始まりました!
どうやら初回セットアップ後、いちどデバイスを抜き差しする必要があったようです。
とりあえずLチカの動作を確認できたので、次にWiFiの動作を試してみました。
//https://lab.seeed.co.jp/entry/2020/05/21/120000
#include <Arduino.h>
#include <WiFi.h>
#ifdef ARDUINO_ARCH_ESP32
 #include <WebServer.h> //if you get an error here please update to ESP32 arduino core 1.0.0
#else
 #include <ESP8266WebServer.h>
#endif

#ifdef ARDUINO_ARCH_ESP32
WebServer* pServer = NULL;
#else
ESP8266WebServer* pServer=NULL;
#endif

static bool gIsLedOn;

void setServerCallback(){
  static const String htmlStr0 ="<!DOCTYPE html><html lang='ja'><head><meta charset='UTF-8'>";
  static const String htmlStr1 ="<style>input {margin:2px;width:190px;height:90px;}</style>";
  static const String htmlStr2 ="<title>test</title></head><body>";
  static const String htmlBtn1Str ="<div><form method='get'><input type='submit' name='nLed' value='LED'></form></div>";
  static const String htmlStr4 ="</body></html>";
  static const String main_htmlStr = htmlStr0+htmlStr1+htmlStr2+htmlBtn1Str+htmlStr4;

  pServer->on("/", [](){
    int paramNum = pServer->args();
    String str = main_htmlStr;

    if(paramNum>0){
        String nameArr[paramNum];
        String valArr[paramNum];
        for(int i=0;i<paramNum;++i){
            nameArr[i] = pServer->argName(i);
            valArr[i] = pServer->arg(i);
            Serial.print(nameArr[i]+":"+valArr[i]+", ");
        }
        Serial.println("//end");
        if(paramNum>0 && nameArr[0]=="nLed"){
          gIsLedOn = !gIsLedOn;
          digitalWrite(D10,gIsLedOn?HIGH:LOW);
        }
    }else{
        Serial.println("no params input:");
    }

    pServer->send(
      200,
      "text/html",
      str.c_str());
  });
}

void initServer(){
#ifdef ARDUINO_ARCH_ESP32
  pServer = new WebServer(80);
#else
  pServer = new ESP8266WebServer(80);
#endif
  //-----------------------------------------------------
  delay(100);
  const char *setup_ssid = "XIAOESP32AP";
  const char *setup_password = "98765";
  const IPAddress setup_ip = IPAddress( 192, 168, 10, 10 );
  const IPAddress setup_subnet = IPAddress( 255, 255, 255, 0 );
  WiFi.softAP(setup_ssid, setup_password);
  delay(100);
  WiFi.softAPConfig(setup_ip, setup_ip, setup_subnet);
  IPAddress myIP = WiFi.softAPIP();
  pServer->begin();
  delay(100);
  Serial.print("softAPIP: ");
  Serial.println("SSID: "+WiFi.softAPSSID());
  Serial.println("AP IP address: "+myIP.toString());
  Serial.println("Access to "+String(setup_ssid)+" 192.168.10.10/");

  setServerCallback();
  //-----------------------------------------------------
}

void setup() {
  // put your setup code here, to run once:
  gIsLedOn=true;
  Serial.begin(9600);
  Serial.println("start");
  pinMode(D10,OUTPUT);
  digitalWrite(D10,gIsLedOn?HIGH:LOW);
  initServer();
}

void loop() {
  // put your main code here, to run repeatedly:
  pServer->handleClient();
}
特にライブラリ等を入れることなくビルドすることができました。
付属のアンテナを接続し、上記を実行すると、WiFiの選択肢にESP32が追加されるのですが、おや・・・?

XIAOESP32APと指定したはずのSSIDが、、、それにパスワードも設定されていないようです。

ひとまずそこは後で調べるとして、Windowsを上記SSIDのWiFiに接続します。
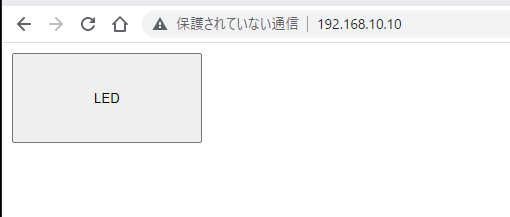
接続したら ブラウザのアドレスバーに http://192.168.10.10 と入力すると、
D10とGNDの間にLEDを接続し、ブラウザ上の[LED]ボタンを押たびにLEDが点灯/消灯します。
SSIDが違う件は、引き続き調査したいと思います(以前にも同じことがあったような・・・それも単純なミスだったような・・・)
続いてBLEを試してみます。
#include <Arduino.h>
#include <BLEDevice.h>
#include <BLEServer.h>
#include <BLEUtils.h>
#include <BLE2902.h>

BLECharacteristic *pCharacteristic;
bool deviceConnected = false;

// https://www.uuidgenerator.net/
# define    SERVICE_UUID    "199a9fa8-94f8-46bc-8228-ce67c9e807e6"
# define    CHARACTERISTIC_UUID "208c149e-8266-4686-8918-981e90546c2a"

const int _LED_PIN = D10;
const String BLEName = "XIAO_ESP32BLE";

class MyServerCallbacks: public BLEServerCallbacks {
    void onConnect(BLEServer* pServer) {
      deviceConnected = true;
        uint8_t data_buff[2]; // test用2byte'AB'
        data_buff[0] = 'A';
        data_buff[1] = 'B';
        Serial.printf("*** NOTIFY: %d, %d ***\n", data_buff[0], data_buff[1]);
        pCharacteristic->setValue(data_buff, 2);
    };

    void onDisconnect(BLEServer* pServer) {
      Serial.printf("*** disconnected. ***\n");
      deviceConnected = false;
    }
};


void setup() {
  Serial.begin(115200);

  // Create the BLE Device
  BLEDevice::init(BLEName.c_str());

  // Create the BLE Server
  BLEServer *pServer = BLEDevice::createServer();
  pServer->setCallbacks(new MyServerCallbacks());

  // Create the BLE Service
  BLEService *pService = pServer->createService(SERVICE_UUID);

  // Create a BLE Characteristic
  pCharacteristic = pService->createCharacteristic(
                      CHARACTERISTIC_UUID,
                      BLECharacteristic::PROPERTY_READ   |
                      BLECharacteristic::PROPERTY_WRITE  |
                      BLECharacteristic::PROPERTY_NOTIFY |
                      BLECharacteristic::PROPERTY_INDICATE
                    );

  // Create a BLE Descriptor
  pCharacteristic->addDescriptor(new BLE2902());

  // Start the service
  pService->start();

  // Start advertising
  pServer->getAdvertising()->start();
  Serial.println("Waiting a client connection to notify...");

  pinMode(_LED_PIN, OUTPUT);
}

void loop() {
  if(deviceConnected){
        Serial.print(".");
        uint8_t* pData = pCharacteristic->getData();
        digitalWrite(_LED_PIN, (pData[0]!='A')?LOW:HIGH); // 1byte目が'A'でなくなったら消灯
        pCharacteristic->notify();
  }
  delay(1000);
}
これも特にライブラリの追加なしにビルドすることができました。
LightBlue等のアプリを使って、valueに65('A'のascii code)を入れると点灯、それ以外を入れると消灯します(D10-GND間にLEDをつないでいれば)。
<!DOCTYPE html>
<html><head><title>BLE test</title></head>
<script>
const SERVICE_NAME = "XIAO_ESP32BLE";
const SERVICE_UUID = "199a9fa8-94f8-46bc-8228-ce67c9e807e6";
const CHARACTERISTIC_UUID = "208c149e-8266-4686-8918-981e90546c2a";

var g_device = null;
var g_characteristic = null;
var g_value = 65;

_onload = function(){
    var info=document.getElementById('iInfo');
    ckFnc=async function(){
        info.innerHTML+="start<br>";
        if((g_device!=null)&&(g_device.gatt.connected)){
            info.innerHTML+="disconnect<br>";
            console.log('Disconnecting from Bluetooth Device...');
            g_device.gatt.disconnect();
            document.getElementById('iCheckBtn').value="check";
            document.getElementById('iSendBtn').value="---";
            g_device=null;
            g_characteristic=null;
            return;
        }
        navigator.bluetooth.requestDevice({
            filters: [{ name: SERVICE_NAME }],
            optionalServices: [SERVICE_UUID]
            //acceptAllDevices: false,
        })
        .then(device => {
            info.innerHTML+="navigator.bluetooth.requestDevice.then<br>";
            g_device = device;
            device.gatt.connect()
            .then(server => {
                info.innerHTML+="device.gatt.connect.then<br>";
                console.log(server);
                server.getPrimaryService(SERVICE_UUID)
                .then(service => {
                    info.innerHTML+="server.getPrimaryService(SERVICE_UUID).then<br>";
                    console.log(service);
                    document.getElementById('iCheckBtn').value="connected";
                    document.getElementById('iSendBtn').value="send";
                    service.getCharacteristic(CHARACTERISTIC_UUID)
                    .then(characteristic => {
                        info.innerHTML+="service.getCharacteristic(CHARACTERISTIC_UUID).then<br>";
                        console.log(characteristic);
                        g_characteristic = characteristic;
                        onRead();
                    }).catch(error => { console.error(error); })
                }).catch(error => { console.error(error); })
            }).catch(error => { console.error(error); });
        }).catch(error => { console.error(error); })
    }
}

onSend=function(){
    var info=document.getElementById('iInfo');
    info.innerHTML+="onSend<br>";
    if(g_characteristic!=null){
        info.innerHTML+="g_characteristic!=null<br>";
        console.log('send');
        const asciiA = 'A'.charCodeAt(0);
        g_value = (g_value==asciiA?0:asciiA); // 'A'なら点灯
        g_characteristic.writeValue(Uint8Array.of(g_value))
        .then(_ => {
            info.innerHTML+="g_characteristic.writeValue(Uint8Array.of(g_value)<br>";
            console.log(`${g_value} send ok.`);
        }).catch(error => { console.error(error); });
    }
}
onRead=function(){
    var info=document.getElementById('iInfo');
    info.innerHTML+="onRead<br>";
    if(g_characteristic!=null){
        g_characteristic.readValue()
        .then(value => {
            info.innerHTML+="g_characteristic.readValue().then<br>";
            console.log(`value= ${value.getUint8(0)}`);
        }).catch(error => { console.error(error); })
    }
}
onClear=function(){
    var info=document.getElementById('iInfo');
    info.innerHTML="---";
}
</script>
<body onload="_onload()">
<input type="button" id="iCheckBtn" value="check" onclick="ckFnc()"></input>
<input type="button" id="iSendBtn" value="---" onclick="onSend()"></input>
<div id='iInfo'>---</div>
<input type="button" id="iClearInfo" value="ClearInfo" onclick="onClear()"></input>
</body></html>
上記ページをどこかのサーバーに置き、ブラウザから立ち上げると、

こんな画面が表示されます。
XIAO ESP32C3を起動した状態で[check]ボタンを押すと、
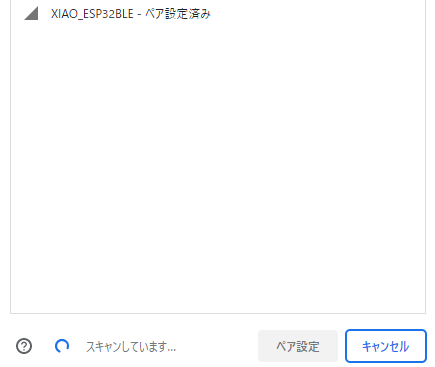
こんなウインドウが立ち上がるので、XIAO_ESP32BLEを選択しペアリングします。
(スマホからだとポップアップがブロックされるのでうまくいかないようです)
すると(D10-GND間にLEDをつないでいれば)LEDが点灯し、

のように画面が変化します。
後はsendボタンを押すごとにLEDが点灯/消灯します。
このプログラムを使ってダイソーのシャボン玉発生器を遠隔操作してみました。
