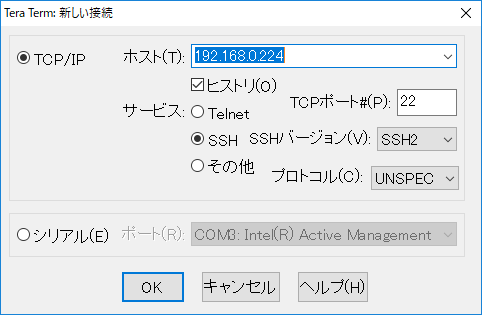
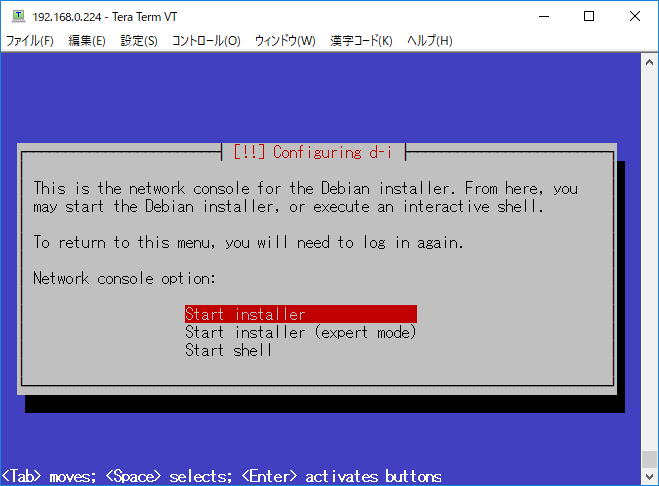
モニターもキーボードもないPCにDebianをインストールする。
DebianのHeadless Installに挑戦します。
モニタ出力を持たないWindows Home Server製品に、Debianをインストールしてみます。
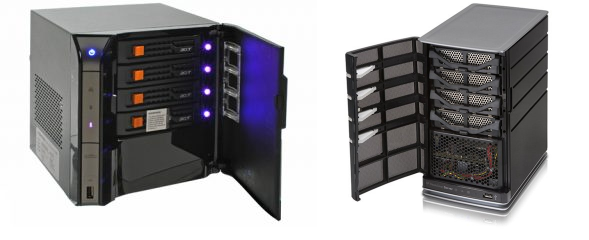
Acer easyStore H340
HP MediaSmart Server EX490
の2機種で試してみましたが、いずれも無事インストールできました。
作業の流れ
作業にはdebianがすでにインストールされたPCが必要です。
準備作業として、Headlessインストールに対応させたインストールUSBメモリを用意します。
- Debian の netinst isoファイルをダウンロード
- isoファイルを展開
- Preseed ファイルを配置
- isoファイルを固めなおして、USBに書き込み
その後、作成したUSBメモリで対象のPCを起動、SSH接続してインストール作業を続行します。
準備作業
まずは Debian の netinst isoファイルをダウンロードして展開します。
# もととなる netinst イメージをダウンロード
wget http://ftp.riken.jp/Linux/debian/debian-cd/current/amd64/iso-cd/debian-9.8.0-amd64-netinst.iso

# isoファイルを展開、再作成するためのツールをインストール
sudo apt -y install xorriso

# isofiles ディレクトリに展開する
xorriso -osirrox on -indev debian-9.8.0-amd64-netinst.iso -extract / isofiles
まずはブートメニューの編集から
Grub の Time Out をデフォルトのTime Outなしから 1秒に変更して、キーボード入力がなくともインストールに進むようにします。
sudo vi isofiles/isolinux/isolinux.cfg
# D-I config version 2.0
# search path for the c32 support libraries (libcom32, libutil etc.)
path
include menu.cfg
default vesamenu.c32
prompt 0
# Grubの入力待ちで停止しないように timeout 1 とする。
timeout 1
さらに、ロケールや言語の質問などで入力待ち状態にならないようにいくつかのパラメータを指定します。
sudo vi isofiles/isolinux/gtk.cfg
isofiles/isolinux/gtk.cfg
default installgui
label installgui
        menu label ^Graphical install
        menu default
        kernel /install.amd/vmlinuz
        append vga=788 auto=true priority=critical file=/cdrom/preseed.cfg initrd=/install.amd/gtk/initrd.gz ---quiet
        # ↑以下の項目を追加しています。
        # auto=true               ロケールやキーボードの質問を preseed で行えるよう遅らせます。
        # priority=critical       優先度の低い質問を抑制するようになります。
        # file=/cdrom/preseed.cfg preseedファイルを指定します。
次に、インストーラ起動後にSSH接続できるようpreseed.cfgを作成、配置します。
wget https://www.debian.org/releases/stable/example-preseed.txt
sudo cp example-preseed.txt isofiles/preseed.cfg
sudo vi isofiles/preseed.cfg
#### Contents of the preconfiguration file (for stretch)
### Localization
# Preseeding only locale sets language, country and locale.
d-i debian-installer/locale string en_US

# Keyboard selection.
d-i keyboard-configuration/xkb-keymap select us
# d-i keyboard-configuration/toggle select No toggling

# netcfg will choose an interface that has link if possible. This makes it
# skip displaying a list if there is more than one interface.
d-i netcfg/choose_interface select auto

# Any hostname and domain names assigned from dhcp take precedence over
# values set here. However, setting the values still prevents the questions
# from being shown, even if values come from dhcp.
d-i netcfg/get_hostname string unassigned-hostname
d-i netcfg/get_domain string unassigned-domain

### Network console
# Use the following settings if you wish to make use of the network-console
# component for remote installation over SSH. This only makes sense if you
# intend to perform the remainder of the installation manually.
d-i anna/choose_modules string network-console
d-i network-console/password password r00tme
d-i network-console/password-again password r00tme
md5を計算しなおします。
cd isofiles/
chmod 666 md5sum.txt
find -follow -type f -exec md5sum {} \; > md5sum.txt
chmod 444 md5sum.txt
cd ..
isoファイルに固めなおします。
# isohdpfx.bin を導入します。
sudo apt -y install isolinux

# ISOファイルを作成します。
xorriso -as mkisofs -o debian-9.8.0-amd64-netinst-headless.iso \
        -isohybrid-mbr /usr/lib/ISOLINUX/isohdpfx.bin \
        -c isolinux/boot.cat -b isolinux/isolinux.bin -no-emul-boot \
        -boot-load-size 4 -boot-info-table isofiles
USBに書き込みます。
ここでは /dev/sdc がUSBメモリということになっていますが、間違えてHDDに書いちゃったりすると大変なので気を付けてください。
# USBメモリに書き込む前に対応するデバイスファイルを確認、以下のコマンドを発行してからUSBメモリを刺す。
sudo tail -f /var/log/messages
Ctrl + C で抜ける

# USBメモリへ書き込み、 書き込み先のデバイスファイル間違いには要注意!
sudo dd if=debian-9.5.0-amd64-netinst-headless.iso of=/dev/sdc
これでインストール用のUSBメモリは完成です。
インストールする
ここからは簡単です。
-
USBメモリと有線LANをさして Power ON します
-
しばらくUSBメモリのアクセスLEDが落ち着くまで待ちます。
-
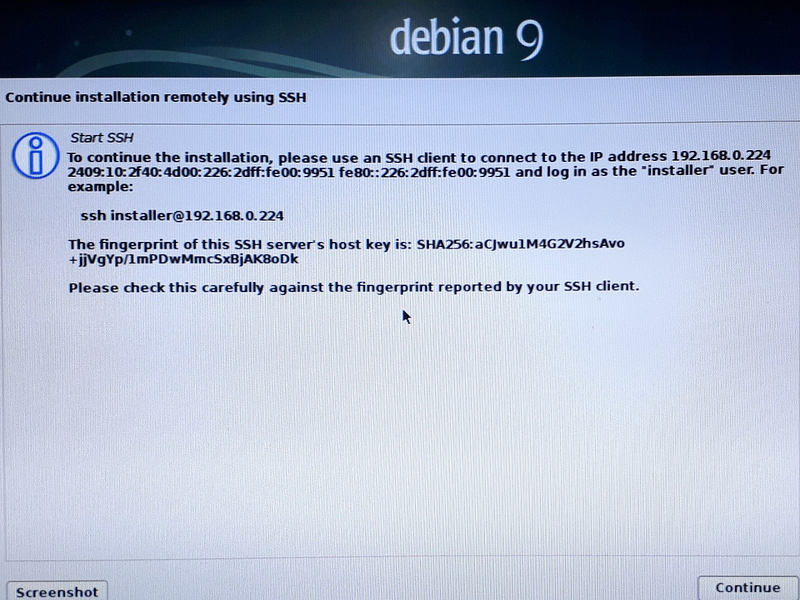
USBメモリへのアクセスが落ち着いたら、有線LANのLEDなどでネットワークが上がっていることを確認します。この時つながっていないモニターには実はこんな感じ↓の画面が表示されており、「インストールを続けるにはSSHで接続してね」という状態で待ち受けてくれています。
-
ただし、モニターを接続していないので上記のメッセージは見れません。そこで、Fing等を利用して、インストーラーがDHCPで取得したアドレスを調べます。
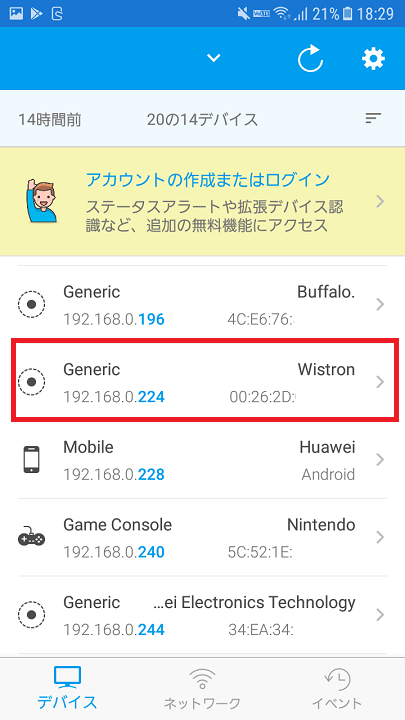
ログインの際のID パスワードは
ID: installer
Password : r00tme
となっています。
(Password はPreseed.cfgで指定しています。)
あとはお好きなオプションでインストールを進めます。
1点だけ、インストールパッケージを指定する際に
SSH Server
の指定など、インストール直後から外部アクセスできるようにするのを忘れずに。。
以上です。
参考にしたサイト
https://wiki.debian.org/DebianInstaller/Preseed/EditIso
https://www.debian.org/releases/stable/amd64/apbs02.html.ja#preseed-auto
https://sowhatisthesolution.wordpress.com/2016/03/13/headless-debian-install-via-ssh/
