TensorFlowをより使いやすくしたフレームワーク"Keras"
比較的手軽にDeep Learningを実感できます。
今回は、とりあえずKerasを実行することにのみ重点を置いて、
極力無駄なものを省いて超シンプルに記述しました。
Kerasを用いた学習までのざっくりとした下記の流れに沿ってコーディングしていきます。
- y(目的変数)ワンホットエンコーディング化
- modelの宣言
- Compile
- 学習(fit)
今回はテストデータとしてKaggleのTitanicデータを利用。
前処理については下記ブログを参照ください
[【Beginner】【AI】【機械学習】Light GBM: Titanic: Machine Learning from Disaster]
(https://qiita.com/daikichi56/items/28694fe38a4fa05beec7)
1.y(目的変数)ワンホットエンコーディング化
2019.0828更新
importファイルを載せていなかったので追記致します
import pandas as pd
import numpy as np
from keras.models import Sequential
from keras.layers import Dense
from keras.layers import Dropout
from keras.layers import Flatten
from keras.layers import Activation
from keras.layers.convolutional import Conv2D
from keras.layers.convolutional import MaxPooling2D
from keras.optimizers import Adam
from keras.utils import np_utils
from keras import backend as K
from sklearn.utils import shuffle
import tensorflow as tf
from tensorflow.keras import layers
Kerasに読み込ませるデータはワンホットエンコーディング化する必要があるらしい。
今回は生きるか死ぬかの0 or 1で登録するため不要かもしれないですが。。
一応、kerasにはワンホットエンコーディングを簡単にできるライブラリがあるのでそれの紹介も兼ねて記述します。
2020.01.19更新:データ整形丁寧に記述しました
# データの読み込み
test = pd.read_csv("test.csv")
train = pd.read_csv("train.csv")

# 教師データ、テストデータの定義
train_x = train.drop("Survived",axis=1)
train_y =train["Survived"]
test_x = test

# 不要なカラムの削除
train_x = train_x.drop(["Name","Ticket","Cabin"],axis=1)
test_x = test_x.drop(["Name","Ticket","Cabin"],axis=1)

# 教師データの欠損値の補完
train_age_median = train_x["Age"].median()
train_x["Age"] = train_x["Age"].fillna(train_age_median)
train_x["Embarked"] = train_x["Embarked"].fillna("S")

# テストデータの欠損値の補完
test_age_median = test_x["Age"].median()
test_x["Age"] = test_x["Age"].fillna(test_age_median)
test_x["Fare"].describe()#[5]
test_x["Fare"] = test_x["Fare"].fillna(test_x["Fare"].describe()[5])

# 教師/テストデータのダミー化
train_x_dummy = pd.get_dummies(train_x,columns=["Sex","Embarked"])
test_x_dummy = pd.get_dummies(test_x,columns=["Sex","Embarked"])

# 目的変数のOne-Hot-Encoding
train_y_onehot = np_utils.to_categorical(train_y)

# kerasインプットのためにarrayに変え、型を変更
train_x_dummy_array= train_x_dummy.as_matrix().astype("float32")
# 202005訂正
train_x_dummy_array= train_x_dummy.values.astype("float32")
2.Modelの宣言
宣言方法にはいろいろあるらしい。
下記を参照すると良くわかります。
TensorFlow公式:単純なモデルの構築
[SequentialモデルでKerasを始めてみよう]
(https://keras.io/ja/getting-started/sequential-model-guide/)
[Kerasの使い方まとめ【入門者向け】]
(https://sinyblog.com/deaplearning/keras_how_to/)
[KerasでDeep Learning:とりあえずネットワークを組んでみる]
(http://tekenuko.hatenablog.com/entry/2017/07/04/223010)
学習済モデルを保存できるらしい
[KerasでCNNを簡単に構築]
(https://qiita.com/sasayabaku/items/9e376ba8e38efe3bcf79)
更に難しいDeep Learningを実行したい場合は下記リンクを参考に*勉強中
[Kerasでちょっと難しいModelやTrainingを実装するときのTips]
(https://qiita.com/mokemokechicken/items/483099fead460dc3a6fa#lambda%E3%82%92%E4%BD%BF%E3%81%A3%E3%81%9F%E7%B0%A1%E6%98%93%E5%A4%89%E6%8F%9B%E3%81%AF%E4%BE%BF%E5%88%A9)
今回は最も単純な全結合ネットワークを記述
# modelの宣言
# シーケンシャルモデル:単純に層を積み重ねる
model = tf.keras.Sequential()
# ユニット数が64の全結合層をモデルに追加します:
# 全結合、入力64次元、出力64次元、活性化関数relu
model.add(layers.Dense(64, activation='relu'))
# 全結合、入力64次元、出力64次元、活性化関数relu
model.add(layers.Dense(64, activation='relu'))
# 全結合、入力64次元、出力2次元、活性化関数softmax
model.add(layers.Dense(2,activation="softmax"))
3.Compile
モデル構築後にcompileメソッドにより学習方法を構成します。
2020.01.19訂正:Optimizer Adamがうまく機能しなくなったため"rmsprop"を利用
これにも代表的なものが他に2つほどあるようなので上の公式サイトより要確認
# modelのコンパイル:学習方法の構成
model.compile(optimizer='rmsprop',
              loss='categorical_crossentropy',
              metrics=['accuracy'])
下記の様に"Recall"も設定可能
metricsの参考は下記
Classification metrics based on True/False positives & negatives
model.compile(optimizer='sgd',
              loss='mse',
              metrics=[tf.keras.metrics.Recall()])
[【Keras入門(4)】Kerasの評価関数(Metrics)]
(https://qiita.com/FukuharaYohei/items/f7df70b984a4c7a53d58)
from tensorflow.keras.metrics import Precision, Recall
model.compile(loss="binary_crossentropy", optimizer="sgd", metrics=[Precision(), Recall()])
4.学習(fit)
# modelの学習
model.fit(train_x_dummy_array,train_y_onehot,epochs=300,batch_size=32)
fit時に過学習防止の設定も可能
参考は下記
Kerasのcallbackを試す(modelのsave,restore/TensorBoard書き出し/early stopping)
model.compile(optimizer='rmsprop',
              loss='categorical_crossentropy',
              metrics=['accuracy'])
# アーリーストッピングの実装
es_cb = tf.keras.callbacks.EarlyStopping(monitor = 'loss', patience = 2, verbose = 1, mode = 'auto')

# modelの学習
model.fit(train_x_dummy_array,train_y_onehot,epochs=300,batch_size=32, callbacks=[es_cb])

# モデルの保存
dl_model.save('dl.h5')
結果
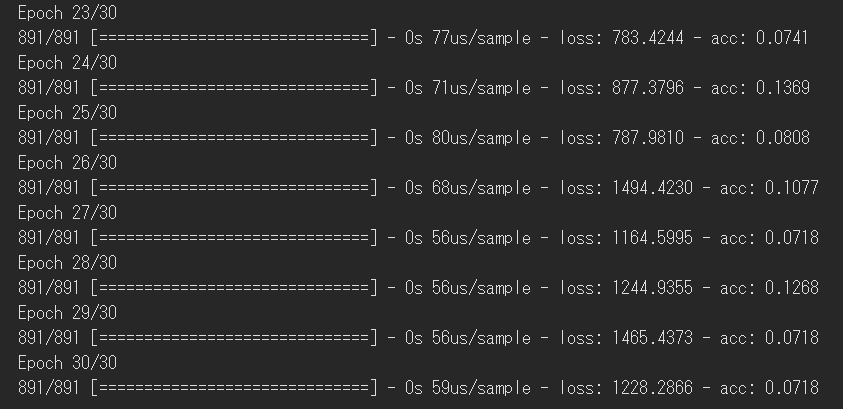
全然制度良くならない。。。
学習までは出来ているのでデータの処理に問題があるようです。
要修正。
ここまで読まれた方申し訳ございません。
近々修正更新します。
2020.01.19
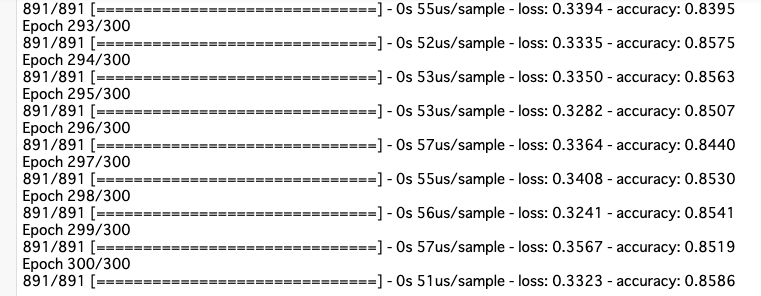
修正完了!
modelの宣言の最終を二次元にすることで精度をあげることができました
# モデルを適用して予測
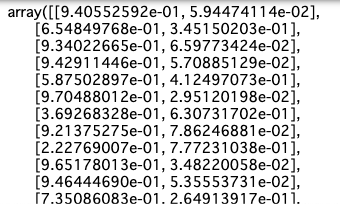
y_pred = model.predict(test_x_dummy)
y_pred
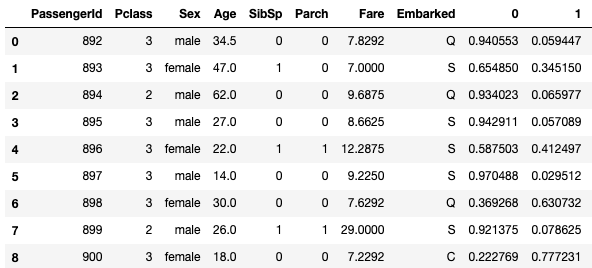
↓木ベースアルゴリズムと違いpredictを適用するとすでに確率が表示されるようです
# 予測結果は元のリストに結合させることでクライアントへ提出することも可能です
y_pred_df = pd.DataFrame(y_pred)
test = pd.concat([test_x,y_pred_df],axis=1)
test.head(10)
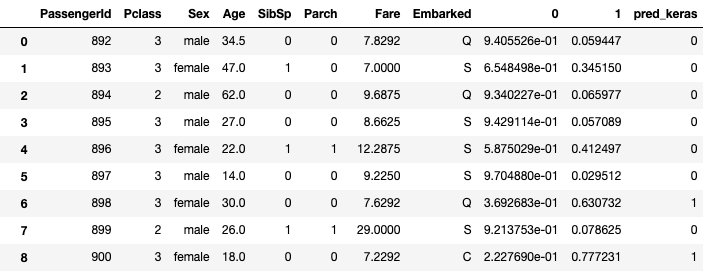
# 0,1のフラグ立ては後ほど行ってあげる必要がありそうです
test["pred_keras"]=0

for row in range(len(test)):
    if test.iloc[row,8] > 0.5:
        test.iloc[row,10] = 0
    else:
        test.iloc[row,10] = 1
