当記事では点群の外れ値の除去やデノイジング(denoising)について取り組んだ研究である、PointCleanNetの論文とPyTorch実装の確認を行います。
PointCleanNetの論文の確認
当節では以下、上記の論文の確認を行います。
PointCleanNetの概要
3Dスキャナーや画像からのreconstructionを用いて生成された点群は多くのノイズや外れ値を持ちます。PointCleanNetはこの外れ値の除去やデノイジング(denoising)することを目的とするPCPNetに基づいたDeepLearningです。

PCPNetのDeepLearningの構成(PCPNet論文 Fig.2)
PCPNet論文によると、PCPNetは主にPointNetに基づいているとされており、上図のSTN(Spatial Transformer Network)はPointNet論文におけるT-Netに対応します。

PointNetの構成(PointNet論文 Fig.2)
また、PointCleanNetの処理プロセス(Cleaning)が主に「1. 外れ値の除去」、「2. デノイジング(denoising)」の2つのプロセスで実現されることも合わせて抑えておくと良いです。以下、PointCleanNetの問題定義や処理の流れについて論文の数式を元に確認します。
数式に基づく確認

PointCleanNet論文 Figure 2
以下では論文の数式を上図と対応させながら確認します。
\begin{align}
\mathbb{P}' = \{ p_i' \} = \{ p_i + n_i \}_{p_i \in \mathbb{P}} \cup \{ o_j \}_{o_j \in \mathbb{O}}
\end{align}
上記で定義された$\mathbb{P}'$は観測されたノイズを含む点群データの集合、$\mathbb{P}$はノイズのない完全な点群サンプル(perfect surface samples)の集合、$\mathbb{O}$は外れ値の点群データの集合をそれぞれ表します。また、$n_i \in \mathbb{R}^{3}$は$p_i \in \mathbb{R}^{3}$に加えるノイズです。このとき、PointCleanNetではCleaningという処理を用いることで、与えられた$\mathbb{P}'$から$\mathbb{P}$に近い点群データが得られるように学習を行います。
PointCleanNetではCleaningを行うにあたって、「1.外れ値の除去」と「2.デノイジング(denoising)」の2ステップで処理を行います。以下それぞれのステップについて確認します。
外れ値の除去
まず、外れ値の除去によって、下記のように定義される$\hat{\mathbb{P}}$の取得を試みます。
\begin{align}
\hat{\mathbb{P}} = \mathbb{P}' \setminus \tilde{\mathbb{O}}
\end{align}
ここで上記の$\tilde{\mathbb{O}}$は推定される外れ値の集合、$\hat{\mathbb{P}}$は外れ値の除去処理の出力にそれぞれ対応します。集合$\tilde{\mathbb{O}}$は下記のように定義されます。
\begin{align}
\tilde{\mathbb{O}} = \{ \tilde{o}_{i} = g(\mathbb{P}_{i}') \, | \, \tilde{o}_{i} > 0.5 \}
\end{align}
上記の関数$g$は外れ値かどうかを判定する非線形関数(non-linear function)であり、この関数$g$をPCPNetの学習によって得ます。また、$\mathbb{P}_{i}'$は$p_i'$の近傍点をサンプリングしたものであり、500個ほどのサンプルがデフォルトでは用いられます。
デノイジング(denoising)
前項で得た集合$\hat{\mathbb{P}}$の「デノイズを行うにあたって加えるべき項の$d_{i}$」を予測する関数の$f$を下記のように定義します($\hat{\mathbb{P}}_{i}$は点$i$の近傍点の集合)。
\begin{align}
d_{i} = f(\hat{\mathbb{P}}_{i}), \,\,\, \hat{\mathbb{P}}_{i} \subset \hat{\mathbb{P}}
\end{align}
上記の$d_{i}$を用いてPointCleanNetの出力となる点の集合$\tilde{\mathbb{P}}$は下記のように推定されます。
\begin{align}
\tilde{\mathbb{P}} &= \{ \tilde{p}_{i} \} \\
\tilde{p}_{i} &= \hat{p}_{i} + d_{i} \\
\hat{p}_{i} & \in \hat{\mathbb{P}} = \mathbb{P}' \setminus \tilde{\mathbb{O}}
\end{align}
$\hat{\mathbb{P}}$が予め用意された正解の点群と一致するようにPCPNetに基づいて構築される関数$f$の学習が行われます。
PointCleanNetの実装の確認
当節では以下、上記のリポジトリの確認を行います。
データセットとmodelの取得
データセットの取得
データセットの取得にあたっては下記のように実装されたdownload_data.pyを用います。
...
if __name__ == '__main__':
    opt = parse_arguments()
    if opt.task == "denoising":
        source_url = 'http://geometry.cs.ucl.ac.uk/projects/2019/pointcleannet/data/pointCleanNetDataset.tar.gz'
        target_dir = os.path.dirname(os.path.abspath(__file__))
        target_file = os.path.join(target_dir, 'pointCleanNetDataset.tar.gz')
        download_dataset(source_url,  target_dir, target_file)
    elif opt.task == "outliers_removal":
        source_url = 'http://geometry.cs.ucl.ac.uk/projects/2019/pointcleannet/data/pointCleanNetOutliersTestSet.tar.gz'
        target_dir = os.path.dirname(os.path.abspath(__file__))
        target_file = os.path.join(target_dir, 'pointCleanNetOutliersTestSet.tar.gz')
        download_dataset(source_url,  target_dir, target_file)
        source_url = 'http://geometry.cs.ucl.ac.uk/projects/2019/pointcleannet/data/pointCleanNetOutliersTrainingSet.tar.gz'
        target_dir = os.path.dirname(os.path.abspath(__file__))
        target_file = os.path.join(target_dir, 'pointCleanNetOutliersTrainingSet.tar.gz')
        download_dataset(source_url,  target_dir, target_file)
    else:
        print('unknown dataset')
上記は筆者環境ではurllibの問題で動かなかったので、source_url記載のURLから直接データセットを入手し、ファイルの解凍を行いました。
・外れ値除去(outliers removal)
http://geometry.cs.ucl.ac.uk/projects/2019/pointcleannet/data/pointCleanNetOutliersTestSet.tar.gz

・デノイジング(denoising)
http://geometry.cs.ucl.ac.uk/projects/2019/pointcleannet/data/pointCleanNetDataset.tar.gz
入手したファイルのリストは下記のコマンドを実行することなどにより確認できます。
$ ls data/pointCleanNetDataset
Cup33100k.clean_xyz					 cylinder100k_noise_white_5.00e-03.xyz
Cup33100k.clean_xyz.npy					 cylinder100k_noise_white_5.00e-03.xyz.npy
Cup33100k.xyz						 dragon100k.clean_xyz
Cup33100k.xyz.npy					 dragon100k.clean_xyz.npy
Cup33100k_noise_white_1.00e-02.clean_xyz		 dragon100k.xyz
Cup33100k_noise_white_1.00e-02.clean_xyz.npy		 dragon100k.xyz.npy
Cup33100k_noise_white_1.00e-02.xyz			 dragon100k_noise_white_1.00e-02.clean_xyz
Cup33100k_noise_white_1.00e-02.xyz.npy			 dragon100k_noise_white_1.00e-02.clean_xyz.npy
Cup33100k_noise_white_1.50e-02.clean_xyz		 dragon100k_noise_white_1.00e-02.xyz
Cup33100k_noise_white_1.50e-02.clean_xyz.npy		 dragon100k_noise_white_1.00e-02.xyz.npy
Cup33100k_noise_white_1.50e-02.xyz			 dragon100k_noise_white_1.50e-02.clean_xyz
Cup33100k_noise_white_1.50e-02.xyz.npy			 dragon100k_noise_white_1.50e-02.xyz
...
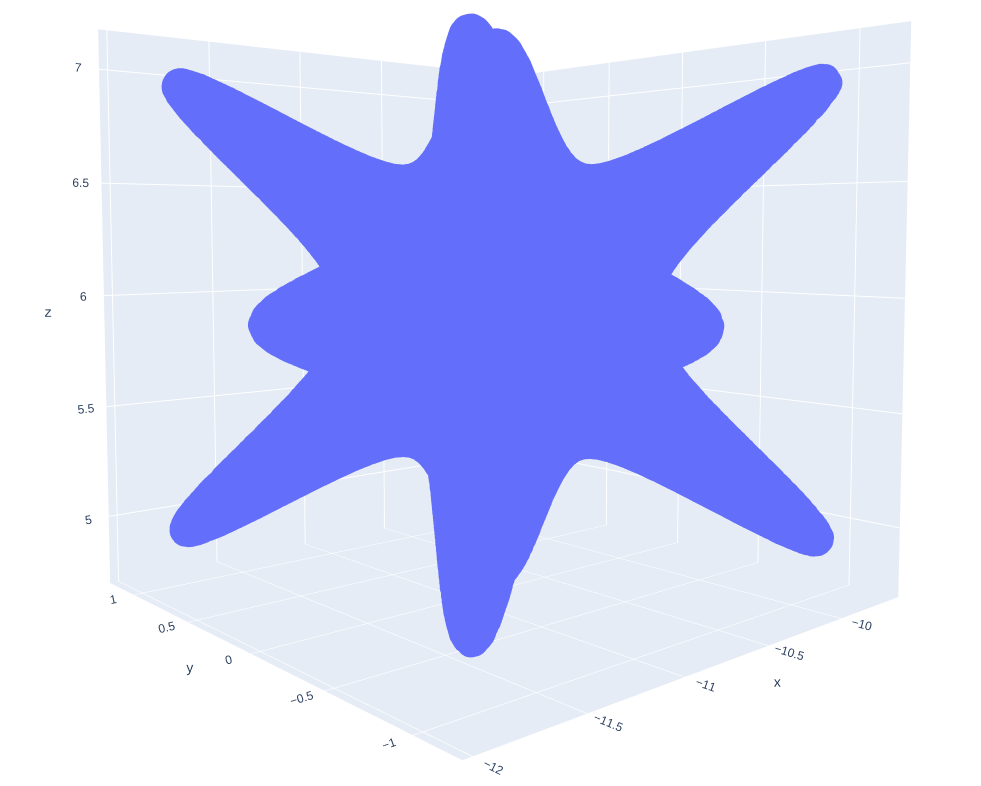
上記については下記などを実行することで確認することができます。
import numpy as np
import plotly.graph_objects as go

shape = "star_smooth100k"

x = np.load("pointCleanNetOutliersTestSet/"+shape+".xyz.npy")
print(x.shape)

fig = go.Figure()

fig.add_trace(go.Scatter3d(x=x[:,0],
                           y=x[:,1],
                           z=x[:,2],
                           mode='markers',
                       ))

fig.write_html(shape+".html")
・実行結果
(100000, 3)
import numpy as np
import plotly.graph_objects as go

shape = "dragon100k"

x = np.load("pointCleanNetOutliersTestSet/"+shape+".xyz.npy")
print(x.shape)

fig = go.Figure()

fig.add_trace(go.Scatter3d(x=x[:,0],
                           y=x[:,1],
                           z=x[:,2],
                           mode='markers',
                       ))

fig.write_html(shape+".html")
・実行結果
(100000, 3)

modelの取得
modelの取得にあたっては下記のように実装されたdownload_models.pyを用います。
...
if __name__ == '__main__':
    opt = parse_arguments()
    if opt.task == "denoising":
        source_url = 'http://geometry.cs.ucl.ac.uk/projects/2019/pointcleannet/data/denoisingModel.tar.gz'
        target_dir = os.path.dirname(os.path.abspath(__file__))
        target_file = os.path.join(target_dir, 'denoisingModel.tar.gz')
        download_model(source_url,  target_dir, target_file)
    elif opt.task == "outliers_removal":
        source_url = 'http://geometry.cs.ucl.ac.uk/projects/2019/pointcleannet/data/outliersRemovalModel.tar.gz'
        target_dir = os.path.dirname(os.path.abspath(__file__))
        target_file = os.path.join(target_dir, 'outliersRemovalModel.tar.gz')
        download_model(source_url,  target_dir, target_file)
    else:
        print('unknown model')
上記もデータセットと同様に筆者環境ではurllibの問題で動かなかったので、source_url記載のURLから直接modelを入手し、ファイルの解凍を行いました。
・外れ値除去(outliers removal)
http://geometry.cs.ucl.ac.uk/projects/2019/pointcleannet/data/outliersRemovalModel.tar.gz

・デノイジング(denoising)
http://geometry.cs.ucl.ac.uk/projects/2019/pointcleannet/data/denoisingModel.tar.gz
入手したmodelのリストは下記のコマンドを実行することなどにより確認できます。
$ ls models/outliersRemovalModel
PointCleanNetOutliers_model.pth  PointCleanNetOutliers_params.pth
外れ値の除去
以下、外れ値の除去の学習を行うoutliers_removal/train_pcpnet.pyの処理の概要について確認を行います。
def train_pcpnet(opt):
    ...

    target_features, output_target_ind, output_pred_ind, output_loss_weight, n_predicted_features = get_output_format(opt)

    pcpnet = ResPCPNet(
        num_points=opt.points_per_patch,
        output_dim=n_predicted_features,
        use_point_stn=opt.use_point_stn,
        use_feat_stn=opt.use_feat_stn,
        sym_op=opt.sym_op,
        point_tuple=opt.point_tuple)

    ...

    # create train and test dataset loaders
    train_dataloader, train_datasampler, train_dataset = get_data(target_features, opt, train=True)
    test_dataloader, test_datasampler, test_dataset = get_data(target_features, opt, train=False)

    ...

    criterion = torch.nn.L1Loss()
    for epoch in range(opt.nepoch):
        current_train_batch_index = -1
        train_completion = 0.0
        train_batches = enumerate(train_dataloader, 0)
        current_test_batch_index = -1
        test_completion = 0.0
        test_batches = enumerate(test_dataloader, 0)
        for current_train_batch_index, data in train_batches:
            # update learning rate
            scheduler.step(epoch * total_train_batches + current_train_batch_index)
            # set to training mode
            pcpnet.train()

            # get trainingset batch, convert to variables and upload to GPU
            points = data[0]
            target = data[1:-1]
            points = Variable(points)
            points = points.transpose(2, 1)
            points = points.cuda()

            target = tuple(Variable(t) for t in target)
            target = tuple(t.cuda() for t in target)

            # zero gradients
            optimizer.zero_grad()

            # forward pass
            pred, trans, _, _ = pcpnet(points)
            loss = compute_loss(pred=pred, target=target,outputs=opt.outputs,output_pred_ind=output_pred_ind,
                output_target_ind=output_target_ind,output_loss_weight=output_loss_weight,
                patch_rot=trans if opt.use_point_stn else None, criterion=criterion)

            # backpropagate through entire network to compute gradients of loss w.r.t. parameters
            loss.backward()

            # parameter optimization step
            optimizer.step()
            ...


if __name__ == '__main__':
    train_opt = parse_arguments()
    train_pcpnet(train_opt)
上記より、modelのインスタンスの生成(ResPCPNet)、データの読み込み(get_data)、lossの定義(compute_loss)などについて確認することができます。以下、それぞれについて詳しく確認します。
modelのインスタンスの生成
from pcpnet import ResPCPNet
outliers_removal/train_pcpnet.pyではResPCPNetの読み込みを上記のように行うので以下outliers_removal/pcpnet.pyについて確認を行います。
class ResPCPNet(nn.Module):
    def __init__(self, num_points=500, output_dim=3, use_point_stn=True, use_feat_stn=True, sym_op='max', get_pointfvals=False, point_tuple=1):
        super(ResPCPNet, self).__init__()
        self.num_points = num_points

        self.feat = ResPointNetfeat(
            num_points=num_points,
            num_scales=1,
            use_point_stn=use_point_stn,
            use_feat_stn=use_feat_stn,
            sym_op=sym_op,
            get_pointfvals=get_pointfvals,
            point_tuple=point_tuple)

        self.b1 = BasicBlock(1024, 512)

        self.b2 = BasicBlock(512, 256)
        self.b3 = BasicBlock(256, output_dim)


    def forward(self, x):
        x, trans, trans2, pointfvals = self.feat(x)
        x = self.b1(x)
        x = self.b2(x)
        x = self.b3(x)
        return x, trans, trans2, pointfvals
上記で実装されるResPCPNetではResPointNetfeatとBasicBlockを用いて処理が行われています。まずBasicBlockは下記のように実装されています。
class BasicBlock(nn.Module):
    expansion = 1

    def __init__(self, in_planes, planes, stride=1, conv = False):
        super(BasicBlock, self).__init__()
        if conv:
            self.l1 = torch.nn.Conv1d(in_planes, planes, 1)
            self.l2 = torch.nn.Conv1d(planes, planes, 1)
        else:
            self.l1 = nn.Linear(in_planes,planes)
            self.l2 = nn.Linear(planes, planes)

        stdv = 0.001 # for working small initialisation

        self.bn1 = nn.BatchNorm1d(planes, momentum = 0.01)
        self.shortcut = nn.Sequential()
        if in_planes != planes:
            if conv:
                self.l0 = nn.Conv1d(in_planes, planes, 1)
            else:
                self.l0 = nn.Linear(in_planes, planes)

            self.shortcut = nn.Sequential(self.l0,nn.BatchNorm1d(planes))
        self.bn2 = nn.BatchNorm1d(planes, momentum = 0.01)

    def forward(self, x):
            out = F.relu(self.bn1(self.l1(x)))
            out = self.bn2(self.l2(out))
            out += self.shortcut(x)
            out = F.relu(out)
            return out
基本的な処理にはカーネルサイズ1のtorch.nn.Conv1dが用いられており、この処理がPointCleanNet論文の図におけるFNN処理に対応します。次にResPointNetfeatの実装について確認します。
class ResPointNetfeat(nn.Module):
    def __init__(self, num_scales=1, num_points=500, use_point_stn=True, use_feat_stn=True, sym_op='max', get_pointfvals=False, point_tuple=1):
        super(ResPointNetfeat, self).__init__()
        self.num_points = num_points
        self.num_scales = num_scales
        self.use_point_stn = use_point_stn
        self.use_feat_stn = use_feat_stn
        self.sym_op = sym_op
        self.get_pointfvals = get_pointfvals
        self.point_tuple = point_tuple

        if self.use_point_stn:
            # self.stn1 = STN(num_scales=self.num_scales, num_points=num_points, dim=3, sym_op=self.sym_op)
            self.stn1 = ResSTN(num_scales=self.num_scales, num_points=num_points*self.point_tuple, dim=3, sym_op=self.sym_op, quaternion=True)

        if self.use_feat_stn:
            self.stn2 = ResSTN(num_scales=self.num_scales, num_points=num_points, dim=64, sym_op=self.sym_op)

        self.b0a = BasicBlock(3*self.point_tuple, 64, conv = True)
        self.b0b = BasicBlock(64, 64, conv=True)

        self.b1 = BasicBlock(64, 64, conv = True)
        self.b2 = BasicBlock(64, 128, conv = True)
        self.b3 = BasicBlock(128, 1024, conv = True)

        if self.num_scales > 1:
            self.b4 = BasicBlock(1024, 1024*self.num_scs, conv = True)

        if self.sym_op == 'max':
            self.mp1 = torch.nn.MaxPool1d(num_points)
        elif self.sym_op == 'sum':
            self.mp1 = None
        else:
            raise ValueError('Unsupported symmetric operation: %s' % (self.sym_op))

    def forward(self, x):

        # input transform
        if self.use_point_stn:
            # from tuples to list of single points
            x = x.view(x.size(0), 3, -1)
            trans = self.stn1(x)
            x = x.transpose(2, 1)
            x = torch.bmm(x, trans)
            x = x.transpose(2, 1)
            x = x.contiguous().view(x.size(0), 3*self.point_tuple, -1)
        else:
            trans = None

        # mlp (64,64)
        x = self.b0a(x)
        x = self.b0b(x)

        # feature transform
        if self.use_feat_stn:
            trans2 = self.stn2(x)
            x = x.transpose(2, 1)
            x = torch.bmm(x, trans2)
            x = x.transpose(2, 1)
        else:
            trans2 = None

        # mlp (64,128,1024)
        x = self.b1(x)
        x = self.b2(x)
        x = self.b3(x)

        # mlp (1024,1024*num_scales)
        if self.num_scales > 1:
            x = self.b4(x)

        if self.get_pointfvals:
            pointfvals = x
        else:
            pointfvals = None # so the intermediate result can be forgotten if it is not needed

        # symmetric max operation over all points
        if self.num_scales == 1:
            if self.sym_op == 'max':
                x = self.mp1(x)
            elif self.sym_op == 'sum':
                x = torch.sum(x, 2, keepdim=True)
            else:
                raise ValueError('Unsupported symmetric operation: %s' % (self.sym_op))

        else:
            if x.is_cuda:
                x_scales = Variable(torch.cuda.FloatTensor(x.size(0), 1024*self.num_scales**2, 1))
            else:
                x_scales = Variable(torch.FloatTensor(x.size(0), 1024*self.num_scales**2, 1))
            if self.sym_op == 'max':
                for s in range(self.num_scales):
                    x_scales[:, s*self.num_scales*1024:(s+1)*self.num_scales*1024, :] = self.mp1(x[:, :, s*self.num_points:(s+1)*self.num_points])
            elif self.sym_op == 'sum':
                for s in range(self.num_scales):
                    x_scales[:, s*self.num_scales*1024:(s+1)*self.num_scales*1024, :] = torch.sum(x[:, :, s*self.num_points:(s+1)*self.num_points], 2, keepdim=True)
            else:
                raise ValueError('Unsupported symmetric operation: %s' % (self.sym_op))
            x = x_scales

        x = x.view(-1, 1024*self.num_scales**2)

        return x, trans, trans2, pointfvals
上記ではBasicBlockで実装されたFNN処理と、STNやResSTNで実装されたSTN(Spatial Transformer Network)が用いられており、外れ値除去のメイン処理に対応します。また、self.sym_opの値(maxかsum)を元に全ての点の特徴量を統合していることが確認できます。点群の処理にあたっては入力の順番を入れ替えた際にも出力が変化しない必要があるので、PointNetをベースとするPCPNetでは途中でPooling処理を行わない点にも注意しておくと良いです。このように入力した点を統合する処理を行うことで入力の分類タスクを取り扱うことができるようになります。STNクラスについては下記のように実装されています。
class STN(nn.Module):
    def __init__(self, num_scales=1, num_points=500, dim=3, sym_op='max', quaternion =False):
        super(STN, self).__init__()
        self.quaternion = quaternion
        self.dim = dim
        self.sym_op = sym_op
        self.num_scales = num_scales
        self.num_points = num_points

        self.conv1 = torch.nn.Conv1d(self.dim, 64, 1)
        self.conv2 = torch.nn.Conv1d(64, 128, 1)
        self.conv3 = torch.nn.Conv1d(128, 1024, 1)
        self.mp1 = torch.nn.MaxPool1d(num_points)

        self.fc1 = nn.Linear(1024, 512)
        self.fc2 = nn.Linear(512, 256)
        if not quaternion:
            self.fc3 = nn.Linear(256, self.dim*self.dim)
        else:
            self.fc3 = nn.Linear(256, 4)
        self.bn1 = nn.BatchNorm1d(64)
        self.bn2 = nn.BatchNorm1d(128)
        self.bn3 = nn.BatchNorm1d(1024)
        self.bn4 = nn.BatchNorm1d(512)
        self.bn5 = nn.BatchNorm1d(256)

        if self.num_scales > 1:
            self.fc0 = nn.Linear(1024*self.num_scales, 1024)
            self.bn0 = nn.BatchNorm1d(1024)


    def forward(self, x):
        batchsize = x.size()[0]
        x = F.relu(self.bn1(self.conv1(x)))
        x = F.relu(self.bn2(self.conv2(x)))
        x = F.relu(self.bn3(self.conv3(x)))

        # symmetric operation over all points
        if self.num_scales == 1:
            x = self.mp1(x)
        else:
            if x.is_cuda:
                x_scales = Variable(torch.cuda.FloatTensor(x.size(0), 1024*self.num_scales, 1))
            else:
                x_scales = Variable(torch.FloatTensor(x.size(0), 1024*self.num_scales, 1))
            for s in range(self.num_scales):
                x_scales[:, s*1024:(s+1)*1024, :] = self.mp1(x[:, :, s*self.num_points:(s+1)*self.num_points])
            x = x_scales

        x = x.view(-1, 1024*self.num_scales)

        if self.num_scales > 1:
            x = F.relu(self.bn0(self.fc0(x)))

        x = F.relu(self.bn4(self.fc1(x)))
        x = F.relu(self.bn5(self.fc2(x)))
        x = self.fc3(x)

        if not self.quaternion:
            iden = Variable(torch.from_numpy(np.identity(self.dim, 'float32')).clone()).view(1, self.dim*self.dim).repeat(batchsize, 1)

            if x.is_cuda:
                iden = iden.cuda()
            x = x + iden
            x = x.view(-1, self.dim, self.dim)
        else:
            # add identity quaternion (so the network can output 0 to leave the point cloud identical)
            iden = Variable(torch.FloatTensor([1, 0, 0, 0]))
            if x.is_cuda:
                iden = iden.cuda()
            x = x + iden

            # convert quaternion to rotation matrix
            if x.is_cuda:
                trans = Variable(torch.cuda.FloatTensor(batchsize, 3, 3))
            else:
                trans = Variable(torch.FloatTensor(batchsize, 3, 3))
            x = utils.batch_quat_to_rotmat(x, trans)
        return x
また、ResPCPNetオブジェクトの生成時に出力層の次元数を指定するn_predicted_featuresについては下記のようにget_output_formatで値が指定されます。
def parse_arguments():
    parser = argparse.ArgumentParser()
    ...
    parser.add_argument('--outputs', type=str, nargs='+', default=['outliers'], help='outputs of the network')
    return parser.parse_args()

def get_output_format(opt):
    # get indices in targets and predictions corresponding to each output
    target_features = []
    output_target_ind = []
    output_pred_ind = []
    output_loss_weight = []
    pred_dim = 0
    for o in opt.outputs:
        if o in ['unoriented_normals', 'oriented_normals']:
            if 'normal' not in target_features:
                target_features.append('normal')

            output_target_ind.append(target_features.index('normal'))
            output_pred_ind.append(pred_dim)
            output_loss_weight.append(1.0)
            pred_dim += 3
        ...
        elif o in ['outliers']:
            target_features.append(o)
            output_target_ind.append(target_features.index(o))
            output_pred_ind.append(pred_dim)
            output_loss_weight.append(1.0)
            pred_dim += 1
        else:
            raise ValueError('Unknown output: %s' % (o))

    if pred_dim <= 0:
        raise ValueError('Prediction is empty for the given outputs.')
    return target_features, output_target_ind, output_pred_ind,  output_loss_weight, pred_dim
上記よりoutliers_removal/train_pcpnet.pyではn_predicted_featuresが1であり、これは関数$g$の出力が1次元であることに対応します。
データの読み込み
PointCleanNetの実装ではデータの読み込みに用いるDataLoaderオブジェクトの生成を行うget_data関数は下記のように実装されています。
def get_data(target_features, opt, train=True):
    # create train and test dataset loaders
    if train:
        shapes_list_file = opt.trainset
    else:
        shapes_list_file = opt.testset
    dataset = PointcloudPatchDataset(
        root=opt.indir,
        shapes_list_file=shapes_list_file,
        patch_radius=opt.patch_radius,
        points_per_patch=opt.points_per_patch,
        patch_features=target_features,
        point_count_std=opt.patch_point_count_std,
        seed=opt.seed,
        identical_epochs=opt.identical_epochs,
        use_pca=opt.use_pca,
        center=opt.patch_center,
        point_tuple=opt.point_tuple,
        cache_capacity=opt.cache_capacity)
    print('training_order ', opt.training_order)
    if opt.training_order == 'random':
        datasampler = RandomPointcloudPatchSampler(
            dataset,
            patches_per_shape=opt.patches_per_shape,
            seed=opt.seed,
            identical_epochs=opt.identical_epochs)
    elif opt.training_order == 'random_shape_consecutive':
        datasampler = SequentialShapeRandomPointcloudPatchSampler(
            dataset,
            patches_per_shape=opt.patches_per_shape,
            seed=opt.seed,
            identical_epochs=opt.identical_epochs)
    else:
        raise ValueError('Unknown training order: %s' % (opt.training_order))
    dataloader = torch.utils.data.DataLoader(
        dataset,
        sampler=datasampler,
        batch_size=opt.batchSize,
        num_workers=int(opt.workers))

    return dataloader, datasampler, dataset
上記の把握にあたってはデータセットの指定を行うPointcloudPatchDatasetとDataLoaderの生成を行うtorch.utils.data.DataLoaderに着目すると良いです。以下ではPointcloudPatchDatasetの実装について確認します。
from dataset import PointcloudPatchDataset, RandomPointcloudPatchSampler, SequentialShapeRandomPointcloudPatchSampler
outliers_removal/train_pcpnet.pyではPointcloudPatchDatasetの読み込みを上記のように行うので以下outliers_removal/dataset.pyについて確認を行います。
class PointcloudPatchDataset(data.Dataset):
    ...
    # returns a patch centered at the point with the given global index
    # and the ground truth normal the the patch center
    def __getitem__(self, index):

        # find shape that contains the point with given global index
        shape_ind, patch_ind = self.shape_index(index)

        shape = self.shape_cache.get(shape_ind)
        if shape.pidx is None:
            center_point_ind = patch_ind
        else:
            center_point_ind = shape.pidx[patch_ind]

        # get neighboring points (within euclidean distance patch_radius)
        patch_pts = torch.FloatTensor(self.points_per_patch*len(self.patch_radius_absolute[shape_ind]), 3).zero_()
        # patch_pts_valid = torch.ByteTensor(self.points_per_patch*len(self.patch_radius_absolute[shape_ind])).zero_()
        patch_pts_valid = []
        scale_ind_range = np.zeros([len(self.patch_radius_absolute[shape_ind]), 2], dtype='int')
        for radius_index, patch_radius in enumerate(self.patch_radius_absolute[shape_ind]):
            patch_pts, patch_pts_valid, scale_ind_range = self.select_patch_points(patch_radius, index,
                center_point_ind, shape, radius_index, scale_ind_range, patch_pts_valid, patch_pts)

        ...

        patch_feats = ()
        for pfeat in self.patch_features:
            if pfeat == 'normal':
                patch_feats = patch_feats + (patch_normal,)
            elif pfeat == 'max_curvature':
                patch_feats = patch_feats + (patch_curv[0:1],)
            elif pfeat == 'min_curvature':
                patch_feats = patch_feats + (patch_curv[1:2],)
            elif pfeat == 'clean_points':
                patch_feats = patch_feats + (patch_clean_points,)
            elif pfeat == "original":
                patch_feats = patch_feats + (original,patch_radius)
            else:
                raise ValueError('Unknown patch feature: %s' % (pfeat))
        return (patch_pts,) + patch_feats + (trans,)

    ...
上記よりPointcloudPatchDatasetクラスはtorch.utils.data.Datasetをベースに実装されていることが確認できます。__get_item__に与えられるindexは点のインデックスに対応しており、self.select_patch_pointsで近傍のサンプリングを行います。
class PointcloudPatchDataset(data.Dataset):
    ...
    def select_patch_points(self, patch_radius, global_point_index, center_point_ind, shape, radius_index,
    scale_ind_range, patch_pts_valid, patch_pts, clean_points=False):
        if clean_points:
            patch_point_inds = np.array(shape.clean_kdtree.query_ball_point(shape.clean_points[center_point_ind, :], patch_radius))
            # patch_point_inds = np.array(shape.clean_kdtree.query_ball_point(shape.pts[center_point_ind, :], patch_radius))
        else:
            patch_point_inds = np.array(shape.kdtree.query_ball_point(shape.pts[center_point_ind, :], patch_radius))

        # optionally always pick the same points for a given patch index (mainly for debugging)
        if self.identical_epochs:
            self.rng.seed((self.seed + global_point_index) % (2**32))

        point_count = min(self.points_per_patch, len(patch_point_inds))
        # randomly decrease the number of points to get patches with different point densities
        if self.point_count_std > 0:
            point_count = max(5, round(point_count * self.rng.uniform(1.0-self.point_count_std*2)))
            point_count = min(point_count, len(patch_point_inds))

        # if there are too many neighbors, pick a random subset
        if point_count < len(patch_point_inds):
            patch_point_inds = patch_point_inds[self.rng.choice(len(patch_point_inds), point_count, replace=False)]
        ...
        return patch_pts, patch_pts_valid, scale_ind_range
基本的にはkd-treeを用いて近傍点を探索し(半径はpatch_radiusで指定)、上限値であるpoints_per_patch(基本的には500が用いられる)より大きい場合は該当する点からサンプリングすることでパッチの作成を行います。
def parse_arguments():
    parser = argparse.ArgumentParser()

    ...
    parser.add_argument('--patch_radius', type=float, default=[
                        0.05], nargs='+', help='patch radius in multiples of the shape\'s bounding box diagonal, multiple values for multi-scale.')
    ...
    parser.add_argument('--points_per_patch', type=int,
                        default=500, help='max. number of points per patch')
    return parser.parse_args()
outliers_removal/train_pcpnet.pyでは上記のようにpatch_radiusとpoints_per_patchの指定を行うことを合わせて抑えておくと良いと思います。
lossの定義
def train_pcpnet(opt):
    for epoch in range(opt.nepoch):
        ...
            criterion = torch.nn.L1Loss()
            for current_train_batch_index, data in train_batches:
                ...
                # forward pass
                pred, trans, _, _ = pcpnet(points)
                loss = compute_loss(
                    pred=pred, target=target,
                    outputs=opt.outputs,
                    output_pred_ind=output_pred_ind,
                    output_target_ind=output_target_ind,
                    patch_rot=trans if opt.use_point_stn else None)
outliers_removal/train_pcpnet.pyではlossの計算にあたっては上記のようにcompute_lossを用います。compute_lossは下記のように実装されています。
def compute_loss(pred, target, outputs, output_pred_ind, output_target_ind, output_loss_weight, patch_rot, criterion = None, cleaning=False):
    loss = 0
    for output_index, output in enumerate(outputs):
        loss += compute_outliers_loss(pred, output_pred_ind, output_index,  target, output_target_ind, output_loss_weight, criterion)
    return loss


def compute_outliers_loss(pred, output_pred_ind, output_index,  target, output_target_ind, output_loss_weight, criterion):
    o_pred = pred[:, output_pred_ind[output_index]:output_pred_ind[output_index] + 1]
    o_target = target[output_target_ind[output_index]]
    o_target = o_target.cuda()
    loss = criterion(o_pred[:,0], o_target)
    return loss
デノイジング(denoising)
デノイジングの実装は基本的に外れ値の除去と同様な処理で実現されるので、以下では外れ値の除去と同様な点に着目しつつ取りまとめます。
def parse_arguments():
    parser = argparse.ArgumentParser()
    ...
    parser.add_argument('--outputs', type=str, nargs='+', default=['clean_points'], help='output of the network')
    ...
    return parser.parse_args()

def get_output_format(opt):
    # get indices in targets and predictions corresponding to each output
    target_features = []
    output_target_ind = []
    output_pred_ind = []
    pred_dim = 0
    for o in opt.outputs:
        if o in ['clean_points']:
            target_features.append(o)
            output_target_ind.append(target_features.index(o))
            output_pred_ind.append(pred_dim)
            pred_dim += 3

        else:
            raise ValueError('Unknown output: %s' % (o))
    if pred_dim <= 0:
        raise ValueError('Prediction is empty for the given outputs.')
    return target_features, output_target_ind, output_pred_ind,  pred_dim
上記の実装より、PCPNetの出力の次元が3であることが確認できます。

PointCleanNet論文 Figure 3
デノイジングの出力の$d_i$は上図のように点の位置の補正に使われるので出力が3次元になると理解すると良いと思います。また、デノイジングのmodelについては下記のようなコードで実装されています。
def parse_arguments():
    parser = argparse.ArgumentParser()
    ...
    parser.add_argument('--patch_radius', type=float, default=[
                        0.05], nargs='+', help='patch radius in multiples of the shape\'s bounding box diagonal, multiple values for multi-scale.')
    ...
    return parser.parse_args()

def train_pcpnet(opt):
    ...
    pcpnet = create_model(n_predicted_features, opt)

def create_model(n_predicted_features, opt):
    # create model
    if len(opt.patch_radius) == 1:
        pcpnet = ResPCPNet(
            num_points=opt.points_per_patch,
            output_dim=n_predicted_features,
            use_point_stn=opt.use_point_stn,
            use_feat_stn=opt.use_feat_stn,
            sym_op=opt.sym_op,
            point_tuple=opt.point_tuple)
    else:
        pcpnet = ResMSPCPNet(
            num_scales=len(opt.patch_radius),
            num_points=opt.points_per_patch,
            output_dim=n_predicted_features,
            use_point_stn=opt.use_point_stn,
            use_feat_stn=opt.use_feat_stn,
            sym_op=opt.sym_op,
            point_tuple=opt.point_tuple)
    return pcpnet
上記よりデフォルトでの実行ではResPCPNet、patch_radiusに2つ以上の値を与えた場合にはResMSPCPNetが用いられることが確認できます。