はじめに
本記事は、クラウドの無料枠やOSS等を使用して、自分のポートフォリオ(※)を作るための方法について記載しています。
誰でも自分のポートフォリオを作成して、Web上にすぐに公開することができます。ドメインも無料で取得し、HTTPS化も行います。
自分でサーバを作って公開することで、以下の知識が体系的に学べて、ポートフォリオも持てるので駆け出しエンジニアの方や、転職活動している人などにお勧めです。
- クラウドインフラ:GCP
- OS:Linux
- MW:Nginx
- フレームワーク:Bootstrap
- DNS/HTTP/HTTPS等各種プロトコル
本記事で扱わない内容:Nginxの設定、HTMLやCSSの書き方等
(※)本記事のポートフォリオは、自分で作成した成果物や作品を公開するための方法を指します。
GCP
Google Cloud Platform(以下、GCP)は、Googleが提供するパブリッククラウドサービスの総称になります。GCPが提供するサービスより、Google Compute Engine(以下、GCE)を利用して、仮想マシンのインスタンス1台を構築します。
仮想マシンのインスタンス構築方法(※)については、以前書いたこれから始めるGCP(GCE) 安全に無料枠を使い倒せを参照
(※)本記事の環境は、debian-9のイメージを選択
Nginx
静的コンテンツ(HTMLファイルや画像)や動的コンテンツを提供する場合は、Webサーバの機能が必要になります。本記事では軽量なNginxをインストールします。
Nginxのインストール
- Nginxのインストール
# wget https://nginx.org/keys/nginx_signing.key
# apt-key add nginx_signing.key
# deb http://nginx.org/packages/mainline/ubuntu/ artful nginx
# apt-get update
# apt-get install nginx
Nginxをインストールしただけでは、ファイアウォールによりポートが塞がっているため、アクセスできません。HTTPで通信する場合は80、HTTPSで通信する場合は443をファイアーウォール ルールで許可します。ファイアウォールの設定方法もファイアーウォール ルールの設定に書いています。
構築中はいきなり外部公開せずに、「ソースIPの範囲」で、サブネットマスクを32ビットに設定し、自分のグローバルIP/32で制限を行うことをお勧めします。
Bootstrap
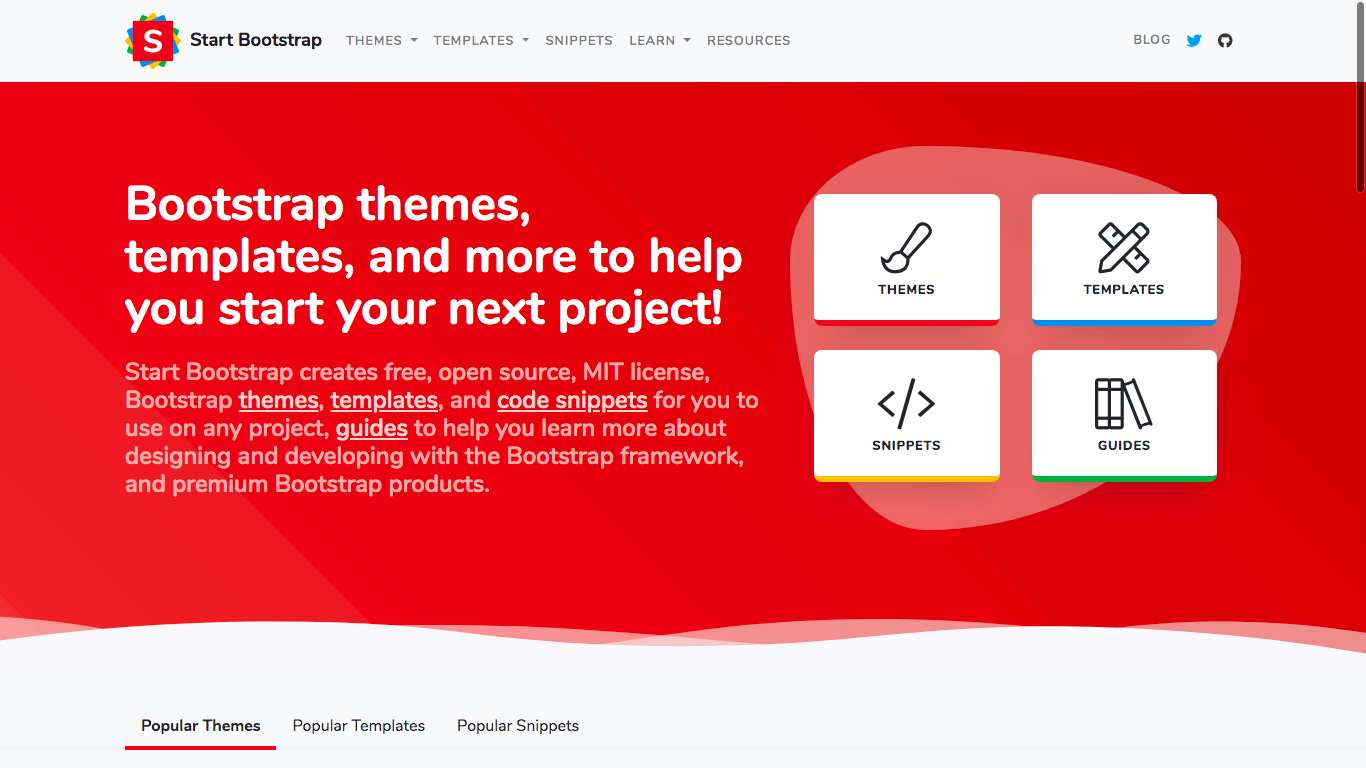
BootstrapはウェブサイトやWebアプリケーションを作成するためのフレームワークになります。Bootstrapでは、無料のテンプレートが公開されているため、テンプレートを使用することで、おしゃれなWebサイトを簡単に作ることができます。テンプレートは公式のStart Bootstrapよりダウンロードします。
Bootstrapのテンプレート適用
Bootstrapのテンプレートを使用する手順は以下になります。
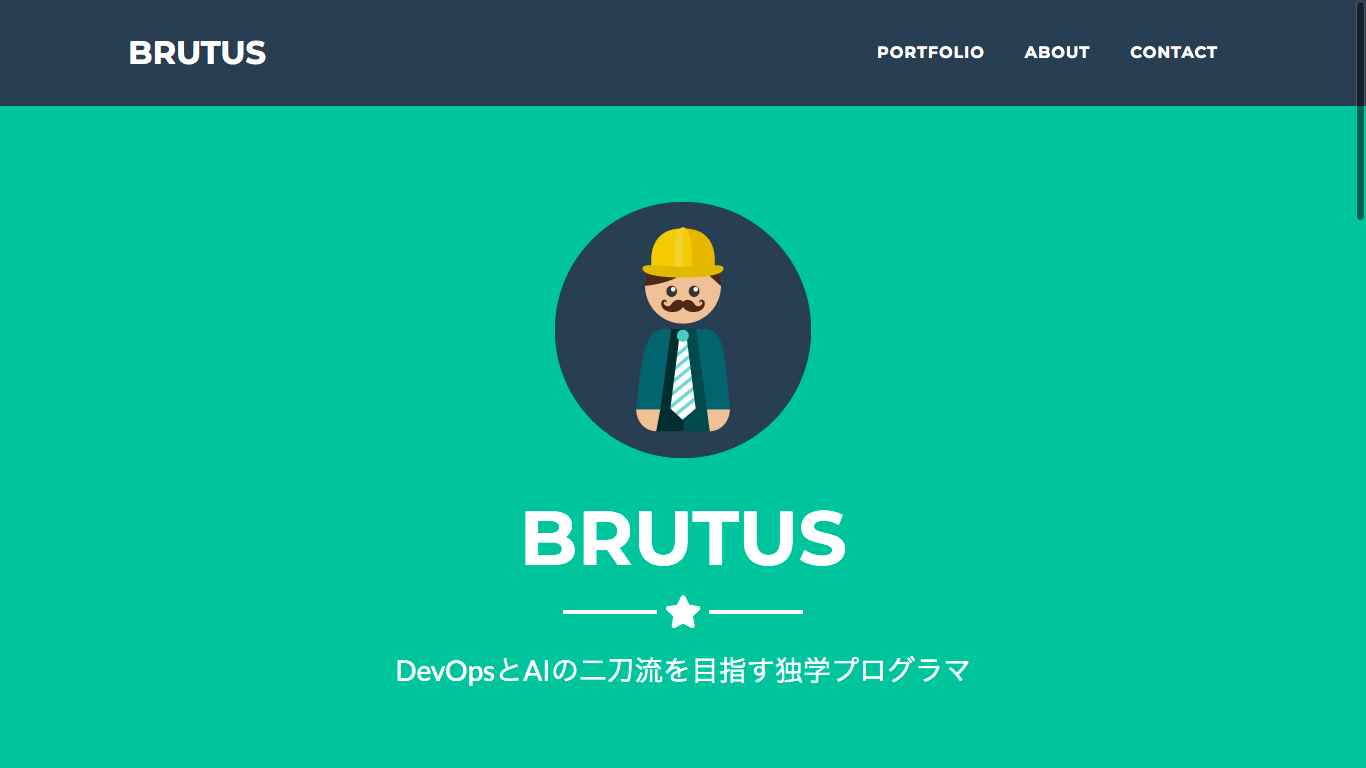
- Bootstrapのテンプレートをダウンロード(本記事では、Freelancerを使用)
- Bootstrapのテンプレートから、index.htmlファイルをエディタで開き、編集する
- 編集後、全ての資材をzipで圧縮する
- 以下のコマンドを実行し、編集した資材を展開する
<ローカルでの操作>
- 資材の転送
$ scp -P 変更後のポート番号 -i ~/.ssh/my-ssh-key startbootstrap-freelancer-gh-pages.zip 外部IP:/tmp - サーバにログイン
$ ssh 外部IP -i ~/.ssh/my-ssh-key -p 変更後のポート番号
<インスタンスでの操作(※)>
- unzipのインストール
# apt-get install unzip - 資材の解凍
# unzip /tmp/startbootstrap-freelancer-gh-pages.zip - 資材の配置
# mv /tmp/startbootstrap-freelancer-gh-pages /var/www/html
(※)コマンドは全てrootで実行
Freenom
Freenomを使用することで、無料でドメインが取得できます。なお、ドメイン取得時にカード情報などを登録することもありません。本記事ではドメイン取得後のAレコード設定手順(※)について解説します。(ドメイン取得の手順については割愛)
(※)Let's Encryptのcertbotコマンド実行時に、Aレコードが設定されていない場合、エラーになります。
FreenomのAレコード設定
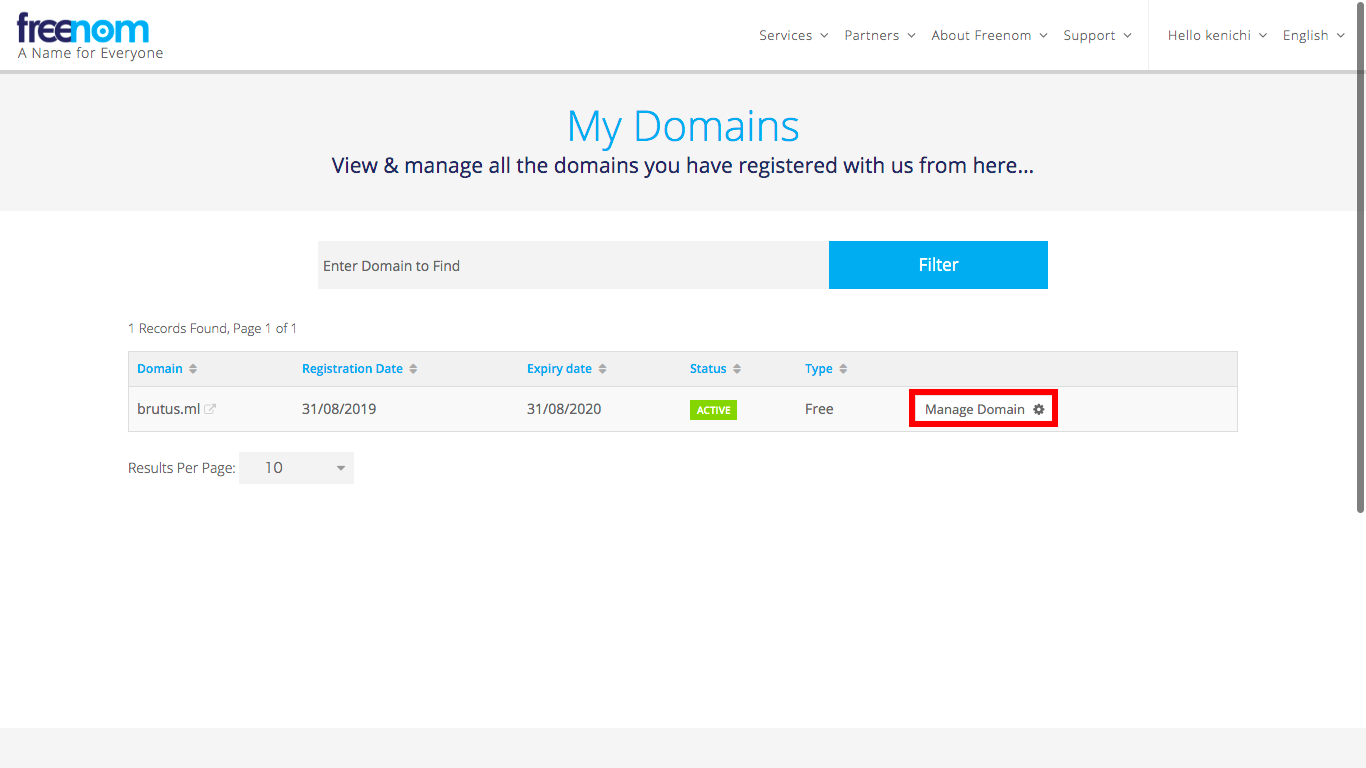
ドメイン取得後、画面上部の「Services」-「My Domains」-「Manage Domain」をクリックします。
「NAME」に取得したドメイン名を入力し、「Target」にGCEインスタンスの外部IPを入力します。
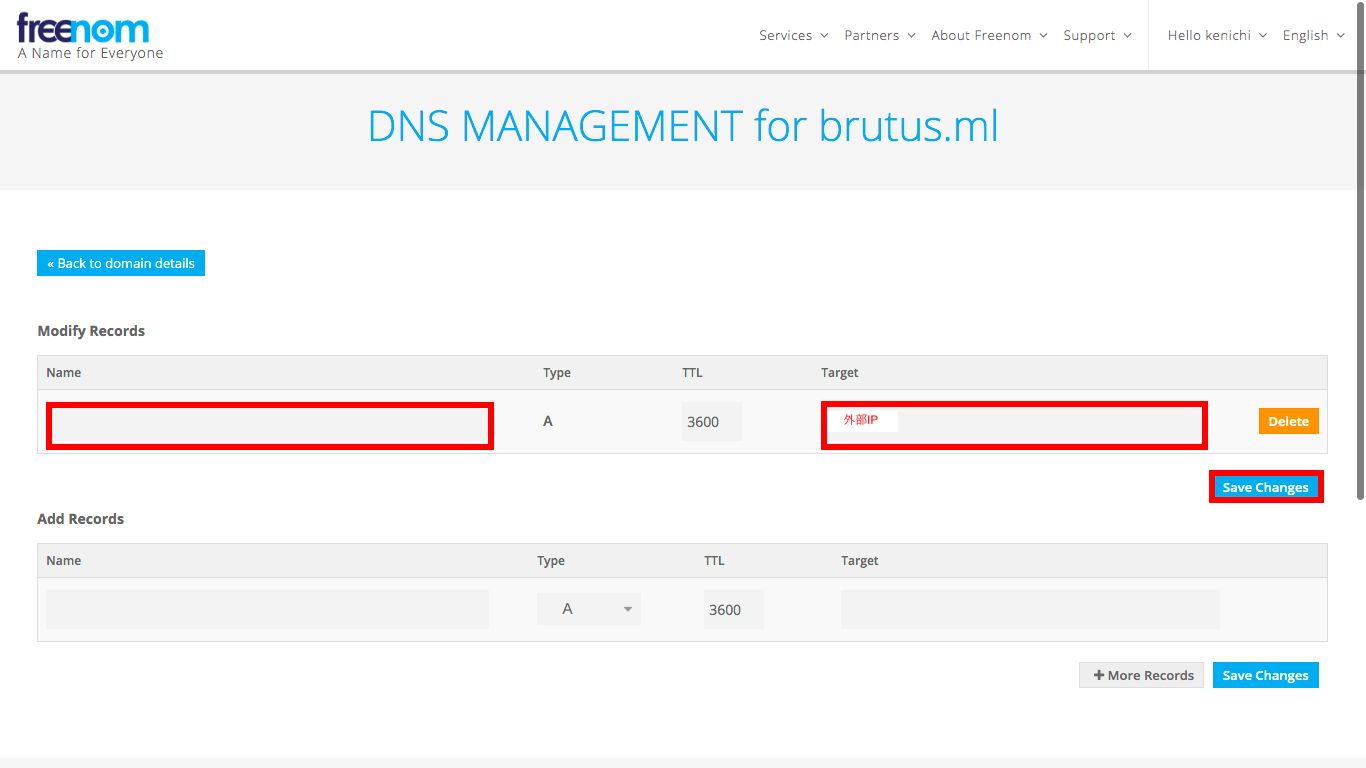
「NAME」と「Target」を入力後、「Save Changes」をクリックします。「Record added successfully」と出力されれば、設定完了です。
Aレコードの反映には約30分程度かかるのでしばらく待ちます。![]()
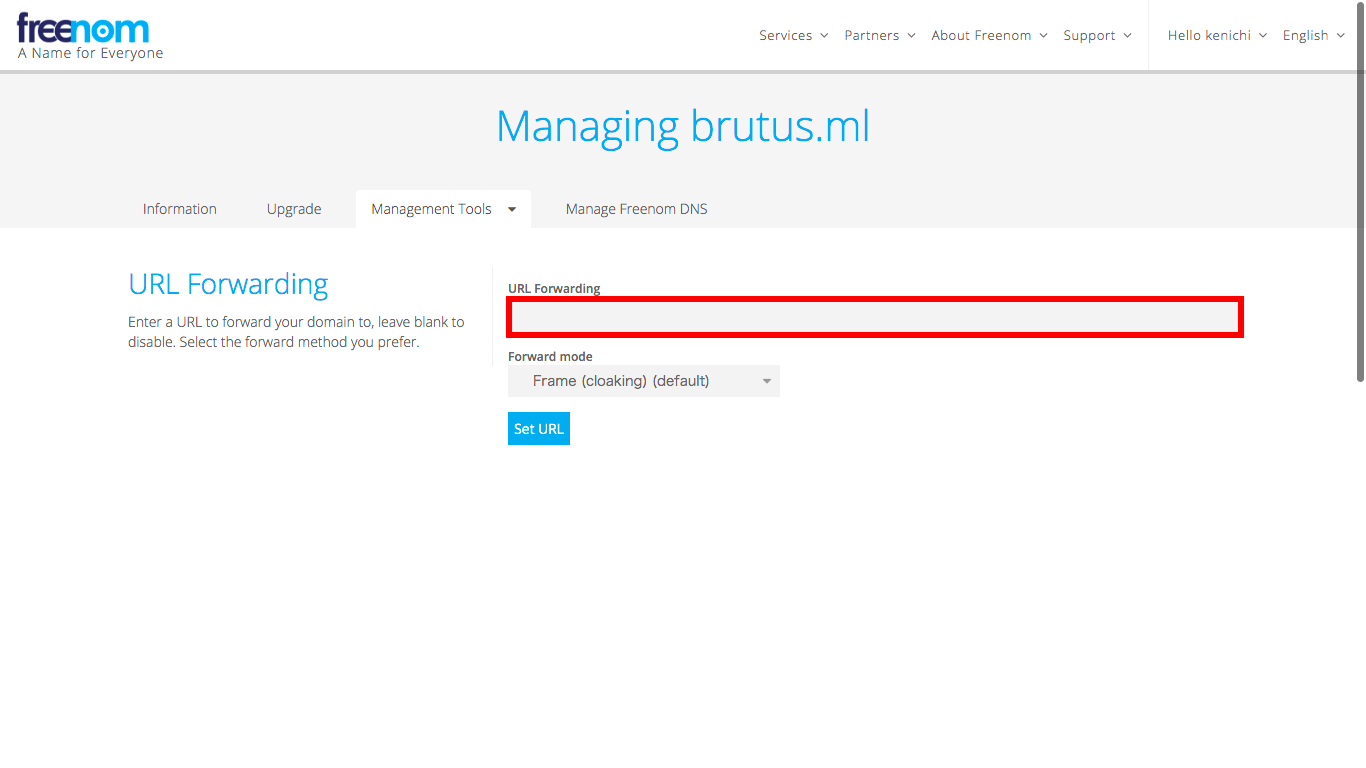
なお、「Management Tools」の「URL Forwarding」にGCEインスタンスの外部IPを入力することで、HTTPアクセスはできますが、Aレコードを設定した訳ではないのでご注意ください。
Let's Encrypt
本記事では、certbotを使用して設定します。
certbotの使用方法は、certbot instructionsを参照し、WebサーバとOSの組み合わせを選択して、表示されたコマンドを実行するだけです。本記事の例では、Nginxと**Debian 9 (stretch)**の組み合わせになります。
# apt-get install certbot python-certbot-nginx -t stretch-backports
# certbot --nginx
Saving debug log to /var/log/letsencrypt/letsencrypt.log
Plugins selected: Authenticator nginx, Installer nginx
No names were found in your configuration files. Please enter in your domain
name(s) (comma and/or space separated)  (Enter 'c' to cancel): brutus.ml
Obtaining a new certificate
Performing the following challenges:
http-01 challenge for brutus.ml
Waiting for verification...
Cleaning up challenges
Deploying Certificate to VirtualHost /etc/nginx/sites-enabled/default

Please choose whether or not to redirect HTTP traffic to HTTPS, removing HTTP access.
- - - - - - - - - - - - - - - - - - - - - - - - - - - - - - - - - - - - - - - -
1: No redirect - Make no further changes to the webserver configuration.
2: Redirect - Make all requests redirect to secure HTTPS access. Choose this for
new sites, or if you're confident your site works on HTTPS. You can undo this
change by editing your web server's configuration.
- - - - - - - - - - - - - - - - - - - - - - - - - - - - - - - - - - - - - - - -
Select the appropriate number [1-2] then [enter] (press 'c' to cancel): 2
Redirecting all traffic on port 80 to ssl in /etc/nginx/sites-enabled/default

- - - - - - - - - - - - - - - - - - - - - - - - - - - - - - - - - - - - - - - -
Congratulations! You have successfully enabled https://brutus.ml

You should test your configuration at:
https://www.ssllabs.com/ssltest/analyze.html?d=brutus.ml
- - - - - - - - - - - - - - - - - - - - - - - - - - - - - - - - - - - - - - - -

IMPORTANT NOTES:
 - Congratulations! Your certificate and chain have been saved at:
   /etc/letsencrypt/live/brutus.ml/fullchain.pem
   Your key file has been saved at:
   /etc/letsencrypt/live/brutus.ml/privkey.pem
   Your cert will expire on 2019-12-07. To obtain a new or tweaked
   version of this certificate in the future, simply run certbot again
   with the "certonly" option. To non-interactively renew *all* of
   your certificates, run "certbot renew"
 - If you like Certbot, please consider supporting our work by:

   Donating to ISRG / Let's Encrypt:   https://letsencrypt.org/donate
   Donating to EFF:                    https://eff.org/donate-le
certbot --nginxコマンド実行後、対話的になるので自分のドメインと、HTTPのリダイレクトについて1か2を入力します。(本記事では、2を選択)
エラーの例
certbot --nginxコマンド実行時に、以下の様なエラーが出力される場合は、Aレコードの設定が行われていないためです。
   To fix these errors, please make sure that your domain name was
   entered correctly and the DNS A/AAAA record(s) for that domain
   contain(s) the right IP address.
 - Your account credentials have been saved in your Certbot
   configuration directory at /etc/letsencrypt. You should make a
   secure backup of this folder now. This configuration directory will
   also contain certificates and private keys obtained by Certbot so
   making regular backups of this folder is ideal.
セキュリティ設定
全て無料といっても、セキュリテイに対する責任は自分で取らないといけません。
すぐに適用可能な実施しておくとよいセキュリテイ設定について一部記載します。
その他参考として、Linuxサーバのセキュリテイ対策については、以前書いたクラウドインフラのLinuxセキュリティ対策 設計を制するものはクラウドも制するを参照
Nginxのバージョン情報非表示
Nginxのデフォルト設定は、404などのエラーページ表示時にバージョン情報が表示されてしまうため、「/etc/nginx/nginx.conf」ファイルの以下の設定値を変更します。設定値変更後はNginxの再起動が必要です。
# 変更前
22c22
< 	# server_tokens off;
---
# 変更後
> 	server_tokens off;
ログ管理
Nginxインストール後、rsyslogの「/etc/logrotate.d/nginx」ファイルのログローテの設定値(rotate)は14になっているため、二週間分しか保存されません。必要に応じてrotateの値を変更しましょう。
/var/log/nginx/*.log {
	daily
	missingok
	rotate 14
	compress
	delaycompress
	notifempty
	create 0640 www-data adm
	sharedscripts
	prerotate
		if [ -d /etc/logrotate.d/httpd-prerotate ]; then \
			run-parts /etc/logrotate.d/httpd-prerotate; \
		fi \
	endscript
	postrotate
		invoke-rc.d nginx rotate >/dev/null 2>&1
	endscript
}
不正アクセス対策
Webサーバ公開後は、ログを見て観察しましょう。
以下のコマンドを実行することで、アクセス頻度の高いIPアドレスを降順で出力します。
# cat /var/log/nginx/access.log | cut -d " " -f 1 | sort | uniq -c | sort -nr
nginxのアクセスログを見ると、海外から脆弱性を狙った不正アクセスが確認できます。代表的なのは、WordPressの脆弱性を狙った「wp-config.php」ファイルのアクセスをはじめ、phpファイルへの攻撃が盛んに行われています。
118.97.112.34 - - [08/Sep/2019:04:51:34 +0900] "GET /wp-config.php HTTP/1.1" 404 162 "-" "Mozilla/5.0 (Windows NT 6.1
; Win64; x64; rv:45.0) Gecko/20100101 Firefox/45.0"
不正アクセス対策として、ファイアーウォール ルールの設定で、上記コマンド結果からアクセス頻度の高いIPアドレスを拒否することで、当該IPアドレスからのアクセスを拒否できます。
ファイアウォール ルールの優先度(※)は、一般的なファイアウォールと同じ考え方になります。小さい整数の順に高い優先度になるため、拒否のルールを先に書いて、後に許可のルールを設定します。

(※)優先度の詳細については、公式の優先度を参照
テンプレートのphpファイル削除
本記事で使用している、Freelancerのテンプレートにも含まれていますが、PHPを使用しない場合は不要なPHPファイルはアクセスできない様に削除しましょう。
おわりに
今までどんなことをやったか、どんなものを作ったか、それらを証明するのはポートフォリオが便利です。
是非、自分だけの素敵なポートフォリオを作ってみてください![]()