はじめに
仕事の都合でJupyter on OpenShiftを試したくなったので、複数回に分けてその過程を紹介してゆきます。
本稿は、3本目です。
1本目:CentOSのインストールとCRCのインストール
2本目:NFSサーバのインストールとJupyterHubのデプロイ
3本目:JupyterLabへの永続ボリュームの割当てとJupyterLabイメージの切替え設定 ★本稿
本稿で紹介すること
以下、2つの環境設定をJupyterHubに施してゆきます。
- JupyterLabへの永続ボリュームの割当て設定
- JupyterLabイメージの切替え設定
項目としては2つですが同じ画面で設定するため、その方法や設定値をまとめて紹介します。
参考記事
以下の記事を見て、手元PCで進めてゆきます。
JupyterHubの環境設定
過去の記事でも触れてきていますが、JupyterHubの振る舞いを変えたいときは「環境設定ファイル(jupyterhub_config.py)」に手を加える、が基本的な方法です。
Jupyter on OpenShiftにおいても、それを実現する手立てが用意されており、OpenShiftの世界でConfigMapなるオブジェクトを作成(・変更)する、というかたちです。
(ConfigMap自体の解説は本家に任せるとして、、、OSで環境変数を使うように、OpenShiftではConfigMapを使って環境依存情報を注入することができる、という話です。)
ConfigMapオブジェクトの変更方法
以下を順に辿って、(Templateのインスタンス化によって)既に登録済みのConfigMapオブジェクト「jupyterhub-cfg」を変更します。
「開発者向け表示」
→「ConfigMap」
→「jupyterhub-cfg」
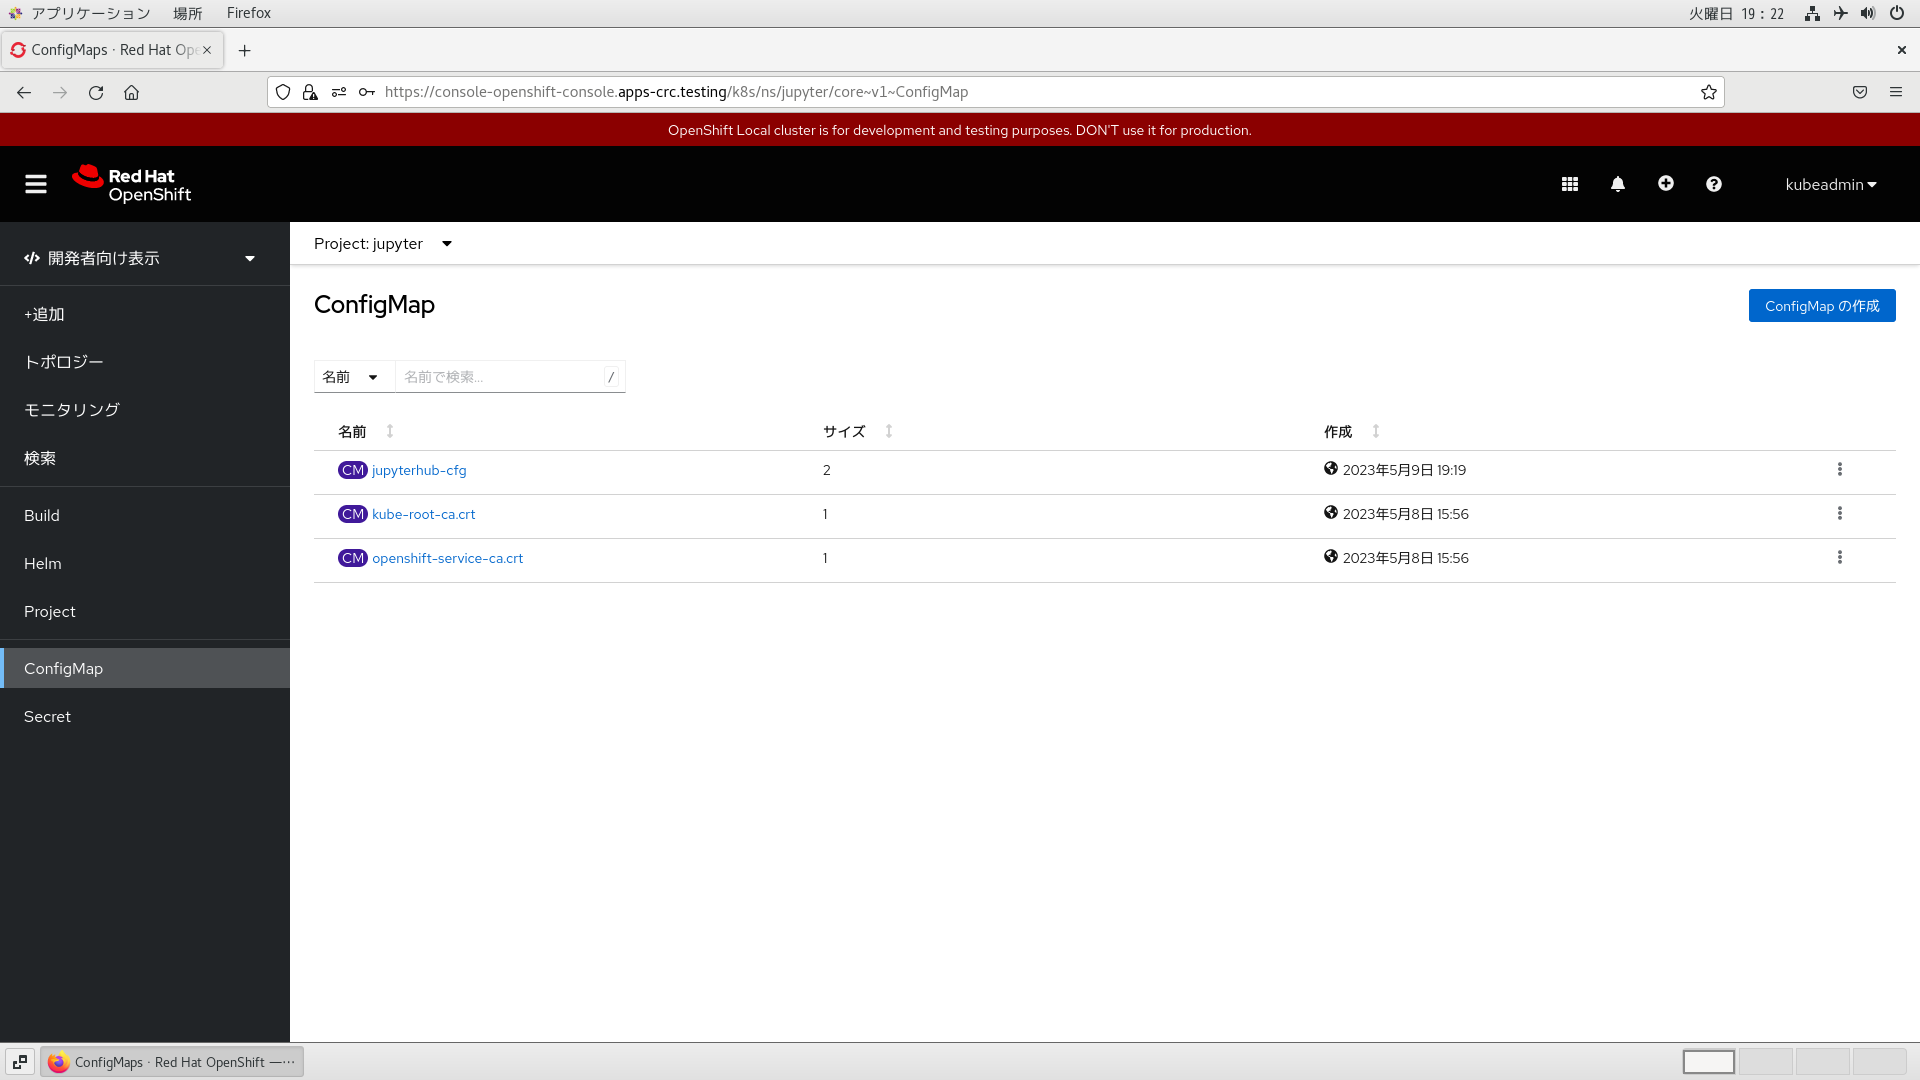
遷移先の画面、「YAML」タブで実際に手を入れてゆきます。
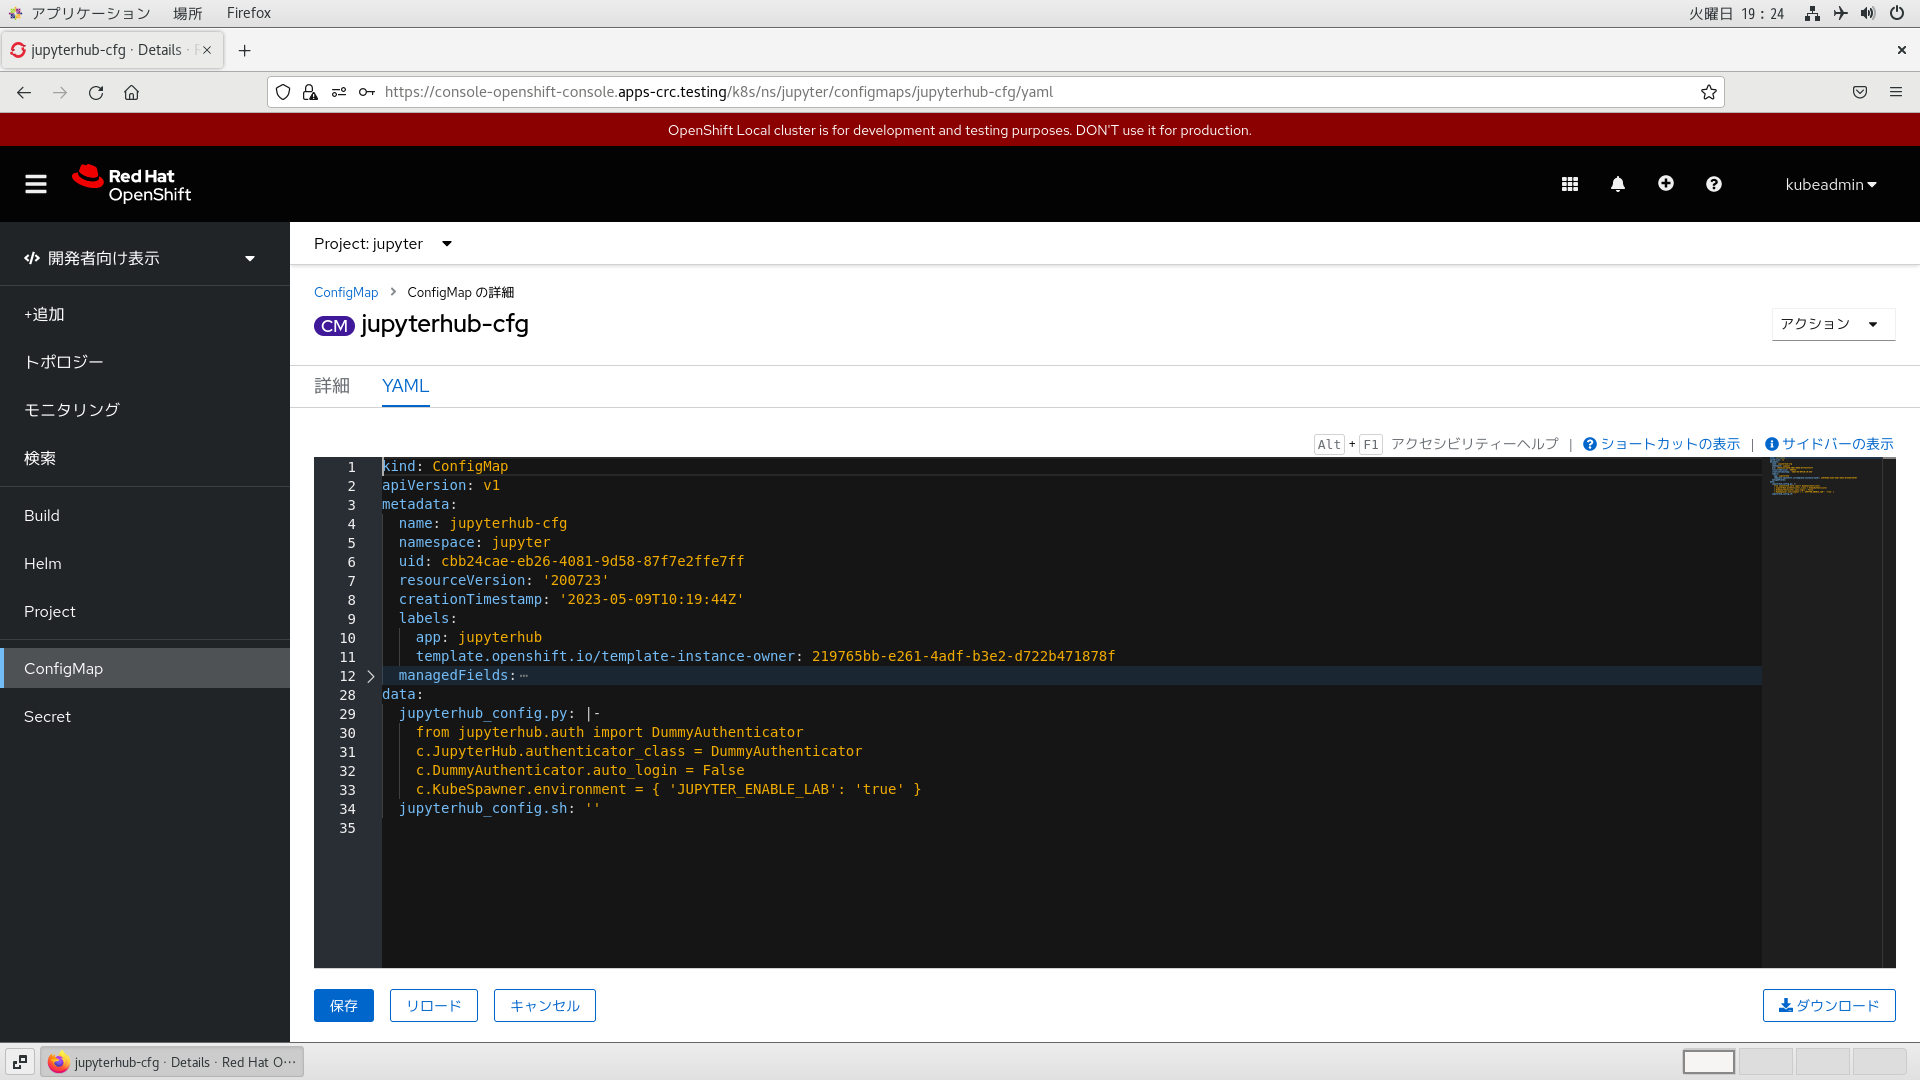
ConfigMapオブジェクトの設定値
手っ取り早く、BeforeとAfterを示します。
設定内容は、GitHubで公開していますので全体はそちらを参照ください。
~
(略)
~
data:
  jupyterhub_config.py: |-
    from jupyterhub.auth import DummyAuthenticator
    c.JupyterHub.authenticator_class = DummyAuthenticator
    c.DummyAuthenticator.auto_login = False
    c.KubeSpawner.environment = { "JUPYTER_ENABLE_LAB": "true" }
  jupyterhub_config.sh: ''
~
(略)
~
data:
  jupyterhub_config.py: |-
    from jupyterhub.auth import DummyAuthenticator
    c.JupyterHub.authenticator_class = DummyAuthenticator
    c.DummyAuthenticator.auto_login = False
    c.KubeSpawner.environment = { "JUPYTER_ENABLE_LAB": "true" }
    c.KubeSpawner.start_timeout = 300
    c.KubeSpawner.http_timeout = 120
    c.Authenticator.admin_users = { "admin", "jupyter" }
    c.KubeSpawner.profile_list = [
        {
            "display_name": "Python 3.6",
            "description": "[Resource] CPU:1.0/Mem:4.0GB",
            "default": True,
            "kubespawner_override": {
                "image": "s2i-minimal-notebook-py36:2.5.1",
                "cpu_guarantee": 1.0,
                "cpu_limit": 1.0,
                "mem_guarantee": "4000M",
                "mem_limit": "4000M",
            }
        },
        {
            "display_name": "Python 3.8",
            "description": "[Resource] CPU:1.0/Mem:4.0GB",
            "kubespawner_override": {
                "image": "s2i-minimal-py38-notebook:v1.0.0",
                "cpu_guarantee": 1.0,
                "cpu_limit": 1.0,
                "mem_guarantee": "4000M",
                "mem_limit": "4000M",
            }
        },
        {
            "display_name": "Python 3.8 w/Spark",
            "description": "[Resource] CPU:1.0/Mem:4.0GB",
            "kubespawner_override": {
                "image": "pyspark-notebook:python-3.8",
                'supplemental_gids': [100],
                "cpu_guarantee": 1.0,
                "cpu_limit": 1.0,
                "mem_guarantee": "4000M",
                "mem_limit": "4000M",
                "volume_mounts": [
                  {
                    "name": "data",
                    "mountPath": "/home/jovyan"
                  }
                ]
            }
        }
    ]
    c.KubeSpawner.pvc_name_template = "pvc-{username}"
    c.KubeSpawner.user_storage_capacity = "1Gi"
    c.KubeSpawner.volumes = [
        {
            "name": "data",
            "persistentVolumeClaim": {
                "claimName": c.KubeSpawner.pvc_name_template
            }
        }
    ]
    c.KubeSpawner.volume_mounts = [
        {
            "name": "data",
            "mountPath": "/opt/app-root/src"
        }
    ]
  jupyterhub_config.sh: ''
ポイント絞って、軽く解説します。
JupyterLabへの永続ボリュームの割当て設定
-
c.KubeSpawner.pvc_name_template
JupyterHubでのログインユーザ単位で永続ボリュームを割り当てる考え方です。
ユーザ名に呼応するようにPVCオブジェクト"pvc-{username}"を指定しています。
そのため、ユーザ単位で予めNFSサーバ上に公開ディレクトリ/OpenShift上でPVおよびPVCを作成しておく必要があります。 -
c.KubeSpawner.volumes/c.KubeSpawner.volume_mounts
コンテナの中でのMountポイントを指定しています。
PVCオブジェクト"pvc-{username}"を、コンテナOS上で"mountPath"に指定するPATHにMountしています。
    c.KubeSpawner.pvc_name_template = "pvc-{username}"
    c.KubeSpawner.user_storage_capacity = "1Gi"
    c.KubeSpawner.volumes = [
        {
            "name": "data",
            "persistentVolumeClaim": {
                "claimName": c.KubeSpawner.pvc_name_template
            }
        }
    ]
    c.KubeSpawner.volume_mounts = [
        {
            "name": "data",
            "mountPath": "/opt/app-root/src"
        }
    ]
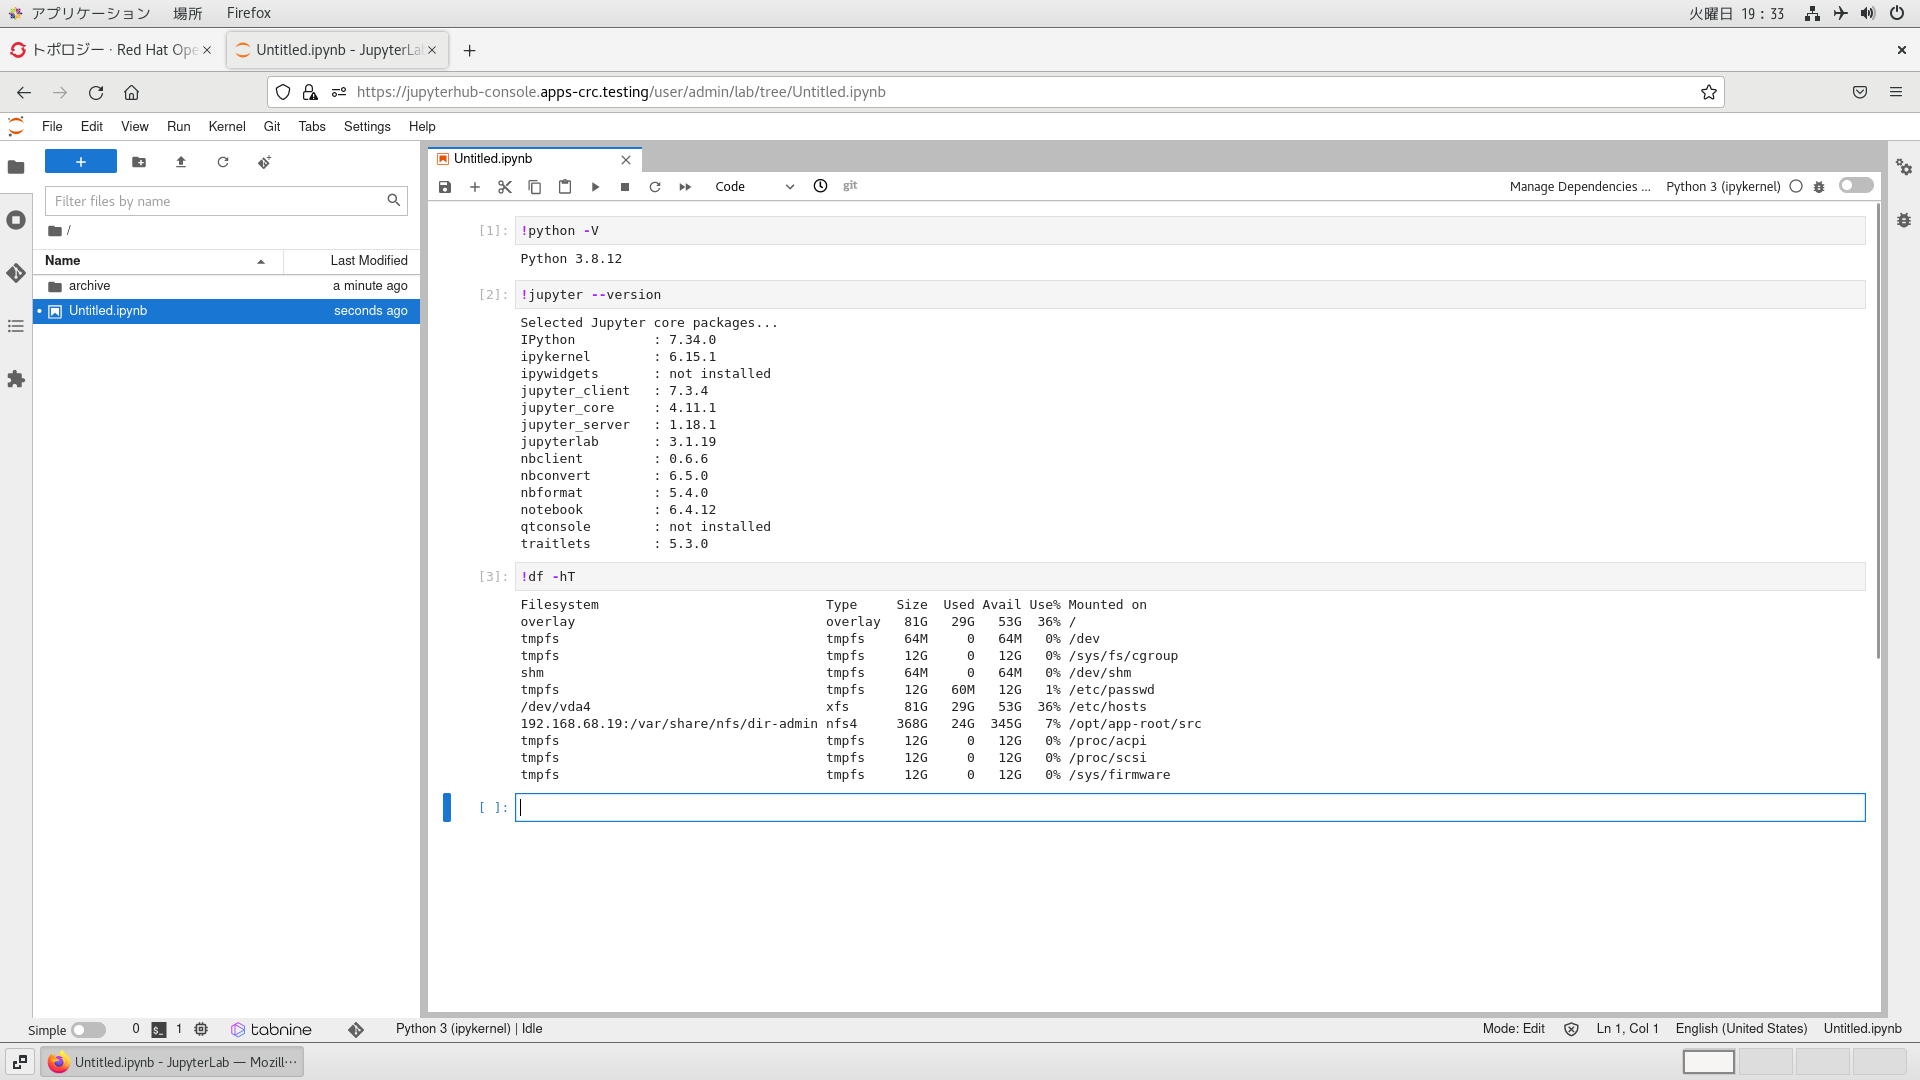
この設定が反映されると、JupyterLabコンテナ上でもNFSでMountされた領域が見えるようになります。
Mountポイントも指定通りで、HostOS上の公開ディレクトリに向いていることがわかります。
JupyterLabイメージの切替え設定
- c.KubeSpawner.profile_list
起動可能なコンテナイメージ候補を全て指定しています。
JupyterHubのユーザ自ら1つを選択して起動するという流れのため、"display_name"と"description"は分かり易いように記載する必要があります。特に、"display_name"は記載が重複しないように注意が必要です。
初期選択は"display_name"で指定可能です。
"kubespawner_override"をうまく利用すると、コンテナイメージのみならず、リソース割り当て(CPUとMemory)や永続ボリュームのMountポイントも柔軟に指定可能です。
    c.KubeSpawner.profile_list = [
        {
            "display_name": "Python 3.6",
            "description": "[Resource] CPU:1.0/Mem:4.0GB",
            "default": True,
            "kubespawner_override": {
                "image": "s2i-minimal-notebook-py36:2.5.1",
                "cpu_guarantee": 1.0,
                "cpu_limit": 1.0,
                "mem_guarantee": "4000M",
                "mem_limit": "4000M",
            }
        },
        {
            "display_name": "Python 3.8",
            "description": "[Resource] CPU:1.0/Mem:4.0GB",
            "kubespawner_override": {
                "image": "s2i-minimal-py38-notebook:v1.0.0",
                "cpu_guarantee": 1.0,
                "cpu_limit": 1.0,
                "mem_guarantee": "4000M",
                "mem_limit": "4000M",
            }
        },
        {
            "display_name": "Python 3.8 w/Spark",
            "description": "[Resource] CPU:1.0/Mem:4.0GB",
            "kubespawner_override": {
                "image": "pyspark-notebook:python-3.8",
                'supplemental_gids': [100],
                "cpu_guarantee": 1.0,
                "cpu_limit": 1.0,
                "mem_guarantee": "4000M",
                "mem_limit": "4000M",
                "volume_mounts": [
                  {
                    "name": "data",
                    "mountPath": "/home/jovyan"
                  }
                ]
            }
        }
    ]
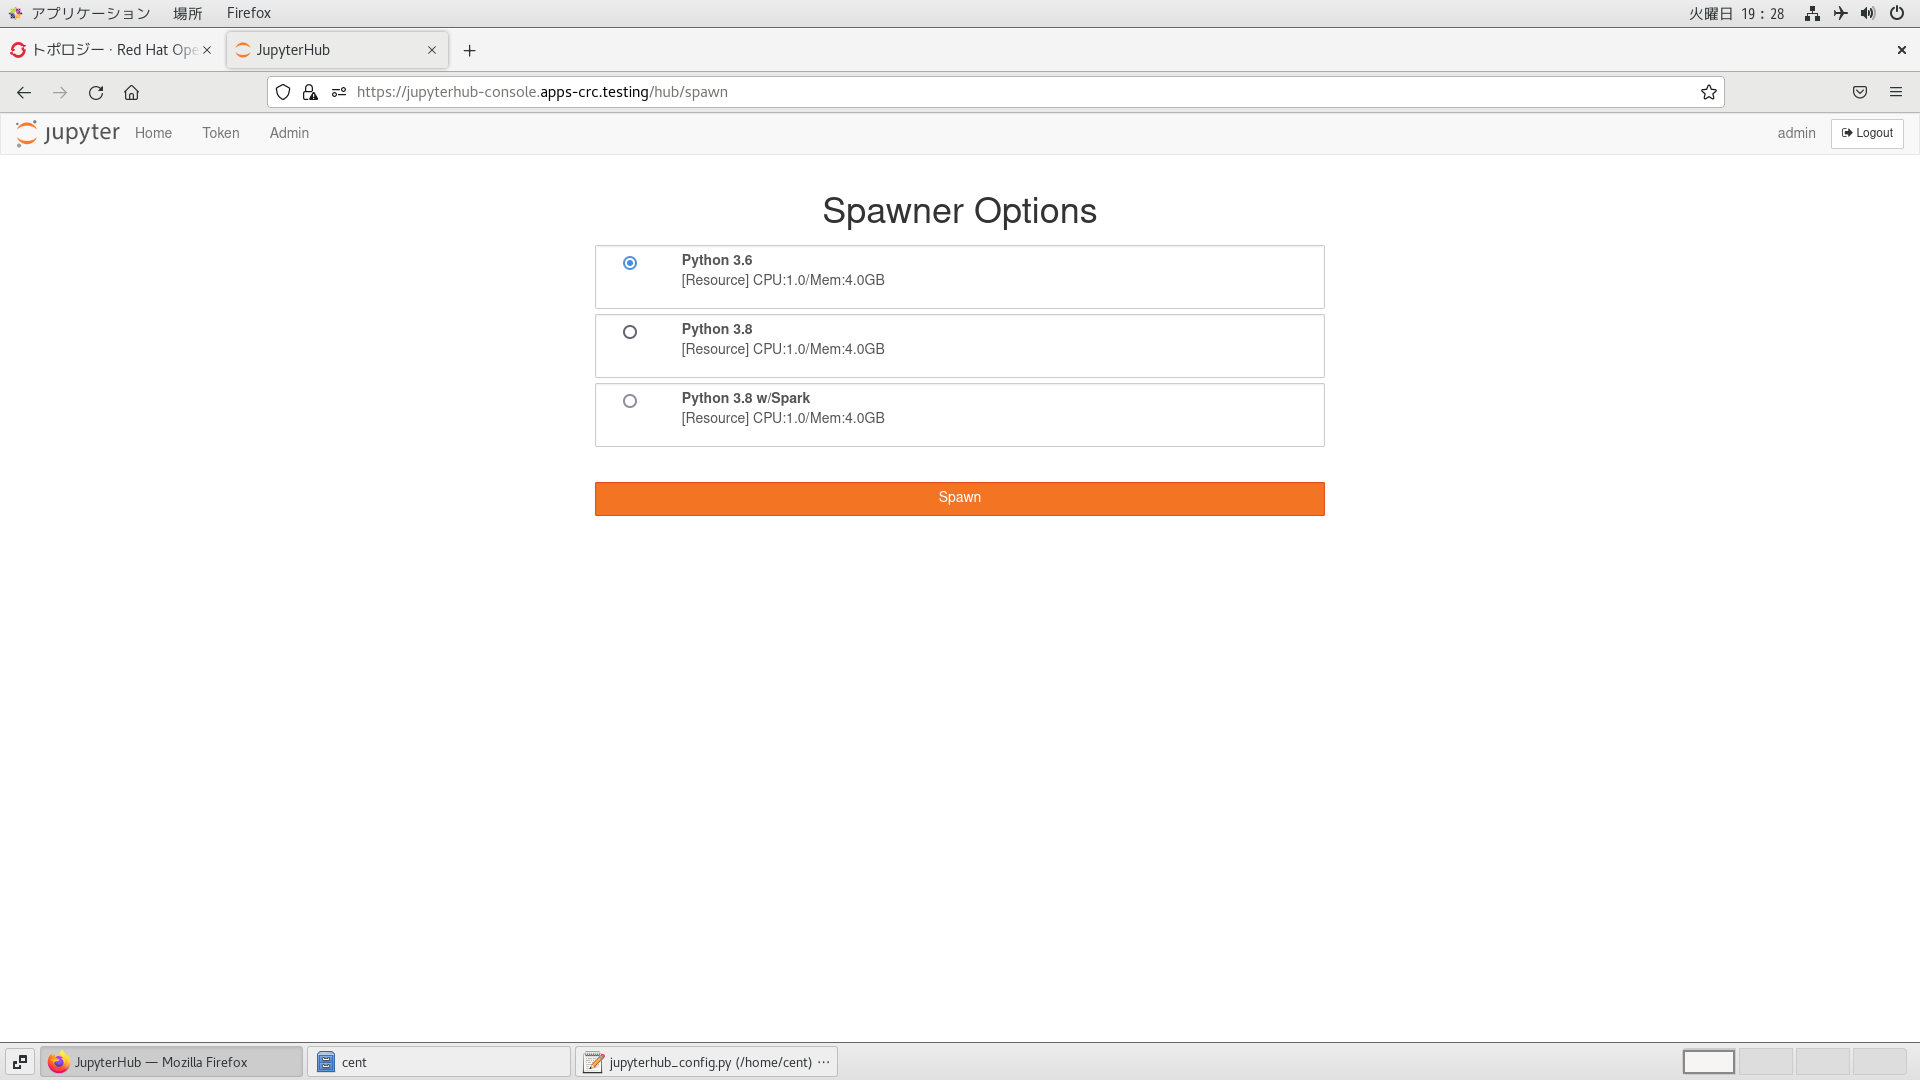
この設定が反映されると、JupyterHubでログインすると、コンテナイメージ選択画面に遷移するようになります。
用途を鑑みて、コンテナイメージを選択し、「Spawn」ボタンを押下することでJupyterLabコンテナが起動します。
DockerHub公開の公式Jupyterコンテナイメージを使う場合は、"supplemental_gids"を指定しましょう。
jupyter-on-openshift/jupyterhub-quickstart1でも以下のように言及しています。
The special setting is supplemental_gids, with it needing to be set to include the UNIX group ID of 100.
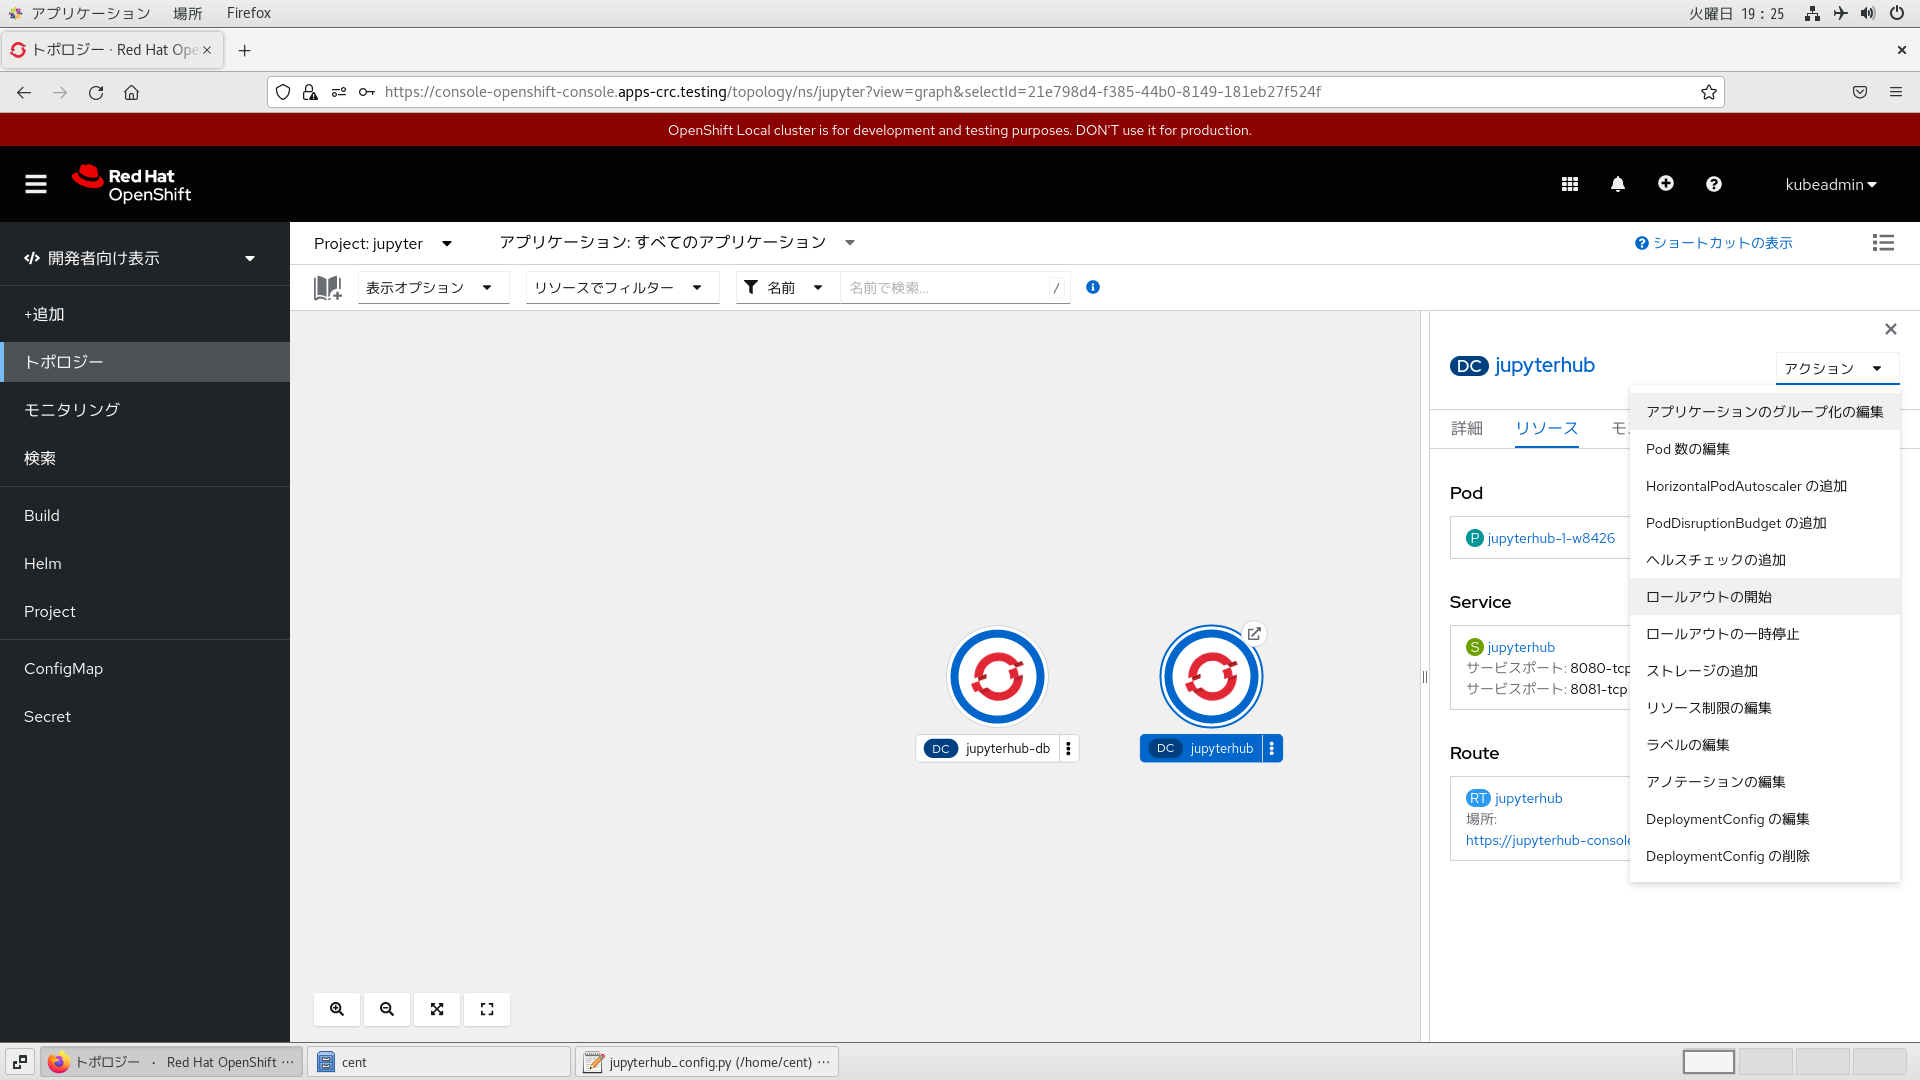
ConfigMapオブジェクトの変更反映
「トポロジー」ビュー上、DC/jupyterhubを選択します。
選択後、画面右にパネルが出現するので、「アクション」ドロップダウンメニューから「ロールアウトの開始」をクリックします。
再度、アイコンの周囲を青い帯が囲むまでしばらく待ちます。
まとめ
本稿では更に踏み込んで、JupyterHubの環境設定に取り組みました。
とりあえずは、Jupyter on OpenShiftをお試しが手元PCで進められそうです。
-
Using the Jupyter Project Notebook Images | https://github.com/jupyter-on-openshift/jupyterhub-quickstart#using-the-jupyter-project-notebook-images ↩