qnote Advent Calendar 2015 の 17日目を担当する横田です。
今日はAndroid端末にGoogle Cloud Messaging(以下、GCM)を使ってプッシュ通知をするときにことを備忘録として書いてみます。
いろいろやること多くて、次やるときに絶対忘れてる自信があるからね!
この記事の対象としている環境。
OS :Android 4.4.2
端末 :Nexus 7
開発環境:AndroidStudio 1.3
Google Play Services:6.5.8
なお、サーバー側の実装は自分ではやらないので、今回は割愛させていただきます。
手順1. Google Developers Consoleでプロジェクトを作成
まずはGoogle Developers Consoleにアクセスします。

上記のスクリーンショットの赤枠の部分をクリックして、プロジェクト作成のダイアログを表示します。
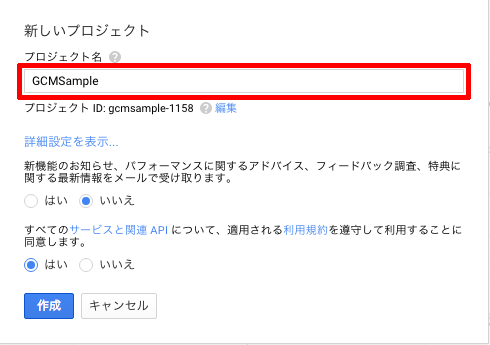
上記のスクリーンショットの赤枠の部分にプロジェクト名を入力して、利用規約の同意を「はい」にして、新規にプロジェクトを作成する。
私はGCMSampleというプロジェクトにしました。

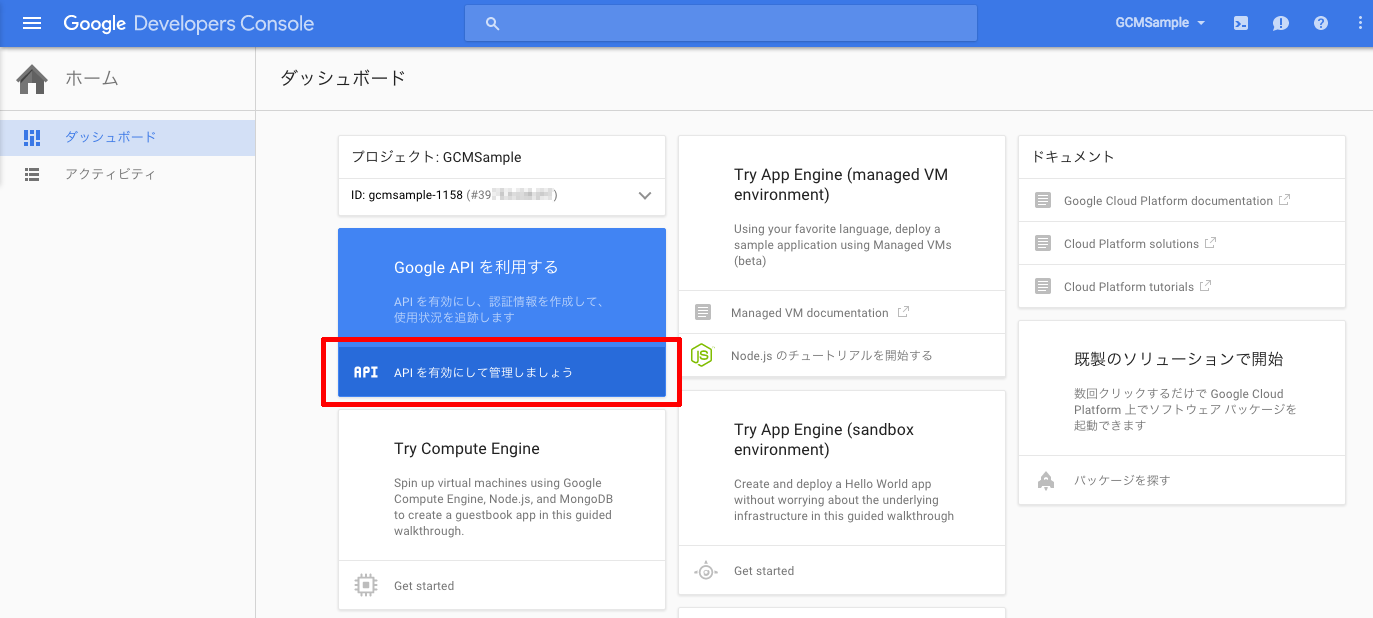
自動的に作成したプロジェクトのホーム画面に遷移するので、赤枠の部分をクリックして、APIの管理画面を表示します。
ID部分は念のためモザイク処理をしています。
プロジェクト番号はあとで使用するのでメモっておきましょう。
利用できるAPIの一覧画面が表示されますので、今回の目的である「Cloud Messaging for Android」をクリックします(スクリーンショットの赤枠部分)。
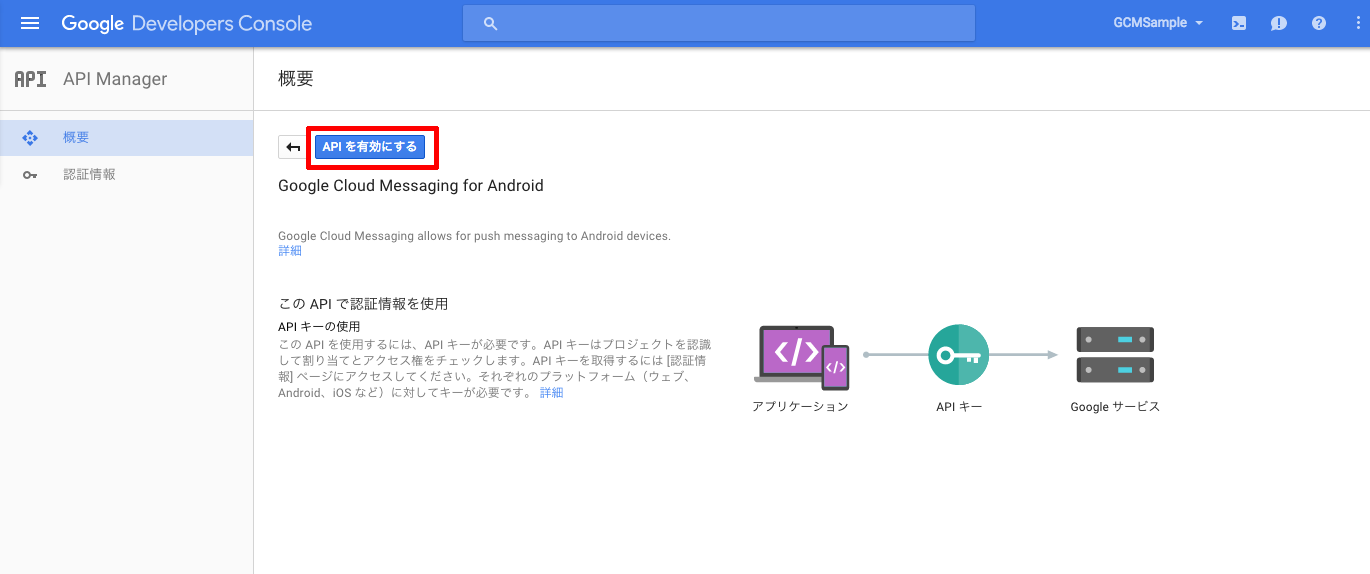
上記のスクリーンショットの赤枠の部分の「APIを有効にする」をクリックします。
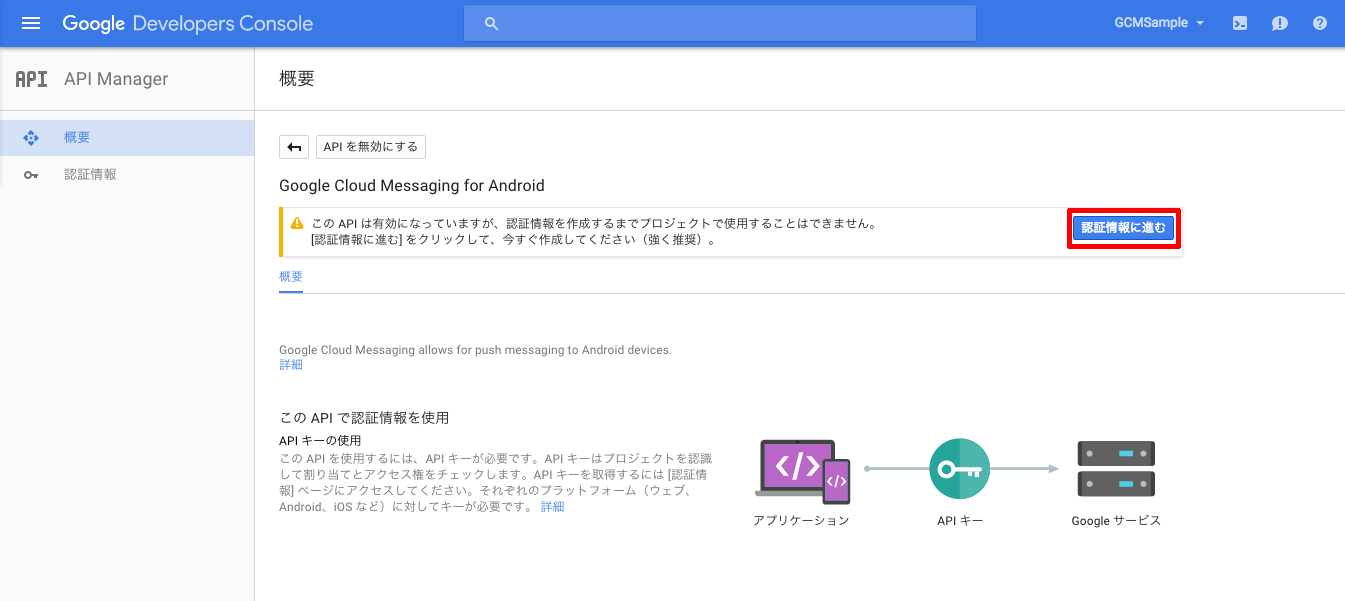
APIが有効になりましたが、認証情報が作成されてないのでまだ使えません。
上記スクリーンショットの赤枠部分の「認証情報に進む」をクリックします。
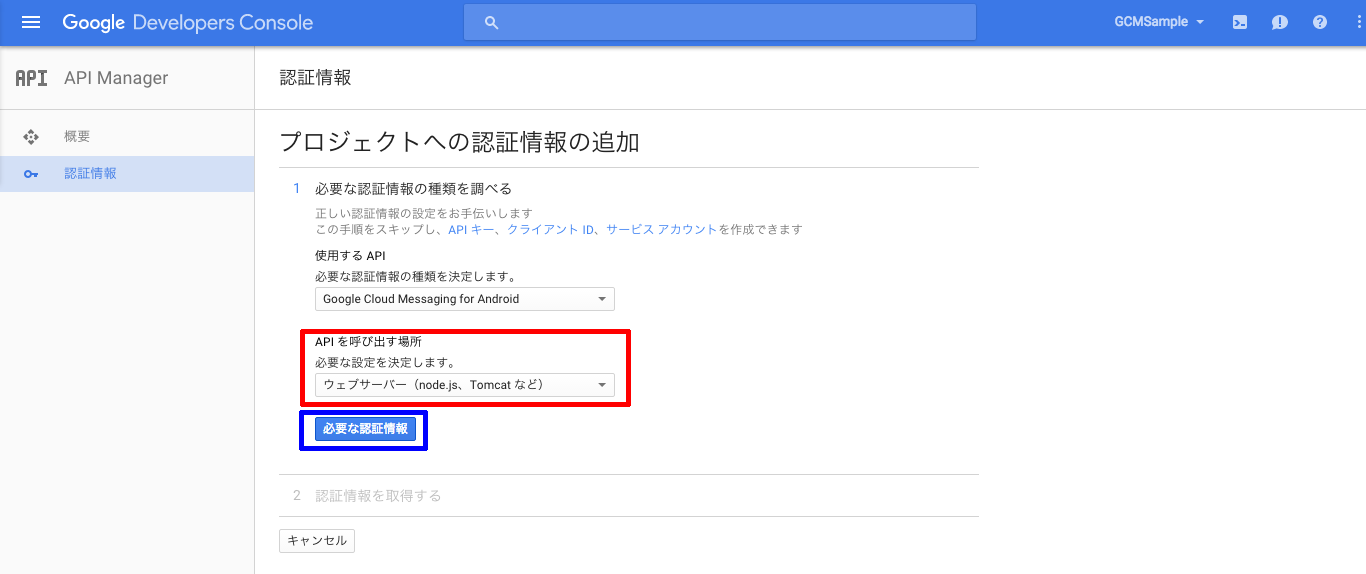
上記のスクリーンショットの赤枠のプルダウンをクリックするとAPIを呼び出す場所の選択肢が表示されます。
今回はサーバーを使用するので「ウェブサーバー」を選択します。
続いて、青枠の「必要な認証情報」をクリックします。
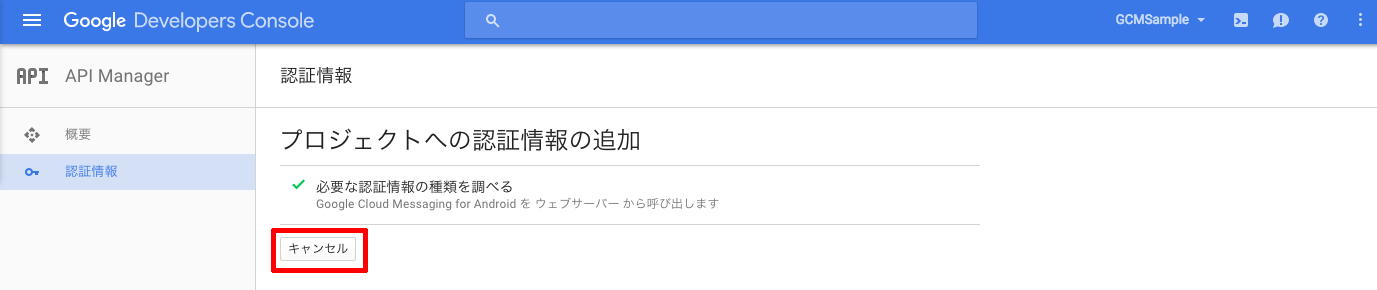
表示された内容を確認して、上記スクリーンショットの赤枠部分の「キャンセル」をクリックします。
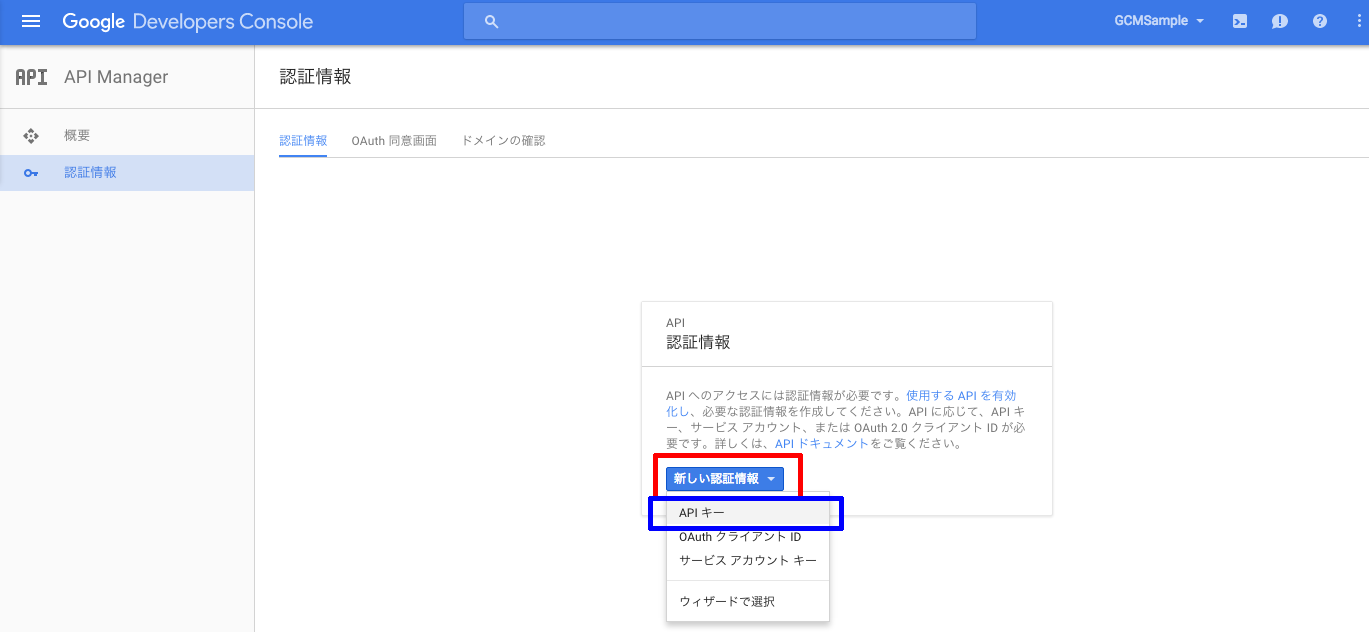
認証情報の画面に遷移するので、上記スクリーンショットの赤枠部分の「新しい認証情報」をクリックして、表示された選択肢の中から赤枠部分の「APIキー」をクリックします。

上記スクリーンショットの赤枠部分の「サーバーキー」をクリックします。
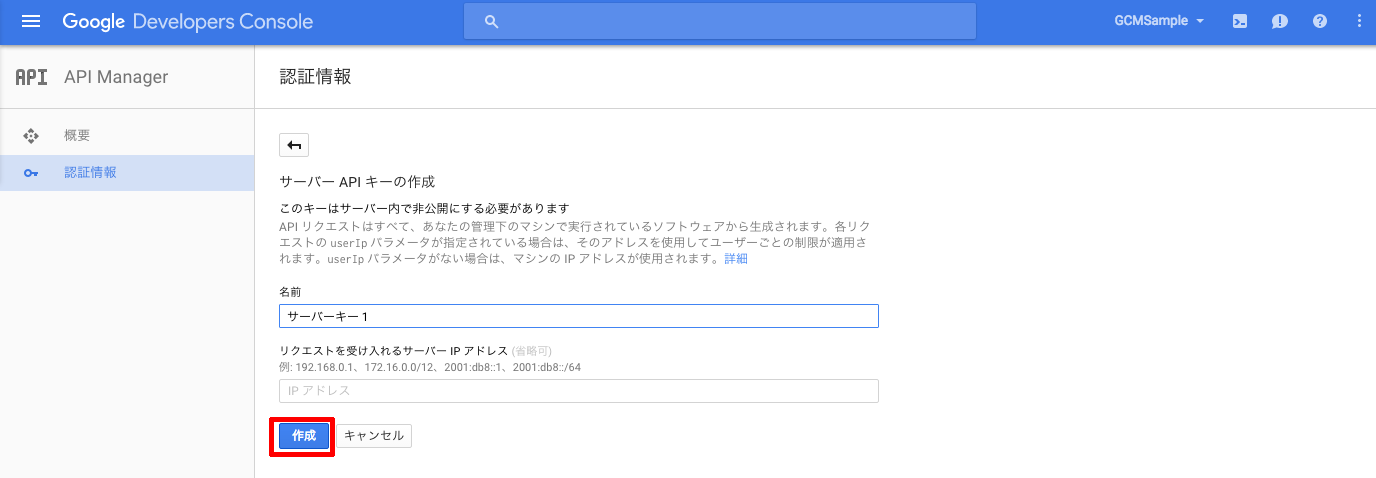
サーバーキーの登録画面に遷移するので、名前、サーバーIPアドレスを入力します。
今回はテスト用なので名前はデフォルトのまま、サーバーIPアドレスは空欄のままにして、赤枠部分の「作成」をクリックします。

作成されたAPIキーが表示されます。
念のため、モザイク処理をしています。
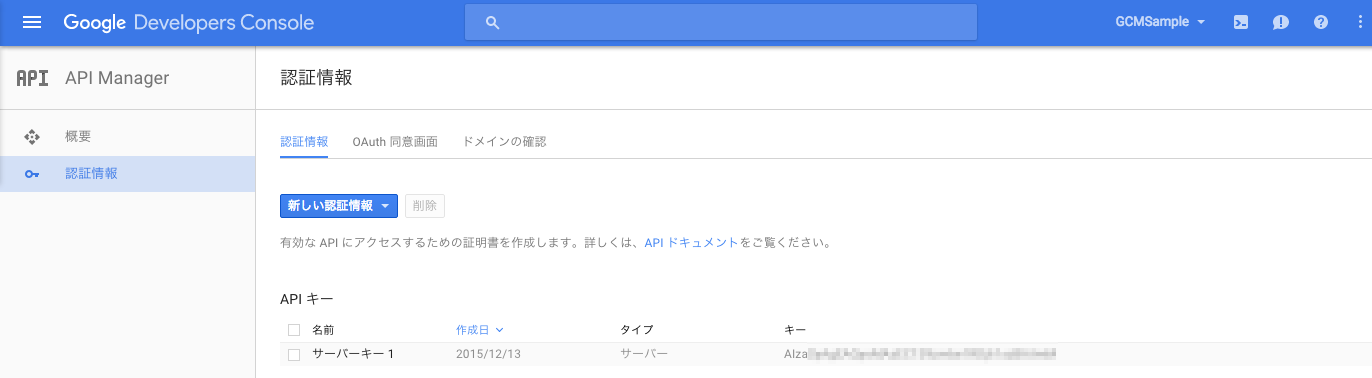
登録されたAPIキーが一覧で表示されます。
あとで使用するのでAPIキーはメモっておきましょう。
Google Developers Consoleでの作業はこれで終了です。
手順2. Android Studioでプロジェクトを作成する
テスト用にAndroid Studioでプロジェクトを作成します。
今回はGCMSampleというプロジェクトを作成しました。
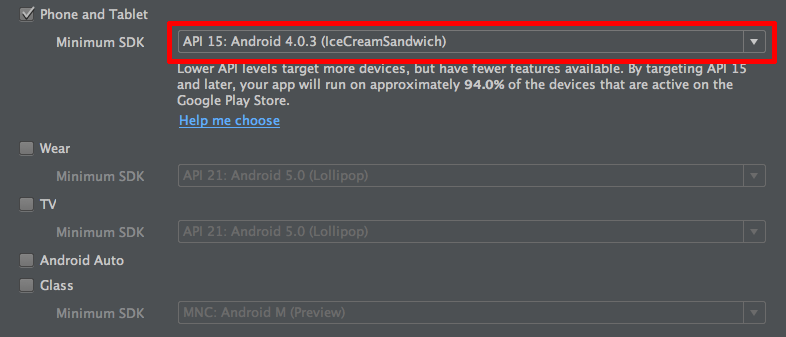
上記のスクリーンショットの赤枠部分の「Minimun SDK」は10以上にしておきます。
今回は15にしました。
手順3. Google Play Servicesをプロジェクトにインストールする
アプリ直下のbuild.gradleを修正して、Google Play Servicesをプロジェクトにインストールします。
と思ったのですが、すでにインストール済みのようでした。
    compile fileTree(dir: 'libs', include: ['*.jar'])
    compile 'com.android.support:appcompat-v7:23.+'
    compile 'com.google.android.gms:play-services:6.+' //これがGoogle Play Services
}
手順4. AndroidManifest.xmlを修正する
GCMを使用できるようにするために必要なパーミッションの権限取得や、GCMの受信のためのレシーバやインテントを追加するために、AndroidManifest.xmlを修正します。
修正前。
<?xml version="1.0" encoding="utf-8"?>
<manifest xmlns:android="http://schemas.android.com/apk/res/android"
    package="com.example.blackcat.gcmsample" >

    <application
        android:allowBackup="true"
        android:icon="@mipmap/ic_launcher"
        android:label="@string/app_name"
        android:theme="@style/AppTheme" >
        <activity
            android:name=".MainActivity"
            android:label="@string/app_name" >
            <intent-filter>
                <action android:name="android.intent.action.MAIN" />

                <category android:name="android.intent.category.LAUNCHER" />
            </intent-filter>
        </activity>
    </application>
</manifest>
修正後。
<?xml version="1.0" encoding="utf-8"?>
<manifest xmlns:android="http://schemas.android.com/apk/res/android"
    package="com.example.blackcat.gcmsample" >

    <uses-permission android:name="android.permission.INTERNET" />
    <uses-permission android:name="android.permission.GET_ACCOUNTS" />
    <uses-permission android:name="android.permission.WAKE_LOCK" />
    <uses-permission android:name="com.google.android.c2dm.permission.RECEIVE" />

    <permission
        android:name="com.example.blackcat.gcmsample.permission.C2D_MESSAGE"
        android:protectionLevel="signature" />
    <uses-permission android:name="com.example.blackcat.gcmsample.permission.C2D_MESSAGE" />
    <uses-permission android:name="com.example.blackcat.gcmsample.c2dm.permission.RECEIVE" />

    <application
        android:allowBackup="true"
        android:icon="@mipmap/ic_launcher"
        android:label="@string/app_name"
        android:theme="@style/AppTheme" >
        <activity
            android:name=".MainActivity"
            android:label="@string/app_name" >
            <intent-filter>
                <action android:name="android.intent.action.MAIN" />

                <category android:name="android.intent.category.LAUNCHER" />
            </intent-filter>
        </activity>

        <receiver
            android:name="com.example.blackcat.gcmsample.gcm.GcmBroadcastReceiver"
            android:permission="com.google.android.c2dm.permission.SEND" >
            <intent-filter>
                <action android:name="com.google.android.c2dm.intent.RECEIVE" />
                <category android:name="com.example.blackcat.gcmsample" />
            </intent-filter>
        </receiver>
        <service android:name="com.example.blackcat.gcmsample.gcm.GcmIntentService" />
    </application>
</manifest>
この時点ではまだクラスを作成していないので、「com.example.blackcat.gcmsample.gcm.GcmBroadcastReceiver」と「com.example.blackcat.gcmsample.gcm.GcmIntentService」のところにワーニングが表示されているかと思います。
手順5. 受信用のクラスを実装する
GCMで使用するクラスはわかりやすいようにパッケージを作成して、その中にクラスファイルを格納しました。
今回はgcmという名前のパッケージを作成しました。
作成したパッケージの中に、GcmBroadcastReceiverクラスを実装します。
package com.example.blackcat.gcmsample.gcm;

import android.app.Activity;
import android.content.ComponentName;
import android.content.Context;
import android.content.Intent;
import android.support.v4.content.WakefulBroadcastReceiver;

public class GcmBroadcastReceiver extends WakefulBroadcastReceiver {
    @Override
    public void onReceive(Context context, Intent intent) {
        //受け取ったインテントの処理をGcmIntentServiceで行う
        final ComponentName comp = new ComponentName(context.getPackageName(),
                GcmIntentService.class.getName());

        //サービスの起動。処理中スリープを制御
        startWakefulService(context, (intent.setComponent(comp)));
        setResultCode(Activity.RESULT_OK);
    }
}
続いてGcmIntentServiceクラスを実装します。
package com.example.blackcat.gcmsample.gcm;

import android.app.IntentService;
import android.app.NotificationManager;
import android.app.PendingIntent;
import android.content.Context;
import android.content.Intent;
import android.media.RingtoneManager;
import android.net.Uri;
import android.os.Bundle;
import android.support.v4.app.NotificationCompat;
import android.util.Log;

import com.example.blackcat.gcmsample.MainActivity;
import com.google.android.gms.gcm.GoogleCloudMessaging;
import com.example.blackcat.gcmsample.R;

public class GcmIntentService extends IntentService {
    public static final int NOTIFICATION_ID = 1;

    public GcmIntentService(String name) {
        super(name);
    }

    public GcmIntentService() {
        super("GcmIntentService");
    }

    @Override
    protected void onHandleIntent(Intent intent) {
        final Bundle extras = intent.getExtras();
        final GoogleCloudMessaging gcm = GoogleCloudMessaging.getInstance(this);
        final String messageType = gcm.getMessageType(intent);

        if (!extras.isEmpty()) {
            if (GoogleCloudMessaging.MESSAGE_TYPE_SEND_ERROR.equals(messageType)) {
                Log.d("LOG", "messageType(error): " + messageType + ",body:" + extras.toString());
            } else if (GoogleCloudMessaging.MESSAGE_TYPE_DELETED.equals(messageType)) {
                Log.d("LOG", "messageType(deleted): " + messageType + ",body:" + extras.toString());
            } else if (GoogleCloudMessaging.MESSAGE_TYPE_MESSAGE.equals(messageType)) {
                Log.d("LOG", "messageType(message): " + messageType + ",body:" + extras.toString());

                final String message = extras.getString("message");
                sendNotification(message);
            }
        }
        GcmBroadcastReceiver.completeWakefulIntent(intent);
    }

    private void sendNotification(String msg) {
        final NotificationManager notificationManager = (NotificationManager)
                this.getSystemService(Context.NOTIFICATION_SERVICE);

        final PendingIntent contentIntent = PendingIntent.getActivity(this, 0,
                new Intent(this, MainActivity.class), 0);

        final Uri uri= RingtoneManager.getDefaultUri(RingtoneManager.TYPE_NOTIFICATION);

        final NotificationCompat.Builder builder = new NotificationCompat.Builder(this);
        builder.setContentTitle(getString(R.string.app_name));
        builder.setSmallIcon(R.drawable.icon);
        builder.setStyle(new NotificationCompat.BigTextStyle().bigText(msg));
        builder.setContentText(msg);
        builder.setWhen(System.currentTimeMillis());
        builder.setSound(uri);

        // タップで通知領域から削除する
        builder.setAutoCancel(true);

        builder.setContentIntent(contentIntent);
        notificationManager.notify(NOTIFICATION_ID, builder.build());
    }
}
手順6. Activityを修正する
GCMを使用するためには端末をGCM側に登録しなければいけませんので、そのためにActivityを修正します。
package com.example.blackcat.gcmsample;

import android.content.Context;
import android.content.SharedPreferences;
import android.content.pm.PackageInfo;
import android.content.pm.PackageManager;
import android.os.AsyncTask;
import android.support.v7.app.AppCompatActivity;
import android.os.Bundle;
import android.util.Log;
import android.view.Menu;
import android.view.MenuItem;

import com.google.android.gms.common.ConnectionResult;
import com.google.android.gms.common.GooglePlayServicesUtil;
import com.google.android.gms.gcm.GoogleCloudMessaging;

import java.io.IOException;

public class MainActivity extends AppCompatActivity {

    // GCM関連
    public static final String PROPERTY_REG_ID = "registration_id";
    private static final String PROPERTY_APP_VERSION = "appVersion";
    private final static int PLAY_SERVICES_RESOLUTION_REQUEST = 9000;
    // デベロッパーコンソールで取得したプロジェクト番号
    private static final String SENDER_ID = "プロジェクト番号";

    private GoogleCloudMessaging gcm;
    private String registrationId = "";
    private static Context context;
    private AsyncTask<Void, Void, String> registerTask;

    @Override
    protected void onCreate(Bundle savedInstanceState) {
        super.onCreate(savedInstanceState);
        setContentView(R.layout.activity_main);
        gcmRegister();
    }

    @Override
    public boolean onCreateOptionsMenu(Menu menu) {
        getMenuInflater().inflate(R.menu.menu_main, menu);
        return true;
    }

    @Override
    public boolean onOptionsItemSelected(MenuItem item) {
        int id = item.getItemId();

        if (id == R.id.action_settings) {
            return true;
        }

        return super.onOptionsItemSelected(item);
    }

    /**
     * GCMのレジストレーションIDを取得
     */
    private void gcmRegister() {
        context = getApplicationContext();

        if (checkPlayServices()) {
            gcm = GoogleCloudMessaging.getInstance(context);
            registrationId = getRegistrationId();
        } else {
            Log.d("MainActivity", "端末にGooglePlayServiceAPKがありません");
        }

        if (registrationId.equals("")) {
            registerTask = new AsyncTask<Void, Void, String>() {
                @Override
                protected String doInBackground(Void... params) {
                    if (gcm == null) {
                        gcm = GoogleCloudMessaging.getInstance(context);
                    }
                    try {
                        registrationId = gcm.register(SENDER_ID);
                        sendRegistrationIdToAppServer();
                        storeRegistrationId(registrationId);
                    } catch (IOException e) {
                        e.printStackTrace();
                    }
                    return null;
                }

                @Override
                protected void onPostExecute(String resultPostExecute) {
                    registerTask = null;
                }
            };
            registerTask.execute(null, null, null);
        }
    }

    /**
     * 端末のGooglePlayServiceAPKの有無をチェック
     */
    private boolean checkPlayServices() {
        final int resultCode = GooglePlayServicesUtil.isGooglePlayServicesAvailable(this);
        if (resultCode != ConnectionResult.SUCCESS) {
            if (GooglePlayServicesUtil.isUserRecoverableError(resultCode)) {
                GooglePlayServicesUtil.getErrorDialog(resultCode, this,
                        PLAY_SERVICES_RESOLUTION_REQUEST).show();
            } else {
                finish();
            }
            return false;
        }
        return true;
    }

    /**
     * 端末に保存されているレジストレーションIDの取得
     */
    private String getRegistrationId() {
        final SharedPreferences prefs = getGCMPreferences();
        registrationId = prefs.getString(PROPERTY_REG_ID, "");
        try {
            if (registrationId.equals("")) {
                return "";
            }
        } catch (Exception e) {
            return "";
        }
        final int registeredVersion = prefs.getInt(PROPERTY_APP_VERSION, Integer.MIN_VALUE);
        final int currentVersion = getAppVersion();
        if (registeredVersion != currentVersion) {
            return "";
        }
        return registrationId;
    }

    /**
     * アプリケーションのバージョン情報を取得する
     */
    private static int getAppVersion() {
        try {
            final PackageInfo packageInfo = context.getPackageManager()
                    .getPackageInfo(context.getPackageName(), 0);
            return packageInfo.versionCode;
        } catch (PackageManager.NameNotFoundException e) {
            throw new RuntimeException("パッケージが見つかりません:" + e);
        }
    }

    /**
     * アプリのプリファレンスを取得する
     */
    private SharedPreferences getGCMPreferences() {
        return getSharedPreferences(MainActivity.class.getSimpleName(),
                Context.MODE_PRIVATE);
    }

    /**
     * レジストレーションIDの端末保存
     */
    private void storeRegistrationId(String regId) {
        final SharedPreferences prefs = getGCMPreferences();
        final int appVersion = getAppVersion();
        final SharedPreferences.Editor editor = prefs.edit();
        editor.putString(PROPERTY_REG_ID, regId);
        editor.putInt(PROPERTY_APP_VERSION, appVersion);
        editor.apply();
    }

    private void sendRegistrationIdToAppServer(){
        //各々の仕様にあわせて実装してください
    }

    @Override
    protected void onResume() {
        super.onResume();
        checkPlayServices();
    }

    @Override
    protected void onDestroy() {
        if (registerTask != null) {
            registerTask.cancel(true);
        }
        gcm.close();
        super.onDestroy();
    }
}
SENDER_IDには手順1.で作成したプロジェクトの番号を代入してください。
動作としては、
- Google Play ServiceAPKが端末にインストールされているかチェックします
- インストールされていたら端末に保存されているレジストレーションIDを取得します
- 端末にレジストレーションIDが保存されていなかったら(取得したレジストレーションIDが空だったら)、バックグラウンドでレジストレーションIDを取得します
- レジストレーションIDをサーバーに登録します(sendRegistrationIdToAppServerメソッドを実行する。今回は未実装)
- 取得したレジストレーションIDを端末に保存します
といった処理を行っています。
手順7. プッシュ通知が届くか確認する
アプリ側の実装が終わったので、実際にプッシュ通知が届くか確認してみます。
本来はサーバーからプッシュ通知を送ってもらってテストしないといけないのですが、今回は端末がプッシュ通知を受信できればOKなので、ターミナルからコマンドを叩いて、プッシュ通知の受信テストを行います。
curl --header "Authorization: key=<API KEY>" --header Content-Type:"application/json" https://android.googleapis.com/gcm/send -d "{\"registration_ids\":[\"<RegistrationID>\"],\"data\":{\"message\":\"Hello\"}}"
<API KEY>には手順1.でメモったサーバーのAPIキーを、<RegistrationID>には端末のレジストレーションIDを入れてください。
端末のレジストレーションIDは手順6.のActivityでログを出力するなどして確認してください。
正しく実装されていれば下記のスクリーンショットのようなプッシュ通知が端末に届きます。

GCMを実装してみて
AppleのAPNSに比べてアプリの実装がちょっと面倒くさいなーと思いました。
でも、APNSのように証明書やプロビジョニングファイルをAPNS用に作成しなくてもいいので、その辺りは楽でした。