この記事では、elixir-desktopを使用してAndroidアプリを作成する方法について説明します。
少し前にgithub.com/elixir-desktop/android-example-appのsampleを実行することができたのですが、自分で作成したDesktopプロジェクトをAndroidで実行したいなと思いました。AndroidStudioを使ったことがなくAndoridアプリ化することに難儀したのですが、他の方のqiita記事をじっくりことこと見させて頂いて、ようやく理解することができました。ぜひご覧下さい。
私の環境
Manjaro Linux 22.1.2
開発環境構築
android-example-appのHow to build & runという項目に従って、asdfをインストールします。
すでにerlangとlixirをインストールしている場合、パッケージマネージャのコマンドからアンインストールを行ってください。
erlangとelixirの最新バージョンもインストールして普段は最新バージョンを、elixir-dektopのプロジェクトを置くディレクトリに指定されたバージョンを使うようにします。
erlangとelixirをインストール
asdf install erlang 25.0.4
asdf install elixir 1.13.4-otp-25

最新のバージョン(5/24現在の)もインストールします。
asdf install erlang 25.3.1
asdf install elixir 1.14.4-otp-25

インストールできているか確認
asdf list

asdf plugin-add erlang https://github.com/asdf-vm/asdf-erlang.git
asdf plugin-add elixir https://github.com/asdf-vm/asdf-elixir.git

いつも使用するバージョンを指定(最新バージョン)
asdf global erlang 25.3.1
asdf global elixir 1.14.4-otp-25

elixir-desktop用のディレクトリを作って移動。このディレクトリ(以下)で使用するバージョンを指定する。
asdf local erang 25.0.4
asdf local elixir 1.13.4-otp-25

現在のバージョンを確認
asdf current
erlangとelixirのインストールが終わったら、phoenixをインストールします。
mix archive.install hex phx_new
Desktopプロジェクトの作成
上の項目で作成したディレクトリ(以後desktop_dirと呼ぶことにします)でphoenixプロジェクトを作成していきます。
今回はno-ectoを指定し、ここではプロジェクト名をdesktop_tutoにします。
mix phx.new desktop_tuto --no-ecto
この時点ではディレクトリ構成は以下のようになっているはずです。
.
├── .tool-versions
└── desktop_tuto
デスクトップ化するには以下の手順を行います
- mix.exsの変更
- endpoint.exの変更
- config.exの変更
- runtime.exの削除
- スーパーバイザの設定
mix.exsの変更
以下の変更を行ってください
defmodule DesktopTuto.MixProject do
  use Mix.Project
  ...
  def application do
    [
-     mod: {DesktopTuto.Application, []},
+     mod: {DesktopTuto, []},
      extra_applications: [:logger, :runtime_tools]
    ]
  end
  ...
  defp deps do
    [
      ...
+     {:desktop, "~> 1.5"},
+     {:wx, "~> 1.1", hex: :bridge, targets: [:android, :ios]}
    ]
  end
endpoint.exsの変更
defmodule DesktopTutoWeb.Endpoint do
- use Phoenix.Endpoint, otp_app: :desktop_tuto
+ use Desktop.Endpoint, otp_app: :desktop_tuto
  ...
  @session_options [
-   store: :cookie,
+   store: :ets,
    key: "_desktop_tuto_key",
-   signing_salt: ..., #`mix phx.new`毎に値が異なりますので「...」で省略しています
+   table: :session
  ]
config.exsの変更
import Config
...
config :desktop_tuto, DesktopTutoWeb.Endpoint,
- url: [host: "localhost"],
+ http: [ip: {127, 0, 0, 1}, port: 10_000 + :rand.uniform(45_000)],
  render_errors: [view: DesktopTutoWeb.ErrorView, accepts: ~w(html json), layout: false],
  pubsub_server: DesktopTuto.PubSub,
  live_view: [signing_salt: ...], #`mix phx.new`毎に値が異なりますので省略
+ secret_key_base: :crypto.strong_rand_bytes(32),
+ server: true
runtime.exsの削除
runtime.exsがありますと起動できないようなので、リネームか削除を行ってください。
スーパーバイザの設定
以下を貼り付けてください
defmodule DesktopTuto do
  use Application
  require Logger

  def config_dir() do
    Path.join([Desktop.OS.home(), ".config", "todo"])
  end

  @app Mix.Project.config()[:app]

  def start(:normal, []) do
    Desktop.identify_default_locale(DesktopTutoWeb.Gettext)
    File.mkdir_p!(config_dir())

    # session用のETSを起動
    :session = :ets.new(:session, [:named_table, :public, read_concurrency: true])

    children = [
      {Phoenix.PubSub, name: DesktopTuto.PubSub},
      DesktopTutoWeb.Endpoint
    ]

    opts = [strategy: :one_for_one, name: DesktopTuto.Supervisor]

    {:ok, sup} = Supervisor.start_link(children, opts)

    # phoenixサーバーの起動中のポート番号を取得
    port = :ranch.get_port(DesktopTutoWeb.Endpoint.HTTP)

    {:ok, _} =
      Supervisor.start_child(sup, {
        Desktop.Window,
        [
          app: @app,
          id: DesktopTutoWindow,
          title: "DesktopTutoApp",
          size: {600, 500},
          # アイコンとして表示される画像(priv/)
          # icon: "icon.png",
          url: "http://localhost:#{port}"
        ]
      })
  end

  def config_change(changed, _new, removed) do
    DesktopTutoWeb.Endpoint.config_change(changed, removed)
    :ok
  end
end
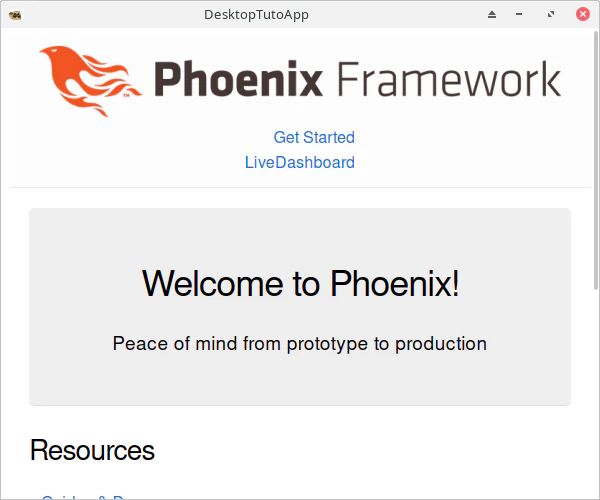
ここまでを行ったあとmix phx.serverで起動してみてください。以下のようになると思います。
(アイコンにたぬきのイラストを置きましたので左上とタスクバーのアイコンがたぬきになってますが気にしないでください。なにもいじっていないと歯車が表示されていると思います。)
Androidでの実行
@the_haigoさんの記事1を参考に
git clone https://github.com/elixir-desktop/android-example-app.git android
androidディレクトリのappにDesktopプロジェクト(desktop_tuto)をコピーしてください。
次にapp/run_mixを書き換えます。さんの記事1を参考にrun_mixを変更します。
#!/bin/bash
set -e

BASE=`pwd`
APP_FILE="$BASE/src/main/assets/app.zip"
export MIX_ENV=prod
export MIX_TARGET=android

- if [ ! -d "elixir-app" ]; then
-   git clone https://github.com/elixir-desktop/desktop-example-app.git elixir-app
- fi

# using the right runtime versions
- if [ ! -f "elixir-app/.tool-versions" ]; then
-   cp .tool-versions elixir-app/
- fi

- cd elixir-app
+ cd desktop_tuto
if [ ! -d "deps/desktop" ]; then
  mix local.hex --force
  mix local.rebar
  mix deps.get
fi

# まだライブラリは未使用なので
# if [ ! -d "assets/node_modules" ]; then
#   cd assets && npm i && cd ..
# fi

if [ -f "$APP_FILE" ]; then
  rm "$APP_FILE"
fi

mix assets.deploy && \
  mix release --overwrite && \
- cd "_build/${MIX_TARGET}_${MIX_ENV}/rel/todo_app" && \
+ cd "_build/${MIX_TARGET}_${MIX_ENV}/rel/desktop_tuto" && \

  zip -9r "$APP_FILE" lib/ releases/ --exclude "*.so"
このあとはappディレクトリにcdしてからrun_mixを実行しましょう
実行後はandroid-studioでfile->open->androidディレクトリ選択したあとに実行ボタンを押します。
すると次のような画面が出るかと思います。

終わりとあとがき
このあと機能を実装していく場合、はいつも通りにliveviewを触る感覚でコードを記述していきます
最初にelixirでスマホアプリを開発できると聞いたときは胸が踊りました。
「何ですと!?」って感じです。スマホアプリのボタン押して画面が変わるみたいな処理は、
なんかのボタン押してhandle_eventでpush_navigateが〜って感じで。
phoenix勉強続けて本当に良かったです。学習した知識をもとにもっと実用的なものを作りたいですね。
誤字脱字、間違いがございましたら教えてください。