本記事では、Azure AD B2Cとサードパーティ製のメール配信サービスを連携させ、メールをカスタマイズする方法を紹介します。
前提
- 本記事では以下の利用を前提としております。
- 定義方法:カスタムポリシー
- メールサービス:SendGrid
B2Cのメールについて
-
現状、B2Cデフォルトのメール内容はカスタマイズできません。
- 例えば「メールアドレス確認」は、下記の内容で固定されています。
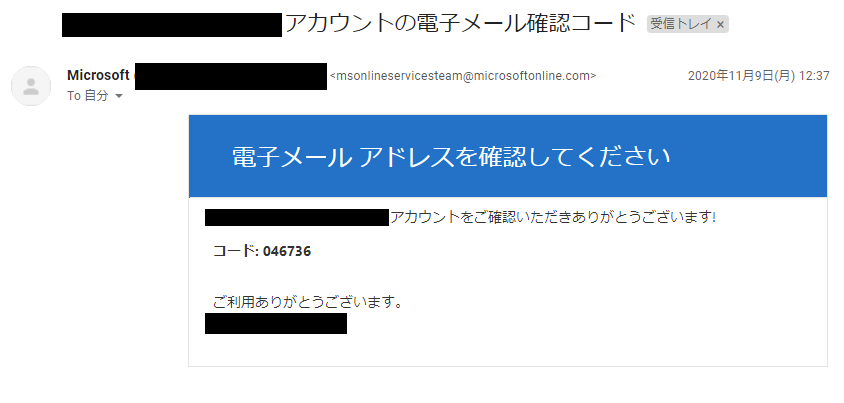
- 例えば「メールアドレス確認」は、下記の内容で固定されています。
-
そこでメールサービスをB2Cデフォルトからサードパーティ制のサービスに移行することにより、件名・差出人・本文等をカスタマイズできます。
カスタムメール利用の仕組み
カスタムメールとB2Cの関係は、以下のようになっております。
- B2Cの画面でメールアドレスを入力し、「確認コードを送信」ボタンを選択します。
- B2Cはメールサービス向けにAPIリクエストを送ります。リクエストの中には以下の内容が含まれます。
- テンプレートID:メールテンプレートのID
- 確認コード:B2C内で生成する確認コード
- 宛先メールアドレス:ユーザーが入力したメールアドレス
- SendGridはリクエスト内容を元にメールを作成し、ユーザーにメールを送信します。

カスタムメールの利用手順
カスタムメールを利用するには、カスタムメールのテンプレート作成、ポリシーキーの設定、カスタムポリシーの変更を行う必要があります。
下記ドキュメントを参考に手順を紹介します。
カスタムメールのテンプレート作成
- SendGridにログインし、メールのテンプレートを追加します。
- SendGridのアカウントが無い場合は、SendGrid アカウントの作成を参考にアカウントを作成します。
- テンプレートの例は以下の通りです。
{{otp}}の箇所にはB2Cで生成される確認コードをバインドさせます。-
件名:確認コード
-
本文
<html>
  <head></head>
  <body>
    <div>
      以下の確認コードを入力してください。<br>
      確認コード:{{otp}}
    </div>
  </body>
</html>
-
- 上記のテンプレートを作成後、以下の値を控えておきます。
- テンプレートID
- SendGrid APIキー
ポリシーキーの設定
- B2C側の設定画面を開き、以下の通りポリシーキーを追加します。
- オプション:手動
- 名前:ポリシーキー名(
SendGridSecretなど) - シークレット:SendGrid APIキー
- キー使用法:署名
- 完了後
B2C_1A_[ポリシーキー名]というポリシーキーが追加されます。このキーの名前を控えておきます。
カスタムポリシーの変更
ここからはカスタムポリシーで必要な定義になります。
※ソースコード例はポイントのみ紹介しております。詳細なコードは各タイトルのリンクをご覧ください。
カスタムメール用Claimの追加
- 下記の3つを
ClaimsSchemaに追加します。- Otp:確認コード
- emailRequestBody:SendGridに送信するリクエスト内容
- VerificationCode:確認コードの入力項目
要求変換の追加
- 宛先メールアドレス等をSendGridへのリクエスト内容に変換する処理を
ClaimsTransformationを定義します。- SendGridで追加したテンプレートIDを
template_idに定義します。 - こちらの要求変換処理の詳細についてはGenerateJsonのドキュメントをご覧ください。
- SendGridで追加したテンプレートIDを
  <ClaimsTransformation Id="GenerateEmailRequestBody" TransformationMethod="GenerateJson">
    <InputClaims>
      <!-- 宛先メールアドレス -->
      <InputClaim ClaimTypeReferenceId="email" TransformationClaimType="personalizations.0.to.0.email" />
      <!-- 確認コード -->
      <InputClaim ClaimTypeReferenceId="otp" TransformationClaimType="personalizations.0.dynamic_template_data.otp" />
    </InputClaims>
    <InputParameters>
      <!-- テンプレートID -->
      <InputParameter Id="template_id" DataType="string" Value="d-xxxxxxxxxxxxxxxxxxxxxxxxxxxxxxxx"/>
      <!-- 送信元メールアドレス -->
      <InputParameter Id="from.email" DataType="string" Value="system@example.com"/>
    </InputParameters>
    <OutputClaims>
      <!-- SendGrid向けリクエスト -->
      <OutputClaim ClaimTypeReferenceId="emailRequestBody" TransformationClaimType="outputClaim"/>
    </OutputClaims>
  </ClaimsTransformation>
DataUri コンテンツ定義の追加
サインアップやパスワードリセット画面等、確認コードを利用する画面のContentDefinitionのうち、DataUriを2.1.2にアップデートします。
DisplayControlの作成
メールアドレス及び確認コードの入力項目を定義するDisplayControlを追加します。
OTP 技術プロファイルの追加
- 以下の処理を追加します。
- GenerateOtp:確認コードの生成
- VerifyOtp:確認コードの検証
- GenerateOtpのMetadataでは、確認コードの有効期限や最大試行回数等の細かい設定ができます。詳細はこちらをご覧ください。
- B2Cのデフォルトのメール設定に合わせる場合、このような設定値になります。
<ClaimsProvider>
  <DisplayName>One time password technical profiles</DisplayName>
  <TechnicalProfiles>
    <TechnicalProfile Id="GenerateOtp">
      ...
      <Metadata>
        <Item Key="Operation">GenerateCode</Item>
        <Item Key="CodeExpirationInSeconds">300</Item>
        <Item Key="CodeLength">6</Item>
        <Item Key="CharacterSet">0-9</Item>
        <Item Key="ReuseSameCode">false</Item>
        <Item Key="NumRetryAttempts">2</Item>
      </Metadata>
      ...
    </TechnicalProfile>
  </TechnicalProfiles>
</ClaimsProvider>
REST API 技術プロファイルの追加
- SendGridのAPIを呼び出しを定義します。
-
StorageReferenceIdには、「ポリシーキーの設定」で追加したSendGridポリシーキー名を設定します。
<ClaimsProvider>
  <DisplayName>RestfulProvider</DisplayName>
  <TechnicalProfiles>
    <TechnicalProfile Id="SendOtp">
      ...
      <Metadata>
        <Item Key="ServiceUrl">https://api.sendgrid.com/v3/mail/send</Item>
        <Item Key="AuthenticationType">Bearer</Item>
        <Item Key="SendClaimsIn">Body</Item>
        <Item Key="ClaimUsedForRequestPayload">emailRequestBody</Item>
      </Metadata>
      <CryptographicKeys>
        <Key Id="BearerAuthenticationToken" StorageReferenceId="B2C_1A_[ポリシーキー名]" />
      </CryptographicKeys>
      ...
    </TechnicalProfile>
  </TechnicalProfiles>
</ClaimsProvider>
DisplayControl への参照を付ける
- サインアップ等のTechnicalProfileに、「DisplayControlの作成」で作成したDisplayControlを紐づけます。
- ここでポイントとなるのは、パスワードや氏名等の入力項目をOutputClaimで定義している場合、それらの入力項目もDisplayClaimに定義する必要があることです。
- 詳細については表示要求と出力要求の組み合わせは慎重に使用するをご覧ください。
- 具体的な例を以下に記載します。
-
変更前
<TechnicalProfile Id="LocalAccountSignUpWithLogonEmail"> <OutputClaims> <!-- メールアドレス --> <OutputClaim ClaimTypeReferenceId="email" PartnerClaimType="Verified.Email" Required="true" /> <!-- パスワード --> <OutputClaim ClaimTypeReferenceId="newPassword" Required="true" /> <!-- パスワードの再確認 --> <OutputClaim ClaimTypeReferenceId="reenterPassword" Required="true" /> <!-- 姓 --> <OutputClaim ClaimTypeReferenceId="surname" Required="true" /> <!-- 名 --> <OutputClaim ClaimTypeReferenceId="givenName" Required="true" /> </OutputClaims> </TechnicalProfile> -
変更後
<TechnicalProfile Id="LocalAccountSignUpWithLogonEmail">
  <DisplayClaims>
    <!-- メールアドレス -->
    <DisplayClaim DisplayControlReferenceId="emailVerificationControl" />
    <!-- パスワード -->
    <DisplayClaim ClaimTypeReferenceId="newPassword" Required="true" />
    <!-- パスワードの再確認 -->
    <DisplayClaim ClaimTypeReferenceId="reenterPassword" Required="true" />
    <!-- 姓 -->
    <DisplayClaim ClaimTypeReferenceId="surname" Required="true" />
    <!-- 名 -->
    <DisplayClaim ClaimTypeReferenceId="givenName" Required="true" />
  </DisplayClaims>
  <OutputClaims>
    <OutputClaim ClaimTypeReferenceId="email" Required="true" />
    <OutputClaim ClaimTypeReferenceId="newPassword" Required="true" />
    <OutputClaim ClaimTypeReferenceId="reenterPassword" Required="true" />
    <OutputClaim ClaimTypeReferenceId="surname" Required="true" />
    <OutputClaim ClaimTypeReferenceId="givenName" Required="true" />
  </OutputClaims>
</TechnicalProfile>
-
【補足】UIをローカライズする
- カスタムメールを適用した際も、B2Cデフォルトのメール設定と同様にボタンの文言やバリデーションメッセージ等のローカライズが可能です。
- ただし、B2Cデフォルトのメールを利用する場合と比べ、いくつかローカライズ文字列IDやHTMLのIDが変更されていることに注意してください。
- 変更されるローカライズ文字列IDの一例はの下記の表の通りです。
| メッセージ文言 | B2Cデフォルト | カスタムメール適用後 | |
|---|---|---|---|
| 1 | 確認コードを送信する | ver_but_verify | but_verify_code |
| 2 | 新しいコードを送信します | ver_but_resend | but_send_new_code |
| 3 | コードが正しくありません。もう一度お試しください。 | ver_fail_retry | UserMessageIfInvalidCode |
- その他の項目については、以下のローカライズ文字列IDのドキュメントをご覧ください。
まとめ
- Azure AD B2CではSendGrid等のサードパーティ制のメール配信サービスと連携させることにより、文言やデザインのカスタマイズができます。
- カスタムメールを利用するには、カスタムメールのテンプレート作成・ポリシーキーの設定・カスタムポリシーの変更を行う必要があります。