概要
この記事は初心者の自分がRESTful なAPIとswiftでiPhone向けのクーポン配信サービスを開発した手順を順番に記事にしています。技術要素を1つずつ調べながら実装したため、とても遠回りな実装となっています。
前回の swiftで配列型のJSONから値を取り出す でクーポンの詳細情報や利用可能店舗名、有効期間の情報を取得できるようになりましたので、それらをアプリ画面に表示するようにTableViewを改造します。
参考
- やさしくはじめる iPhoneアプリ作りの教科書 森 巧尚 著 マイナビ
環境
Mac OS 10.15
Swift5
Xcode11.1
手順
- Main.storyboardでTableViewCellをデザイン
- 配置したラベルにそれぞれの情報を表示できるようにViewControllerを改造
- 動作確認
Main.storyboardでTableViewCellをデザイン
現在は subtitle というTableViewの標準のデザインを使い、メイン情報を詳細情報の2つを表示する仕様になっています。3つ以上の情報をtableViewに表示したい場合は標準デザインが対応していないためオリジナル仕様のTableViewCellを作る必要があります。
まず既に配置済みのTableViewの上にTableViewCellを配置します。ObjectsのウィンドウはXcodeの右上の「+」ボタンで表示できます。
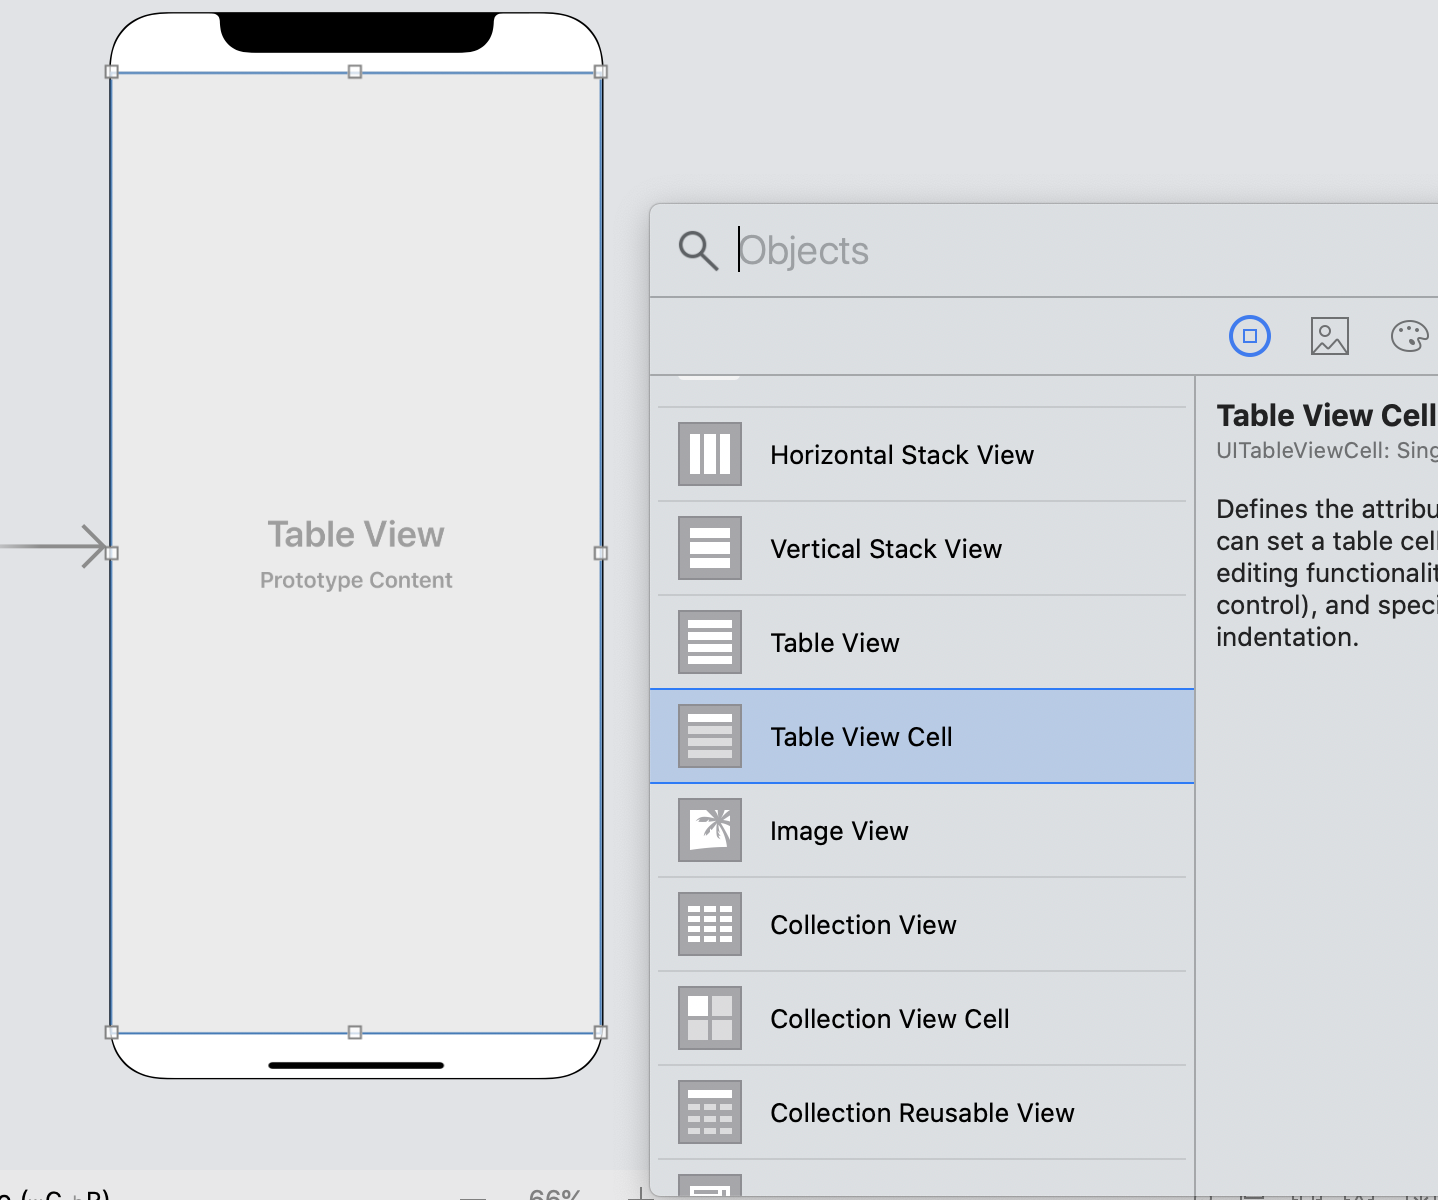
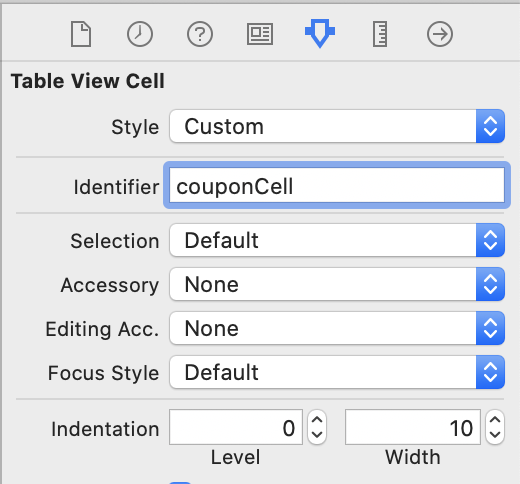
配置したTableViewCellのIdentifier にTableViewCellを特定するための名前をつけます。
右側の「show the size inspector」でTableViewCellの高さを200ptに設定し、TableViewCellの上に、クーポンの情報を表示するためのLabelを配置しました。ラベルの用途は下記の通りです。
- クーポン特典を表示するラベル
- クーポンのコメントを表示するラベル
- 利用可能店舗を表示するラベル
- 開始利用開始日と利用期限を繋げて利用可能期間を表示するラベル
それぞれのラベルをプログラムから識別するためにtag(通し番号)をつけます。
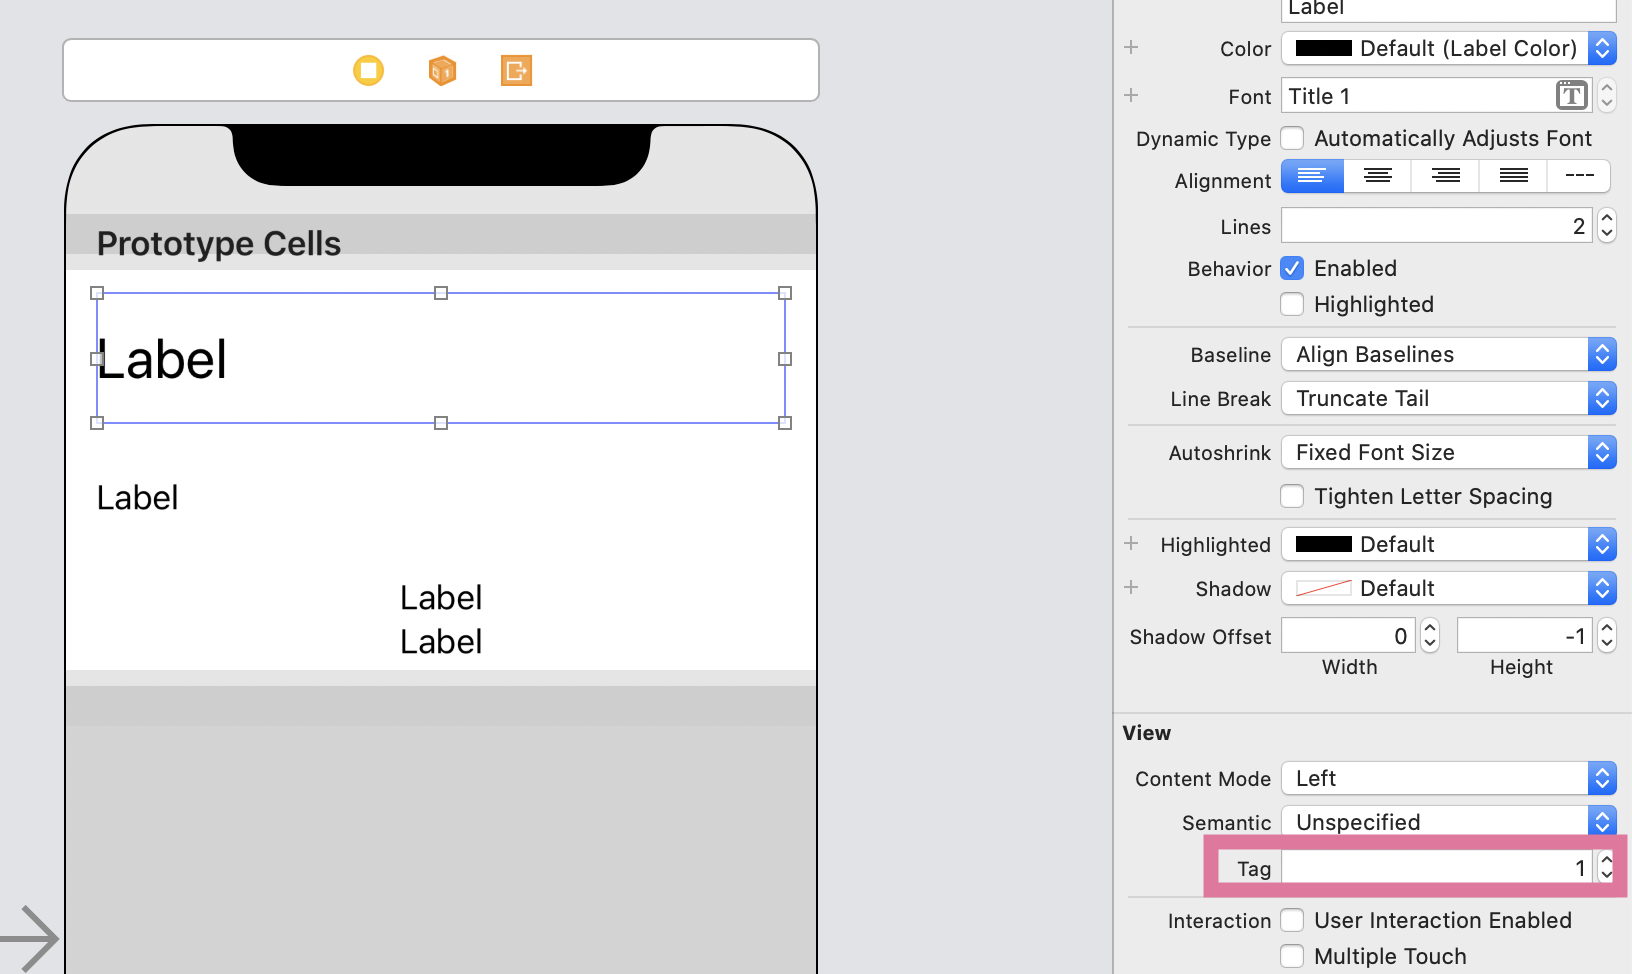
タグ番号の振り分けは下記の通りにしました。
- クーポン特典を表示するラベル
- クーポンのコメントを表示するラベル
- 利用可能店舗を表示するラベル
- 開始利用開始日と利用期限を繋げて利用可能期間を表示するラベル
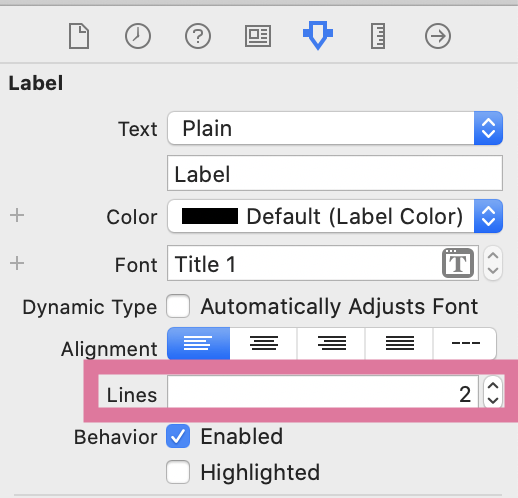
クーポン特典とコメントは複数行で表示させたいので行数を2行に設定します。LabelのLinesで行数を設定できます。
以上でTableViewCellのデザインは完了です。
配置したラベルにそれぞれの情報を表示できるようにViewControllerを改造。
「10_swiftでクーポンを表示する画面を実装する」で作成したプログラムを改造していきます。
改造する箇所は関数func tableView(_ tableView: UITableView, cellForRowAt indexPath: IndexPath)だけです。
まず、セルオブジェクトを作るコードをMain.storyboard でデザインしたCell(couponCell)のセルオブジェクトを作る形式に変えます。
変更前
let cell = UITableViewCell(style: .subtitle, reuseIdentifier: "couponCell")
変更後
withIdentifier: のところは 作成したTableViewCellのIdentifierに設定した名前(今回は couponCell)を指定します。
let cell = tableView.dequeueReusableCell(withIdentifier: "couponCell", for: indexPath as IndexPath)
次に、セルの高さを設定します。(Main.storyboardでも設定しましたが、ViewControllerでも設定しないと反映しませんでした。)
tableView.rowHeight = 200
次に各Labelに表示する値を設定します。
ラベルオブジェクトを作るところで、cell.viewWithTag( ) の「( )」に設定したtagの通し番号を入力します。ラベルに表示する文字列を設定する部分で、変数couponは[String: Any]型なので、String型にキャストします。コードは以下のようになります。
//ラベルオブジェクトを作る
let labelBenefit = cell.viewWithTag(1) as! UILabel
//ラベルに表示する文字列を設定
labelBenefit.text = (coupon["coupon_benefits"] as! String)
これを4つのラベル分、実装します。
出来上がったコードはこちらです。
    func tableView(_ tableView: UITableView, cellForRowAt indexPath: IndexPath) -> UITableViewCell {

        let coupon = self.coupons[indexPath.row]
        //セルを作る
        let cell = tableView.dequeueReusableCell(withIdentifier: "couponCell", for: indexPath as IndexPath)

        tableView.rowHeight = 200

         //各ラベルに値を設定する
        let labelBenefit = cell.viewWithTag(1) as! UILabel
        labelBenefit.text = (coupon["coupon_benefits"] as! String)

        let labelExplanation = cell.viewWithTag(2) as! UILabel
        labelExplanation.text = (coupon["coupon_explanation"] as! String)

        let labelStore = cell.viewWithTag(3) as! UILabel
        labelStore.text = (coupon["coupon_store"] as! String)

        let labelDay = cell.viewWithTag(4) as! UILabel
        labelDay.text = "有効期間: " + (coupon["coupon_start"] as! String) + " ~ " + (coupon["coupon_deadline"] as! String)
動作確認
実行したところ、デザインした通りにクーポンが表示されています。
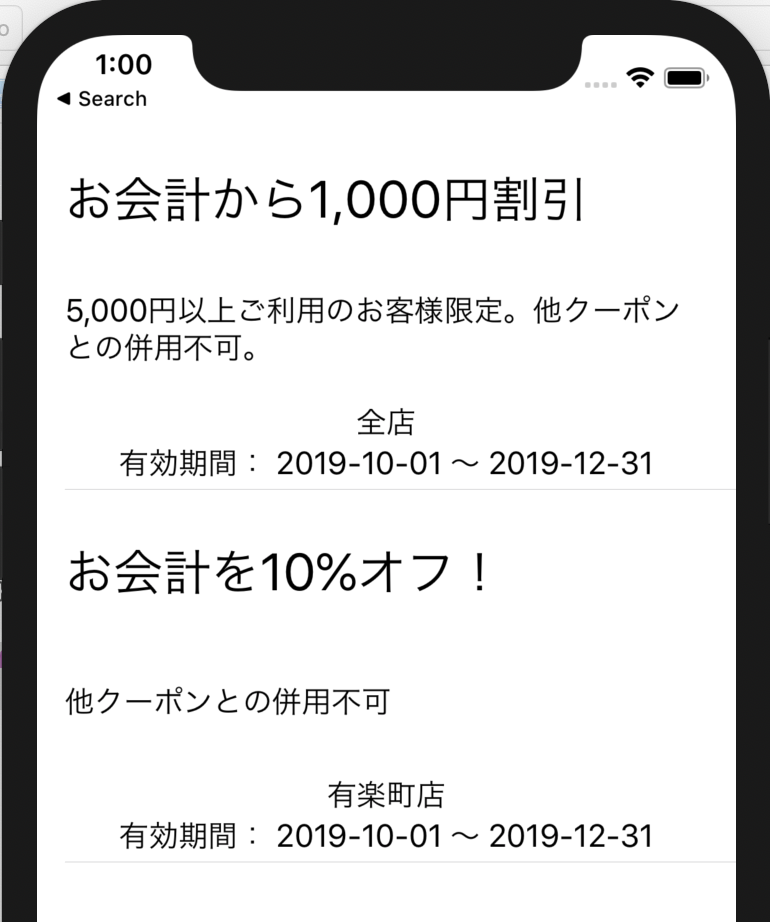
これで少しクーポンらしくなりました。
次回は、webAPI側をRESTfulなAPIに改造します。