概要
前回に引き続き、今回は gRPC マルチコンテナを Azure Kubernetes Service (AKS) 環境へデプロイしていきたいと思います。Azure Kubernetes Service (AKS) は、Kubernetes 環境を管理するフルマネージドな PaaS サービスで、コンテナ オーケストレーションの専門知識がなくても、コンテナ化したアプリケーションのデプロイと管理を簡単に行うことができます。
Azure Kubernetes Service (AKS) のデプロイ
1.Azure Portal で Kubernetes Service をデプロイ
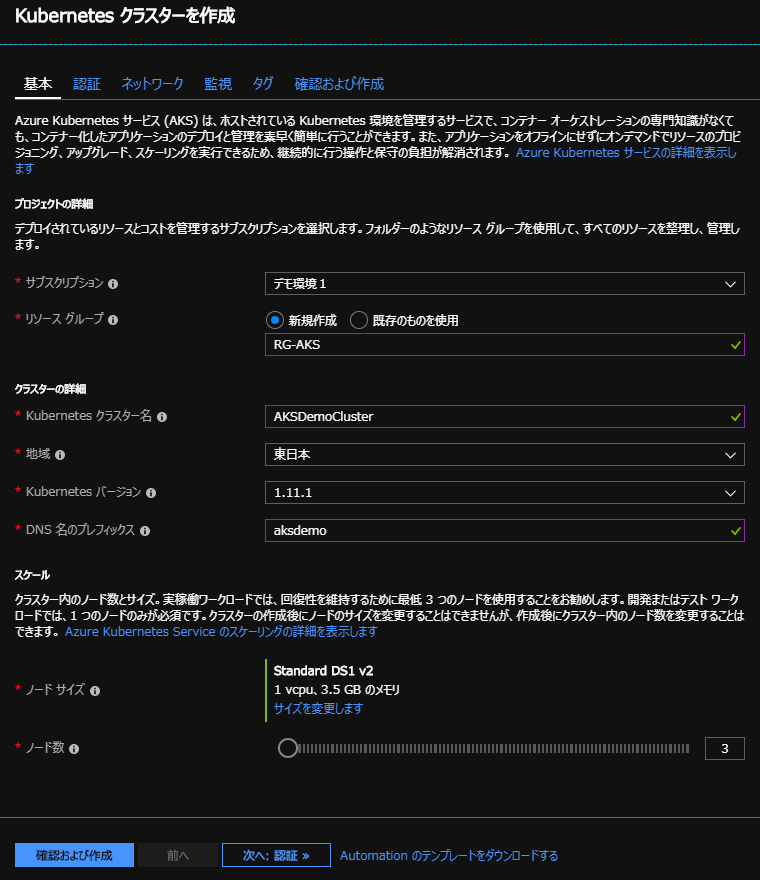
[基本] [認証] [ネットワーク] と各ステップの設定を順次していきます。以下は [基本] 設定画面ですが、特に悩むこともなく必須項目を埋めて次に進みます。

2.最終検証とクラスタ作成
各設定は全て既定のまま進み、最終検証が完了したら [作成] を実行します。正常にデプロイが完了すると指定した Resource Group (今回は RG-AKS)中に次のリソース群が作成されます。

Kubernetes ダッシュボードへ接続
※ 現在こちらの手順は、以下の流れで置き換えられます。
https://docs.microsoft.com/ja-jp/azure/aks/tutorial-kubernetes-deploy-application#deploy-the-application
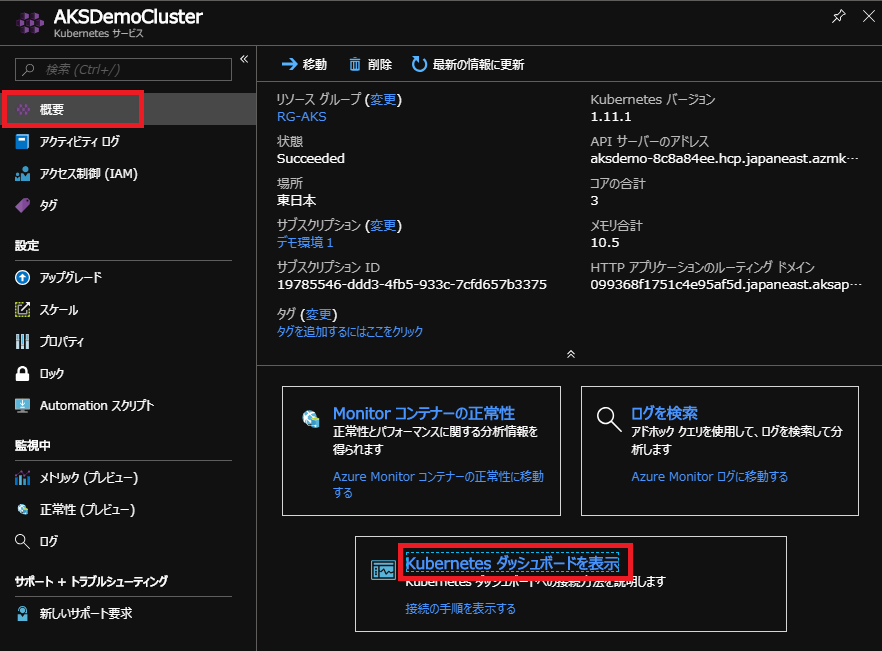
1.デプロイした Kubernetes サービスの [概要] でダッシュボードを表示をクリック

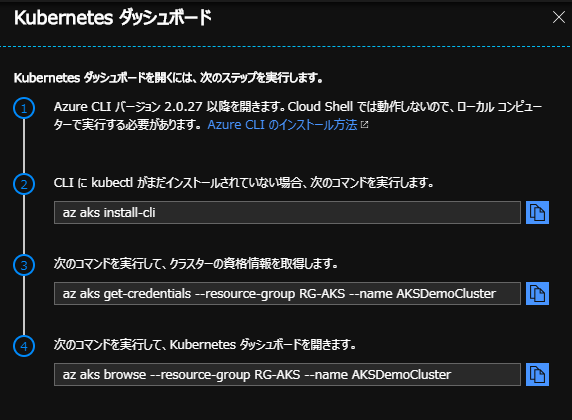
2.Kubernetes ダッシュボードを開くステップを実施
このステップで kubectl コマンド等がインストールされます。

補足
Azure にログインするアカウントが複数のサブスクリプションを持っている場合は、Kubernetes サービスをデプロイした該当サブスクリプションに事前に切り替えてから上記手順を実行する必要があります。
az login
az account set --subscription xxxxxxxx-xxxx-xxxx-xxxx-xxxxxxxxxxxx
3.Kubernetes ダッシュボードの表示
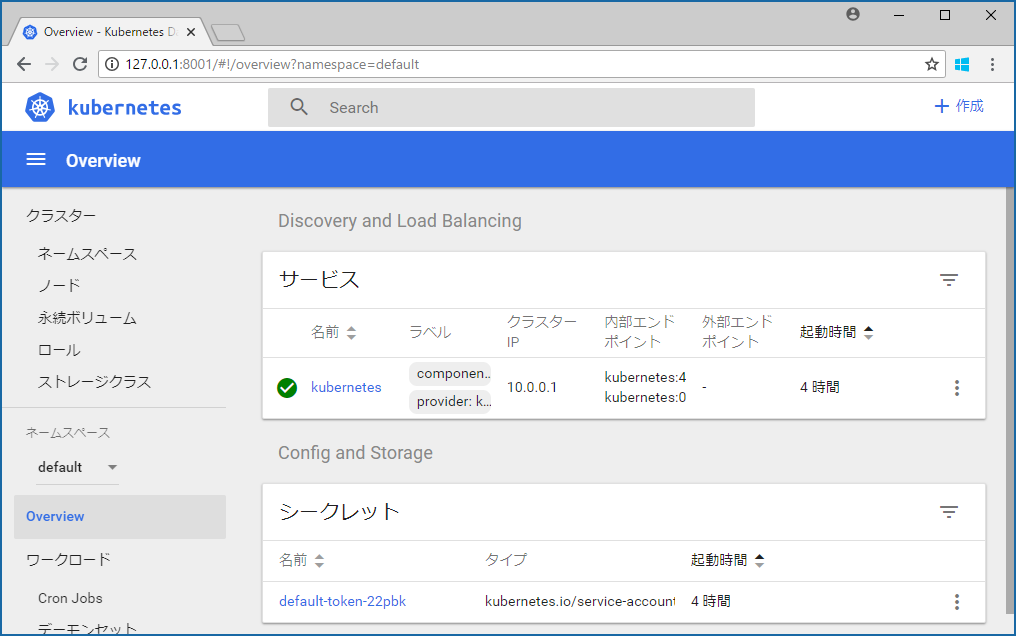
手順2-4で az aks browse コマンドを実行すると、ブラウザが起動され以下のようなダッシュボードが表示されます。このダッシュ―ボードは、AKS へコンテナイメージをデプロイ後にクラスタ状態の確認などで利用します。

gRPC マルチコンテナを AKS へデプロイ
ここでは前回作成したgRPC Docker イメージを利用して AKS へのデプロイを実施していきます。
1.デプロイ用マニフェストファイルの用意
apiVersion: apps/v1beta1
kind: Deployment
metadata:
   name: go-deployment
spec:
   replicas: 2
   template:
     metadata:
       labels:
         app: goclient
     spec:
       containers:
       - name: goclient
         image: yuichii1971/goclient-local
         ports:
         - containerPort: 8080
       - name: goserver
         image: yuichii1971/goserver
         ports:
         - containerPort: 50051
---
apiVersion: v1
kind: Service
metadata:
  name: go
spec:
  type: LoadBalancer
  ports:
  - port: 8080
  selector:
    app: goclient
2.kubectl create コマンドでデプロイ実施
> kubectl create -f deploy.yml
deployment.apps/go-deployment created
service/go created
3.kubectl get service コマンドでデプロイ状況を確認
> kubectl get service go --watch
NAME      TYPE           CLUSTER-IP     EXTERNAL-IP      PORT(S)          AGE
go        LoadBalancer   10.0.141.148   40.115.154.194   8080:31419/TCP   1m
EXTERNAL-IP 欄は、最初"保留中"で表示されます。しばらくすると、EXTERNAL-IP 欄が「保留中」から「IP アドレス」 に変わったら、CTRL-C を使用して kubectl ウォッチ プロセスを停止します。
4.ブラウザでサイトへアクセスし応答を確認
上記の例では IP アドレス 40.115.154.194、ポート 8080 で外部公開されています。ブラウザで http://40.115.154.194:8080/ へアクセスする事でサイトからの応答を確認出来ます。/test など任意の仮想ディレクトリを指定する事で次のような応答が返ってきます。
Your url path is test
Greeting: Hello world
最後に
本記事の内容は、下記 Azure 自習書を参考にしています。併せてご確認頂く事でより詳細な手順が理解できるかと思います。