動かした実装コード
PredNet論文の公式リポジトリから学習済みモデルをgit cloneして、同梱されているサンプル動画ファイルを読み込んで、同モデルの推論タスクを実行しました。
git cloneして公式レポジトリから資源一式を取得
ocean@AfoGuardMacBook-Pro Desktop % git clone https://github.com/coxlab/prednet.git
ocean@AfoGuardMacBook-Pro Desktop % cd prednet
(重み学習済みのpretrainedモデル)kitti_evaluate.pyをTerminalで実行
ocean@AfoGuardMacBook-Pro prednet % python kitti_evaluate.py
Using TensorFlow backend.
2020-12-24 09:33:37.700387: I tensorflow/core/platform/cpu_feature_guard.cc:140] Your CPU supports instructions that this TensorFlow binary was not compiled to use: AVX2 FMA
/Users/ocean/.pyenv/versions/2.7.16/lib/python2.7/site-packages/matplotlib/cbook/deprecation.py:107: MatplotlibDeprecationWarning: Passing one of 'on', 'true', 'off', 'false' as a boolean is deprecated; use an actual boolean (True/False) instead.
  warnings.warn(message, mplDeprecation, stacklevel=1)
ocean@AfoGuardMacBook-Pro prednet %
kitti_resultsという名前のディレクトリに、学習済みモデルが予測(推論)した「1時点先の景色」を収めた画像ファイルが出力される。
ocean@AfoGuardMacBook-Pro prednet % ls kitti_results
prediction_plots    prediction_scores.txt
ocean@AfoGuardMacBook-Pro prednet %
Python2.7
ocean@AfoGuardMacBook-Pro prednet %
ocean@AfoGuardMacBook-Pro prednet % ls kitti_results/prediction_plots
plot_10.png plot_19.png plot_31.png plot_40.png plot_46.png plot_51.png plot_59.png plot_63.png plot_68.png plot_72.png
plot_11.png plot_23.png plot_33.png plot_41.png plot_47.png plot_52.png plot_60.png plot_64.png plot_7.png  plot_73.png
plot_13.png plot_24.png plot_37.png plot_42.png plot_48.png plot_56.png plot_61.png plot_66.png plot_70.png plot_77.png
plot_15.png plot_29.png plot_38.png plot_43.png plot_49.png plot_57.png plot_62.png plot_67.png plot_71.png plot_8.png
ocean@AfoGuardMacBook-Pro prednet %
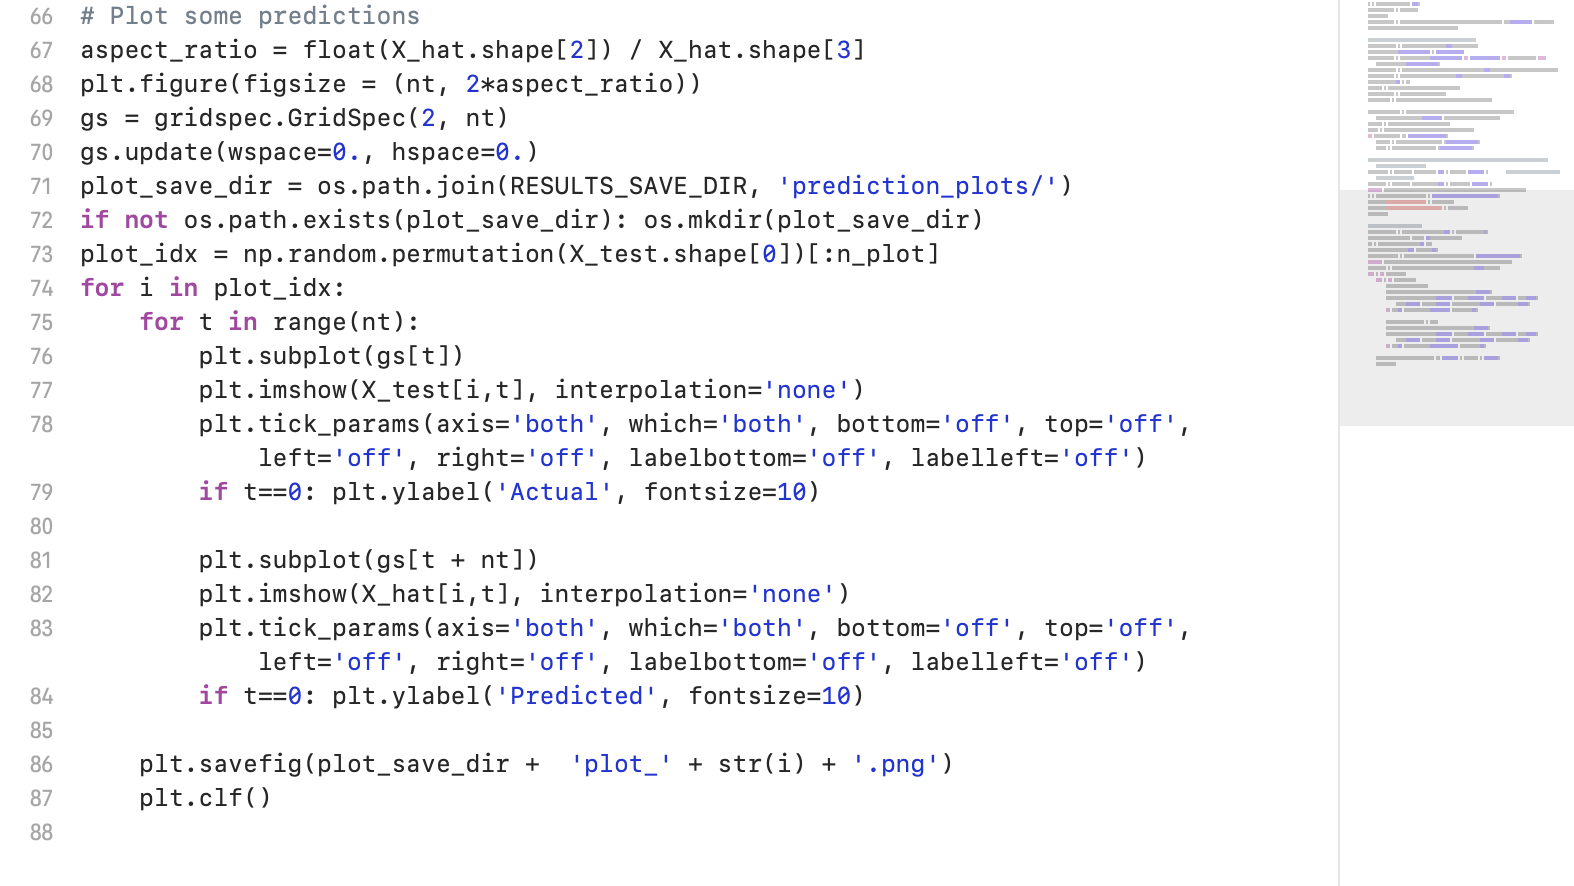
( PredNetの出力結果 )
( 上下2段、左から右に時間が進行していく、コマ送りの画像が出力されます。 )
- 上段:(Actual) 各時間ステップにおける物体の移動の軌跡(正解データ)
- 下段:(Predicted) 学習済みのPredNetモデルが予測した、「各時間ステップにおける物体移動の軌跡」の推定値(予測データ)
( plot7.png )


上記の形式の画像ファイルがたくさん出力されます。

PredNetとは? --理論を簡単に見てみる
2017年のICLRカンファレンスに査読通過した論文で提唱されたモデルです。
この論文は、2020/12/24現在、534本の論文から引用されています(Google Scholar調べ)
時系列データを深層学習ベースの特徴ベクトルに変換するLSTMモデルに、画像内の各オブジェクトの座標位置情報を保持させることができる__ConvLSTMモデル__を使っています。
__ConvLSTMモデル__は、2015年に出た次の論文で提案されたモデルです。
__PredNet__の構造と構成要素を要約した文章としては、次の論考に掲載された文章が簡潔で、とてもわかりやすいです。
2.2 PredNet
PredNetは,大脳皮質における予測符号化の処理を模倣し,深層学習の枠組みで構築されたモデルであり,動画像を与えられた下で将来の画像を予測するタスクを行う過程で汎用的な特徴を学習するモデルとして提案されている.PredNetでは画像の特徴を掴むのに適した Convolutional Neural Network(CNN)および,系列データを扱うのに適したRecurrent Neural Networkの一種であるLong-Short Term Memory(LSTM)とCNNを結合し時空間に対して広がりを持つデータを扱えるようにしたモデルであるConvolutional LSTMを用いて動画の特徴を掴み,予測タスクを行っている.PredNet は同じ構造を持つモジュールを深くスタックした形をとっており,一つのモジュールは,脳内の予測モデルに相当するRepresentationモジュール,入力処理を行うInputモジュール,予測を生成するPredictionモジュール,入力と予測との差分を生成するErrorユニットの 4 パートからなり,PredNet全体では,上位層で生成された予測が下位層へ,下位層で生成されたエラーシグナルが上位層へ伝播するという流れで,情報の授受が行われる.
また、東大松尾研のwebページには、PredNetが持つ(先行モデルに対する)技術的な優位性を含めて、情報密度の高い要約が示されています。
[2175] Deep Predictive Coding Networks for Video Prediction and Unsupervised Learning (2017)
DLにおいて、教師なし学習の利用は、まだ解かれていない課題である。ここでは、視覚世界の構造を学習する教師なし学習のルールとして、動画の系列の将来フレームの予測を取り上げる。神経科学からの予測的コーディングの概念に基づく、予測的ニューラルネットワーク(PredNet)のアーキテクチャーについて述べる。このネットワークは、動画の系列の将来のフレームを予測し、それぞれの層は局所的な予測をし、この予測からの逸脱だけを他のネットワークの層に伝える。このネットワークは、合成的なオブジェクトの動きを予測することができ、ネットワークは、潜在的なオブジェクトのパラメータをデコードするのに有用な内部表現を学習する。その内部表現は、数少ない学習例で物体認識をすることができる。このネットワークは、複雑な自然画像のストリームにスケールすることができ、エゴセントリックな(自分視点での)動きや視覚シーンでの動きを捉えることができ、一般化することができる。
リカレントネットワークによる生成部分による入力の予測と、実際の入力を比較して、その差分が出力される。で、それがまた予測される。
その他、以下の記事では、各時点における観測データを(PredNetモデルが)次々と受け取って、「予測値」と「実測値」との間の「誤差」を修正する作業を積み上げていく過程で、PredNetモデルが予測する「次の瞬間の画像」が、実際の「画像」が持つ画像特徴を、どんどんと忠実に取り込んだ(予測)画像に変貌していく様子が、掲載されています。
図でActualと書かれた行は、入力したデータで、Predictedと書かれた行はそれを見てDeep Pred Networkが予測したイメージを映像化したものです。横は時間軸で、右に行くほど時間が経過しています。
ここでは、顔画像の3Dモデルを回転させながら入力しています。
面白いのは、左上、最初の顔画像の入力に対して、Deep Pred Networkは、二行目の左から二番目のようなたまご型のイメージを「推測(Predict)」します。
この時点では顔だともなんともわかっていないという感じです。
次のコマを見てみると、顎らしきものと鼻らしきものが認識されています。さらに次のコマでは目が認識されています。そして次のコマでは口と眉らしきもの、さらに進むと耳の形をしっかりとイメージするようになります。
奇しくも、これは我々人間が突然動くものを見た時に感じる認識と近いのではないでしょうか。最初は回転する卵のようなものが見えて、次に「あ、鼻がある、目がある・・・あ、口と眉が・・ああ、耳もあるね」と段階的に認識するわけです。
なお、2020年5月18日に、__PredNet__の検証を試みた論文が提出されています。
( 参考 ) ConvLSTMとは?
(Submitted on 13 Jun 2015 (v1), last revised 19 Sep 2015 (this version, v2))
ConvLSTMは、上の論文で提案された深層ニューラルネットワークのセルの1つです。
この論文は、2020/12/24現在、2767本の論文から引用されていて、広く知られています(Google Scholar調べ)。
- Google Scholar, Convolutional LSTM network: A machine learning approach for precipitation nowcasting
PredNet論文のなかで、__ConvLSTM論文__を引用している場所
Deep Predictive Coding Networks論文の12ページ目(引用論文一覧)で引用されています。
Xingjian Shi, Zhourong Chen, Hao Wang, Dit-Yan Yeung, Wai-Kin Wong, and Wang-chun Woo.
Convolutional LSTM network: A machine learning approach for precipitation nowcasting. CoRR, 2015.
( 参考 ) "CNNLSTM-deCNN framework"
なお、Deep Predictive Coding Networks論文を執筆した研究者たちは、PredNetを提案する前の年に、__ConvLSTMではなく、CNNLSTM-deCNN framework__を採用したモデルを、提案する論文を書いています。
Here, we explore the internal models developed by deep neural networks trained using a loss based on predicting future frames in synthetic video sequences, using a CNNLSTM-deCNN framework.
PredNetとPredictive coding
__Deep Predictive Coding Networksモデル__は、__この論文に先立ち、すでに定義されていた*“predictive coding”*__という概念(concept)に触発された("is inspired by")と、論文の中で述べられています。
以下、__太字と斜線部分__が該当箇所です。なお、論文では太字と斜体にはなっていません。
この記事に引用するにあたり、本記事の執筆者が太字と斜体に変えました。
We describe a predictive neural network (“PredNet”) architecture that is inspired by the concept of “predictive coding” from the neuroscience literature. These networks learn to predict future frames in a video sequence, with each layer in the network making local predictions and only forwarding deviations from those predictions to subsequent network layers.
We show that these networks are able to robustly learn to predict the movement of synthetic (rendered) objects, and that in doing so, the networks learn internal representations that are useful for decoding latent object parameters (e.g. pose) that support object recognition with fewer training views.
この__“predictive coding”__という概念は、人間の脳内情報処理過程との類似性に、注目が集まっています(主に脳神経科学界隈で)。
####2・1 感覚・運動信号の予測学習
「人間の脳機能の本質は,外界から知覚した信号と脳で予測した信号との差,つまり予測誤差を最小化する
ように情報を表現することである」とする予測符号化 (predictive coding)の考えが,近年,多くの認知神経科学者によって主張されている [Clark 13, Friston 06, Friston 10].脳は経験を通して環境や身体のモデル(内 部モデル)を獲得するが,その内部モデルが感覚信号を うまく予測するように情報を表現することで,人間の 多様な認知機能を実現するという理論である.また,本理論に基づく計算論的モデルも数多く提案されており [Rao 99, Tani 07],脳のメカニズムの構成的理解に大きく貢献している.
predictive coding は脳機能全般を同じ枠組みで統一的に捉える。この考えは脳を適応のための装置と考え、 適応(学習)には予測した結果と実際の結果の差(予測誤差)が重要な役割を果たすと主張する。
( ・・・省略・・・ )
これまでの感覚・知覚の神経科学では受容器から大脳へ向かう feedforward, bottom-up な情報の流れが主要な問題になってきた。予測する脳では逆方向 の feedback, top-down の流れが問題になる。これは逆階層説と親和的である。なお、予測 誤差が feedforward, bottom-up の系により、下位から上位の脳に送られると考える。ここ では便宜的に、感覚・知覚系内の情報の流れを feedforward, feedback, 感覚・知覚系と例 えば連合野の認知制御系の間の情報の流れを bottom-up, top-down と記述することにする。
2 予測符号化 予測符号化とは,大脳皮質で行われているとされる
処理である。( ・・・省略・・・ )
2.1 大脳皮質における予測符号化
脳は近い将来に入力されるであろう刺激を予測し,実際に入力される刺激との差分
を処理することにより,効率的な情報処理を実現している.大脳皮質においては,
高次領域,低次領域間に双方向の接続が存在し,高次 領域で生成された予測が
低次領域へと伝播,実際の入力刺激と予測の差分が低次領域から高次領域へ
向かってフィードバックされることにより脳内の予測モデルが更新されるという
一連の処理が行われ,より精度の高い予測を行うことが可能になるとされている.2.2 PredNet
PredNetは,大脳皮質における予測符号化の処理を模倣し,深層学習の枠組みで構築
されたモデルであり,動画像を与えられた下で将来の画像を予測するタスクを行う
過程で汎用的な特徴を学習するモデルとして提案 れている.
- 計算神経科学 · 2018/08/17 予測符号化 (predictive coding) とは何か
- 神経情報科学サマースクール Neuro-Informatics Summer School, 2000 (NISS2000) 「脳における予測と文脈生成」 トップダウンの情報はいかにして生成されるのか?
脳神経科学の界隈では、人間が何かを認識する認知活動は、網膜などの感覚器官から受け取った感覚刺激(の神経電磁信号)を、神経回路を伝わる過程で順次、情報処理を施していく、というように、単純な順方向のニューラル・ネットワークモデルでモデル化できるような情報処理過程によって実現されているのではなく、過去に認知した内容から、次に認知すべき感覚情報をあらかじめ、先取りして「予測」した上で、個々の時点(time step)での認知を獲得(形成)しているのではないか、という見方が提出されているとのことです。
こうした、「次の時点の認知内容」を予め、先取りして予測する枠組みの中で、時事刻々と移り変わっていく物体の運動の軌跡や周囲の光景(景色)の変化を認知(認識)する情報処理過程を、人工知能のモデル(数理モデル)として単純化・抽象化したモデルが、__PredNet__なのだそうです。
認識の枠組みを予め仮定においた上で、次の瞬間の認識(認知内容)を形成する__という__枠組み__は、哲学や精神病理学の一分野「現象学」(Edmund Husserl)における「先行する」「過去把持」の考え方__にも近いものを感じます。
この観点からも、__Predictive coding__と、_PredNetモデル__は、__人工知能モデル(数理モデル)を経由した人間が持つ認知過程の解明__に対して、今後、大きな貢献をしていく可能性を孕んでいるのではないでしょうか。
先ほど、__PredNet論文__のAbstractの文章を引用しましたが、その中で、以下の一文がありました。
only forwarding deviations from those predictions to subsequent network layers.
この部分は、__(認知モデルが)予測(想定)した「次の瞬間の認知内容」と、実際に感覚器官から入力された「認知内容」との「差分」「誤差」「ずれ」を、深層ニューラルネットワークモデルの中で、誤差逆伝播させていく__仕組みを要約している部分です。
まさにこの認知モデルの設計方針は、先ほどみた人間の認知モデルについて考えられていることを、人工知能モデルとして素直に数理モデル化しようとする(設計の)考え方であることが、見て取れます。
ところで、以下の一文を書いているとき、これは__「状態空間モデル」と呼ばれる時系列解析手法における「カルマン・フィルター」(Kalman Filter)の考え方__が使えるかな?と思いました。
__(認知モデルが)予測(想定)した「次の瞬間の認知内容」と、実際に感覚器官から入力された「認知内容」との「差分」「誤差」「ずれ」を、深層ニューラルネットワークモデルの中で、誤差逆伝播させていく__仕組み
そこで、__Predictive coding__と__Kalman Filter__でGoogle検索をしてみると、思った通り、いろいろと論文が出てきました。この辺りは、また稿を改めて、取り組んでみたいと思います。
- Yihua Shi Astle, Xuning Tang, Craig Freeman, Application of dynamic logistic regression with unscented Kalman filter in predictive coding
- Jan Kneissle, Jan Drugowitsch, Karl Friston, and Martin V. Butz1, Simultaneous learning and filtering without delusions: a Bayes-optimal combination of Predictive Inference and Adaptive Filtering
- Thomas Arildsen et.al., On Predictive Coding for Erasure Channels Using a
Kalman Framework
上の論文の執筆陣に名を連ねているKarl Friston氏は、「自由エネルギー原理」の提唱者です。
PredNetを使った応用研究(一部)
このPredNetを用いた応用研究として、面白そうな研究が複数、提案されています。(他、VAE(ai主観世界の夢の中で)と組みあわせたもの)
2つ目の研究は、VAEと組み合わせることで、予測対象のフレームを、「次の時点のフレーム」ではなく、「数時点先のフレーム」にできるよう拡張を試みています。
__VAE (変分オートエンコーダモデル)__を、AI Agentの認知モデルとして組み込む研究としては、__いわゆる「世界モデル」__に対する注目が、一部で集まっています。__AI Agentが、観測データを手がかりにして、自分自身の主観的な「世界観」・「世界像」・「世界に関する認知イメージ像」を形成・獲得する研究__が行われています。
また、AI Agentが、__自らの主観的な「世界像」の精神空間(=「夢」Dreams)のなか__で、(深層)強化学習を行う__World Models論文__も、AI Communit1yの中で、大きな反響を呼びました。
__AI Agent__が、観測データを元に、観測データを採取した現実世界や(Minecraftなどの)仮装3D空間に関する__主観的な「世界(像)モデル」(観測データが得られたデータ生成過程(Data Generated Process)に関するモデル)__を形成する過程を数理モデル化する中で、人間の認知過程に近い可能性が指摘されている__Predictive coding__の枠組みを取り込む研究には、__人間に近いAI Agent__を構築する上でも、とても大きな興味が持てるところです。
画像の将来時点予測タスクにおいて、PredNet論文のあとに続く研究の例
__人間の脳の中で行われている(と考えられている)情報処理過程を、人工の数理モデルとしてどう模倣するか?__という関心は、いったん脇におきます。
将来時点の画像を予測する研究__という文脈でみたときに、PredNet論文の成果を引き継いだ後続の研究__と言えるものとして、次の論文があります。
- Ziru Xu et.al., PredCNN: Predictive Learning with Cascade Convolutions, IJCAI-18
- (実装コード)github.com/xzr12/PredCNN
- (解説スライド)harmonylab 「PredCNN: Predictive Learning with Cascade Convolutions」
PredCNN__は、WaveNet論文およびWaveNet for Speech Denoising論文__で採用された __Dialated causal convolution層__と名付けられた、時系列データを畳み込み層で処理する仕組みを取り入れています。
In this paper, we propose PredCNN, an entirely convolu- tional video prediction model, built upon causal convolution structures in WaveNet [Van Den Oord et al., 2016a]. Inspired by the core idea of recurrent models that capture the temporal dependency with a transition between states, we design a cas- cade multiplicative unit (CMU) that mimics the state-to-state transition by applying additional gate-convolution operations to the former state than the current state.
( Dialated causal convolution層とは? )
(次のスライドの10ページ目を参照)
(@MasaEguchiさんのQiita記事が分かりやすい)
Dilated Causal Convolutions
WaveNetのメイン部分は, 時系列データセットに対し, Convolutionをかませている点である.
また、__ConvLSTMセル__などが捉える時間方向と空間方向にまたがる(動画)特徴量に加えて、数字や文字などの記号が持つ「意味」情報や、物体で事象や概念の間の「意味」関係(セマンティック)を考慮しながら、将来時点の画像を予測できるモデルを提案している論文もあります。
__PredNet__の理論的な側面については、以上です。
次に、実装コードを実際に動かしてみた様子を紹介します。最終的に、この記事の冒頭に掲載した画像ファイルが出力されます。
( 実装コード )
PredNetの公式リポジトリから学習済みモデルをgit cloneして、同梱されているサンプル動画ファイルを読み込んで、同モデルの推論タスクを実行しました。
prednet
Code and models accompanying Deep Predictive Coding Networks for Video Prediction and Unsupervised Learning by Bill Lotter, Gabriel Kreiman, and David Cox.The PredNet is a deep recurrent convolutional neural network that is inspired by the neuroscience concept of predictive coding (Rao and Ballard, 1999; Friston, 2005). Check out example prediction videos here.
公式リポジトリとは別に、__ConvLSTMの実装を含めて、PredNetモデル__をフルスクラッチで実装している例もあります。
ConvLSTM「recurrent_convolutional.py」は以下のURLのコードを使わせていただいています。
(https://gist.github.com/henry0312/bc86e166855bc12b18e3bdceb67b3ec1)PredNetは階層性が特徴ですが、実装は1層のみとなっています。
制作途中のため正しく学習できるかどうかは不明です。
BackendはTheanoを使用して確認しています。
'''LICENSE
The MIT License (MIT)
Copyright (c) 2016 Tsukasa OMOTO <henry0312@gmail.com>
Permission is hereby granted, free of charge, to any person obtaining a copy
of this software and associated documentation files (the "Software"), to deal
in the Software without restriction, including without limitation the rights
to use, copy, modify, merge, publish, distribute, sublicense, and/or sell
copies of the Software, and to permit persons to whom the Software is
furnished to do so, subject to the following conditions:
The above copyright notice and this permission notice shall be included in
all copies or substantial portions of the Software.
THE SOFTWARE IS PROVIDED "AS IS", WITHOUT WARRANTY OF ANY KIND, EXPRESS OR
IMPLIED, INCLUDING BUT NOT LIMITED TO THE WARRANTIES OF MERCHANTABILITY,
FITNESS FOR A PARTICULAR PURPOSE AND NONINFRINGEMENT. IN NO EVENT SHALL THE
AUTHORS OR COPYRIGHT HOLDERS BE LIABLE FOR ANY CLAIM, DAMAGES OR OTHER
LIABILITY, WHETHER IN AN ACTION OF CONTRACT, TORT OR OTHERWISE, ARISING FROM,
OUT OF OR IN CONNECTION WITH THE SOFTWARE OR THE USE OR OTHER DEALINGS IN
THE SOFTWARE.
'''

'''NOTICE
This code is based on https://github.com/imodpasteur/keras/blob/RecConv/keras/layers/recurrent_convolutional.py
(cf. https://github.com/fchollet/keras/pull/1818), and I made it support Keras 1.0.4.
'''

from keras import backend as K
from keras import activations, initializations, regularizers
from keras.layers.core import Masking
from keras.engine.topology import Layer
from keras.engine import InputSpec

from keras.layers.convolutional import conv_output_length
import numpy as np


class RecurrentConv2D(Layer):
__ConvLSTM__については、以下も参考になります。
今回は、公式リポジトリであるcoxlab/prednetをgit cloneして、学習済みモデルを動かして推論タスクを実行してみます。
推論結果(github/coxlab/prednet)
実行したこと
- Prednetのモデルファイルと、学習済のモデルの重みファイルをダウンロードした上で、python kitti_evaluate.pyを実行した。
- ローカルマシン(MacBookPro)のCPUを用いて、推論を実行しました。CPUで5分ほどで推論が終わりました。
- PredNetの公式GitHubでは、Python2.7と3.6の双方に対応していると書かれていましたが、Python2系では__"hickle NameError: name 'file' is not defined"__エラーが発生しました。
stackoverflowによると、__file() is not supported in Python 3__との書き込みがありました。
そこで、Python3系ではなく、Python2.7系で実行したところ、このエラーは消えて、推論を実行できました。
__tensorflowとkeras__は、それぞれ、公式GitHubに書かれているバージョンのものを入れました。
(Pyenv環境でPredNet専用の環境を用意しました)
PredNetを動かすための環境構築作業については、この記事で節を改めて、掲載をしています。
ocean@AfoGuardMacBook-Pro prednet % python kitti_evaluate.py
Using TensorFlow backend.
2020-12-24 09:33:37.700387: I tensorflow/core/platform/cpu_feature_guard.cc:140] Your CPU supports instructions that this TensorFlow binary was not compiled to use: AVX2 FMA
/Users/ocean/.pyenv/versions/2.7.16/lib/python2.7/site-packages/matplotlib/cbook/deprecation.py:107: MatplotlibDeprecationWarning: Passing one of 'on', 'true', 'off', 'false' as a boolean is deprecated; use an actual boolean (True/False) instead.
  warnings.warn(message, mplDeprecation, stacklevel=1)
ocean@AfoGuardMacBook-Pro prednet %
ocean@AfoGuardMacBook-Pro prednet % ls kitti_results
prediction_plots	prediction_scores.txt
ocean@AfoGuardMacBook-Pro prednet %
ocean@AfoGuardMacBook-Pro prednet % ls kitti_results/prediction_plots
plot_10.png	plot_19.png	plot_31.png	plot_40.png	plot_46.png	plot_51.png	plot_59.png	plot_63.png	plot_68.png	plot_72.png
plot_11.png	plot_23.png	plot_33.png	plot_41.png	plot_47.png	plot_52.png	plot_60.png	plot_64.png	plot_7.png	plot_73.png
plot_13.png	plot_24.png	plot_37.png	plot_42.png	plot_48.png	plot_56.png	plot_61.png	plot_66.png	plot_70.png	plot_77.png
plot_15.png	plot_29.png	plot_38.png	plot_43.png	plot_49.png	plot_57.png	plot_62.png	plot_67.png	plot_71.png	plot_8.png
ocean@AfoGuardMacBook-Pro prednet %
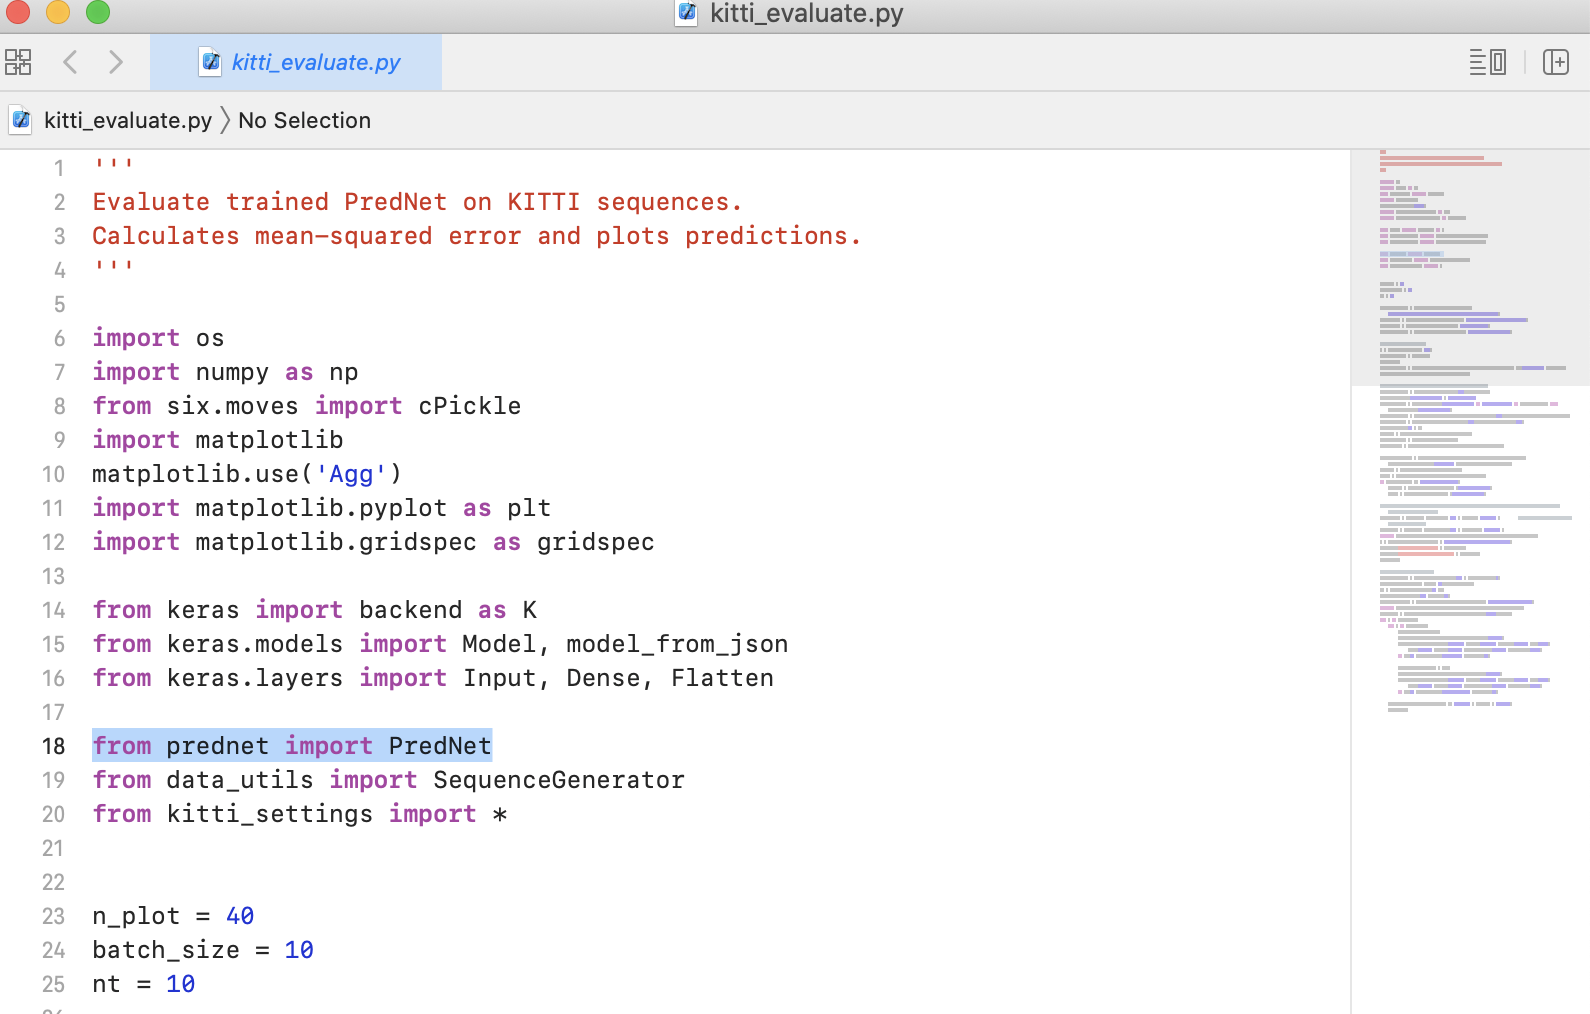
実装コード
( 外部ファイル(モジュール)の読み込み )
( 学習済みのモデルの重みパラメータの読み込み )

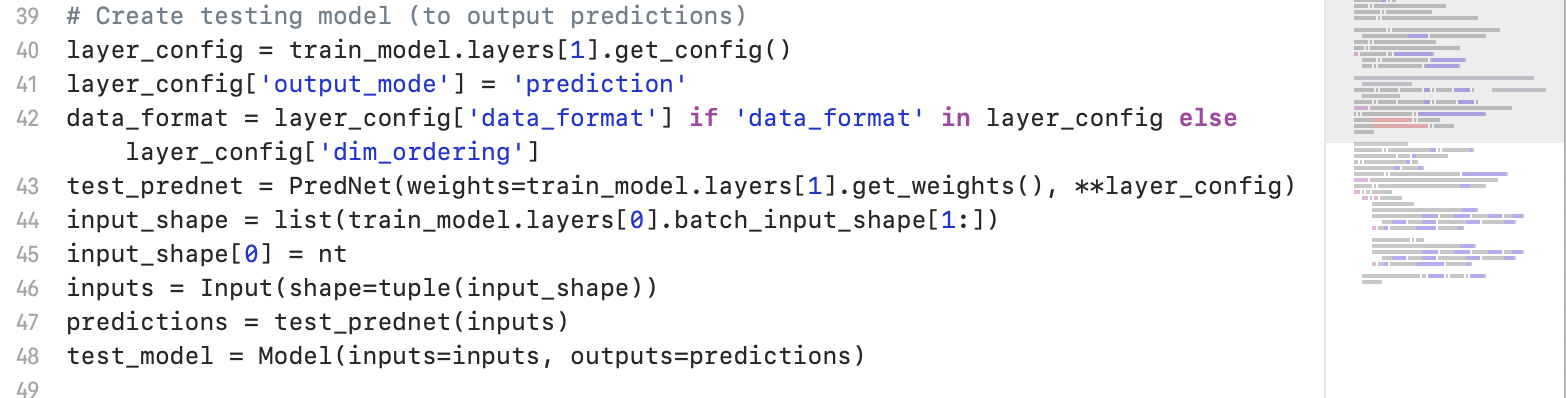
( 深層ニューラルネットワークモデル(PredNet)の定義 )
( 推論結果のファイル出力(画像ファイル) )
( prednet.py )
PredNetモデルの本体__は、prednet.py__で定義されています。
クラス定義__のなかで、引数を説明しているコメント文をみると、all convolutions in the LSTM.__の文字列があります。
畳み込み層とLSTM層を組みあわせて用いている(ConvLSTM)ことがわかります。
class PredNet(Recurrent):
    '''PredNet architecture - Lotter 2016.
        Stacked convolutional LSTM inspired by predictive coding principles.

  ( ・・・省略・・・ )

  R_filt_sizes: filter sizes for the representation (R) modules.
            Has length equal to length of stack_sizes.
            Corresponds to the filter sizes for all convolutions in the LSTM.

( ・・・省略・・・ )

  # References
        - [Deep predictive coding networks for video prediction and unsupervised learning](https://arxiv.org/abs/1605.08104)
        - [Long short-term memory](http://deeplearning.cs.cmu.edu/pdfs/Hochreiter97_lstm.pdf)
        - [Convolutional LSTM network: a machine learning approach for precipitation nowcasting](http://arxiv.org/abs/1506.04214)
        - [Predictive coding in the visual cortex: a functional interpretation of some extra-classical receptive-field effects](http://www.nature.com/neuro/journal/v2/n1/pdf/nn0199_79.pdf)
import numpy as np

from keras import backend as K
from keras import activations
from keras.layers import Recurrent
from keras.layers import Conv2D, UpSampling2D, MaxPooling2D
from keras.engine import InputSpec
from keras_utils import legacy_prednet_support

class PredNet(Recurrent):
    '''PredNet architecture - Lotter 2016.
        Stacked convolutional LSTM inspired by predictive coding principles.

    # Arguments
        stack_sizes: number of channels in targets (A) and predictions (Ahat) in each layer of the architecture.
            Length is the number of layers in the architecture.
            First element is the number of channels in the input.
            Ex. (3, 16, 32) would correspond to a 3 layer architecture that takes in RGB images and has 16 and 32
                channels in the second and third layers, respectively.
        R_stack_sizes: number of channels in the representation (R) modules.
            Length must equal length of stack_sizes, but the number of channels per layer can be different.
        A_filt_sizes: filter sizes for the target (A) modules.
            Has length of 1 - len(stack_sizes).
            Ex. (3, 3) would mean that targets for layers 2 and 3 are computed by a 3x3 convolution of the errors (E)
                from the layer below (followed by max-pooling)
        Ahat_filt_sizes: filter sizes for the prediction (Ahat) modules.
            Has length equal to length of stack_sizes.
            Ex. (3, 3, 3) would mean that the predictions for each layer are computed by a 3x3 convolution of the
                representation (R) modules at each layer.
        R_filt_sizes: filter sizes for the representation (R) modules.
            Has length equal to length of stack_sizes.
            Corresponds to the filter sizes for all convolutions in the LSTM.
        pixel_max: the maximum pixel value.
            Used to clip the pixel-layer prediction.
        error_activation: activation function for the error (E) units.
        A_activation: activation function for the target (A) and prediction (A_hat) units.
        LSTM_activation: activation function for the cell and hidden states of the LSTM.
        LSTM_inner_activation: activation function for the gates in the LSTM.
        output_mode: either 'error', 'prediction', 'all' or layer specification (ex. R2, see below).
            Controls what is outputted by the PredNet.
            If 'error', the mean response of the error (E) units of each layer will be outputted.
                That is, the output shape will be (batch_size, nb_layers).
            If 'prediction', the frame prediction will be outputted.
            If 'all', the output will be the frame prediction concatenated with the mean layer errors.
                The frame prediction is flattened before concatenation.
                Nomenclature of 'all' is kept for backwards compatibility, but should not be confused with returning all of the layers of the model
            For returning the features of a particular layer, output_mode should be of the form unit_type + layer_number.
                For instance, to return the features of the LSTM "representational" units in the lowest layer, output_mode should be specificied as 'R0'.
                The possible unit types are 'R', 'Ahat', 'A', and 'E' corresponding to the 'representation', 'prediction', 'target', and 'error' units respectively.
        extrap_start_time: time step for which model will start extrapolating.
            Starting at this time step, the prediction from the previous time step will be treated as the "actual"
        data_format: 'channels_first' or 'channels_last'.
            It defaults to the `image_data_format` value found in your
            Keras config file at `~/.keras/keras.json`.

    # References
        - [Deep predictive coding networks for video prediction and unsupervised learning](https://arxiv.org/abs/1605.08104)
        - [Long short-term memory](http://deeplearning.cs.cmu.edu/pdfs/Hochreiter97_lstm.pdf)
        - [Convolutional LSTM network: a machine learning approach for precipitation nowcasting](http://arxiv.org/abs/1506.04214)
        - [Predictive coding in the visual cortex: a functional interpretation of some extra-classical receptive-field effects](http://www.nature.com/neuro/journal/v2/n1/pdf/nn0199_79.pdf)
    '''
    @legacy_prednet_support
    def __init__(self, stack_sizes, R_stack_sizes,
                 A_filt_sizes, Ahat_filt_sizes, R_filt_sizes,
                 pixel_max=1., error_activation='relu', A_activation='relu',
                 LSTM_activation='tanh', LSTM_inner_activation='hard_sigmoid',
                 output_mode='error', extrap_start_time=None,
                 data_format=K.image_data_format(), **kwargs):
        self.stack_sizes = stack_sizes
        self.nb_layers = len(stack_sizes)
        assert len(R_stack_sizes) == self.nb_layers, 'len(R_stack_sizes) must equal len(stack_sizes)'
        self.R_stack_sizes = R_stack_sizes
        assert len(A_filt_sizes) == (self.nb_layers - 1), 'len(A_filt_sizes) must equal len(stack_sizes) - 1'
        self.A_filt_sizes = A_filt_sizes
        assert len(Ahat_filt_sizes) == self.nb_layers, 'len(Ahat_filt_sizes) must equal len(stack_sizes)'
        self.Ahat_filt_sizes = Ahat_filt_sizes
        assert len(R_filt_sizes) == (self.nb_layers), 'len(R_filt_sizes) must equal len(stack_sizes)'
        self.R_filt_sizes = R_filt_sizes

        self.pixel_max = pixel_max
        self.error_activation = activations.get(error_activation)
        self.A_activation = activations.get(A_activation)
        self.LSTM_activation = activations.get(LSTM_activation)
        self.LSTM_inner_activation = activations.get(LSTM_inner_activation)

        default_output_modes = ['prediction', 'error', 'all']
        layer_output_modes = [layer + str(n) for n in range(self.nb_layers) for layer in ['R', 'E', 'A', 'Ahat']]
        assert output_mode in default_output_modes + layer_output_modes, 'Invalid output_mode: ' + str(output_mode)
        self.output_mode = output_mode
        if self.output_mode in layer_output_modes:
            self.output_layer_type = self.output_mode[:-1]
            self.output_layer_num = int(self.output_mode[-1])
        else:
            self.output_layer_type = None
            self.output_layer_num = None
        self.extrap_start_time = extrap_start_time

        assert data_format in {'channels_last', 'channels_first'}, 'data_format must be in {channels_last, channels_first}'
        self.data_format = data_format
        self.channel_axis = -3 if data_format == 'channels_first' else -1
        self.row_axis = -2 if data_format == 'channels_first' else -3
        self.column_axis = -1 if data_format == 'channels_first' else -2
        super(PredNet, self).__init__(**kwargs)
        self.input_spec = [InputSpec(ndim=5)]

    def compute_output_shape(self, input_shape):
        if self.output_mode == 'prediction':
            out_shape = input_shape[2:]
        elif self.output_mode == 'error':
            out_shape = (self.nb_layers,)
        elif self.output_mode == 'all':
            out_shape = (np.prod(input_shape[2:]) + self.nb_layers,)
        else:
            stack_str = 'R_stack_sizes' if self.output_layer_type == 'R' else 'stack_sizes'
            stack_mult = 2 if self.output_layer_type == 'E' else 1
            out_stack_size = stack_mult * getattr(self, stack_str)[self.output_layer_num]
            out_nb_row = input_shape[self.row_axis] / 2**self.output_layer_num
            out_nb_col = input_shape[self.column_axis] / 2**self.output_layer_num
            if self.data_format == 'channels_first':
                out_shape = (out_stack_size, out_nb_row, out_nb_col)
            else:
                out_shape = (out_nb_row, out_nb_col, out_stack_size)

        if self.return_sequences:
            return (input_shape[0], input_shape[1]) + out_shape
        else:
            return (input_shape[0],) + out_shape

    def get_initial_state(self, x):
        input_shape = self.input_spec[0].shape
        init_nb_row = input_shape[self.row_axis]
        init_nb_col = input_shape[self.column_axis]

        base_initial_state = K.zeros_like(x)  # (samples, timesteps) + image_shape
        non_channel_axis = -1 if self.data_format == 'channels_first' else -2
        for _ in range(2):
            base_initial_state = K.sum(base_initial_state, axis=non_channel_axis)
        base_initial_state = K.sum(base_initial_state, axis=1)  # (samples, nb_channels)

        initial_states = []
        states_to_pass = ['r', 'c', 'e']
        nlayers_to_pass = {u: self.nb_layers for u in states_to_pass}
        if self.extrap_start_time is not None:
           states_to_pass.append('ahat')  # pass prediction in states so can use as actual for t+1 when extrapolating
           nlayers_to_pass['ahat'] = 1
        for u in states_to_pass:
            for l in range(nlayers_to_pass[u]):
                ds_factor = 2 ** l
                nb_row = init_nb_row // ds_factor
                nb_col = init_nb_col // ds_factor
                if u in ['r', 'c']:
                    stack_size = self.R_stack_sizes[l]
                elif u == 'e':
                    stack_size = 2 * self.stack_sizes[l]
                elif u == 'ahat':
                    stack_size = self.stack_sizes[l]
                output_size = stack_size * nb_row * nb_col  # flattened size

                reducer = K.zeros((input_shape[self.channel_axis], output_size)) # (nb_channels, output_size)
                initial_state = K.dot(base_initial_state, reducer) # (samples, output_size)
                if self.data_format == 'channels_first':
                    output_shp = (-1, stack_size, nb_row, nb_col)
                else:
                    output_shp = (-1, nb_row, nb_col, stack_size)
                initial_state = K.reshape(initial_state, output_shp)
                initial_states += [initial_state]

        if K._BACKEND == 'theano':
            from theano import tensor as T
            # There is a known issue in the Theano scan op when dealing with inputs whose shape is 1 along a dimension.
            # In our case, this is a problem when training on grayscale images, and the below line fixes it.
            initial_states = [T.unbroadcast(init_state, 0, 1) for init_state in initial_states]

        if self.extrap_start_time is not None:
            initial_states += [K.variable(0, int if K.backend() != 'tensorflow' else 'int32')]  # the last state will correspond to the current timestep
        return initial_states

    def build(self, input_shape):
        self.input_spec = [InputSpec(shape=input_shape)]
        self.conv_layers = {c: [] for c in ['i', 'f', 'c', 'o', 'a', 'ahat']}

        for l in range(self.nb_layers):
            for c in ['i', 'f', 'c', 'o']:
                act = self.LSTM_activation if c == 'c' else self.LSTM_inner_activation
                self.conv_layers[c].append(Conv2D(self.R_stack_sizes[l], self.R_filt_sizes[l], padding='same', activation=act, data_format=self.data_format))

            act = 'relu' if l == 0 else self.A_activation
            self.conv_layers['ahat'].append(Conv2D(self.stack_sizes[l], self.Ahat_filt_sizes[l], padding='same', activation=act, data_format=self.data_format))

            if l < self.nb_layers - 1:
                self.conv_layers['a'].append(Conv2D(self.stack_sizes[l+1], self.A_filt_sizes[l], padding='same', activation=self.A_activation, data_format=self.data_format))

        self.upsample = UpSampling2D(data_format=self.data_format)
        self.pool = MaxPooling2D(data_format=self.data_format)

        self.trainable_weights = []
        nb_row, nb_col = (input_shape[-2], input_shape[-1]) if self.data_format == 'channels_first' else (input_shape[-3], input_shape[-2])
        for c in sorted(self.conv_layers.keys()):
            for l in range(len(self.conv_layers[c])):
                ds_factor = 2 ** l
                if c == 'ahat':
                    nb_channels = self.R_stack_sizes[l]
                elif c == 'a':
                    nb_channels = 2 * self.stack_sizes[l]
                else:
                    nb_channels = self.stack_sizes[l] * 2 + self.R_stack_sizes[l]
                    if l < self.nb_layers - 1:
                        nb_channels += self.R_stack_sizes[l+1]
                in_shape = (input_shape[0], nb_channels, nb_row // ds_factor, nb_col // ds_factor)
                if self.data_format == 'channels_last': in_shape = (in_shape[0], in_shape[2], in_shape[3], in_shape[1])
                with K.name_scope('layer_' + c + '_' + str(l)):
                    self.conv_layers[c][l].build(in_shape)
                self.trainable_weights += self.conv_layers[c][l].trainable_weights

        self.states = [None] * self.nb_layers*3

        if self.extrap_start_time is not None:
            self.t_extrap = K.variable(self.extrap_start_time, int if K.backend() != 'tensorflow' else 'int32')
            self.states += [None] * 2  # [previous frame prediction, timestep]

    def step(self, a, states):
        r_tm1 = states[:self.nb_layers]
        c_tm1 = states[self.nb_layers:2*self.nb_layers]
        e_tm1 = states[2*self.nb_layers:3*self.nb_layers]

        if self.extrap_start_time is not None:
            t = states[-1]
            a = K.switch(t >= self.t_extrap, states[-2], a)  # if past self.extrap_start_time, the previous prediction will be treated as the actual

        c = []
        r = []
        e = []

        # Update R units starting from the top
        for l in reversed(range(self.nb_layers)):
            inputs = [r_tm1[l], e_tm1[l]]
            if l < self.nb_layers - 1:
                inputs.append(r_up)

            inputs = K.concatenate(inputs, axis=self.channel_axis)
            i = self.conv_layers['i'][l].call(inputs)
            f = self.conv_layers['f'][l].call(inputs)
            o = self.conv_layers['o'][l].call(inputs)
            _c = f * c_tm1[l] + i * self.conv_layers['c'][l].call(inputs)
            _r = o * self.LSTM_activation(_c)
            c.insert(0, _c)
            r.insert(0, _r)

            if l > 0:
                r_up = self.upsample.call(_r)

        # Update feedforward path starting from the bottom
        for l in range(self.nb_layers):
            ahat = self.conv_layers['ahat'][l].call(r[l])
            if l == 0:
                ahat = K.minimum(ahat, self.pixel_max)
                frame_prediction = ahat

            # compute errors
            e_up = self.error_activation(ahat - a)
            e_down = self.error_activation(a - ahat)

            e.append(K.concatenate((e_up, e_down), axis=self.channel_axis))

            if self.output_layer_num == l:
                if self.output_layer_type == 'A':
                    output = a
                elif self.output_layer_type == 'Ahat':
                    output = ahat
                elif self.output_layer_type == 'R':
                    output = r[l]
                elif self.output_layer_type == 'E':
                    output = e[l]

            if l < self.nb_layers - 1:
                a = self.conv_layers['a'][l].call(e[l])
                a = self.pool.call(a)  # target for next layer

        if self.output_layer_type is None:
            if self.output_mode == 'prediction':
                output = frame_prediction
            else:
                for l in range(self.nb_layers):
                    layer_error = K.mean(K.batch_flatten(e[l]), axis=-1, keepdims=True)
                    all_error = layer_error if l == 0 else K.concatenate((all_error, layer_error), axis=-1)
                if self.output_mode == 'error':
                    output = all_error
                else:
                    output = K.concatenate((K.batch_flatten(frame_prediction), all_error), axis=-1)

        states = r + c + e
        if self.extrap_start_time is not None:
            states += [frame_prediction, t + 1]
        return output, states

    def get_config(self):
        config = {'stack_sizes': self.stack_sizes,
                  'R_stack_sizes': self.R_stack_sizes,
                  'A_filt_sizes': self.A_filt_sizes,
                  'Ahat_filt_sizes': self.Ahat_filt_sizes,
                  'R_filt_sizes': self.R_filt_sizes,
                  'pixel_max': self.pixel_max,
                  'error_activation': self.error_activation.__name__,
                  'A_activation': self.A_activation.__name__,
                  'LSTM_activation': self.LSTM_activation.__name__,
                  'LSTM_inner_activation': self.LSTM_inner_activation.__name__,
                  'data_format': self.data_format,
                  'extrap_start_time': self.extrap_start_time,
                  'output_mode': self.output_mode}
        base_config = super(PredNet, self).get_config()
        return dict(list(base_config.items()) + list(config.items()))
環境構築
1. __PredNet__のGitHub公式レポジトリから、スクリプトファイル一式をダウンロード
・ (GitHub) github.com/coxlab/prednet
ocean@AfoGuardMacBook-Pro Desktop % git clone https://github.com/coxlab/prednet.git
ocean@AfoGuardMacBook-Pro Desktop % ls | grep *prednet*
prednet
ocean@AfoGuardMacBook-Pro Desktop % cd prednet
 prednet % tree | wc -l
      16
 prednet % tree
.
├── License.txt
├── README.md
├── data_utils.py
├── download_data.sh
├── download_models.sh
├── environment.yml
├── keras_utils.py
├── kitti_evaluate.py
├── kitti_extrap_finetune.py
├── kitti_settings.py
├── kitti_train.py
├── prednet.py
└── process_kitti.py

0 directories, 13 files
ocean@AfoGuardMacBook-Pro prednet %
Desktop % cd prednet
( Pre-trained modelを動かすために必要な資源 )
GitHubに、次の説明文があります。
KITTI Demo
Code is included for training the PredNet on the raw KITTI dataset. We include code for downloading and processing the data, as well as training and evaluating the model. The preprocessed data and can also be downloaded directly using download_data.sh and the trained weights by running download_models.sh. The model download will include the original weights trained for t+1 prediction, the fine-tuned weights trained to extrapolate predictions for multiple timesteps, and the "Lall" weights trained with an 0.1 loss weight on upper layers (see paper for details).
- download_data.sh : The preprocessed dataをダウンロードするためのシェルスクリプト
- download_models.sh: the trained weightsをダウンロードするためのシェルスクリプト
なお、上の説明文に続けて、次の文が掲載されています。
Steps
Download/process datapython process_kitti.py
This will scrape the KITTI website to download the raw data from the city, residential, and road categories (~165 GB) and then process the images (cropping, downsampling). Alternatively, the processed data (~3 GB) can be directly downloaded by executing download_data.sh
学習用と検証用のデータセットは、__>python process_kitti.py__を実行することでも、ダウンロードできると書かれています。
__Alternativelyの段落で、同じデータセットは、先ほどみたdownload_data.sh__というシェルスクリプトファイルを実行して、ダウンロードすることもできると言っています。
つまるところ、データセットは、以下のいずれか一方を実行すれば、手元の計算機環境にダウンロードできるということです。
- 選択肢1
python process_kitti.py
- 選択肢2
./download_data.sh
今回は、各スクリプトファイルの動作を確認する意味を込めて、両方を実行します。
2. モデルのダウンロード
Kittiデータセットを入れます。
savedir="kitti_data"
mkdir -p -- "$savedir"
wget https://www.dropbox.com/s/rpwlnn6j39jjme4/kitti_data.zip?dl=0 -O $savedir/prednet_kitti_data.zip
unzip $savedir/prednet_kitti_data.zip -d $savedir
3. __PredNetモデル__のダウンロード
ocean@AfoGuardMacBook-Pro prednet % download_models.sh
実行したのは以下のシェルスクリプトです
savedir="model_data_keras2"
mkdir -p -- "$savedir"
wget https://www.dropbox.com/s/iutxm0anhxqca0z/model_data_keras2.zip?dl=0 -O $savedir/model_data_keras2.zip
unzip $savedir/model_data_keras2.zip -d $savedir
rm $savedir/model_data_keras2.zip
mv $savedir/model_data_keras2/* $savedir
rm -r $savedir/model_data_keras2
4. 学習用と検証用のデータセットをダウンロード (方法2)
% ./download_data.sh
実行したのは以下のシェルスクリプトです
savedir="kitti_data"
mkdir -p -- "$savedir"
wget https://www.dropbox.com/s/rpwlnn6j39jjme4/kitti_data.zip?dl=0 -O $savedir/prednet_kitti_data.zip
unzip $savedir/prednet_kitti_data.zip -d $savedir
4ダッシュ. 学習用と検証用のデータセットをダウンロード (方法1)
今回は、検証用のデータセットのみ使用します。
ocean@AfoGuardMacBook-Pro prednet % python process_kitti.py
上記を実行すると、内部的にBeautifulSoupが走り始めます。
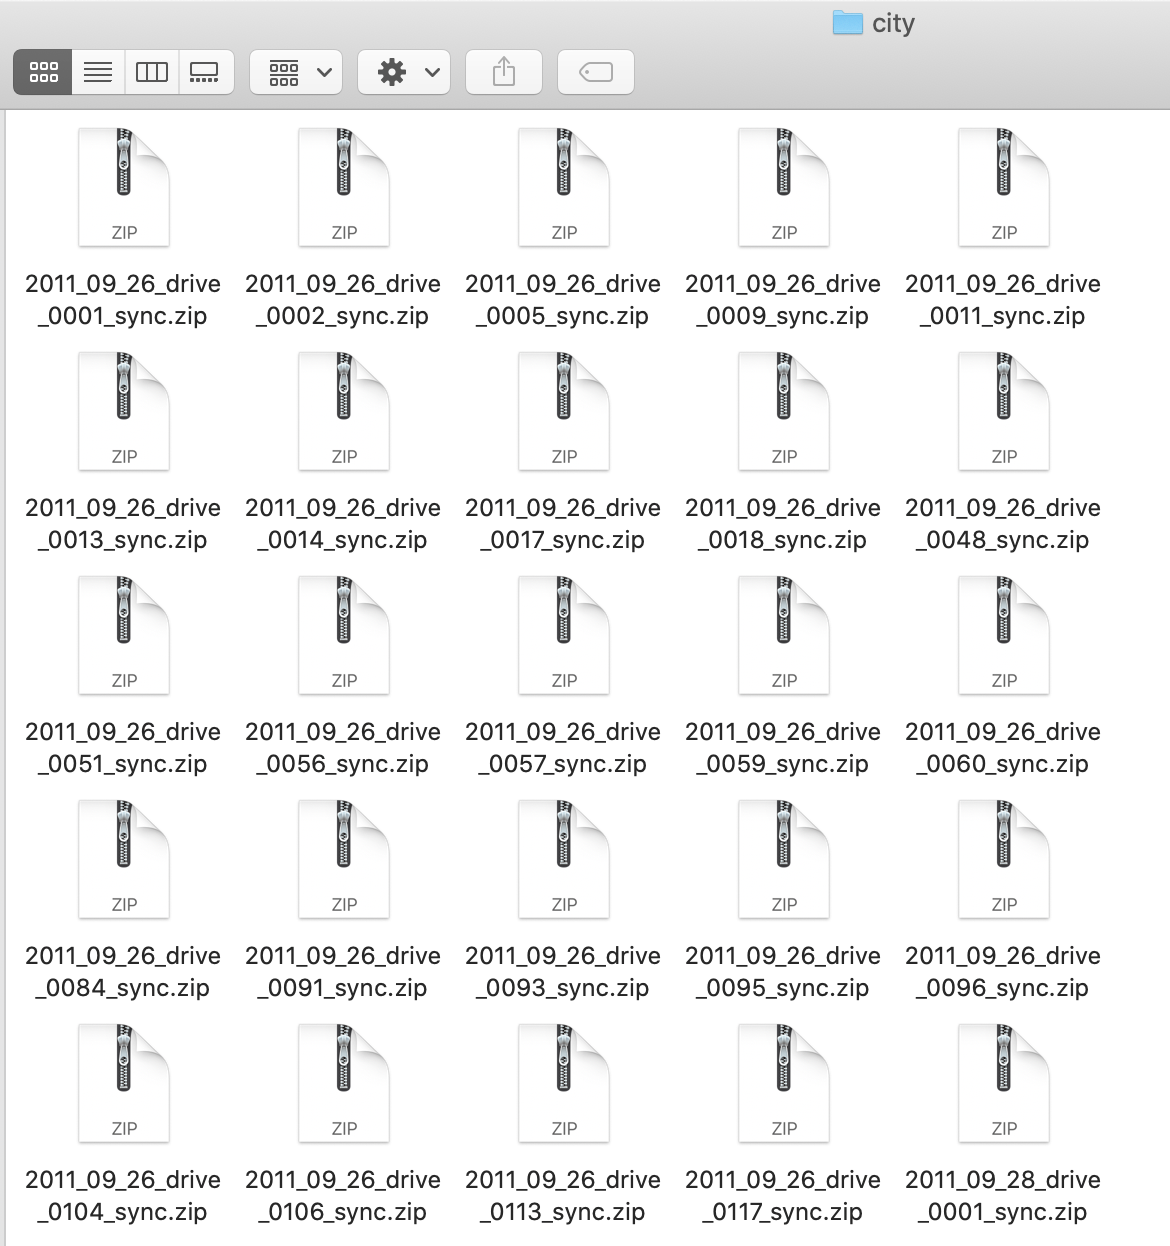
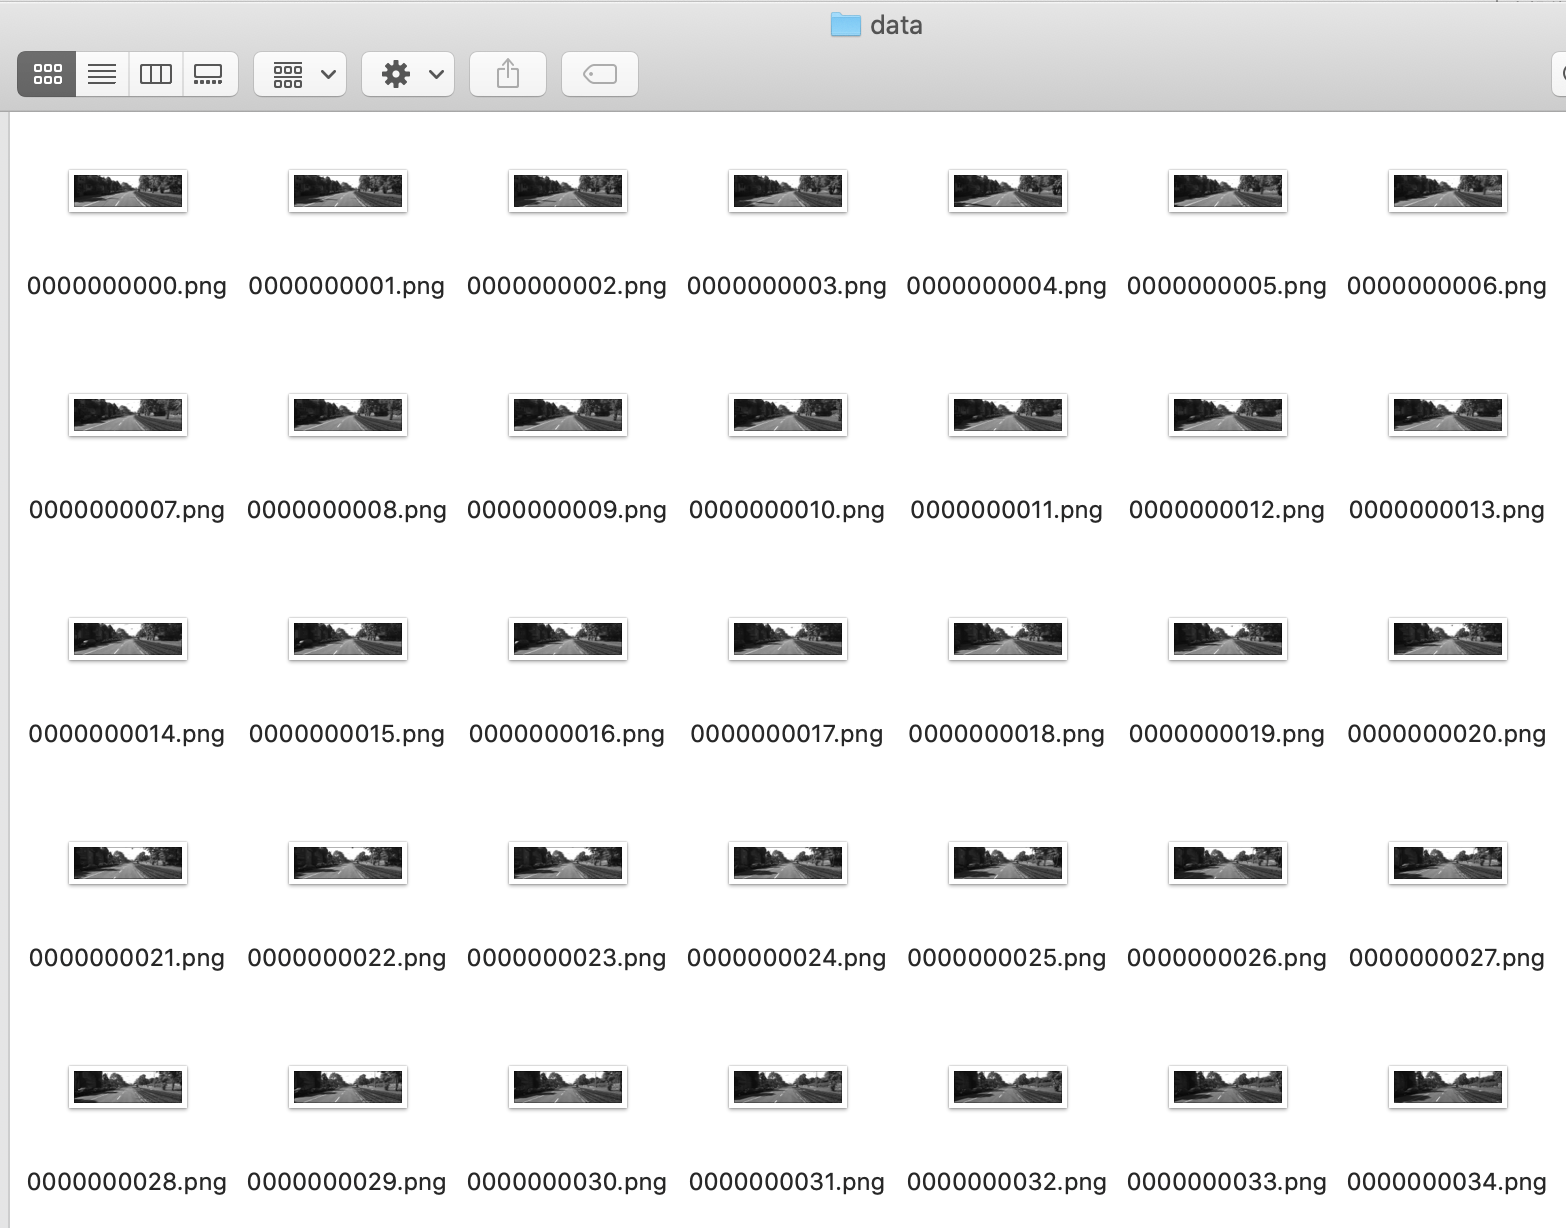
その結果、webから、Kittiデータセットを格納したzipファイルが、"city"や"residential"などの動画カテゴリ別に、数十ファイルずつダウンロードされます。
ocean@AfoGuardMacBook-Pro prednet % python process_kitti.py
process_kitti.py:33: GuessedAtParserWarning: No parser was explicitly specified, so I'm using the best available HTML parser for this system ("html.parser"). This usually isn't a problem, but if you run this code on another system, or in a different virtual environment, it may use a different parser and behave differently.

The code that caused this warning is on line 33 of the file process_kitti.py. To get rid of this warning, pass the additional argument 'features="html.parser"' to the BeautifulSoup constructor.

  soup = BeautifulSoup(r.content)
Downloading set: city
1/28: 2011_09_26_drive_0001
2/28: 2011_09_26_drive_0002
3/28: 2011_09_26_drive_0005
4/28: 2011_09_26_drive_0009
5/28: 2011_09_26_drive_0011
6/28: 2011_09_26_drive_0013
7/28: 2011_09_26_drive_0014
8/28: 2011_09_26_drive_0017
9/28: 2011_09_26_drive_0018
10/28: 2011_09_26_drive_0048
11/28: 2011_09_26_drive_0051
12/28: 2011_09_26_drive_0056
13/28: 2011_09_26_drive_0057
14/28: 2011_09_26_drive_0059
15/28: 2011_09_26_drive_0060
16/28: 2011_09_26_drive_0084
17/28: 2011_09_26_drive_0091
18/28: 2011_09_26_drive_0093
19/28: 2011_09_26_drive_0095
20/28: 2011_09_26_drive_0096
21/28: 2011_09_26_drive_0104
22/28: 2011_09_26_drive_0106
23/28: 2011_09_26_drive_0113
24/28: 2011_09_26_drive_0117
25/28: 2011_09_28_drive_0001
26/28: 2011_09_28_drive_0002
27/28: 2011_09_29_drive_0026
28/28: 2011_09_29_drive_0071

Downloading set: residential
1/21: 2011_09_26_drive_0019
2/21: 2011_09_26_drive_0020
3/21: 2011_09_26_drive_0022
4/21: 2011_09_26_drive_0023
5/21: 2011_09_26_drive_0035
6/21: 2011_09_26_drive_0036
7/21: 2011_09_26_drive_0039
8/21: 2011_09_26_drive_0046
9/21: 2011_09_26_drive_0061

( ・・・以下、省略・・・ )
( ダウンロードしたデータ )
ocean@AfoGuardMacBook-Pro prednet % tree kitti_data
kitti_data
├── X_test.hkl
├── X_train.hkl
├── X_val.hkl
├── prednet_kitti_data.zip
├── raw
│   ├── city
│   │   ├── 2011_09_26_drive_0001_sync.zip
│   │   ├── 2011_09_26_drive_0002_sync.zip
│   │   ├── 2011_09_26_drive_0005_sync.zip
│   │   ├── 2011_09_26_drive_0009_sync.zip
│   │   ├── 2011_09_26_drive_0011_sync.zip
│   │   ├── 2011_09_26_drive_0013_sync.zip
│   │   ├── 2011_09_26_drive_0014_sync.zip
│   │   ├── 2011_09_26_drive_0017_sync.zip
│   │   ├── 2011_09_26_drive_0018_sync.zip
│   │   ├── 2011_09_26_drive_0048_sync.zip
│   │   ├── 2011_09_26_drive_0051_sync.zip
│   │   ├── 2011_09_26_drive_0056_sync.zip
│   │   ├── 2011_09_26_drive_0057_sync.zip
│   │   ├── 2011_09_26_drive_0059_sync.zip
│   │   ├── 2011_09_26_drive_0060_sync.zip
│   │   ├── 2011_09_26_drive_0084_sync.zip
│   │   ├── 2011_09_26_drive_0091_sync.zip
│   │   ├── 2011_09_26_drive_0093_sync.zip
│   │   ├── 2011_09_26_drive_0095_sync.zip
│   │   ├── 2011_09_26_drive_0096_sync.zip
│   │   ├── 2011_09_26_drive_0104_sync.zip
│   │   ├── 2011_09_26_drive_0106_sync.zip
│   │   ├── 2011_09_26_drive_0113_sync.zip
│   │   ├── 2011_09_26_drive_0117_sync.zip
│   │   ├── 2011_09_28_drive_0001_sync.zip
│   │   ├── 2011_09_28_drive_0002_sync.zip
│   │   ├── 2011_09_29_drive_0026_sync.zip
│   │   └── 2011_09_29_drive_0071_sync.zip
│   └── residential
│       ├── 2011_09_26_drive_0019_sync.zip
│       ├── 2011_09_26_drive_0020_sync.zip
│       ├── 2011_09_26_drive_0022_sync.zip
│       ├── 2011_09_26_drive_0023_sync.zip
│       ├── 2011_09_26_drive_0035_sync.zip
│       ├── 2011_09_26_drive_0036_sync.zip

( ・・・省略・・・ )

├── sources_test.hkl
├── sources_train.hkl
└── sources_val.hkl


5. GitHubに記載されているバージョンのtensorflowとkerasを入れる
The architecture is implemented as a custom layer1 in Keras. Code and model data is compatible with Keras 2.0 and Python 2.7 and 3.6. The latest version has been tested on Keras 2.2.4 with Tensorflow 1.6. For previous versions of the code compatible with Keras 1.2.1, use fbcdc18. To convert old PredNet model files and weights for Keras 2.0 compatibility, see convert_model_to_keras2 in keras_utils.py.
ocean@AfoGuardMacBook-Pro prednet % pip install tensorflow==1.6
ocean@AfoGuardMacBook-Pro prednet % pip install keras==2.2.4
6. 必要なPythonのモジュールファイルを入れる
__kitti_evaluate.pyを実行した際に、ImportError: No module named XXX_と表示されるXXXモジュール__を、pip installで入れていきます。
なお、__hickleモジュール__については、@masataka46さんの記事にならい、バージョン2.1.0を入れます。
・ @masataka46さん 「Deep PredNetの学習済みモデルを走らせる」
ocean@AfoGuardMacBook-Pro prednet % pip install hickle==2.1.0
7. Python2系を使う必要がある
__Python3.6.3を使うと、以下のエラーが起きました。 __
NameError: name 'file' is not defined
ocean@AfoGuardMacBook-Pro prednet % python kitti_evaluate.py
Using TensorFlow backend.
/Users/ocean/.pyenv/versions/3.6.3/lib/python3.6/site-packages/tensorflow/python/framework/dtypes.py:517: FutureWarning: Passing (type, 1) or '1type' as a synonym of type is deprecated; in a future version of numpy, it will be understood as (type, (1,)) / '(1,)type'.
  _np_qint8 = np.dtype([("qint8", np.int8, 1)])

( ・・・省略・・・ )

2020-12-24 09:18:08.213790: I tensorflow/core/platform/cpu_feature_guard.cc:140] Your CPU supports instructions that this TensorFlow binary was not compiled to use: AVX2 FMA
Traceback (most recent call last):
  File "kitti_evaluate.py", line 50, in <module>
    test_generator = SequenceGenerator(test_file, test_sources, nt, sequence_start_mode='unique', data_format=data_format)
  File "/Users/ocean/Desktop/prednet/data_utils.py", line 12, in __init__
    self.X = hkl.load(data_file)  # X will be like (n_images, nb_cols, nb_rows, nb_channels)
  File "/Users/ocean/.pyenv/versions/3.6.3/lib/python3.6/site-packages/hickle.py", line 616, in load
    h5f = file_opener(fileobj)
  File "/Users/ocean/.pyenv/versions/3.6.3/lib/python3.6/site-packages/hickle.py", line 148, in file_opener
    if isinstance(f, file):
NameError: name 'file' is not defined
調べてみると、以下の報告がありました。
・ stackoverflow hickle NameError: name 'file' is not defined
1 Answer
Hickle doesn't support Python3 (it uses file() function not supported in Python3), but you can find modified version on GitHub, or just use Python2.
( 参考 ) Pyenv環境にPython2系を入れる方法
・ pyenvでPython2.7をインストールしようとしてzlibが見つからないときの対応【メモ】
対応
メッセージに出力されているWikiページの対応方法を参考に、 CPPFLAGS でzlibの場所を指定してpyenvを実行しましょう。$ CPPFLAGS="-I$(brew --prefix zlib)/include" pyenv install 2.7.16 python-build: use openssl from homebrew python-build: use readline from homebrew Downloading Python-2.7.16.tar.xz... -> https://www.python.org/ftp/python/2.7.16/Python-2.7.16.tar.xz Installing Python-2.7.16... python-build: use readline from homebrew WARNING: The Python sqlite3 extension was not compiled. Missing the SQLite3 lib? Installed Python-2.7.16 to /Users/taoyag/.anyenv/envs/pyenv/versions/2.7.16無事インストールできました。
無事に実行できました。
ocean@AfoGuardMacBook-Pro prednet % python kitti_evaluate.py
Using TensorFlow backend.
2020-12-24 09:33:37.700387: I tensorflow/core/platform/cpu_feature_guard.cc:140] Your CPU supports instructions that this TensorFlow binary was not compiled to use: AVX2 FMA
/Users/ocean/.pyenv/versions/2.7.16/lib/python2.7/site-packages/matplotlib/cbook/deprecation.py:107: MatplotlibDeprecationWarning: Passing one of 'on', 'true', 'off', 'false' as a boolean is deprecated; use an actual boolean (True/False) instead.
  warnings.warn(message, mplDeprecation, stacklevel=1)
ocean@AfoGuardMacBook-Pro prednet %
ocean@AfoGuardMacBook-Pro prednet % ls
License.txt			download_models.sh		kitti_extrap_finetune.py	prednet.py
README.md			environment.yml			kitti_results			prednet.pyc
__pycache__			keras_utils.py			kitti_settings.py		process_kitti.py
data_utils.py			keras_utils.pyc			kitti_settings.pyc
data_utils.pyc			kitti_data			kitti_train.py
download_data.sh		kitti_evaluate.py		model_data_keras2
ocean@AfoGuardMacBook-Pro prednet %
推論結果は、__./kitti_resultsディレクトリの直下__に吐き出されています。
ocean@AfoGuardMacBook-Pro prednet % ls kitti_results
prediction_plots	prediction_scores.txt
ocean@AfoGuardMacBook-Pro prednet %
ocean@AfoGuardMacBook-Pro prednet % ls kitti_results/prediction_plots
plot_10.png	plot_19.png	plot_31.png	plot_40.png	plot_46.png	plot_51.png	plot_59.png	plot_63.png	plot_68.png	plot_72.png
plot_11.png	plot_23.png	plot_33.png	plot_41.png	plot_47.png	plot_52.png	plot_60.png	plot_64.png	plot_7.png	plot_73.png
plot_13.png	plot_24.png	plot_37.png	plot_42.png	plot_48.png	plot_56.png	plot_61.png	plot_66.png	plot_70.png	plot_77.png
plot_15.png	plot_29.png	plot_38.png	plot_43.png	plot_49.png	plot_57.png	plot_62.png	plot_67.png	plot_71.png	plot_8.png
ocean@AfoGuardMacBook-Pro prednet %