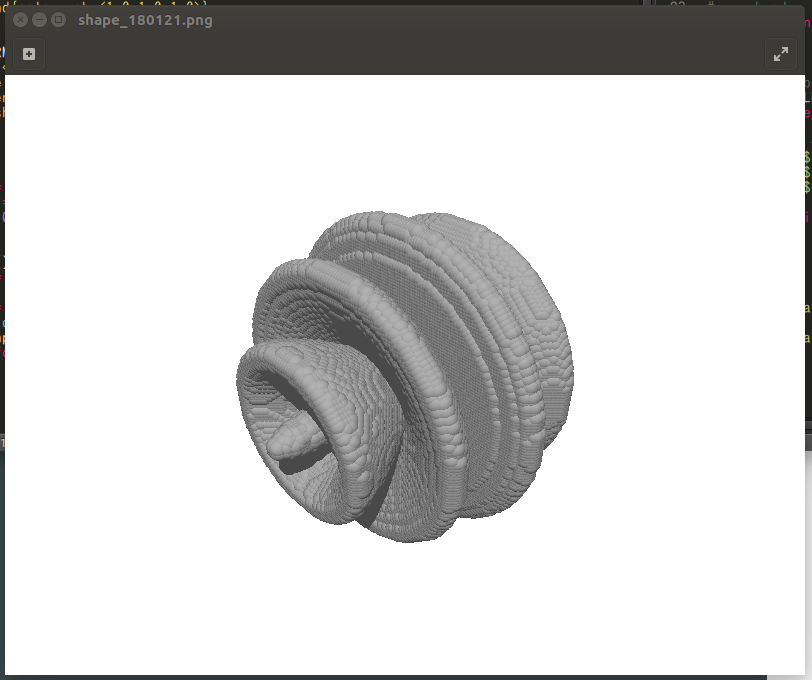
動作環境
GeForce GTX 1070 (8GB)
ASRock Z170M Pro4S [Intel Z170chipset]
Ubuntu 16.04 LTS desktop amd64
TensorFlow v1.2.1
cuDNN v5.1 for Linux
CUDA v8.0
Python 3.5.2
IPython 6.0.0 -- An enhanced Interactive Python.
gcc (Ubuntu 5.4.0-6ubuntu1~16.04.4) 5.4.0 20160609
GNU bash, version 4.3.48(1)-release (x86_64-pc-linux-gnu)
scipy v0.19.1
geopandas v0.3.0
MATLAB R2017b (Home Edition)
ADDA v.1.3b6
bash > 43分の処理
[Obsolete] bash + Povray > conv-pov-exec (2008) > x,y,z座標ファイルに基づき、球粒子により構成されたaggregateの画像を生成する
に2007年ころのbash処理を掲載している。
処理内容は下記
- x,y,zファイルが与えらている
- Povray用のファイルを生成する
2007年ころに記事執筆者が作成したbashスクリプトで処理をするとPovray用ファイル生成までに43分かかる。
2018年の記事執筆者の技術を使ってbashで実装しても遅そうなので、Pythonで実装してみた。
データファイル
以下のようなファイルを読み込む。
処理対象データはN=206,800の点を持つ。
$ head LN-SHAPE
-0.085861 -0.085861 -8.843684
0.085861 -0.085861 -8.843684
-0.085861 0.085861 -8.843684
0.085861 0.085861 -8.843684
-0.085861 -0.085861 -8.671962
0.085861 -0.085861 -8.671962
-0.085861 0.085861 -8.671962
0.085861 0.085861 -8.671962
-0.085861 -0.257583 -8.500240
0.085861 -0.257583 -8.500240
code v0.1
make_pov_180121.py
import numpy as np

'''
v0.1 Jan., 21, 2018
  - output [.pov] file
    + add main()
  - add [SHAPE_FORMAT]
  - add [CONFIG_FORMAT]
'''

# on Python 3.5.2
# coding rule: PEP8

CONFIG_FORMAT = """
camera {
  location <20, 20, -20>
  look_at <0, 0, 0>
}
light_source { <100, 200, -100>
  color rgb <1.0, 1.0, 1.0>
}

background{color rgb <1.0,1.0,1.0>}
"""

SHAPE_FORMAT = """
sphere { <XXX, YYY, ZZZ>, RRR
  texture {
    pigment { color rgb <0.7,0.7,0.7> }
    finish {      ambient 0.4    }
  }
}
"""

IN_FILE = 'LN-SHAPE'
OUT_FILE = "shape_180121.pov"
RADIUS = 0.5


def main():
    cfg = np.array(CONFIG_FORMAT).reshape(1,)

    dat = np.genfromtxt(IN_FILE)
    with open(OUT_FILE, 'wb+') as fd:
        np.savetxt(fd, cfg, fmt='%s')
        for elem in dat:
            wrk = SHAPE_FORMAT.replace('XXX', '%s' % elem[0])
            wrk = wrk.replace('YYY', '%s' % elem[1])
            wrk = wrk.replace('ZZZ', '%s' % elem[2])
            wrk = wrk.replace('RRR', '%s' % RADIUS)
            wrk = np.array(wrk).reshape(1,)
            np.savetxt(fd, wrk, fmt='%s')
    print('[%s] is produced' % OUT_FILE)


if __name__ == '__main__':
    main()
処理 > 3.5秒
$ time python3 make_pov_180121.py
[shape_180121.pov] is produced

real    0m3.452s
user    0m3.392s
sys     0m0.432s
そこそこ速くなった。
povray shape_180121.povは3秒程度なので、数値光散乱シミュレーション用形状の表示はトータルで10秒程度で済むようになりそう。
注意
bashの処理が遅いということではなく、速いbashを書く技術を記事執筆者が持っていない、ということです。
また、最近はデータ処理はPython3が主体になっているので、Python3で実装しました。
bashは必要に応じて使っています。
code v0.2,v0.3
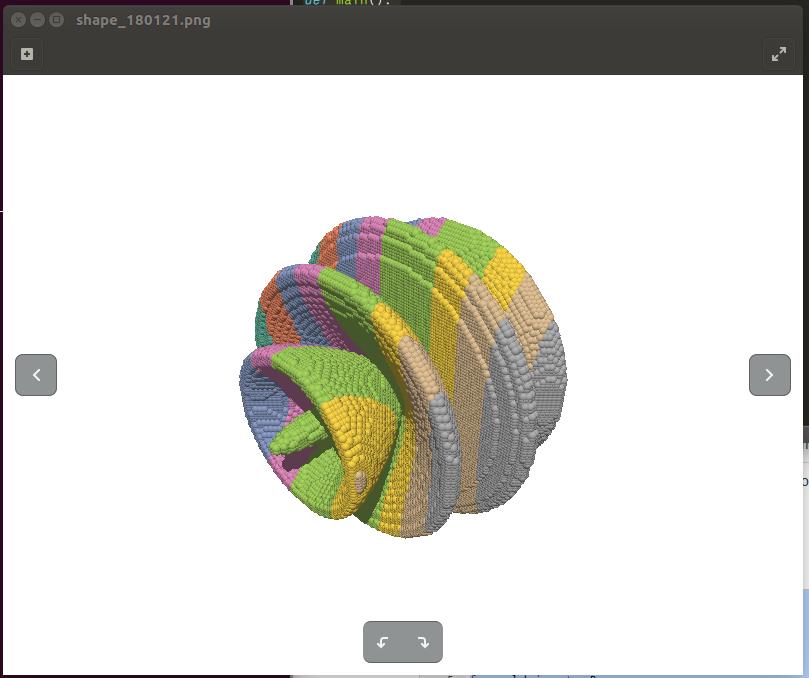
- 粒子のサイズを半分にした
- 色付けを行った
make_pov_180121.py
import numpy as np
import sys

'''
v0.3 Jan., 21, 2018
  - each particle is colored
  - [SHAPE_FORMAT] has color value template
    + [RED], [GREEN], [BLUE]
v0.2 Jan., 21, 2018
  - tweak [RADIUS] from 0.5 to 0.25
v0.1 Jan., 21, 2018
  - output [.pov] file
    + add main()
  - add [SHAPE_FORMAT]
  - add [CONFIG_FORMAT]
'''

# on Python 3.5.2
# coding rule: PEP8

CONFIG_FORMAT = """
camera {
  location <20, 20, -20>
  look_at <0, 0, 0>
}
light_source { <100, 200, -100>
  color rgb <1.0, 1.0, 1.0>
}

background{color rgb <1.0,1.0,1.0>}
"""

SHAPE_FORMAT = """
sphere { <XXX, YYY, ZZZ>, RRR
  texture {
    pigment { color rgb <RED,GREEN,BLUE> }
    finish {      ambient 0.4    }
  }
}
"""

IN_FILE = 'LN-SHAPE'
OUT_FILE = "shape_180121.pov"
RADIUS = 0.25

RGBSET = [
    [0.40000000000000002, 0.76078431372549016, 0.6470588235294118],
    [0.40000000000000002, 0.76078431372549016, 0.6470588235294118],
    [0.9882352941176471, 0.55294117647058827, 0.3843137254901961],
    [0.55294117647058827, 0.62745098039215685, 0.79607843137254897],
    [0.90588235294117647, 0.54117647058823526, 0.76470588235294112],
    [0.65098039215686276, 0.84705882352941175, 0.32941176470588235],
    [0.65098039215686276, 0.84705882352941175, 0.32941176470588235],
    [1.0, 0.85098039215686272, 0.18431372549019609],
    [0.89803921568627454, 0.7686274509803922, 0.58039215686274515],
    [0.70196078431372544, 0.70196078431372544, 0.70196078431372544],
    [0.70196078431372544, 0.70196078431372544, 0.70196078431372544],
]

X_MAX = 10  # used to set colors


def main():
    cfg = np.array(CONFIG_FORMAT).reshape(1,)

    dat = np.genfromtxt(IN_FILE)
    with open(OUT_FILE, 'wb+') as fd:
        np.savetxt(fd, cfg, fmt='%s')
        for elem in dat:
            wrk = SHAPE_FORMAT.replace('XXX', '%s' % elem[0])
            # position
            wrk = wrk.replace('YYY', '%s' % elem[1])
            wrk = wrk.replace('ZZZ', '%s' % elem[2])
            wrk = wrk.replace('RRR', '%s' % RADIUS)
            # color
            #    clidx = (elem[0] - (-50)) / (50 - (-50))
            clidx = (elem[0] - (-X_MAX)) / (X_MAX - (-X_MAX))
            clidx = clidx * len(RGBSET)
            if clidx < 0.0:
                clidx = 0.0
            acol = RGBSET[int(clidx)]
            wrk = wrk.replace('RED', '%s' % acol[0])
            wrk = wrk.replace('GREEN', '%s' % acol[1])
            wrk = wrk.replace('BLUE', '%s' % acol[2])
            wrk = np.array(wrk).reshape(1,)
            np.savetxt(fd, wrk, fmt='%s')
    print('[%s] is produced' % OUT_FILE)


if __name__ == '__main__':
    main()

