Good morning, and in case I don't seeya, good afernoon, good evening and goood night!
って好きなアメリカの女優が言ってて真似してみたかっただけです。
てなわけでおはこんばんちはポンコツ新社会人です。
先日はダウンロード方法の記事をあげました。
よかったら参考にして下さい。
そして本日からはいよいよPspiceの使い方を共有していきたいと思います。
この記事はPSpice® for TI: Introductionの動画を日本語記事化したものです。
プロジェクトの作成
とりあえず基本の反転増幅回路をOPA2743を使用して作成してみましょう。
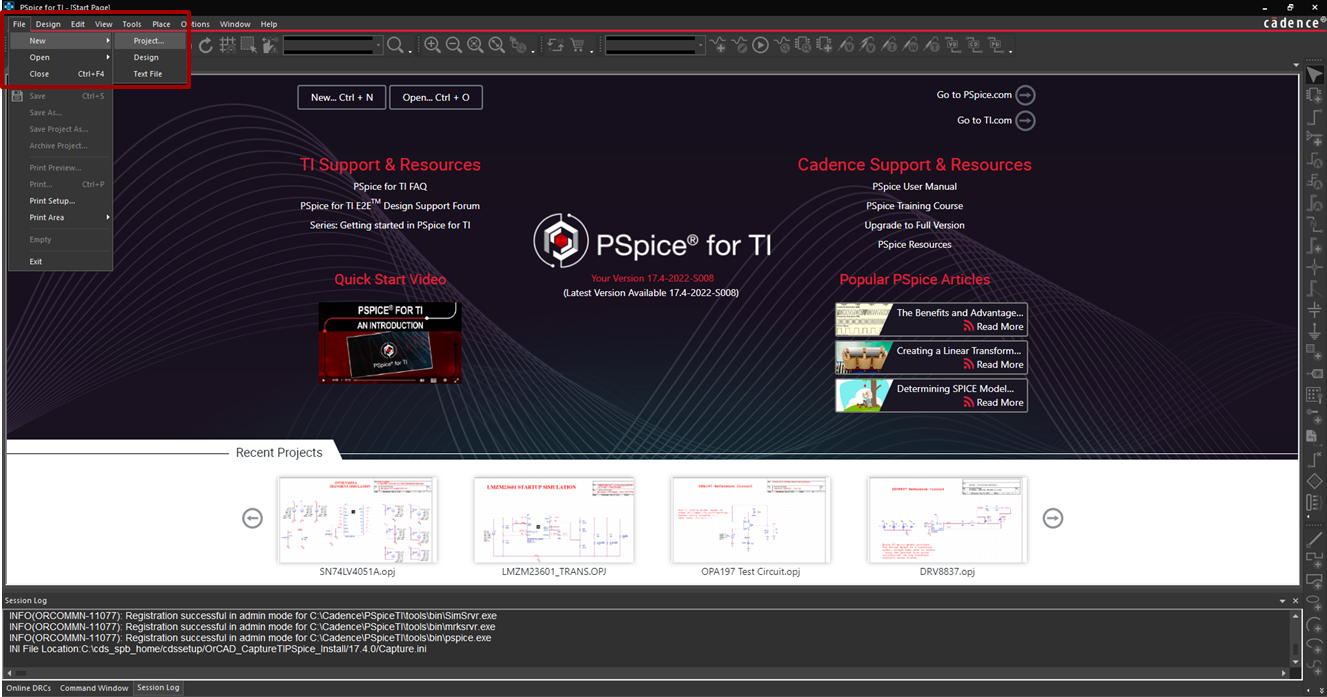
Pspiceを起動したらFile→ New→ Projectをクリック。
新しいプロジェクトを作成します。

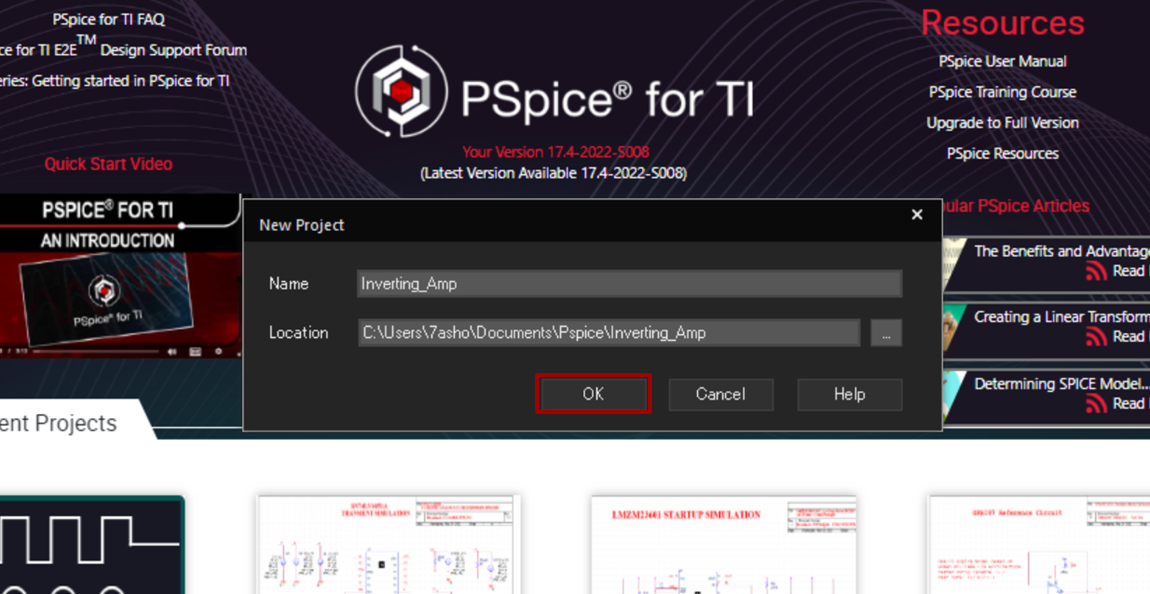
新規プロジェクトの名前と保存場所を入力。
今回は反転増幅器の作成のためfile名は Invert_Amp にした。
パスは好きなところで問題ありません。

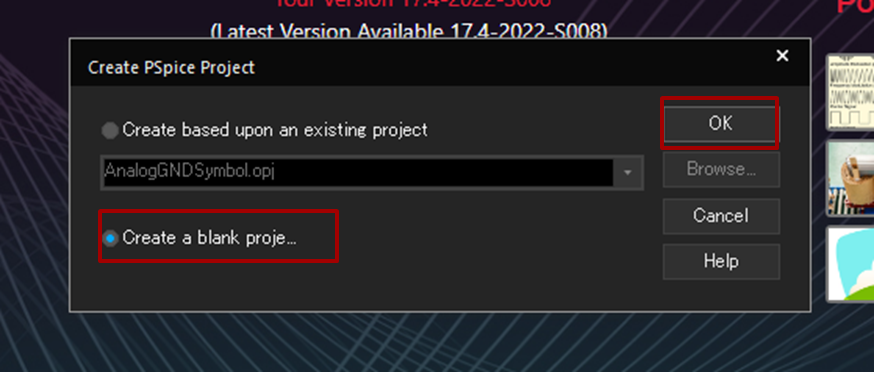
Create blank Project にチェックボックスを入れてOKを選択。

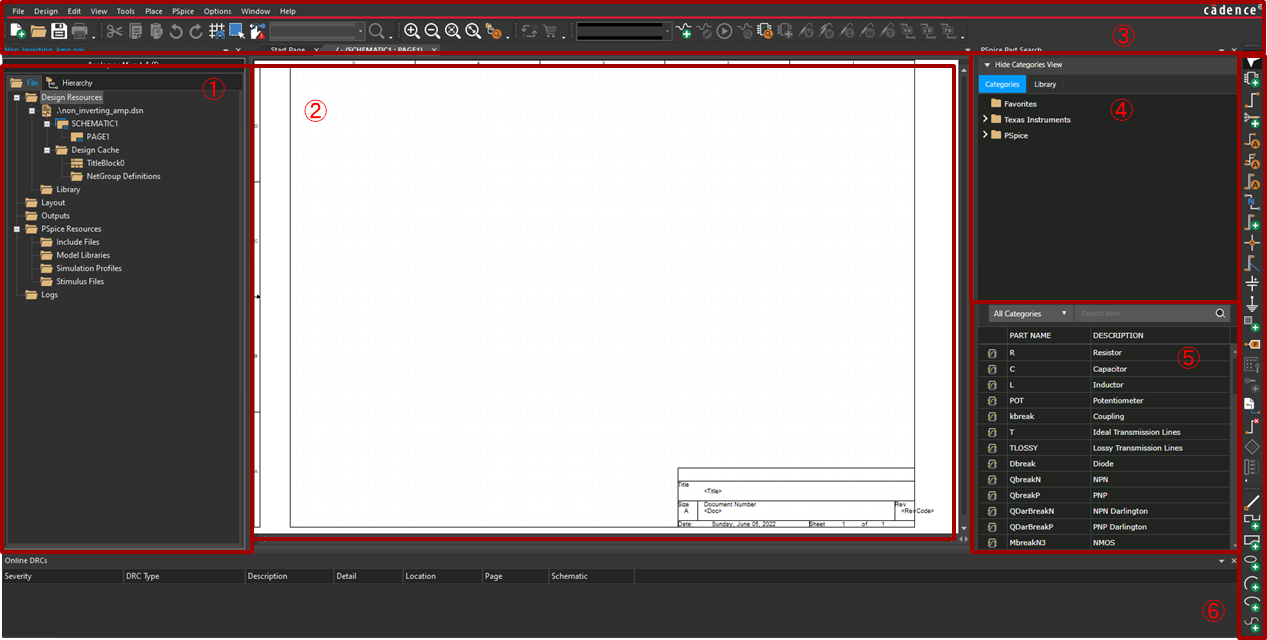
すると以下のように空の回路図が開かれます。
ここに回路図を作成していく。
画面上ではそれぞれ以下の情報が載っています。
1. 開いているプロジェクトのフォルダ、ファイル
2. 回路図
3. プロジェクトの操作
4. 部品のライブラリフォルダ
5. 部品検索
6. 回路図の操作
回路図の操作
下にCheetSheetを書きだした。今後更新する予定です![]() (6/5/2022)
(6/5/2022)
| Shortcuts | Command |
|---|---|
| Gnd | G or f |
| Label | N |
| parts | P |
| Run sim | F11 |
| Text | T |
| Wire | W |
| No connection | X |
シミュレーション
えー途中ではありますがいったん投稿します。
今後鋭意更新予定です。
asm("NOP").....
