React ComponentsでDRAG、SORTABLEなどで検索すると出てくる中、星が一番多いのがreact-dndですが、恐らく一番少ないコード量であろう、04 Sortable/Simpleの中身がなかなか禍々しく、かつfluxでも無いため、読むのに苦労しました。
そこで
- 環境設定
- どうすれば
react-dnd@2.0.2が最低限動くのか -
viewにaction/storeを付与して操作する - mobile対応(申し訳程度の)
を考えた手順を紹介します。
環境設定
以下のpackage.jsonを使用します。
{
  "name": "try-dnd",
  "scripts": {
    "start": "webpack-dev-server --port 59798 --host 0.0.0.0 --content-base dist",
    "build": "webpack"
  },
  "dependencies": {
    "react": "^0.14.2",
    "react-addons-update": "^0.14.2",
    "react-dnd": "^2.0.2",
    "react-dnd-html5-backend": "^2.0.0",
    "react-dnd-touch-backend": "^0.2.0",
    "react-dom": "^0.14.2"
  },
  "devDependencies": {
    "babel-core": "^5.8.33",
    "babel-loader": "^5.3.3",
    "webpack": "^1.12.4",
    "webpack-dev-server": "^1.12.1"
  },
  "babel": {
    "stage": 0
  }
}
以下のwebpack.config.babel.jsを使用します。
import webpack from 'webpack'

export default {
  context: __dirname + '/src',
  entry: {
    javascript: './index.js',
  },

  output: {
    path: __dirname + '/dist',
    filename: 'bundle.js',
  },

  module: {
    loaders: [
      {
        test: /\.js$/,
        exclude: /node_modules/,
        loaders: ['babel-loader'],
      },
    ],
  },

  devtool: '#source-map',
  plugins: [
    // new webpack.optimize.UglifyJsPlugin({compress:{warnings:false}}),
    new webpack.optimize.OccurenceOrderPlugin(),
    new webpack.HotModuleReplacementPlugin(),
    new webpack.NoErrorsPlugin()
  ],
}
エントリポイントであるsrc、ビルド先distを生成し、ブラウザでの確認用index.htmlファイルを作成します。
mkdir src dist
touch dist/index.html
<!DOCTYPE html>
<html lang="en">
<head>
  <meta charset="UTF-8">
  <title>react-dnd</title>
</head>
<body>

  <script src="bundle.js"></script>
  <main></main>

</body>
</html>
src/index.jsに動作確認用のComponentを定義します。
import React from 'react'
import ReactDOM from 'react-dom'

class Sortable extends React.Component{
  constructor(props){
    super(props)

    this.state= {
      items: [
        {id:0,text:'Lorem ipsum dolor sit amet'},
        {id:1,text:'consectetur adipisicing elit'},
        {id:2,text:'Voluptatibus repellendus vitae officia'},
        {id:3,text:'earum ea eligendi voluptates quidem harum'},
        {id:4,text:'voluptas numquam aliquam cum eaque?'},
      ],
    }
  }

  render(){
    return(
      <ul>
        {
          this.state.items.map((item,i) =>
            <li id={item.id} key={i}>{item.text}</li>
          )
        }
      </ul>
    )
  }
}

addEventListener('load',()=>{
  ReactDOM.render(<Sortable />,document.querySelector('main'))
})
必要なファイルが準備できたので、最後にnpm installで依存を解消します。
npm install
# npm WARN EPACKAGEJSON ... (無視)

tree .
# .
# ├── dist
# │   └── index.html
# ├── node_modules
# │   └── (330 directories...)
# ├── package.json
# ├── src
# │   └── index.js
# └── webpack.config.babel.js
npm startで開発用サーバーが起動するので、http://localhost:59798/webpack-dev-server/ でsrc/index.jsのコンパイル結果をindex.html経由で確認します。
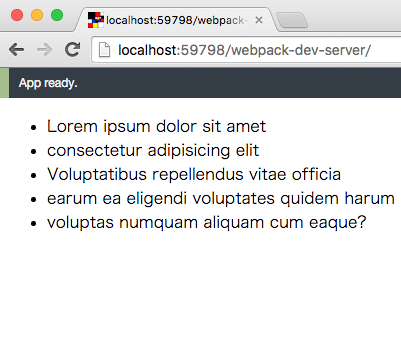
表示を確認したら、このli要素に並び替えの要素を加えていく手順を説明します。
どうすればreact-dnd@2.0.2が最低限動くのか
まず、先ほど作成したSortableコンポーネントにDecorator構文でDragDropContext(ReactDnDHTML5Backend)を注入します。
// ...
import {DragDropContext,DropTarget,DragSource} from 'react-dnd'
import ReactDnDHTML5Backend from 'react-dnd-html5-backend'

@DragDropContext(ReactDnDHTML5Backend)
class Sortable extends React.Component{
// ...
次に、ドラッグ&ドロップする要素を別コンポーネントとして定義し直します。
// ...
          this.state.items.map((item,i) =>
            // li -> Item
            <Item id={item.id} key={i}>{item.text}</Item>
          )
// ...
//...
class Item extends React.Component{
  render(){
    return (
      <li>
        {this.props.children}
      </li>
    )
  }
}
//...
定義し直したItemコンポーネントに、ドラッグ元であることを定義するDragSource、ドラッグ先であることを定義するDropTargetをDecorator構文で注入し、Itemコンポーネントに注入されたラッパ関数this.props.connectDragSource,this.props.connectDropTargetで、render時の要素を梱包してください。
@DropTarget('item',{
  hover(hoverProps,monitor,hoverComponent){
    let dragProps= monitor.getItem()

    console.log(hoverProps.id,dragProps.id)
  },
},(connect)=>{
  return {
    connectDropTarget: connect.dropTarget(),
  }
})
@DragSource('item',{
  beginDrag(props){
    return props
  }
},(connect,monitor)=>{
  return {
    connectDragSource: connect.dragSource(),
    isDragging: monitor.isDragging(),
  }
})
class Item extends React.Component{
  render(){
    return this.props.connectDragSource(this.props.connectDropTarget(
      <li>
        {this.props.children}
      </li>
    ))
  }
}
以上のコードは、src/index.js上で全て書いたことを想定した説明です。結果、ソースコードは下記のようになります。
import React from 'react'
import ReactDOM from 'react-dom'

import {DragDropContext,DropTarget,DragSource} from 'react-dnd'
import ReactDnDHTML5Backend from 'react-dnd-html5-backend'

@DragDropContext(ReactDnDHTML5Backend)
class Sortable extends React.Component{
  constructor(props){
    super(props)

    this.state= {
      items: [
        {id:0,text:'Lorem ipsum dolor sit amet'},
        {id:1,text:'consectetur adipisicing elit'},
        {id:2,text:'Voluptatibus repellendus vitae officia'},
        {id:3,text:'earum ea eligendi voluptates quidem harum'},
        {id:4,text:'voluptas numquam aliquam cum eaque?'},
      ],
    }
  }

  render(){
    return(
      <ul>
        {
          this.state.items.map((item,i) =>
            <Item id={item.id} key={i}>{item.text}</Item>
          )
        }
      </ul>
    )
  }
}

@DropTarget('item',{
  hover(hoverProps,monitor,hoverComponent){
    let dragProps= monitor.getItem()

    console.log(hoverProps.id,dragProps.id)
  },
},(connect)=>{
  return {
    connectDropTarget: connect.dropTarget(),
  }
})
@DragSource('item',{
  beginDrag(props){
    return props
  }
},(connect,monitor)=>{
  return {
    connectDragSource: connect.dragSource(),
    isDragging: monitor.isDragging(),
  }
})
class Item extends React.Component{
  render(){
    return this.props.connectDragSource(this.props.connectDropTarget(
      <li>
        {this.props.children}
      </li>
    ))
  }
}

addEventListener('load',()=>{
  ReactDOM.render(<Sortable />,document.querySelector('main'))
})
ここまでをコンパイルすると、ドラッグしている要素と、マウスの上の要素のpropsを、console.logを吐き出すような結果になります。
viewにaction / storeを付与して操作する
- 重なった要素が別idであれば、state.itemsを並び替えてviewを更新する
を、action->store->views->actionの簡易fluxで行います。
Actionクラス、Storeクラスを定義し、コンポーネントのビジネスロジックやハードコーディングを、所定のクラスへ移動させます。
import React from 'react'
import ReactDOM from 'react-dom'

import {DragDropContext,DropTarget,DragSource} from 'react-dnd'
import ReactDnDHTML5Backend from 'react-dnd-html5-backend'

import EventEmitter from 'events'
import update from 'react-addons-update'

@DragDropContext(ReactDnDHTML5Backend)
class Sortable extends React.Component{
  constructor(props){
    super(props)

    this.state= this.props.store.get()
    this._onChange= ::this.onChange
  }
  onChange(){
    this.setState(this.props.store.get())
  }
  componentDidMount(){
    this.props.store.on('change',this._onChange)
  }
  componentWillUnmount(){
    this.props.store.removeListener('change',this._onChange)
  }

  render(){
    return(
      <ul>
        {
          this.state.items.map((item,i) =>
            <Item action={this.props.action} id={item.id} key={i}>{item.text}</Item>
          )
        }
      </ul>
    )
  }
}

@DropTarget('item',{
  hover(hoverProps,monitor,hoverComponent){
    let dragProps= monitor.getItem()
    if(hoverProps.id === dragProps.id){
      return
    }

    hoverProps.action.emit('exchange',dragProps.id,hoverProps.id)
  },
},(connect)=>{
  return {
    connectDropTarget: connect.dropTarget(),
  }
})
@DragSource('item',{
  beginDrag(props){
    return props
  }
},(connect,monitor)=>{
  return {
    connectDragSource: connect.dragSource(),
    isDragging: monitor.isDragging(),
  }
})
class Item extends React.Component{
  render(){
    return this.props.connectDragSource(this.props.connectDropTarget(
      <li>
        {this.props.children}
      </li>
    ))
  }
}

class Action extends EventEmitter{
  exchange(aId,bId){
    this.emit('exchange',aId,bId)
  }
}
class Store extends EventEmitter{
  constructor(action){
    super()

    this.data= {
      items: [
        {id:0,text:'Lorem ipsum dolor sit amet'},
        {id:1,text:'consectetur adipisicing elit'},
        {id:2,text:'Voluptatibus repellendus vitae officia'},
        {id:3,text:'earum ea eligendi voluptates quidem harum'},
        {id:4,text:'voluptas numquam aliquam cum eaque?'},
      ],
    }

    action.on('exchange',::this.onExchange)
  }
  onExchange(aId,bId){
    let aItem= this.data.items.filter(item => item.id === aId)[0]
    let aIndex= this.data.items.indexOf(aItem)
    let bItem= this.data.items.filter(item => item.id === bId)[0]
    let bIndex= this.data.items.indexOf(bItem)

    this.data= update(this.data,{items:{
      $splice: [[aIndex,1,bItem]],
    }})
    this.data= update(this.data,{items:{
      $splice: [[bIndex,1,aItem]],
    }})

    this.emit('change')
  }
  get(){
    return this.data
  }
}

addEventListener('load',()=>{
  const action= new Action
  const store= new Store(action)
  ReactDOM.render(<Sortable action={action} store={store} />,document.querySelector('main'))
})
また同時に、actionからexchangeイベントを受け取ったstoreが、自身のonExchangeメソッドで、Reactのupdateアドオンを使用して、this.data.itemsを入れ替えていることに注意して下さい。
// ...
  onExchange(aId,bId){
    let aItem= this.data.items.filter(item => item.id === aId)[0]
    let aIndex= this.data.items.indexOf(aItem)
    let bItem= this.data.items.filter(item => item.id === bId)[0]
    let bIndex= this.data.items.indexOf(bItem)

    this.data= update(this.data,{items:{
      $splice: [[aIndex,1,bItem]],
    }})
    this.data= update(this.data,{items:{
      $splice: [[bIndex,1,aItem]],
    }})

    this.emit('change')
  }
// ...
変更が完了したらchangeイベントを発行し、storeを購読しているコンポーネントにstateの更新を促します。
結果は下記のとおりです。
mobile対応(申し訳程度の)
The second package instructs React DnD to use the HTML5 drag and drop API under the hood. You may choose to use a third-party backend instead, such as the touch backend.
http://gaearon.github.io/react-dnd/
とあるように、DragDropContextデコレータで注入しているReactDnDHTML5Backendを
import ReactDnDTouchBackend from 'react-dnd-touch-backend'

@DragDropContext(ReactDnDTouchBackend)
// ...
とすると動くのですが、今度は通常のPCでドラッグ&ドロップしなくなります。
なので、正規表現でnavigator.userAgentを見て、どちらを注入するかを直前に決めてください。
import {DragDropContext,DropTarget,DragSource} from 'react-dnd'
import ReactDnDHTML5Backend from 'react-dnd-html5-backend'
import ReactDnDTouchBackend from 'react-dnd-touch-backend'

const isMobile= navigator.userAgent.match(/(Android|webOS|iPhone|iPad|iPod|BlackBerry|Windows Phone)/i) !== null

@DragDropContext(isMobile? ReactDnDTouchBackend: ReactDnDHTML5Backend)
class Sortable extends React.Component{
// ...