| No. | タイトル |
|---|---|
| 1 | Dockerで開発環境を構築する |
| 2 | ログイン認証を機能を実装する |
| 3 | 記事投稿機能を実装する |
| 4 | AWS ECSを使ってデプロイする |
| 5 | Circle CIを使って自動テスト•デプロイをする |
はじめに
Rails & Nuxtでポートフォリオを作成するシリーズの第2弾になります。
全5部構成でDocker,CircleCI,AWS等のモダンな技術を組み込んだ作品を完成させる予定です。
本章では簡単なログイン認証機能の実装を行います。
事前知識 or 参考資料
Devise-token-auth
Deviseと組み合わせてRailsにおけるトークン認証を実現するgemです。
↓公式ドキュメント
Auth Module
Vuexを使ってログイン状態やユーザー情報を管理してくれます。
最新バージョンでは名前がnuxt-authに変更されていますが、今回は安定版を使用します。
↓公式ドキュメント
Axios
HTTPの非同期通信を簡単に行うことができるJavascriptライブラリ
↓公式ドキュメント
CORS
Cross Origin Resource Sharingの略。自分以外のどのオリジンからのCRUDリクエストを受け付けるか、受け付けないかをフィルターし、セキュリティを高めるためのものです。
Rails側のセットアップ
Gemの追加
# devise関連
gem 'devise',             '4.8.0'
gem 'devise_token_auth',  '1.1.5'
gem 'devise-i18n',        '1.9.4'
# CORS設定
gem 'rack-cors',          '1.1.1'
deviseとdevise_token_authを使用して、認証機能を実装します。
devise-i18nはdeviseの出力メッセージを翻訳してくれるgemです。
install
$: docker compose build
$: docker compose run back rails g devise:install
$: docker compose run back rails g devise_token_auth:install User auth
$: docker compose run back rails g devise:i18n:locale ja
devise-i18n 設定
# deviseの出力メッセージを日本語にする。
config.i18n.default_locale = :ja
ルーティング 設定
devise_for: usersの部分は、current_userなどのdevise gemに用意されたメソッドを使えるようにする為の記述です。
devise_token_authのルーティングは:apiという名前空間内に設定します。/api/authというパスでアクセス出来ます。
Rails.application.routes.draw do
  devise_for :users
  namespace :api do
    mount_devise_token_auth_for 'User', at: 'auth'
  end
end
CORS対策
Nuxt側のオリジンlocalhost:8000からの接続を許可します。
:exposeの部分で、access_token等、ユーザー認証に必要な要素をHeaderに含めるよう指定します。
Rails.application.config.middleware.insert_before 0, Rack::Cors do
  allow do
    origins 'http://localhost:8000'

    resource '*',
      headers: :any,
      :expose  => ['access-token', 'expiry', 'token-type', 'uid', 'client'],
      methods: [:get, :post, :put, :patch, :delete, :options, :head]
  end
end
devise_token_authの設定
config.change_headers_on_each_request:リクエスト毎にtokenを更新するかどうか。
token_lifespan: tokenの有効期間
headers_name: 認証に使うヘッダー要素の名前の定義
DeviseTokenAuth.setup do |config|
  config.change_headers_on_each_request = false
  config.token_lifespan = 2.weeks
  config.headers_names = {:'access-token' => 'access-token',
                          :'client' => 'client',
                          :'expiry' => 'expiry',
                          :'uid' => 'uid',
                          :'token-type' => 'token-type' }
end
コントローラーの設定
application_controllerに以下の記述を追加させることで、devise_token_authのコントローラーを適用させます。
configure_permitted_parametersの部分は、strong_parameterを変更しています。今回は新規登録の時に名前も登録したいので、:nameパラメーターを許可します。ちなみにデフォではメールアドレスとパスワードの2つです。
class ApplicationController < ActionController::Base
        include DeviseTokenAuth::Concerns::SetUserByToken
        skip_before_action :verify_authenticity_token
        before_action :configure_permitted_parameters, if: :devise_controller?

        def configure_permitted_parameters
                devise_parameter_sanitizer.permit(:sign_up, keys: [:name])
        end
end
最後にmigrationをしてRails側のセットアップは完了です。
$: docker compose run back rails db:migrate
フロントサイド
authモジュールの追加
$: docker-compose run front yarn add @nuxtjs/auth
インストールが完了したら、configのmodule内に追加します。
  modules: [
    'bootstrap-vue/nuxt',
    '@nuxtjs/axios',
    '@nuxtjs/auth',
  ],
axiosの設定
baseURLは、axiosがHTTPリクエストを送信時のベースとなるURLを指定します。
Railsの立ち上げホストであるlocalhost:3000を指定します。
  axios: {
    baseURL: "http://localhost:3000"
  },
devise_token_authは通信時にaccess-token、client、uidを用いてユーザー認証を行います。その為、axiosでRailsAPIと送受信をする際に、これらのパラメーターをセットしておく必要があります。
pluginsディレクトリ配下にaxios.jsを作成して下さい。
export default function({ $axios }) {
  $axios.onRequest(config => {
    config.headers.client = window.localStorage.getItem("client")
    config.headers["access-token"] = window.localStorage.getItem("access-token")
    config.headers.uid = window.localStorage.getItem("uid")
    config.headers["token-type"] = window.localStorage.getItem("token-type")
  })

  $axios.onResponse(response => {
    if (response.headers.client) {
      localStorage.setItem("access-token", response.headers["access-token"])
      localStorage.setItem("client", response.headers.client)
      localStorage.setItem("uid", response.headers.uid)
      localStorage.setItem("token-type", response.headers["token-type"])
    }
  })
}
configのpluginsに以下を追加し、いま作成したプラグインを適用させます。
  plugins: [
    '~/plugins/axios.js'
  ],
authの設定
  auth: {
    redirect: {
      login: '/login', //middleware:authを設定したURLにアクセスがあった場合の、リダイレクト先。
      logout: '/', //ログアウト後のリダイレクト先
      callback: false,
      home: '/' ///ログイン後のリダイレクト先。
     },
    strategies: {
      local: {
        endpoints: {
          //ログイン処理に関する設定
          login: { url: '/api/auth/sign_in', method: 'post',propertyName: 'access_token'},
          //ログアウト処理に関する設定
          logout: { url: '/api/auth/sign_out', method: 'delete' },
          //ログイン時にユーザー情報を保存するか。
          user: false
         },
       }
     },
   },
続いて認証に必要な各ページを作成していきます。
ホームページ
<template>
  <b-container>
    <b-col offset-md="1" md="10" class="mt-3">
        <b-jumbotron class="pb-5">
          <template #header>Hello World!</template>
          <div v-if="this.$auth.loggedIn">
            <h2>ログイン済み</h2>
          </div>
          <div v-if="!this.$auth.loggedIn">
            <h2>未ログイン</h2>
          </div>
          <hr class="my-4">
          <b-button v-if="!this.$auth.loggedIn" variant="primary" to="/signup">サインアップ</b-button>
          <b-button v-if="!this.$auth.loggedIn" variant="info" to="/login">ログイン</b-button>
          <b-button v-if="this.$auth.loggedIn" variant="success" to="/update">アカウント情報変更</b-button>
          <b-button v-if="this.$auth.loggedIn" variant="danger" @click="logout">ログアウト</b-button>
        </b-jumbotron>
    </b-col>
  </b-container>
</template>

<script>
  export default({
    data: function () {
      return {
      }
    },
    methods: {
      async logout() {
        await this.$auth.logout()
        .then(
          ()=>{
            localStorage.removeItem("access-token")
            localStorage.removeItem("client")
            localStorage.removeItem("uid")
            localStorage.removeItem("token-type")
          }
        )
      }
    },
  })
</script>

<style></style>
いくつか補足。
-
this.$auth.loggedInはログイン済みがどうかを真偽値で返します。 -
this.$auth.logoutは先ほど設定したloguoutの処理、即ちhttp://localhost:3000/api/sign_outにdeleteリクエストを送り、ルートページにリダイレクトします。 - ログアウト時にlocalStorageに保存されている
access-token等のアイテムを削除します。
サインアップページ
<template>
  <b-container>
    <b-col offset-md="1" md="10" class="mt-3">
      <h3 class="text-center">登録ページ</h3>

      <Notification :message="error" v-if="error" class="mb-4 pb-3" />

      <b-form @submit.prevent="signup">
        <b-form-group label="名前:">
          <b-form-input placeholder="Enter your nickname" required v-model="name" type="text"></b-form-input>
        </b-form-group>
        <b-form-group label="メールアドレス:">
          <b-form-input placeholder="Enter email" required v-model="email" type="email"></b-form-input>
        </b-form-group>
        <b-form-group label="パスワード:">
          <b-form-input placeholder="Enter password" required v-model="password" type="password"></b-form-input>
        </b-form-group>
        <b-form-group label="パスワード確認用:">
          <b-form-input placeholder="password confirmation" required v-model="password_confirmation" type="password"></b-form-input>
        </b-form-group>
        <b-button block type="submit" variant="primary">Submit</b-button>
      </b-form>
    </b-col>
  </b-container>
</template>

<script>

export default{
  data: function () {
    return {
        name: '',
        email: '',
        password: '',
        password_confirmation: '',
        error: null
    }
  },
  methods: {
    async signup() {
      try{
        await this.$axios.post('/api/auth',{
            name: this.name,
            email: this.email,
            password: this.password,
            password_confirmation: this.password_confirmation
        })
        await this.$auth.loginWith('local', {
          data: {
            password: this.password,
            email: this.email
          },
        })
      }catch(e){
        this.error = e.response.data.errors.full_messages
      }
    }
  }
}
</script>

<style></style>
-
送信ボタンが押されると、まずは/api/authにpostリクエストを送信し、新規ユーザーの登録を行います。続けてユーザー登録に成功した場合、loginWithメソッドを使ってログイン処理を実行します。
-
ログインに成功するとプラグインに記述した処理が実行され、
access_token等のアイテムがlocalStorageに保存されます。 -
<Notification :message="error" v-if="error" class="mb-4 pb-3" />
これはリクエストが失敗した場合、エラーメッセージを表示する用のコンポーネントを呼び出しています。エラー内容を:messageを通じて渡しています。
componentsディレクトリ配下にNotification.vueを作成します。
<template>
  <b-alert show variant="danger">
    <div v-for="m in message" :key="m.id">
      <span>{{ m }}</span>
    </div>
  </b-alert>
</template>

<script>
export default {
  name: 'Notification',
  props: ['message']
}
</script>
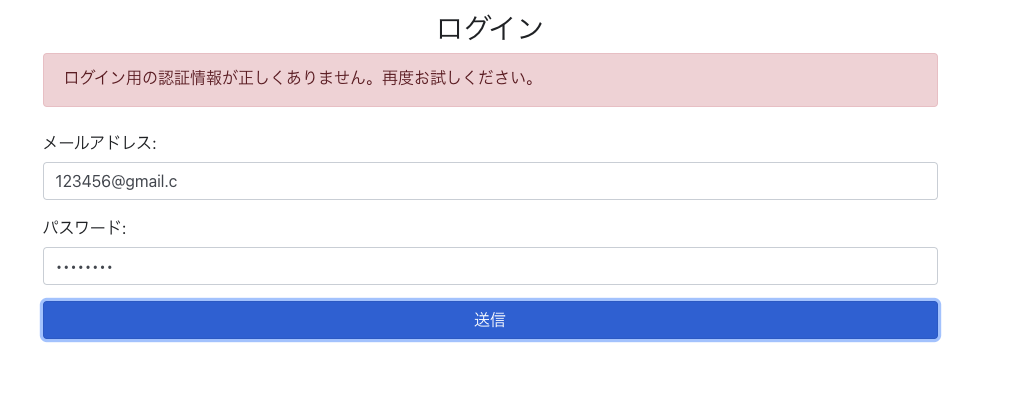
ログインページ
<template>
    <b-container>
      <b-col offset-md="1" md="10" class="mt-3">
        <h3 class = "text-center">ログイン</h3>

          <Notification :message="error" v-if="error" class="mb-4 pb-3" />

          <b-form @submit.prevent="login">
            <b-form-group label="メールアドレス:">
              <b-form-input placeholder="Enter email" required v-model="email" type="email"></b-form-input>
            </b-form-group>
            <b-form-group label="パスワード:">
              <b-form-input placeholder="Enter password" required v-model="password" type="password"></b-form-input>
            </b-form-group>
            <b-button block type="submit" variant="primary">送信</b-button>
          </b-form>
      </b-col>
    </b-container>
</template>

<script>
  export default {
    data: function () {
      return {
        email: '',
        password: '',
        error: null,
      }
    },
    methods: {
      async login() {
          await this.$auth.loginWith('local', {
            data: {
              password: this.password,
              email: this.email
            }
          })
          .then(
            (response) => {
            },
            (error) => {
              this.error = error.response.data.errors
            }
          )
      }
    }
  }
</script>

<style></style>
ユーザー情報変更ページ
<template>
  <b-container>
    <b-col offset-md="1" md="10" class="mt-3">
      <h3 class = "form-title text-center">ユーザー情報変更</h3>
      <Notification :message="error" v-if="error" class="mb-4 pb-3" />

      <b-form @submit.prevent="update">
        <b-form-group label="名前:">
          <b-form-input placeholder="Enter your nickname" required v-model="name" type="text"></b-form-input>
        </b-form-group>
        <b-form-group label="メールアドレス:">
          <b-form-input placeholder="Enter email" required v-model="email" type="email"></b-form-input>
        </b-form-group>
        <b-form-group label="パスワード:">
          <b-form-input placeholder="Enter password" required v-model="password" type="password"></b-form-input>
        </b-form-group>
        <b-form-group label="パスワード確認用:">
          <b-form-input placeholder="password confirmation" required v-model="password_confirmation" type="password"></b-form-input>
        </b-form-group>
        <b-button block type="submit" variant="primary">Submit</b-button>
      </b-form>
    </b-col>
  </b-container>
</template>

<script>

export default{
  middleware: 'auth',
  data: function () {
    return {
        name: '',
        email: '',
        password: '',
        password_confirmation: '',
        error: null
    }
  },
  methods: {
    async update() {
      try{
        await this.$axios.$put('/api/auth',{
            name: this.name,
            email: this.email,
            password: this.password,
            password_confirmation: this.password_confirmation
        })
        this.$router.push('/')
      }catch(e){
        this.error = e.response.data.errors.full_messages
      }
    }
  }
}
</script>

<style></style>
middleware: 'auth'はこのページへのアクセスをログイン済みのユーザーのみに制限します。
終わりに
以上でログイン機能の実装は完了です、お疲れ様でした。
最後に開発の役に立つGoogleアプリを2点紹介して終わります。
Advanced REST client
GETやPOSTなどのhttpリクエストの通信をチェックしてくれるツール。
Vue.js devtools
Googleブラウザ上でVuexの状態を確認できるツール。


