1. はじめに
参考文献
今回のAlexa Presentation Language(APL)スキル 開発チュートリアルは、以下のサイトを参考に、2018年11月時点の開発環境にアレンジし、まとめたものとなります。
このスライドを見てできること
- Alexa Presentation Language(APL)スキルの作り方が理解できるようになる。
今回作成するAlexaスキル
- スキル名:ハローワールド
※ディスプレイ対応のAlexaスキルが作成できます。
トークシナリオ
ユーザー:「アレクサ、ハローワールドを開いて」
アレクサ:「XXXXXXXX。」(APLによるディスプレイ表示)
前提条件
- ASK-CLI(askコマンド)を利用します。askコマンドをご存知で無い方は、Alexa Skills Kitコマンドラインインターフェース(ASK CLI)クイックスタートガイドをご参照ください。
- Displayインターフェース(Bodyテンプレート・Listテンプレート)を理解している方が理解が深まると思います。ご存知で無い方は、Amazon Echo Alexaスキル 入門(Echo Spot編)をご参照ください。
2. 事前準備・開発環境
事前準備
- Amazon Developerアカウントの用意(Alexaスキル開発トレーニングシリーズ 第1回 初めてのスキル開発)
- AWSアカウントの用意(AWS アカウント作成の流れ)
- IAMロールの用意( 初めてLambda用ロールを作成する場合の手順 )
必要なソフトウェア
- ブラウザ:Google Chrome(推奨)
- エディタ:Visual Studio Code(推奨)
必要な開発環境
- マイク&スピーカが利用できるパソコン
- インターネット(Wi-Fi)
3. スキルとモデルの作成
ask new
- ask new コマンドを利用し、hello-world スキルを新規作成する。
Ubuntuコマンドライン
# 作業ディレクトリ(任意)に移動(ホームディレクトリ ~/を想定)
$ cd

# スキルの作成
$ ask new
? Please type in your new skill name: hello-world

# 作業ディレクトリに移動(hello-worldを想定)
$ cd hello-world
- GitHubからも同様のZIPファイルをダウンロードすることは可能ですが、ZIPファイルには、必要なモジュール ask-sdk-core が含まれておりません。ZIP解凍後、コマンドラインから./lambda/custom/フォルダ内(index.jsとpackage.jsonファイルがあるフォルダ内)に移動し、npm install コマンドを実行することで、必要なモジュールを取り込むことが可能です。
Ubuntuコマンドライン
$ cd ./lambda/custom

$ npm install
skill.jsonファイルの日本語スキル化
- ./skill.json ファイルをエディタで開き、"en-US" の文字列を "ja-JP" に書き替えて、日本語スキル化する。
skill.json
修正前:"en-US": {
修正後:"ja-JP": {
en-US.jsonファイルのリネーム
- ./models/en-US.jsonファイル名を「ja-JP.json」にリネームし、日本語スキル化する。
ja-JP.jsonファイルの日本語スキル化
- ./models/ja-JP.jsonファイルを開き、"invocationName"(スキル呼び出し名)の設定値を以下のとおり日本語化する。
ja-JP.json
修正前:"invocationName": "greeter",
修正後:"invocationName": "ハローワールド",
ja-JP.jsonファイルの日本語スキル化
- HelloWorldIntentインテントのサンプル発話の日本語化
- ./models/ja-JP.jsonファイルを開き、HelloWorldIntentのサンプル発話を以下のとおり日本語化する。
ja-JP.json
        {
          "name": "HelloWorldIntent",
          "slots": [

          ],
          "samples": [
            "ハロー",
            "セイハロー",
            "セイハローワールド"
          ]
        }
4. Lambdaの作成
node_modulesの最新化
- ./lambda/customフォルダに移動する。
- 以下のnpmコマンドを実行し、node_modulesを更新する。
Ubuntuコマンドライン
# 作業ディレクトリ(任意)に移動(~/hello-world/lambda/customを想定)
$ cd ./lambda/custom

# node_modulesの最新化(index.jsファイルがあるフォルダで実行すること)
$ npm i -S ask-sdk-core@latest
$ npm i -S ask-sdk-model@latest
index.jsの修正
- ./lambda/custom/index.jsをエディタで開き、ソースプログラムを修正する。
- APL対応のポイントは、supportsAplを利用しデバイスがAPIに対応しているか判定することです。その他は、通常のスキルとほぼ同様となります。
index.js
/* template by ぽいもんラボ zono_0 */
/* eslint-disable  func-names */
/* eslint-disable  no-console */
"use strict";


/**
 * モジュール参照
 * @author zono_0
 */
const Alexa = require('ask-sdk-core');


/**
 * ディスプレイサポート(APL対応)判定値
 * @author zono_0
 */
const supportsApl = (handlerInput) => {
  const hasDisplay =
    handlerInput.requestEnvelope.context &&
    handlerInput.requestEnvelope.context.System &&
    handlerInput.requestEnvelope.context.System.device &&
    handlerInput.requestEnvelope.context.System.device.supportedInterfaces &&
    handlerInput.requestEnvelope.context.System.device.supportedInterfaces['Alexa.Presentation.APL'];

  return hasDisplay;
};


/**
 * ローンチリクエストハンドラ
 * @author zono_0
 */
const LaunchRequestHandler = {
  canHandle(handlerInput) {
    return handlerInput.requestEnvelope.request.type === 'LaunchRequest';
  },
  handle(handlerInput) {
    const speechText = 'ハローワールドスキルへようこそ。このスキルでは、英語のあいさつの練習をおこないます。ハローとおっしゃってください。';

    // ディスプレイ有り(APL対応)の場合
    if (supportsApl(handlerInput)) {
      // APL対応(documentに設定したテンプレートレイアウトを利用し、datasourcesの内容をディスプレイに表示します。)
      handlerInput.responseBuilder
        .addDirective({
          type : 'Alexa.Presentation.APL.RenderDocument',
          version: '1.0',
          document: require('./homepage.json'),
          datasources: require('./data.json')
        });
    }

    return handlerInput.responseBuilder
      .speak(speechText)
      .reprompt(speechText)
      .withShouldEndSession(false)
      .withSimpleCard('ハローワールド', speechText)
      .getResponse();
  },
};


/**
 * ハローワールドインテントハンドラ
 * @author zono_0
 */
const HelloWorldIntentHandler = {
  canHandle(handlerInput) {
    return handlerInput.requestEnvelope.request.type === 'IntentRequest'
      && handlerInput.requestEnvelope.request.intent.name === 'HelloWorldIntent';
  },
  handle(handlerInput) {
    const speechText = 'お上手ですね、こんにちは。';

    return handlerInput.responseBuilder
      .speak(speechText)
      .withShouldEndSession(true)
      .withSimpleCard('ハローワールド', speechText)
      .getResponse();
  },
};


/**
 * ヘルプインテントハンドラ
 * @author zono_0
 */
const HelpIntentHandler = {
  canHandle(handlerInput) {
    return handlerInput.requestEnvelope.request.type === 'IntentRequest'
      && handlerInput.requestEnvelope.request.intent.name === 'AMAZON.HelpIntent';
  },
  handle(handlerInput) {
    const speechText = 'このスキルでは、英語のあいさつの練習をおこないます。ハローとおっしゃってください。';

    return handlerInput.responseBuilder
      .speak(speechText)
      .reprompt(speechText)
      .withShouldEndSession(false)
      .withSimpleCard('ハローワールド', speechText)
      .getResponse();
  },
};


/**
 * キャンセル&ストップインテントハンドラ
 * @author zono_0
 */
const CancelAndStopIntentHandler = {
  canHandle(handlerInput) {
    return handlerInput.requestEnvelope.request.type === 'IntentRequest'
      && (handlerInput.requestEnvelope.request.intent.name === 'AMAZON.CancelIntent'
        || handlerInput.requestEnvelope.request.intent.name === 'AMAZON.StopIntent');
  },
  handle(handlerInput) {
    const speechText = '終了を受け付けました。ご利用ありがとうございます。';

    return handlerInput.responseBuilder
      .speak(speechText)
      .withShouldEndSession(true)
      .withSimpleCard('ハローワールド', speechText)
      .getResponse();
  },
};


/**
 * セッションエンドリクエストハンドラ
 * @author zono_0
 */
const SessionEndedRequestHandler = {
  canHandle(handlerInput) {
    return handlerInput.requestEnvelope.request.type === 'SessionEndedRequest';
  },
  handle(handlerInput) {
    console.log(`Session ended with reason: ${handlerInput.requestEnvelope.request.reason}`);

    return handlerInput.responseBuilder.getResponse();
  },
};


/**
 * エラーハンドラ
 * @author zono_0
 */
const ErrorHandler = {
  canHandle() {
    return true;
  },
  handle(handlerInput, error) {
    console.log(`Error handled: ${error.message}`);

    return handlerInput.responseBuilder
      .speak('ちょっと分かりませんでした。ハローとおっしゃってください。')
      .reprompt('このスキルでは、英語のあいさつの練習をおこないます。ハローとおっしゃってください。')
      .withShouldEndSession(false)
      .getResponse();
  },
};


/**
 * メインンロジック
 * @author zono_0
 */
const skillBuilder = Alexa.SkillBuilders.custom();

exports.handler = skillBuilder
  .addRequestHandlers(
    LaunchRequestHandler,
    HelloWorldIntentHandler,
    HelpIntentHandler,
    CancelAndStopIntentHandler,
    SessionEndedRequestHandler
  )
  .addErrorHandlers(ErrorHandler)
  .lambda();
5. スキルのデプロイ
ask deploy
- ask deploy コマンドを利用し、hello-world スキルをAmazon Developer PortalおよびAWS Lambdaにデプロイします。
- デプロイ先のAWS Lambdaリージョンは、カレントディレクトリ配下の ~/.aws/configファイルにて指定できます。
Ubuntuコマンドライン
# 作業ディレクトリ(任意)に移動(~/hello-worldを想定)
$ cd hello-world

# スキルのデプロイ(skill.jsonフィルと同じディレクトリで実行すること。)
$ ask deploy
Ubuntuコマンドライン
$ cat ~/.aws/config
[default]
region=ap-northeast-1
output=json
デプロイ結果の確認(AWS Lambda)
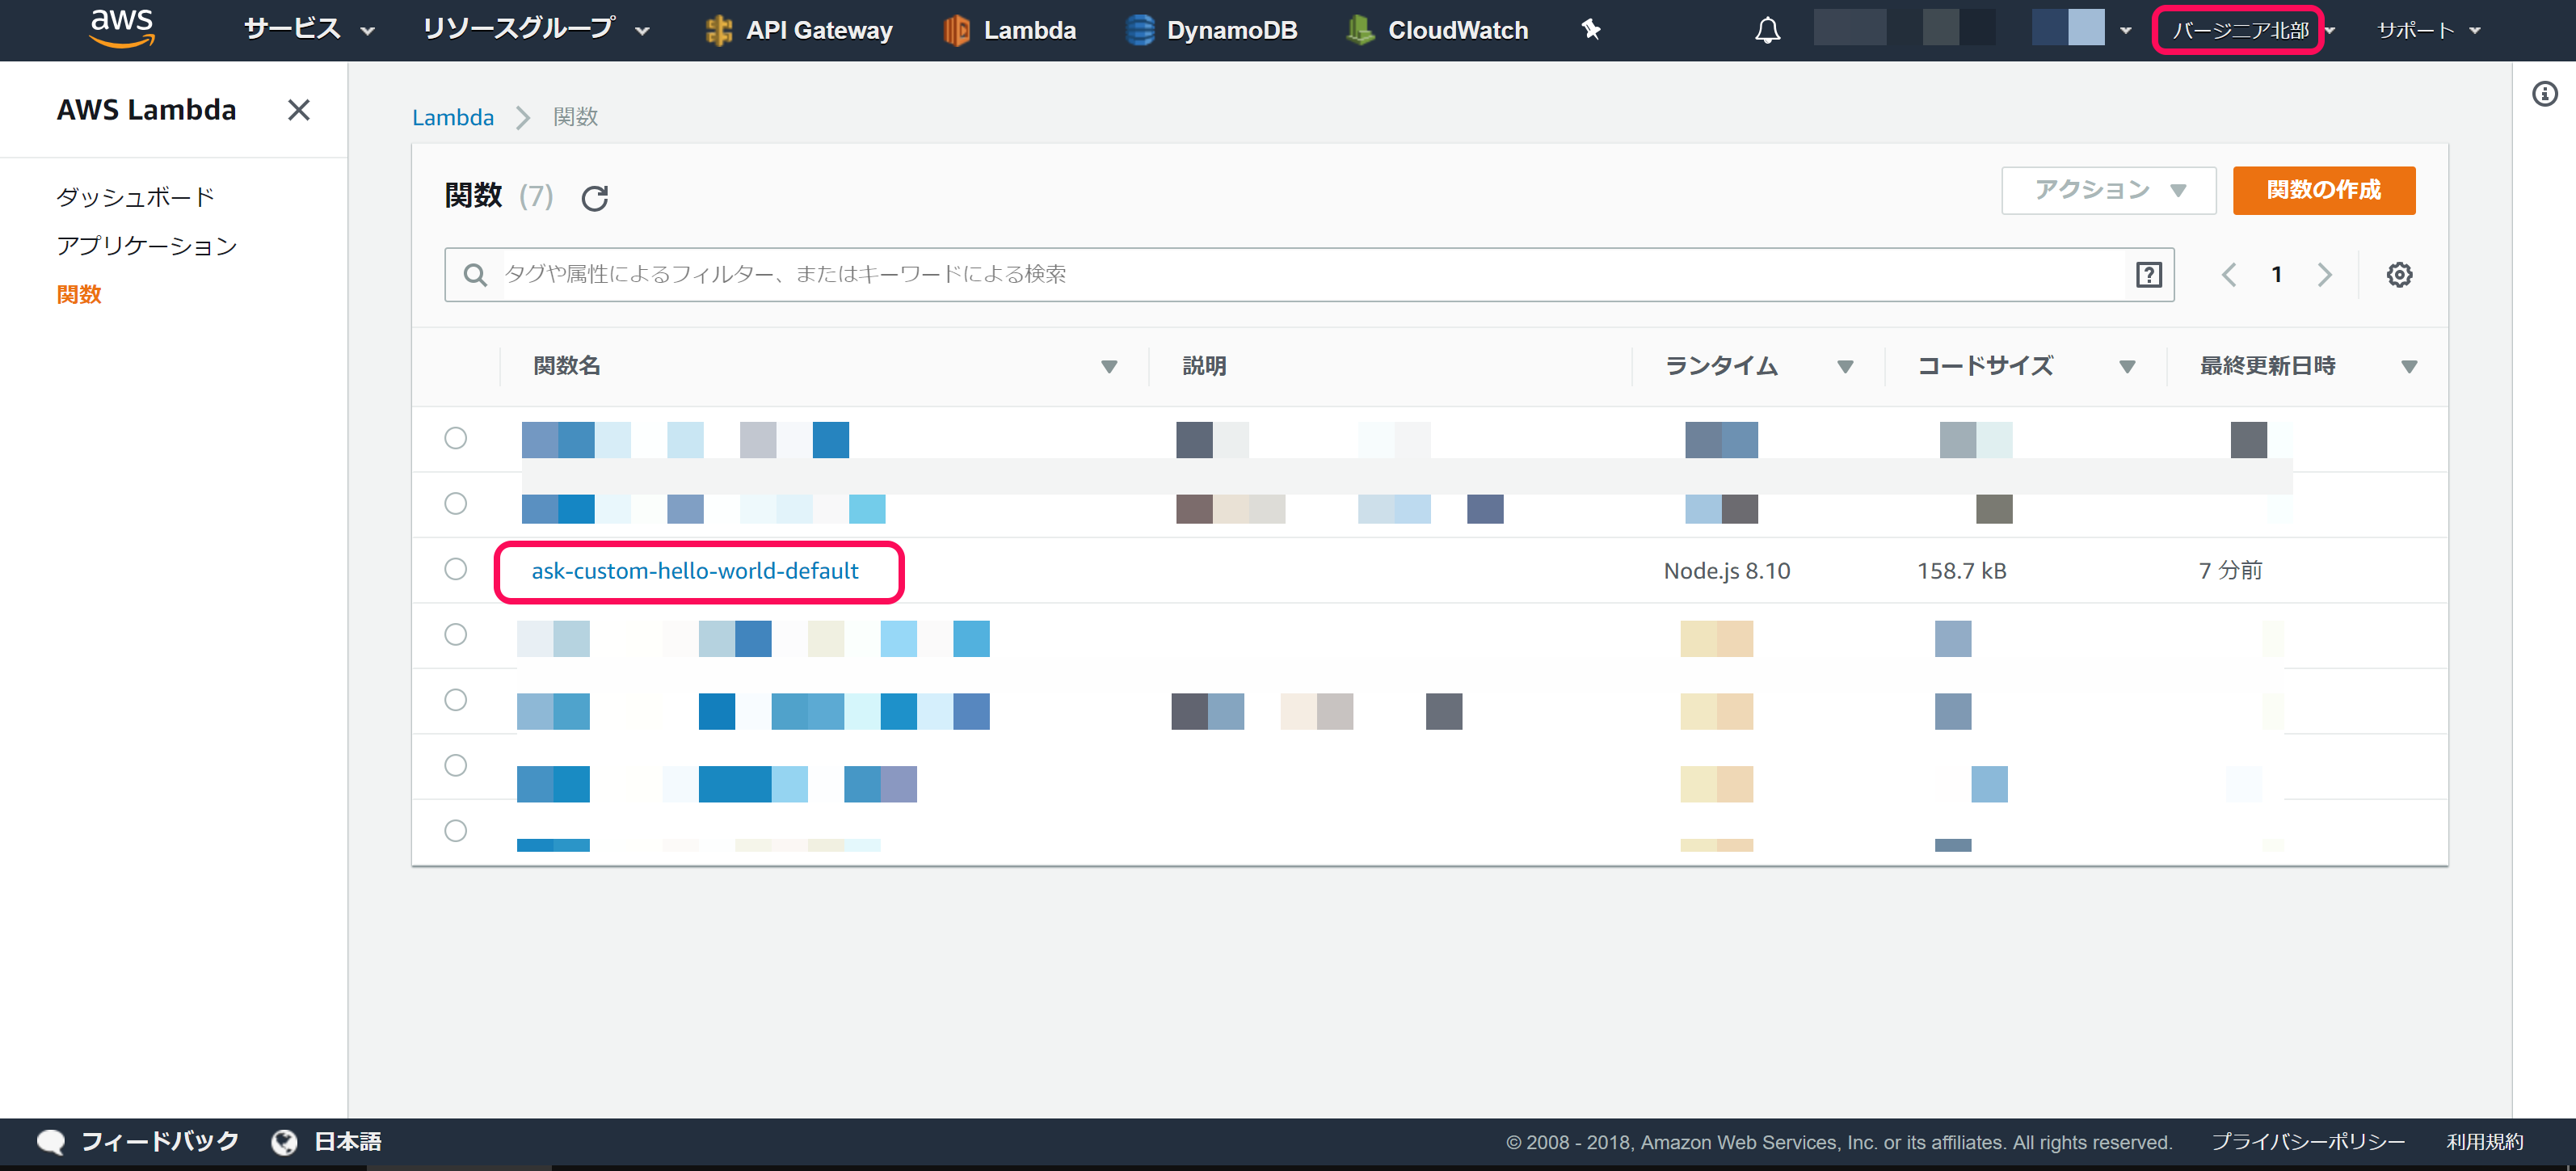
- 当該AWSにログインし、デプロイ先リージョンのLambda関数一覧を確認する。
- 新規関数「ask-custom-hello-world-default」が作成されていることを確認する。
デプロイ結果の確認(Amazon Developer Portal)
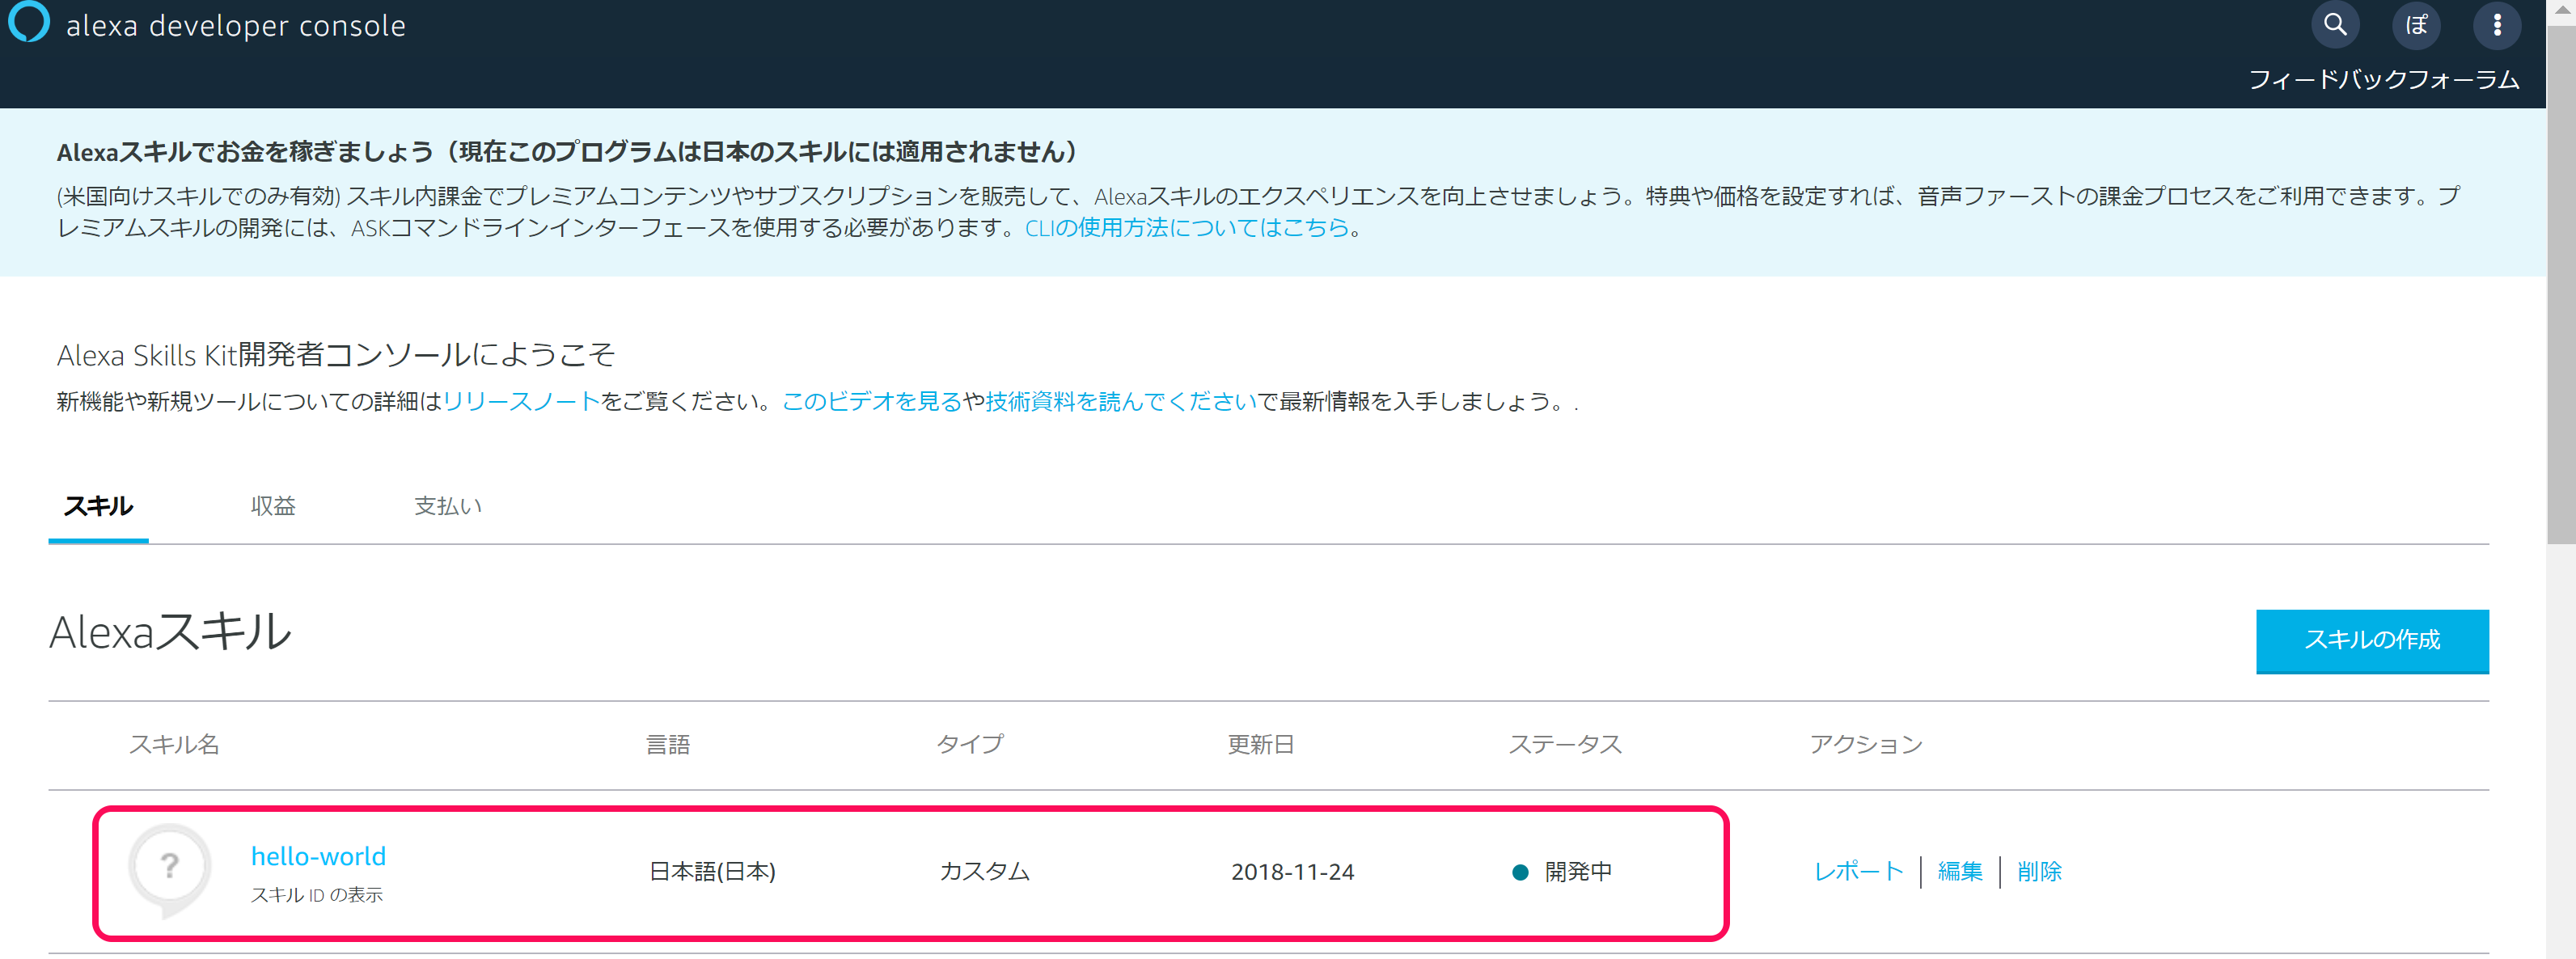
- 当該Amazon Developer Portalにログインし、スキル一覧を確認する。
- 新規スキル「hello-world」が作成されていることを確認する。
6. Alexa Presentation Language(APL)の作成
Amazon Developer Portal
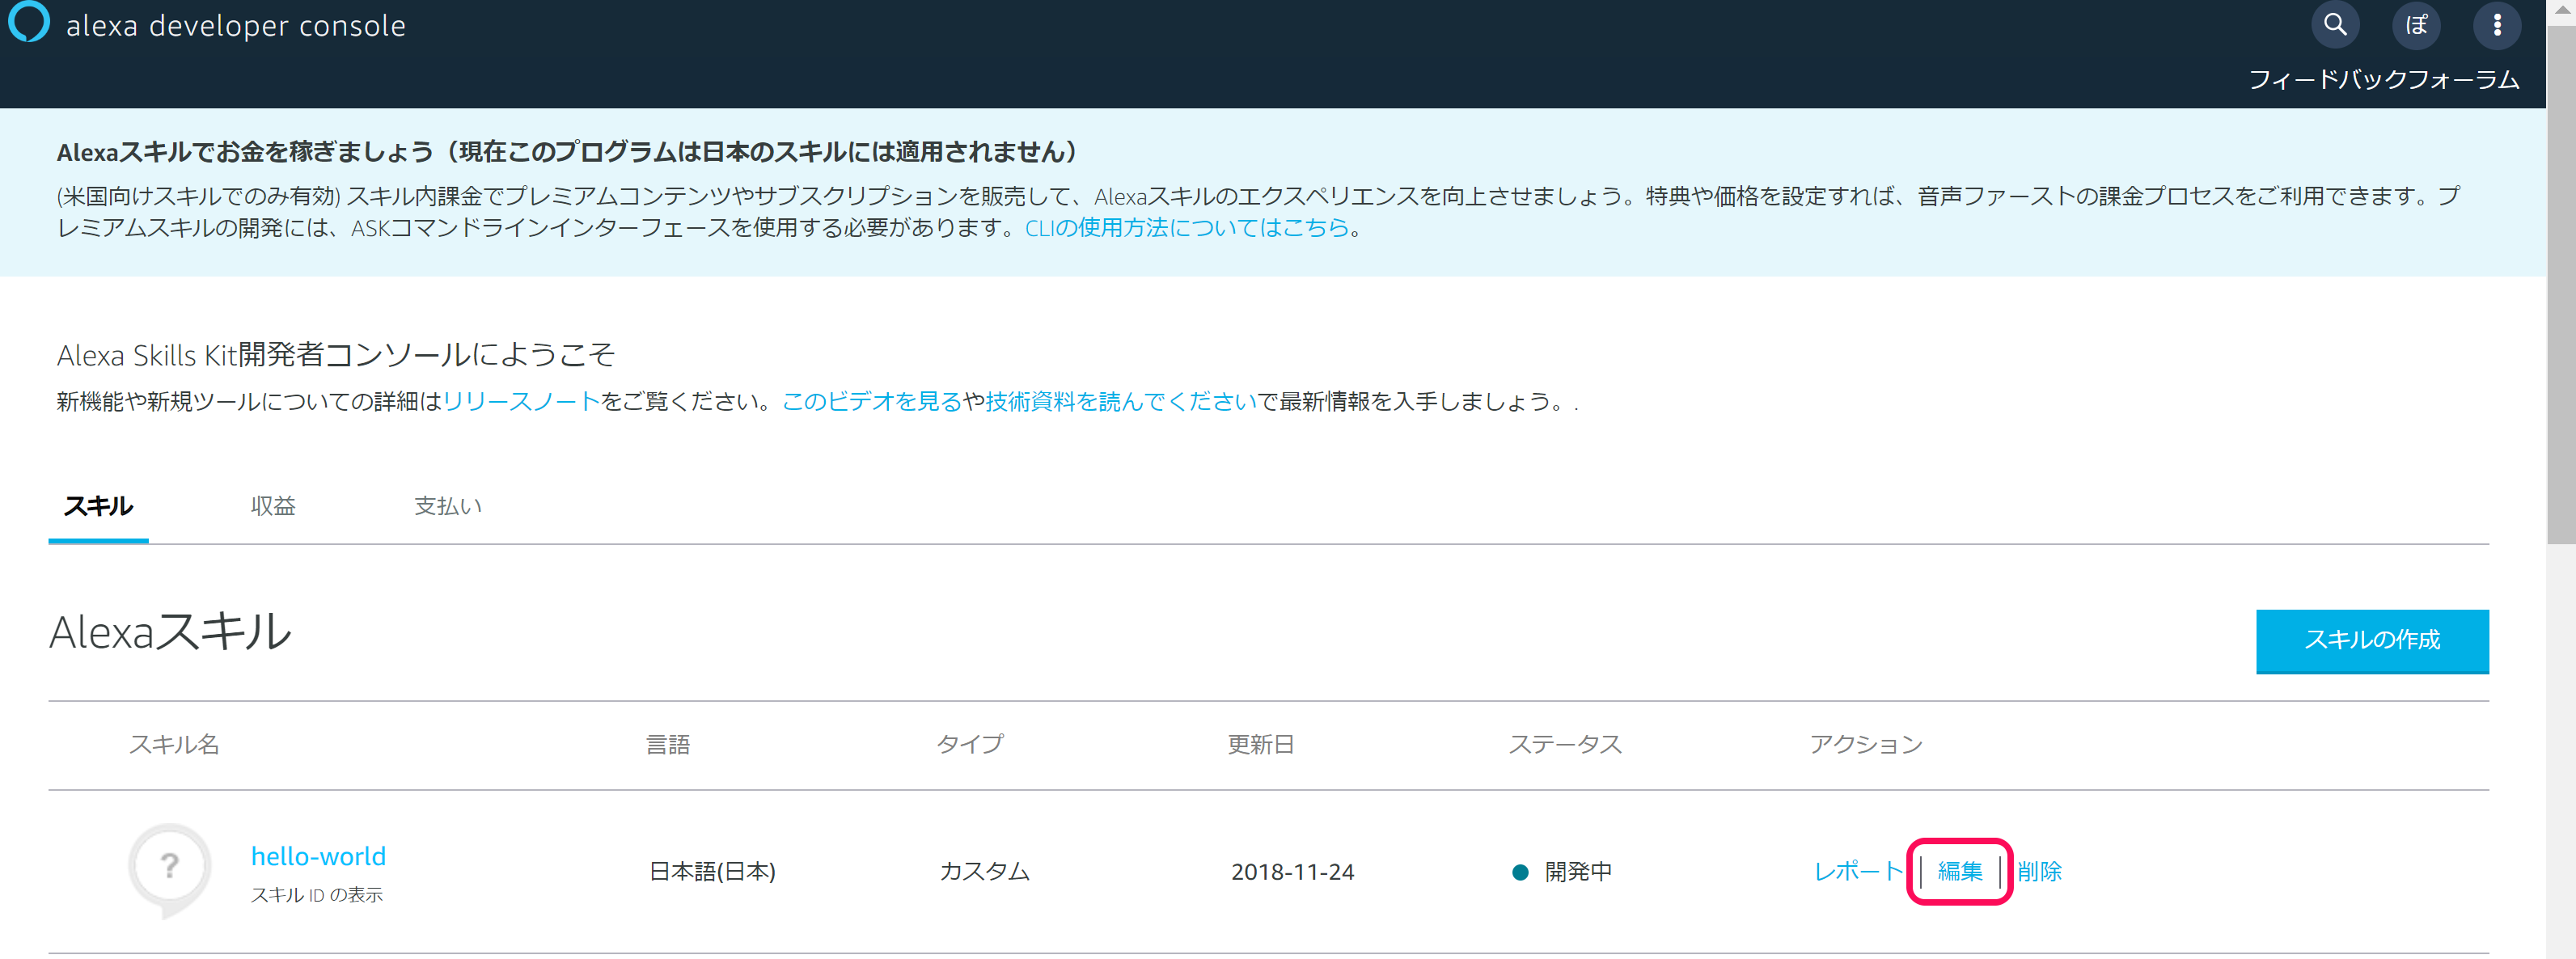
- Amazon Developer Portalのスキル一覧から当該スキルの「編集」を、クリックする。
Amazon Developer Portal
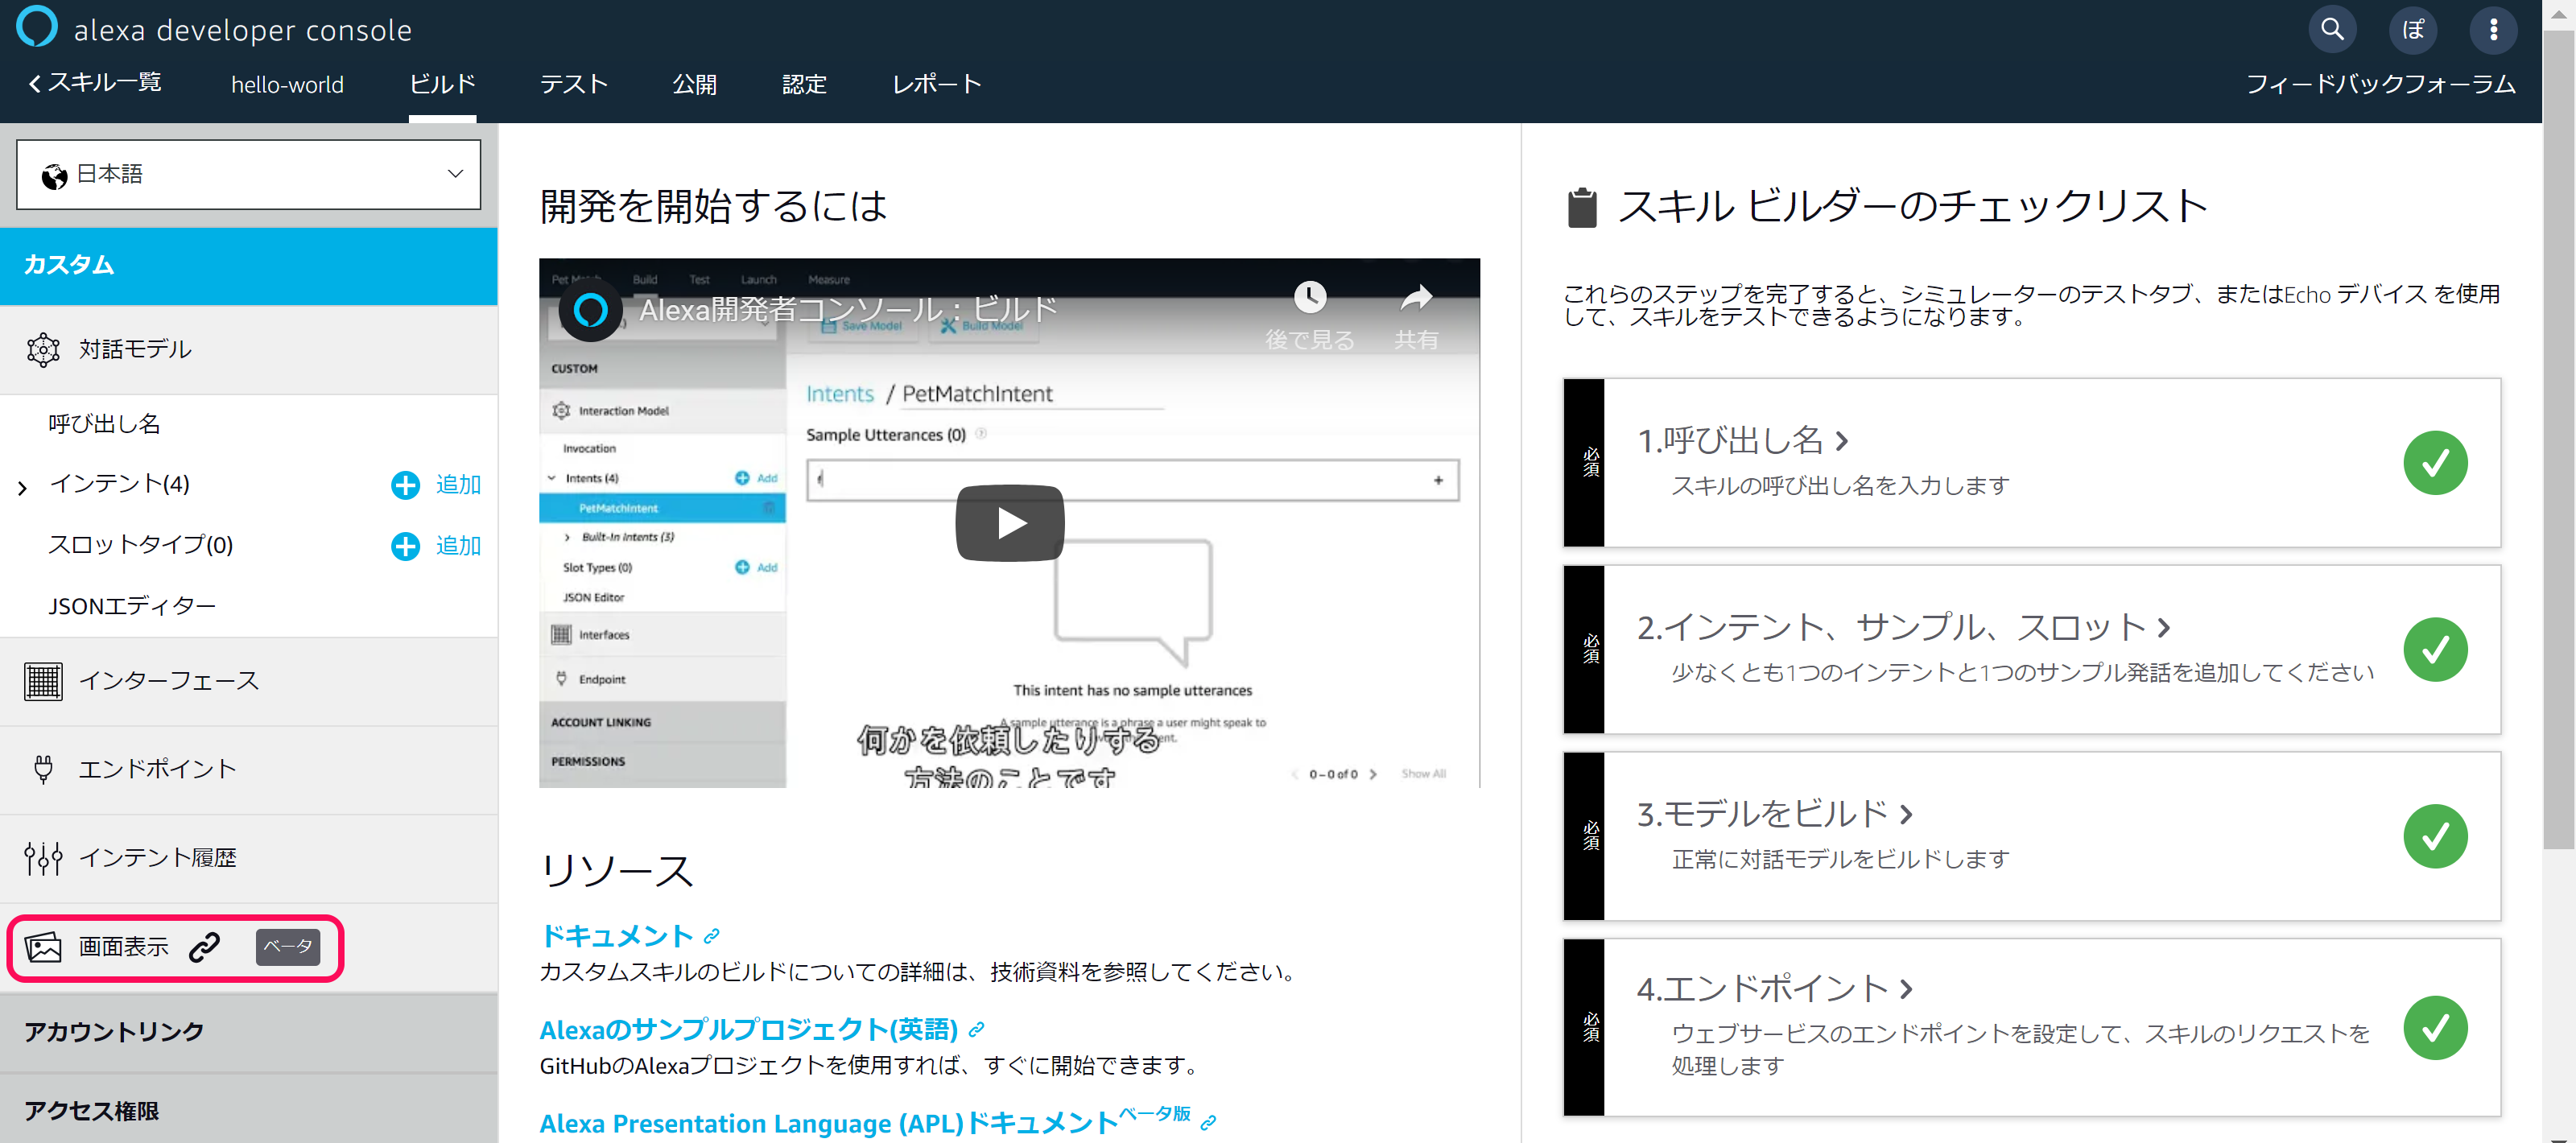
- 「画面表示」をクリックし、APLオーサリングツール(デザインツール)を開く。
Amazon Developer Portal
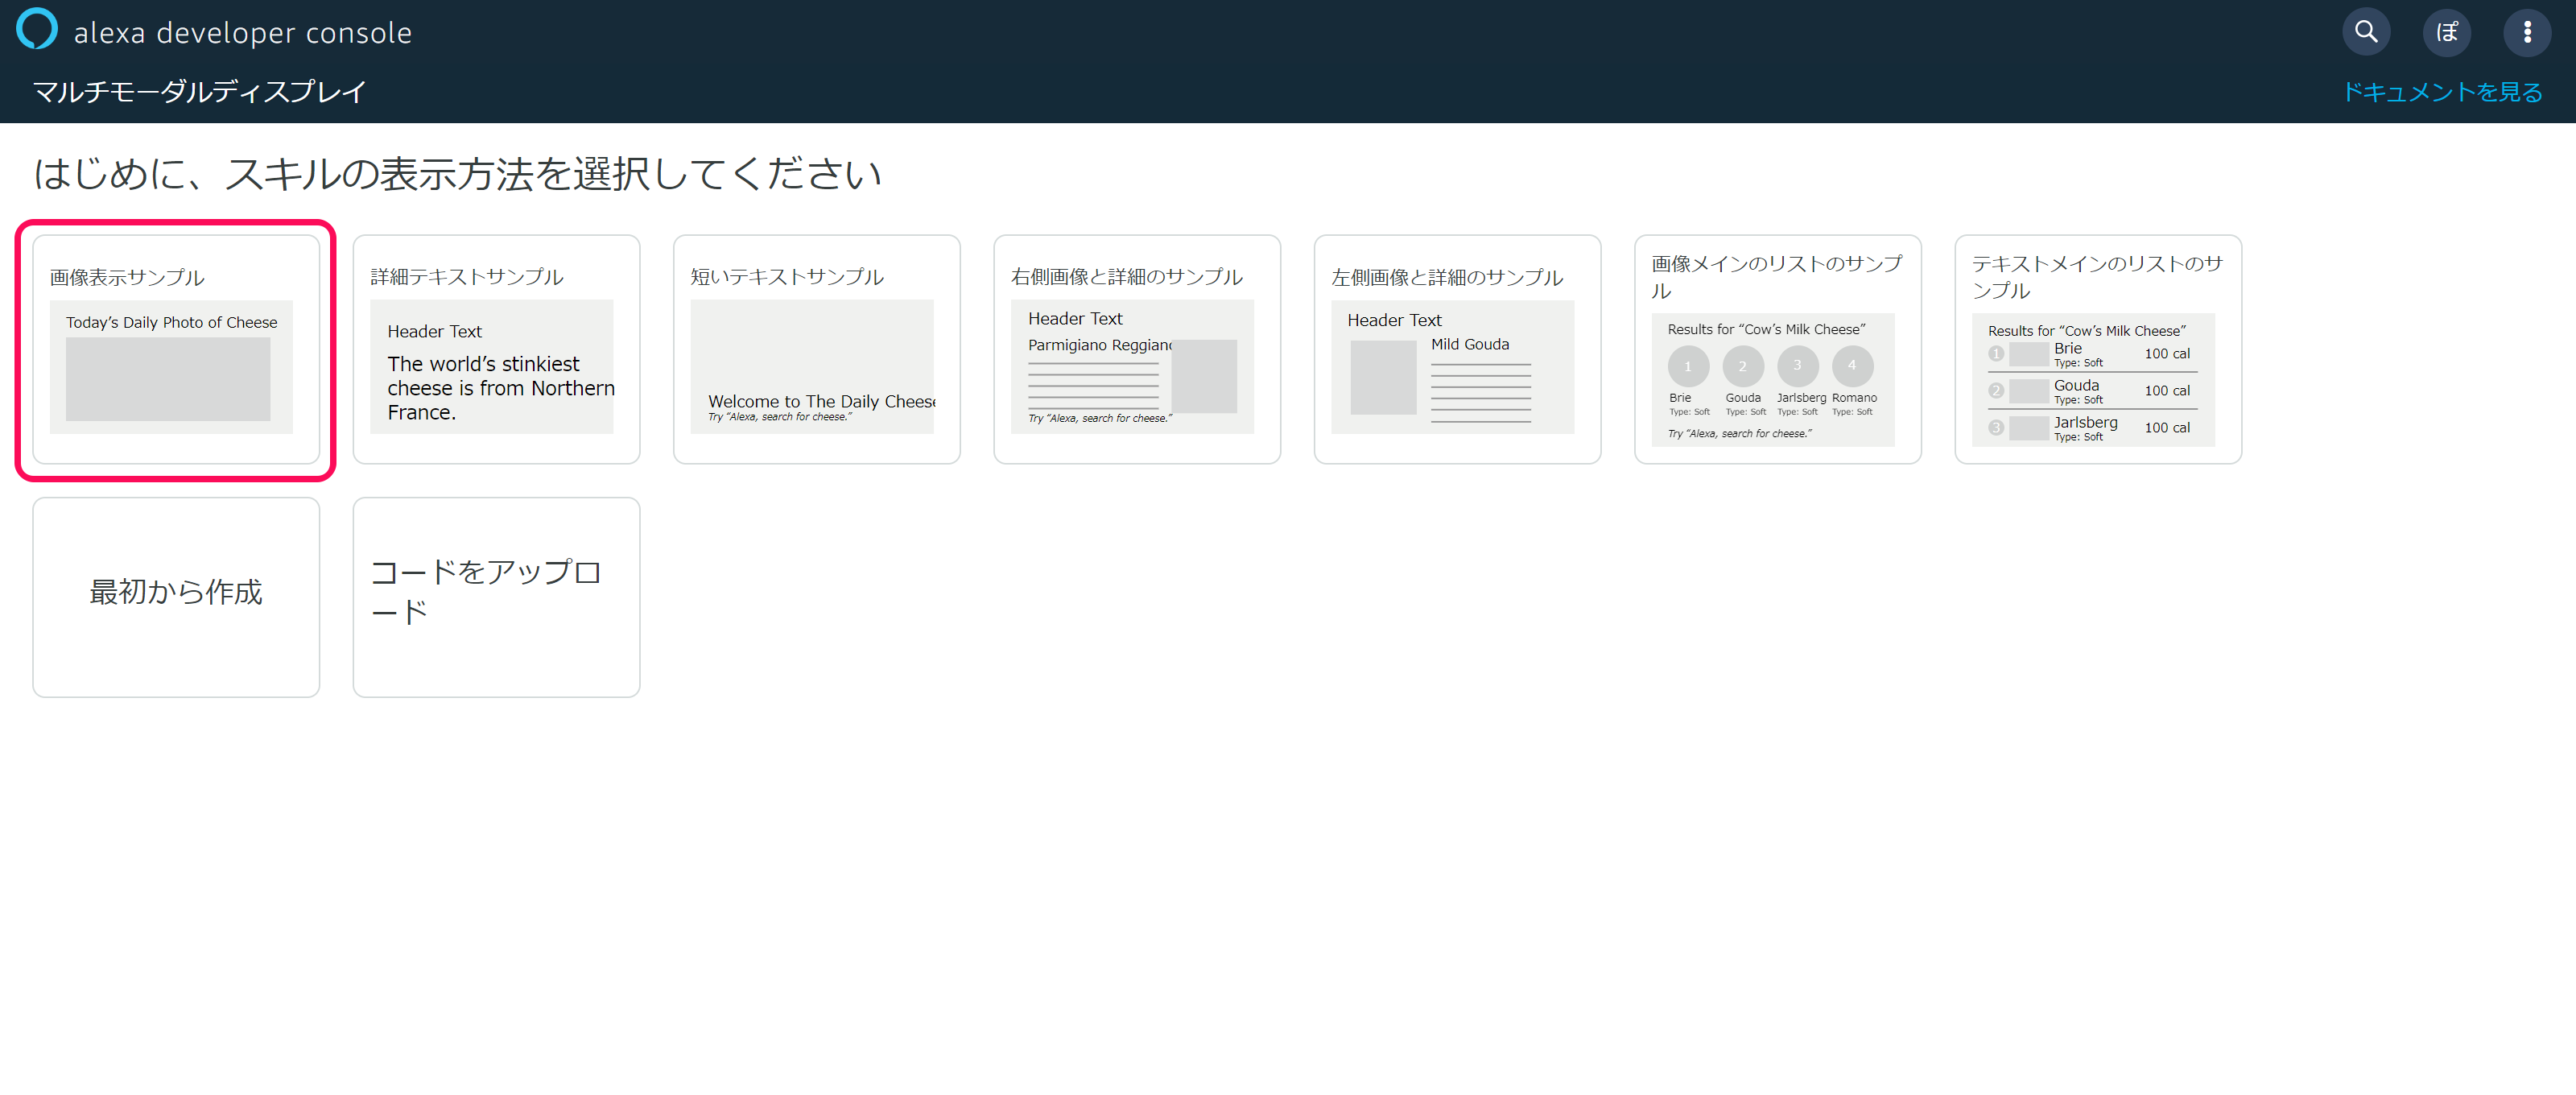
- 「画面表示サンプル」(任意)を、クリックする。
Amazon Developer Portal
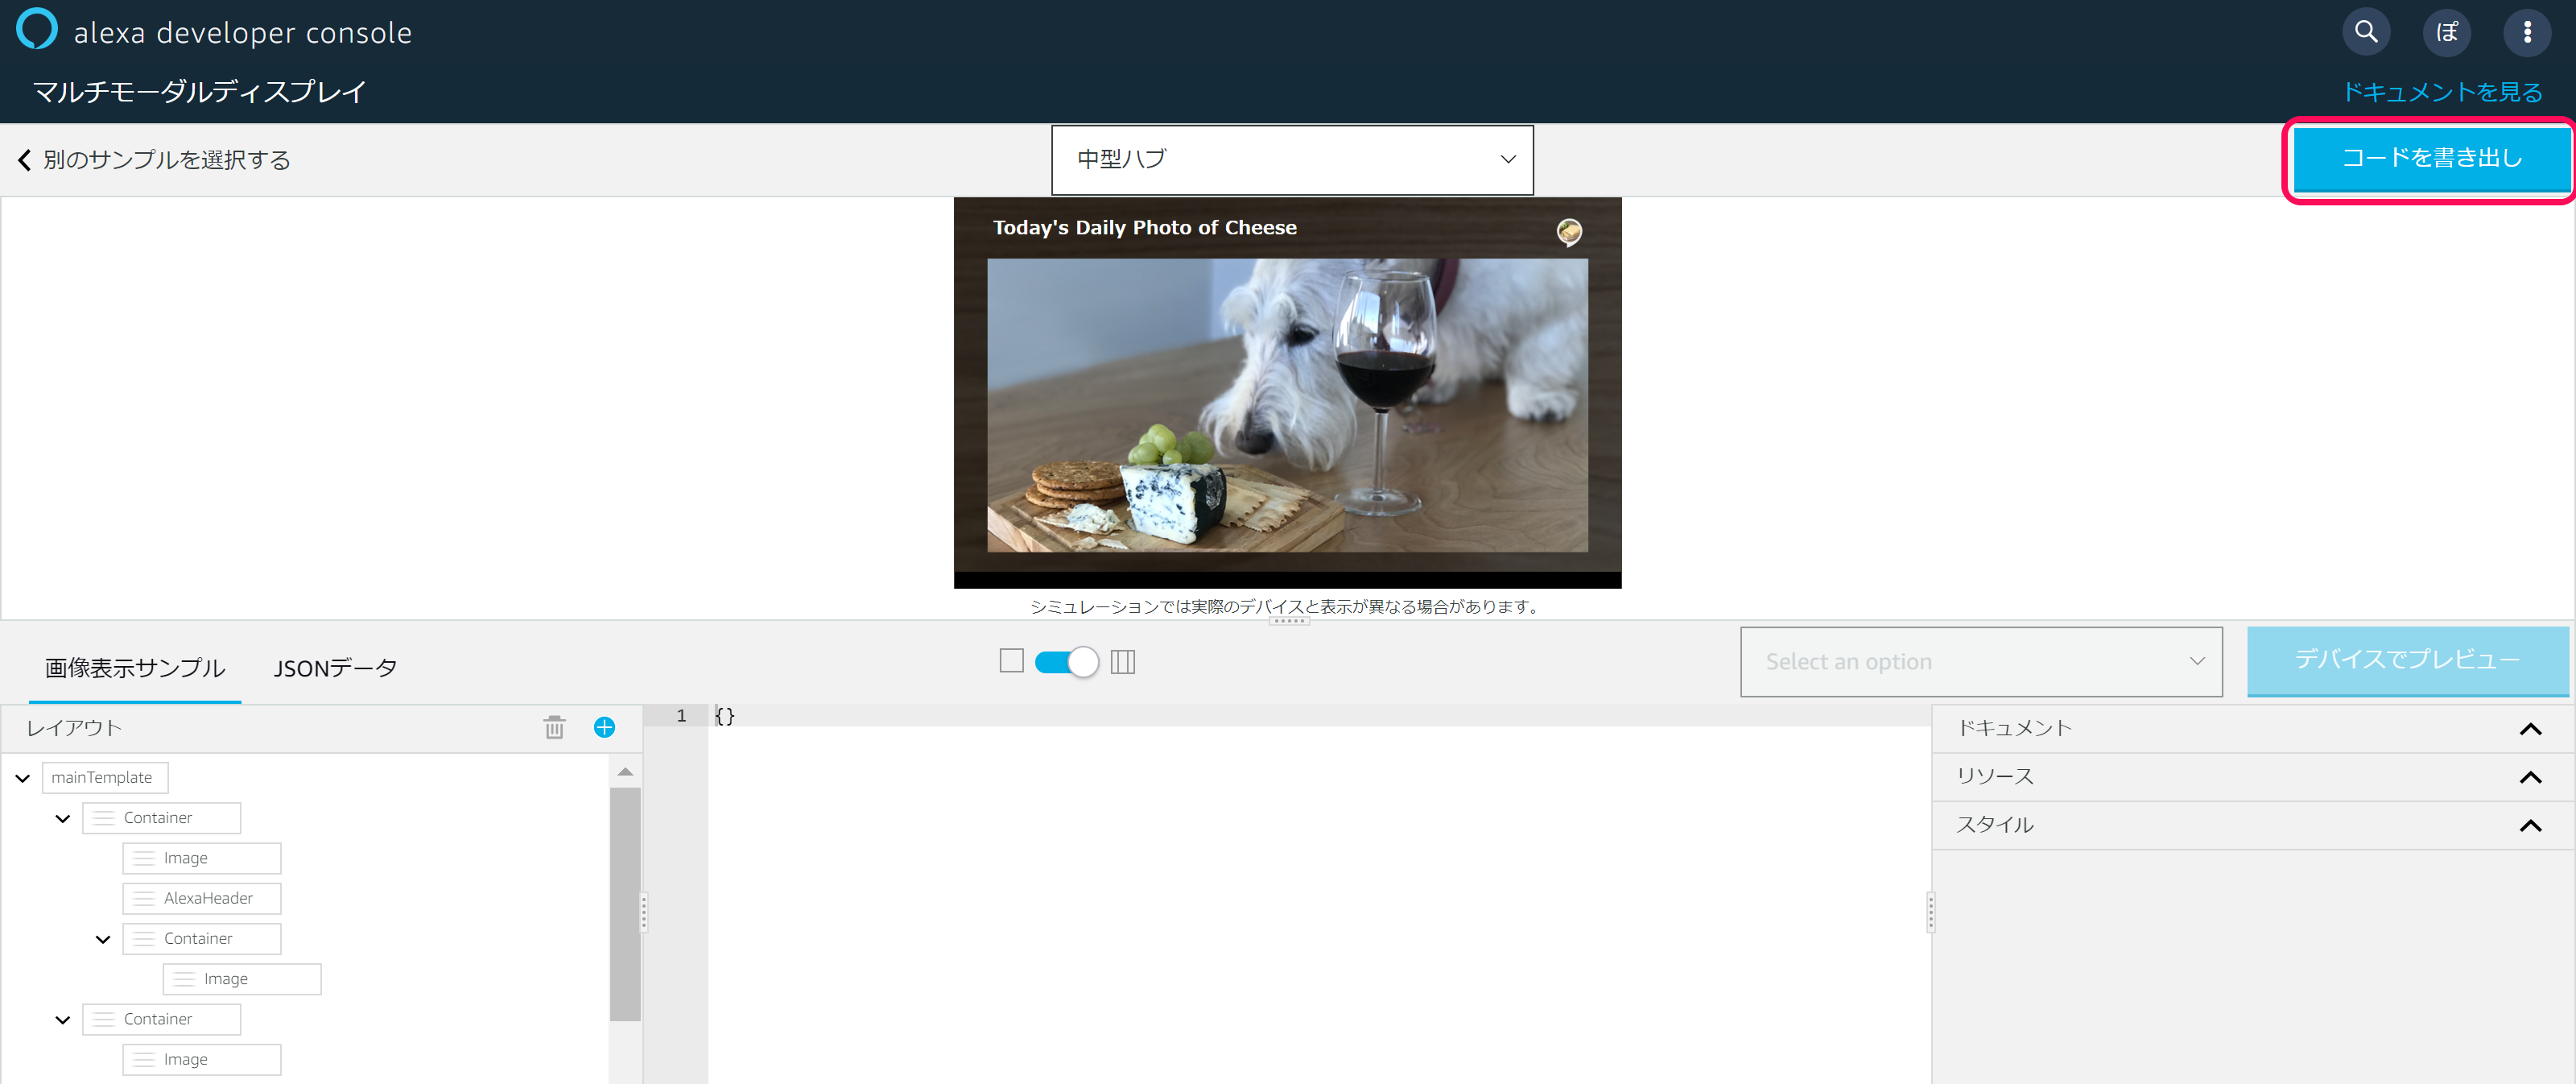
- 「コードを書き出し」を、クリックする。
- 「apl_template_export.json」ファイルをダウンロードし、保存する。
- ※ファイルダウンロードが完了したら、この画面の内容を保存せずに離れても結構です。
APL JSONファイル
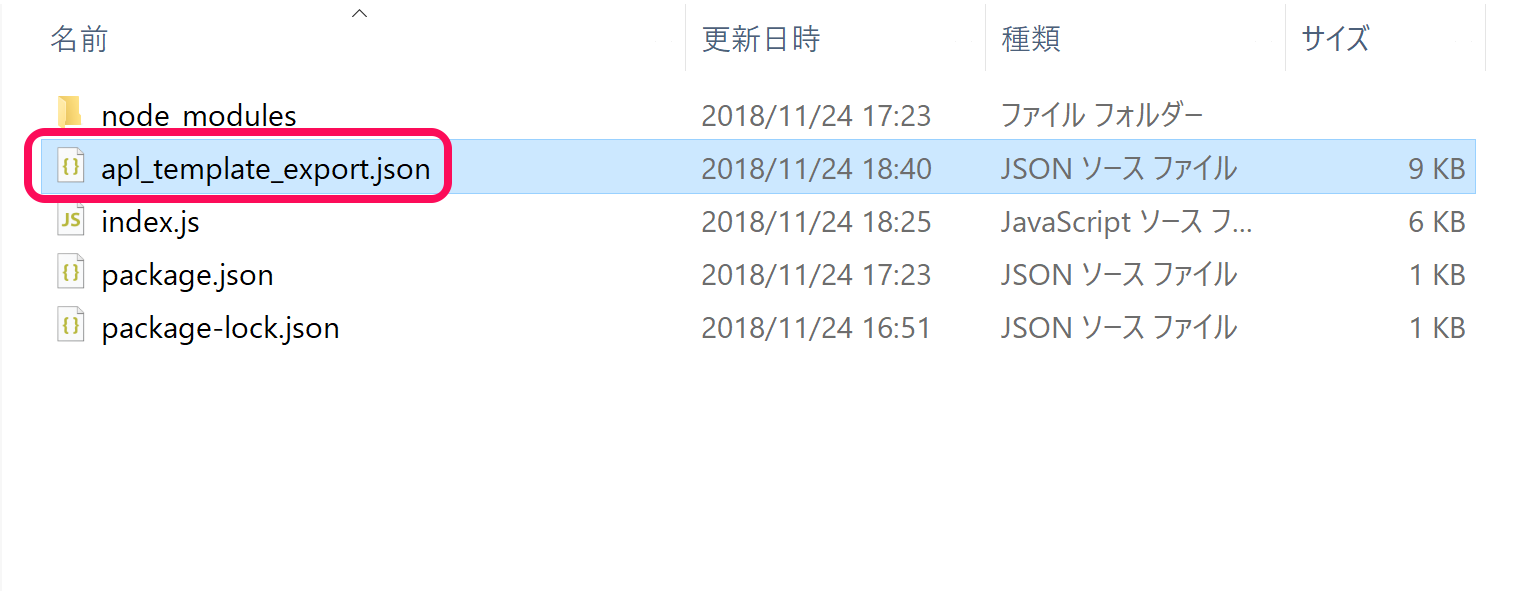
- 「apl_template_export.json」ファイルをダウンロード後、index.jsファイルがあるフォルダにファイルを移動する。(フォルダパス:/hello-world/lambda/custom)
2つのJSONファイル
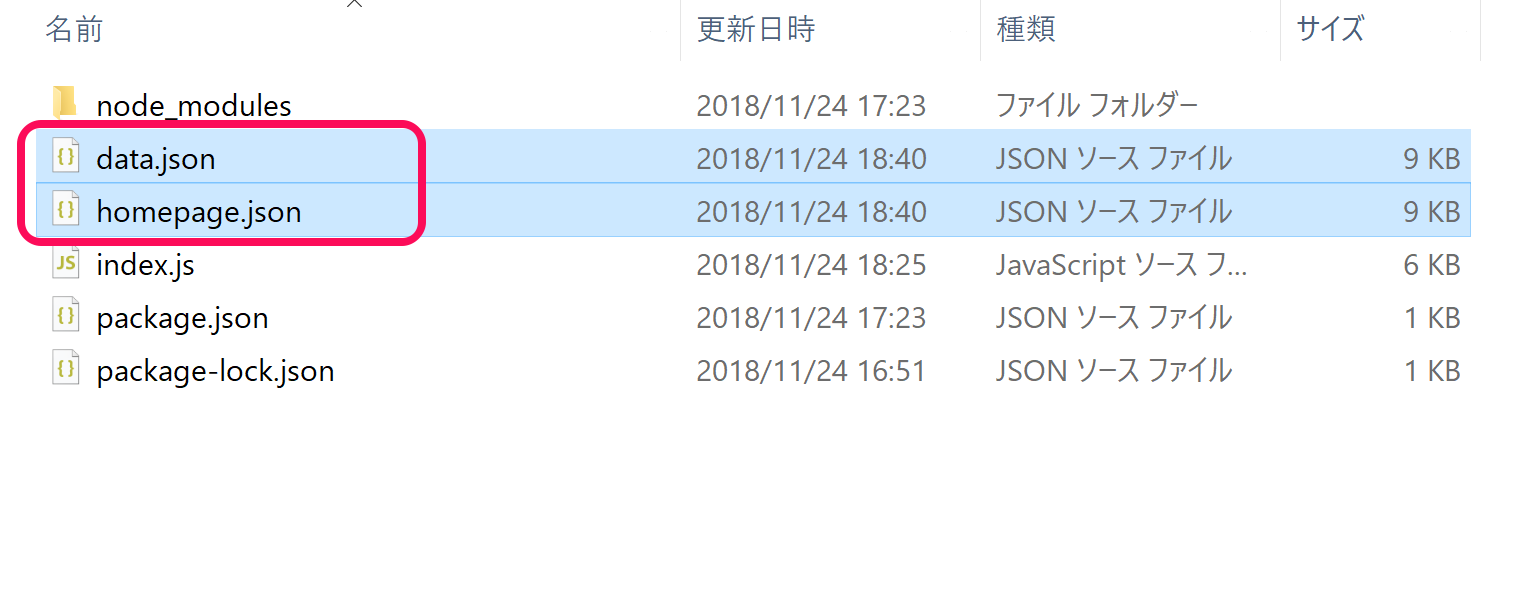
- 「apl_template_export.json」をコピーし、2つのファイルにする。
- 1つのファイル名を「homepage.json」に、もう1つのふぁいる名を「data.json」にリネームする。
homepage.json
- 「homepage.json」をエディタで開き、はじめてのAlexa Presentation Language (APL)の記載を参考に、修正する。
homepage.json
{
    "type": "APL",
    "version": "1.0",
    "theme": "dark",
    "import": [
        {
            "name": "alexa-layouts",
            "version": "1.0.0"
        }
    ],
    "resources": [
        {
            "description": "Stock color for the light theme",
            "colors": {
                "colorTextPrimary": "#151920"
            }
        },
        {
            "description": "Stock color for the dark theme",
            "when": "${viewport.theme == 'dark'}",
            "colors": {
                "colorTextPrimary": "#f0f1ef"
            }
        },
        {
            "description": "Standard font sizes",
            "dimensions": {
                "textSizeBody": 48,
                "textSizePrimary": 27,
                "textSizeSecondary": 23,
                "textSizeSecondaryHint": 25
            }
        },
        {
            "description": "Common spacing values",
            "dimensions": {
                "spacingThin": 6,
                "spacingSmall": 12,
                "spacingMedium": 24,
                "spacingLarge": 48,
                "spacingExtraLarge": 72
            }
        },
        {
            "description": "Common margins and padding",
            "dimensions": {
                "marginTop": 40,
                "marginLeft": 60,
                "marginRight": 60,
                "marginBottom": 40
            }
        }
    ],
    "styles": {
        "textStyleBase": {
            "description": "Base font description; set color and core font family",
            "values": [
                {
                    "color": "@colorTextPrimary",
                    "fontFamily": "Amazon Ember"
                }
            ]
        },
        "textStyleBase0": {
            "description": "Thin version of basic font",
            "extend": "textStyleBase",
            "values": {
                "fontWeight": "100"
            }
        },
        "textStyleBase1": {
            "description": "Light version of basic font",
            "extend": "textStyleBase",
            "values": {
                "fontWeight": "300"
            }
        },
        "mixinBody": {
            "values": {
                "fontSize": "@textSizeBody"
            }
        },
        "mixinPrimary": {
            "values": {
                "fontSize": "@textSizePrimary"
            }
        },
        "mixinSecondary": {
            "values": {
                "fontSize": "@textSizeSecondary"
            }
        },
        "textStylePrimary": {
            "extend": [
                "textStyleBase1",
                "mixinPrimary"
            ]
        },
        "textStyleSecondary": {
            "extend": [
                "textStyleBase0",
                "mixinSecondary"
            ]
        },
        "textStyleBody": {
            "extend": [
                "textStyleBase1",
                "mixinBody"
            ]
        },
        "textStyleSecondaryHint": {
            "values": {
                "fontFamily": "Bookerly",
                "fontStyle": "italic",
                "fontSize": "@textSizeSecondaryHint",
                "color": "@colorTextPrimary"
            }
        }
    },
    "layouts": {},
    "mainTemplate": {
        "parameters": [
            "payload"
        ],
        "items": [
            {
                "when": "${viewport.shape == 'round'}",
                "type": "Container",
                "direction": "column",
                "items": [
                    {
                        "type": "Image",
                        "source": "${payload.bodyTemplate7Data.backgroundImage.sources[0].url}",
                        "scale": "best-fill",
                        "position": "absolute",
                        "width": "100vw",
                        "height": "100vh",
                        "scrim": true
                    },
                    {
                        "type": "AlexaHeader",
                        "headerTitle": "${payload.bodyTemplate7Data.title}",
                        "headerAttributionImage": "${payload.bodyTemplate7Data.logoUrl}"
                    },
                    {
                        "type": "Container",
                        "grow": 1,
                        "alignItems": "center",
                        "justifyContent": "center",
                        "items": [
                            {
                                "type": "Image",
                                "source": "${payload.bodyTemplate7Data.image.sources[0].url}",
                                "scale": "best-fill",
                                "width": "100vh",
                                "height": "70vw",
                                "align": "center"
                            }
                        ]
                    }
                ]
            },
            {
                "type": "Container",
                "items": [
                    {
                        "type": "Image",
                        "source": "${payload.bodyTemplate7Data.backgroundImage.sources[0].url}",
                        "scale": "best-fill",
                        "position": "absolute",
                        "width": "100vw",
                        "height": "100vh"
                    },
                    {
                        "type": "AlexaHeader",
                        "headerTitle": "${payload.bodyTemplate7Data.title}",
                        "headerAttributionImage": "${payload.bodyTemplate7Data.logoUrl}"
                    },
                    {
                        "type": "Container",
                        "direction": "row",
                        "paddingLeft": "5vw",
                        "paddingRight": "5vw",
                        "paddingBottom": "5vh",
                        "alignItems": "center",
                        "justifyContent": "center",
                        "items": [
                            {
                                "type": "Image",
                                "height": "75vh",
                                "width": "90vw",
                                "source": "${payload.bodyTemplate7Data.image.sources[0].url}",
                                "scale": "best-fill",
                                "align": "center"
                            }
                        ]
                    }
                ]
            }
        ]
    }
}
data.json
- 「data.json」をエディタで開き、はじめてのAlexa Presentation Language (APL)の記載を参考に、修正する。
data.json
{
    "bodyTemplate7Data": {
        "type": "object",
        "objectId": "bt7Sample",
        "title": "Today's Daily Photo of Cheese",
        "backgroundImage": {
            "contentDescription": null,
            "smallSourceUrl": null,
            "largeSourceUrl": null,
            "sources": [
                {
                    "url": "https://d2o906d8ln7ui1.cloudfront.net/images/BT7_Background.png",
                    "size": "small",
                    "widthPixels": 0,
                    "heightPixels": 0
                },
                {
                    "url": "https://d2o906d8ln7ui1.cloudfront.net/images/BT7_Background.png",
                    "size": "large",
                    "widthPixels": 0,
                    "heightPixels": 0
                }
            ]
        },
        "image": {
            "contentDescription": null,
            "smallSourceUrl": null,
            "largeSourceUrl": null,
            "sources": [
                {
                    "url": "https://d2o906d8ln7ui1.cloudfront.net/images/MollyforBT7.png",
                    "size": "small",
                    "widthPixels": 0,
                    "heightPixels": 0
                },
                {
                    "url": "https://d2o906d8ln7ui1.cloudfront.net/images/MollyforBT7.png",
                    "size": "large",
                    "widthPixels": 0,
                    "heightPixels": 0
                }
            ]
        },
        "logoUrl": "https://d2o906d8ln7ui1.cloudfront.net/images/cheeseskillicon.png",
        "hintText": "Try, \"Alexa, search for blue cheese\""
    }
}
Lambdaの再デプロイ
- ask deploy -t コマンドを利用し、hello-world スキルのLambdaプログラムのみをAWS Lambdaに再デプロイします。
Ubuntuコマンドライン
# 作業ディレクトリ(任意)に移動(~/hello-worldを想定)
$ cd hello-world

# スキルのデプロイ(skill.jsonフィルと同じディレクトリで実行すること。)
$ ask deploy -t lambda
Amazon Developer Portal
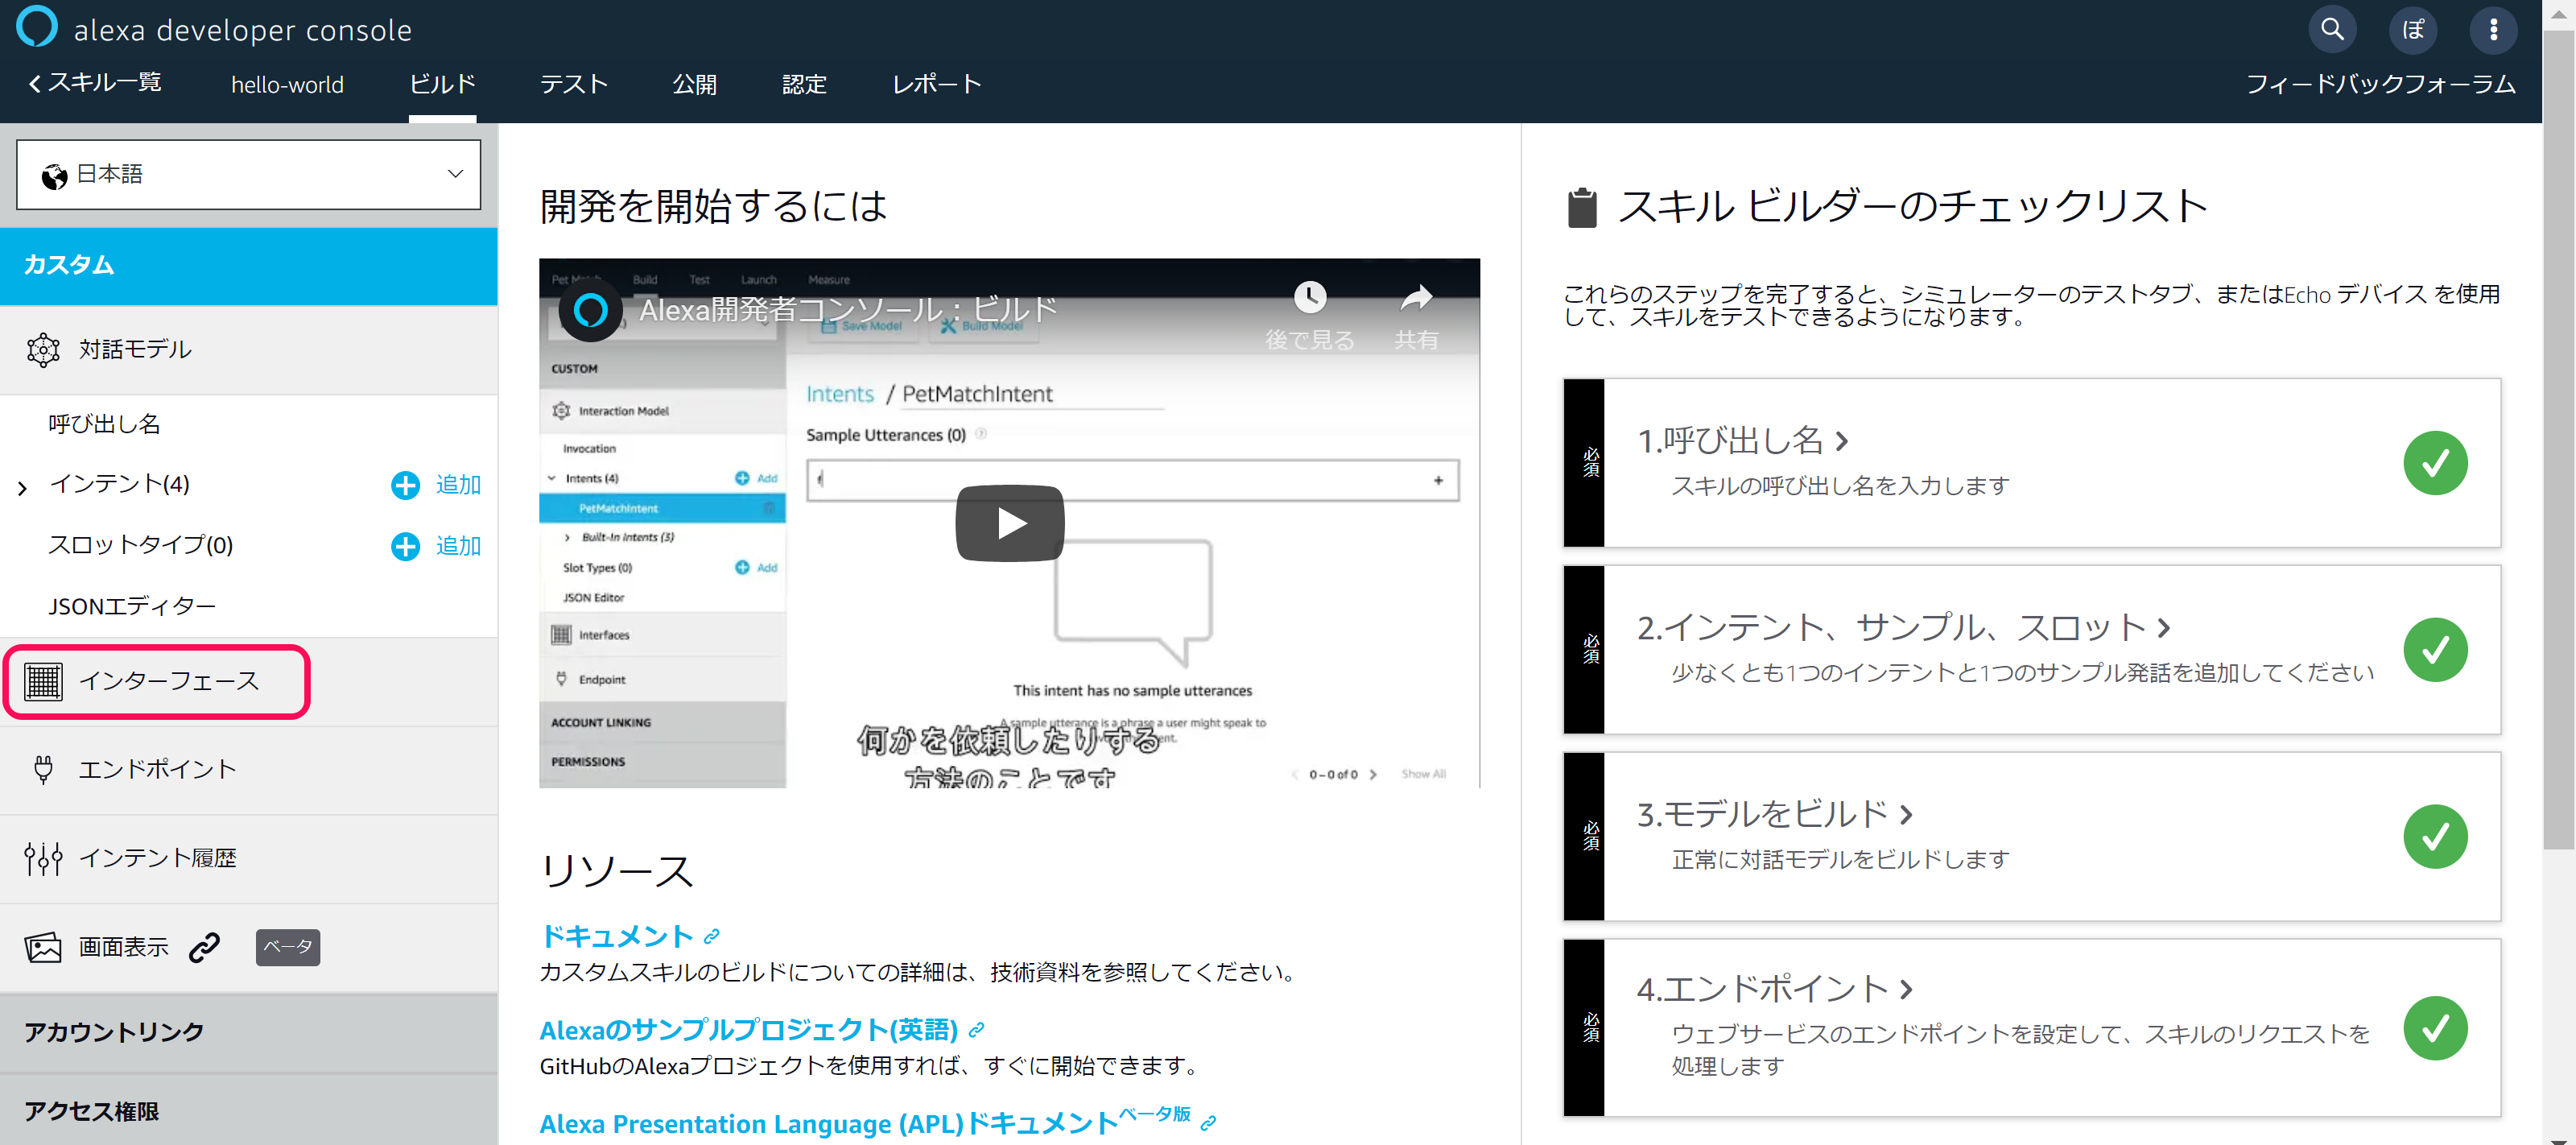
- 「インターフェース」を、クリックする。
Amazon Developer Portal
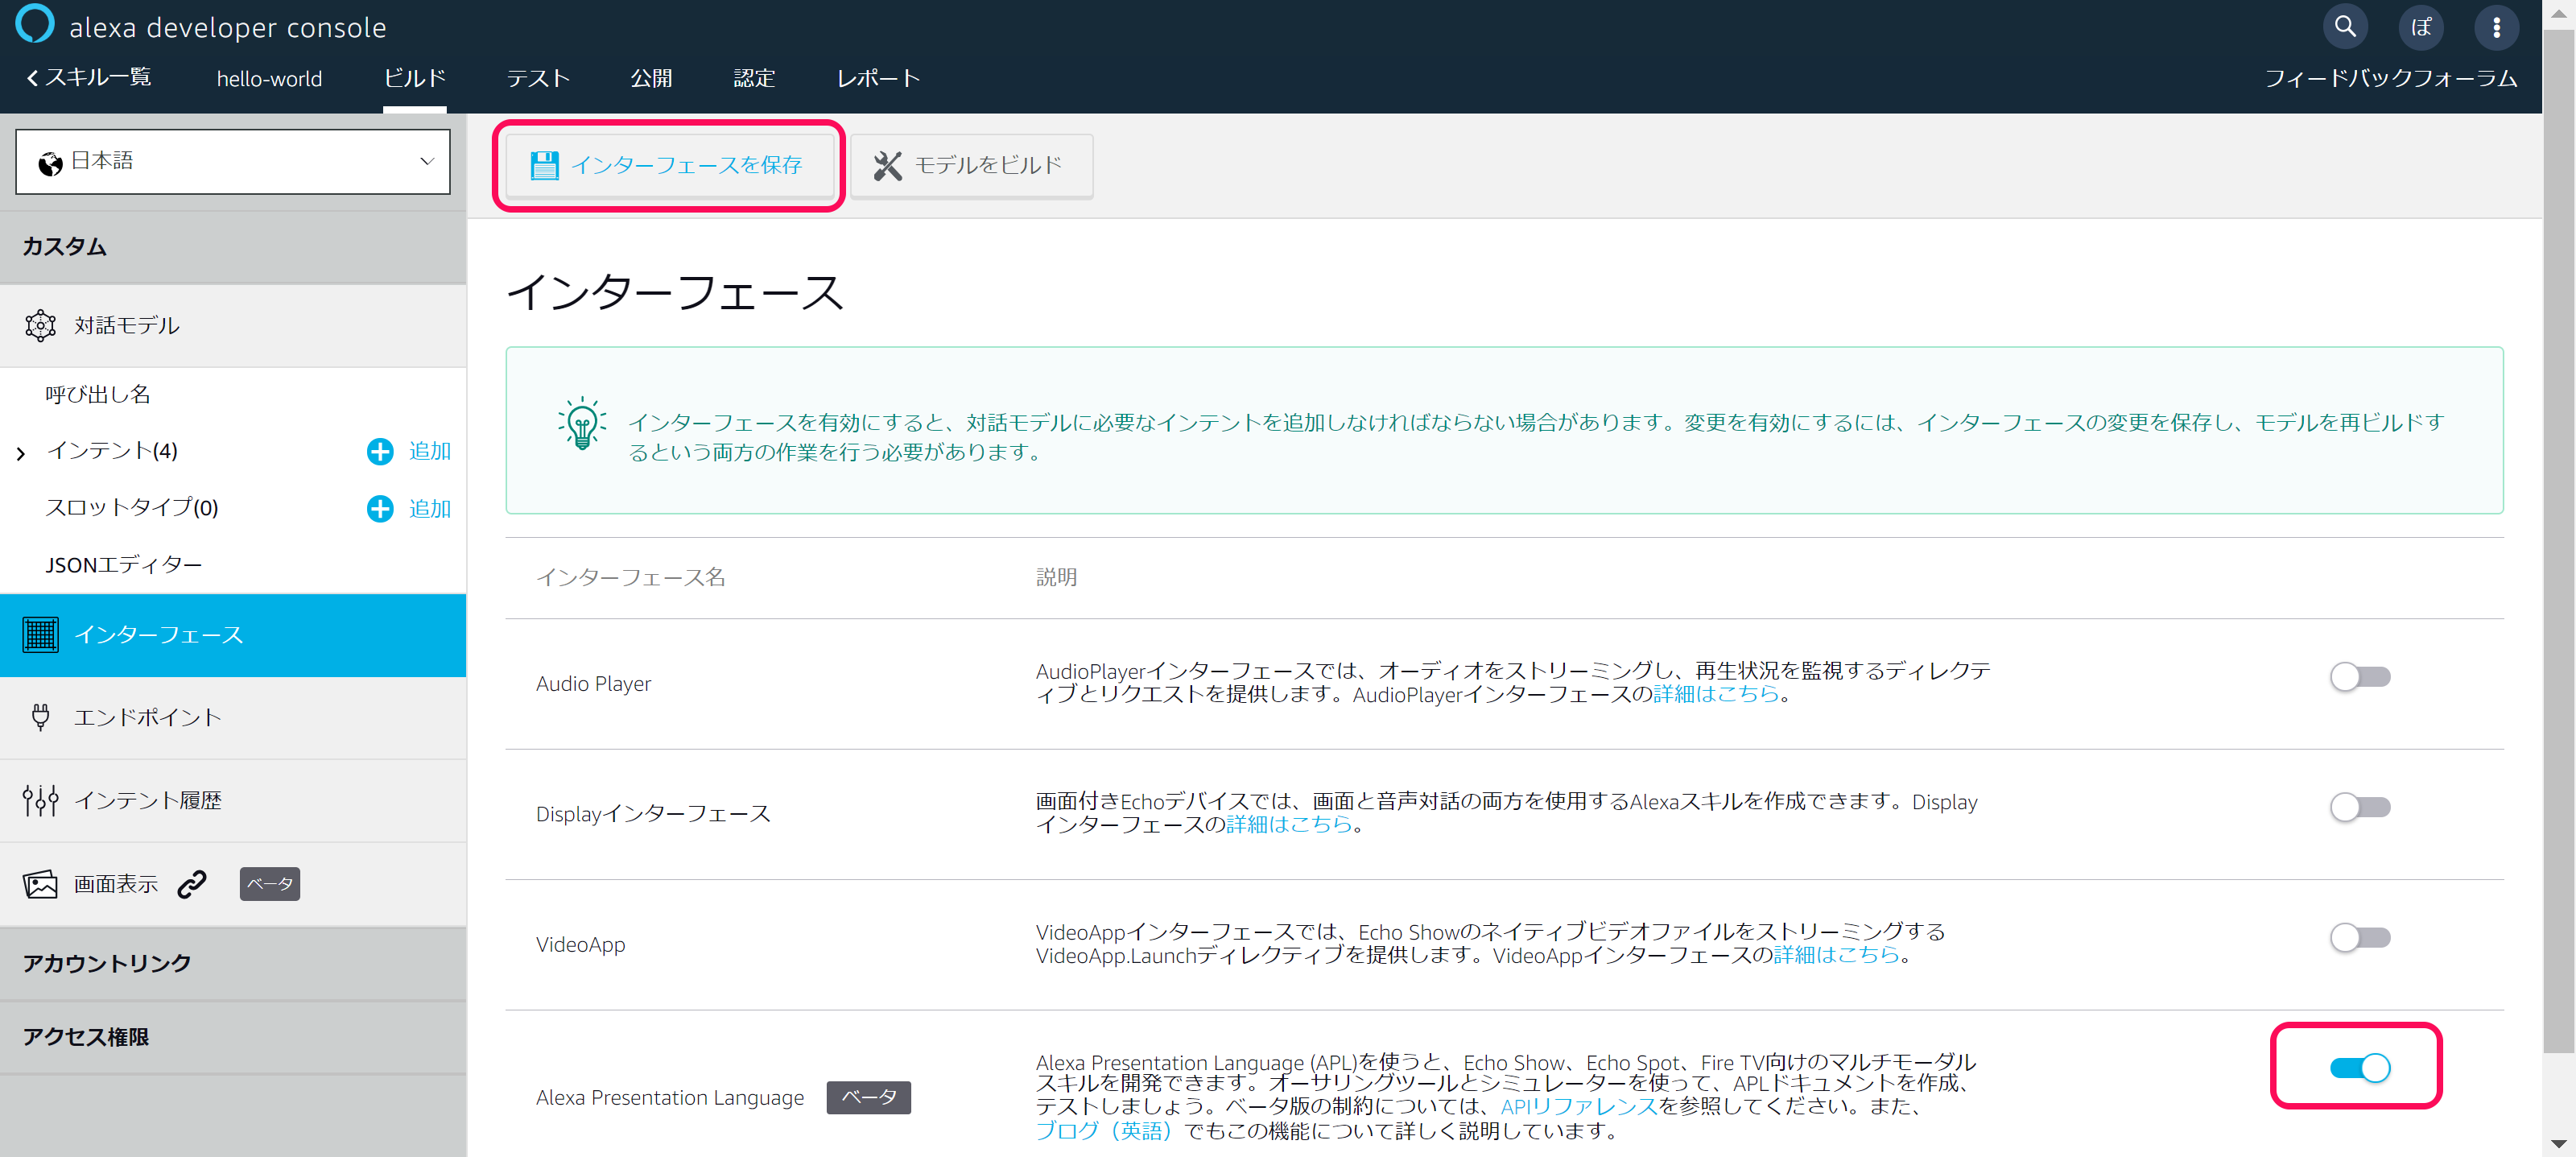
- Alexa Presentation Languageを、チェックする。
- 「インターフェースを保存」を、クリックする。
追記:2019/02/04
- ディスプレイタップ等に正しく対応するために、「Displayインターフェース」もあわせてチェックしておくことをおすすめします。「Displayインターフェース」をチェックすることで、ブラウザシミュレータでの「タップ(クリック)」テストが可能になるかと思います。
7. スキルのテスト
ブラウザシミュレータ
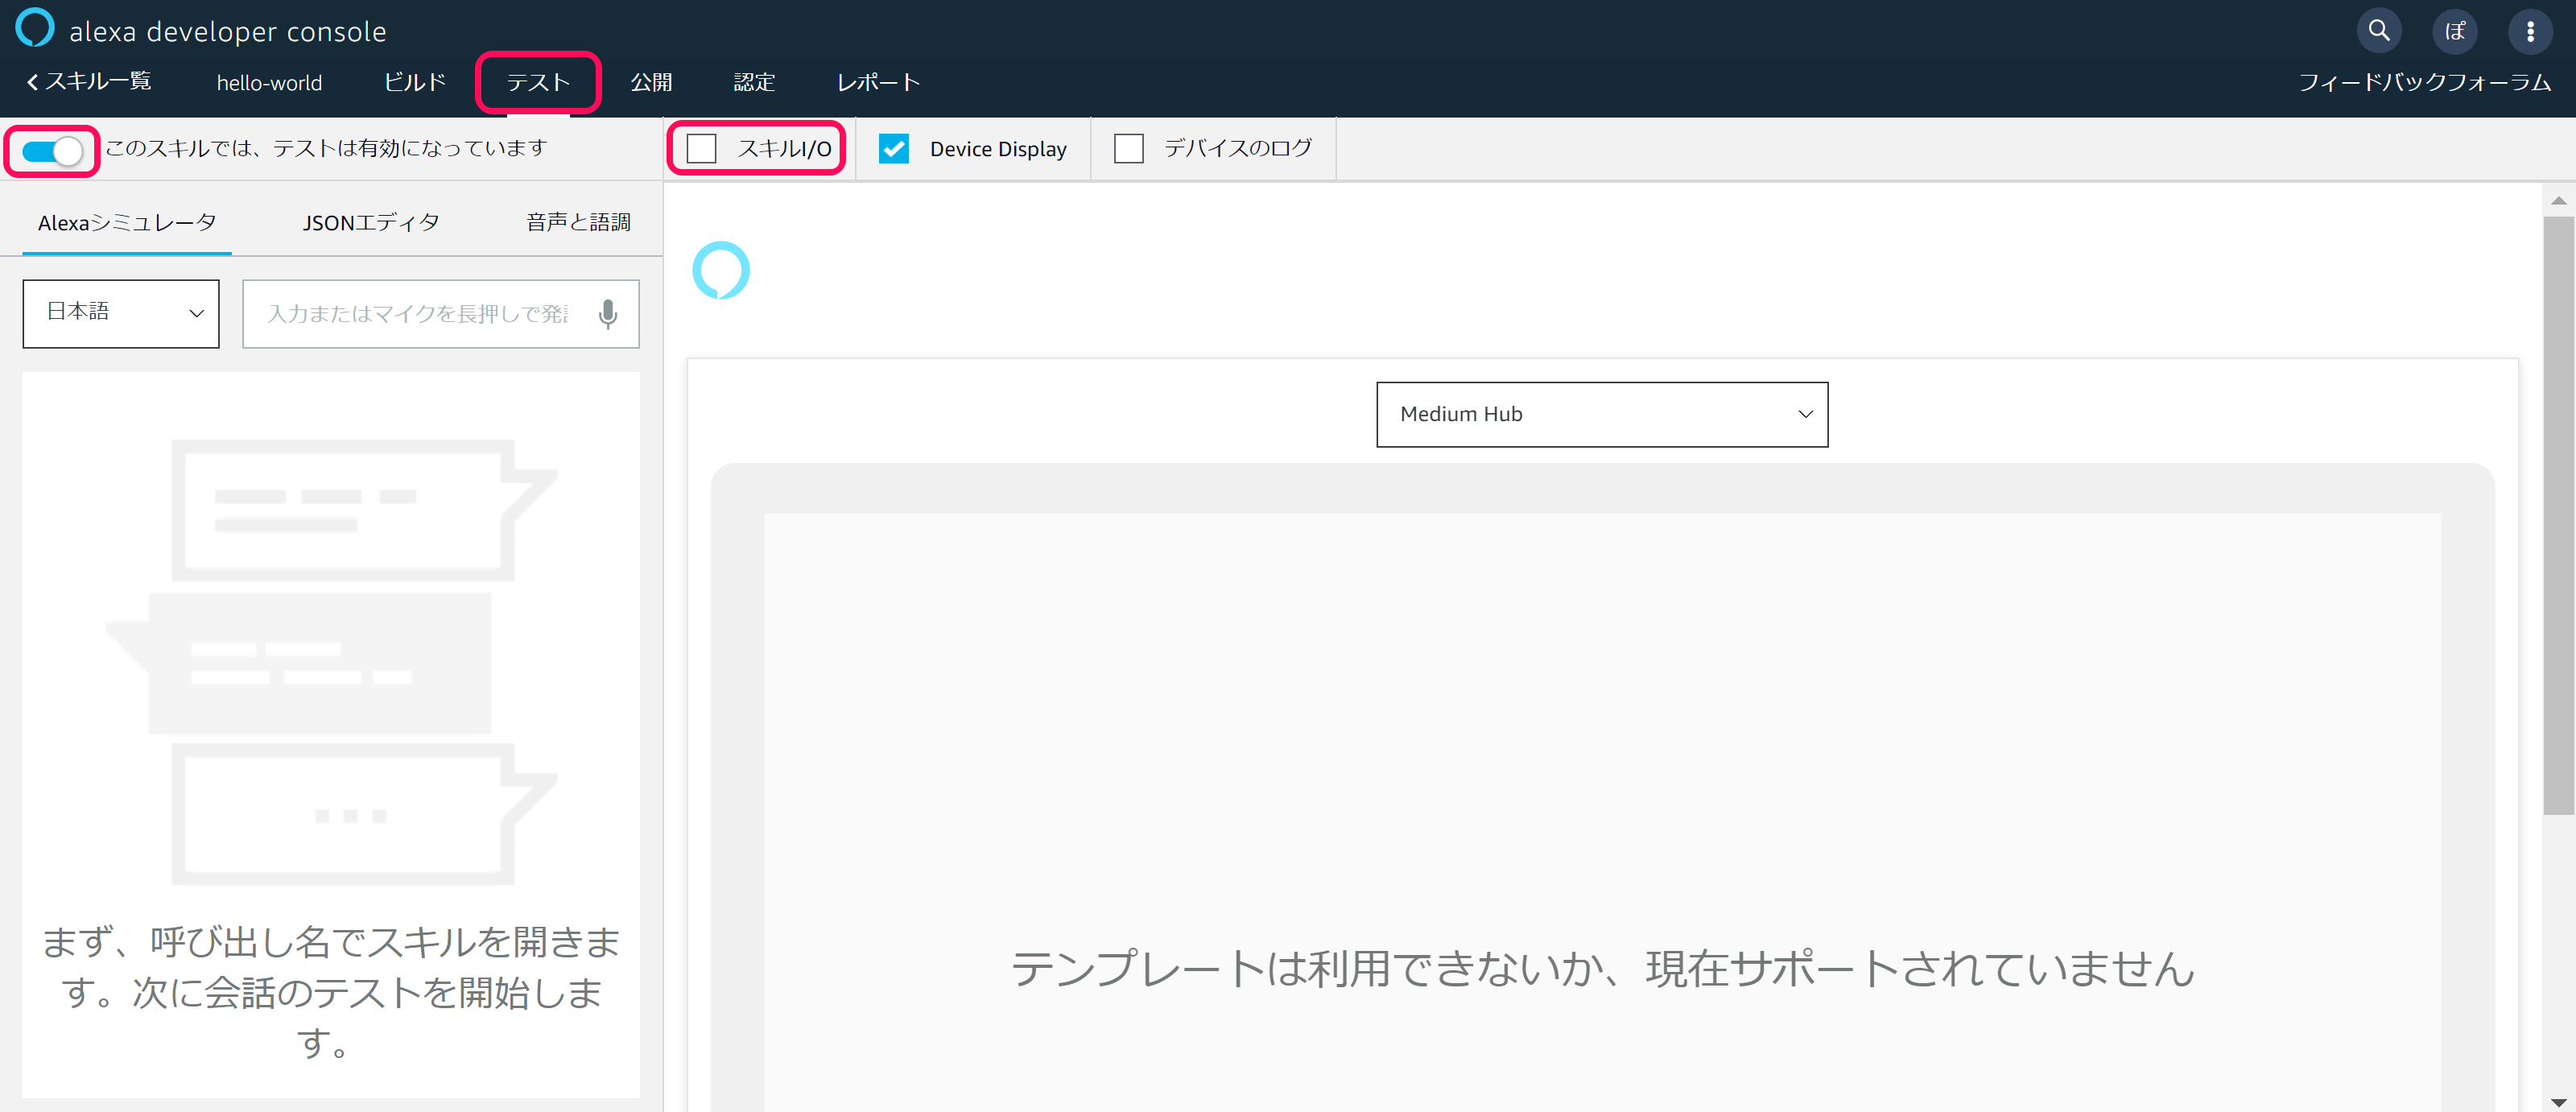
- 「テスト」タブを、クリックする。
- 「テスト有効」を、ONにする。
- 「スキルI/O」のチェックを、はずす。
ブラウザシミュレータ
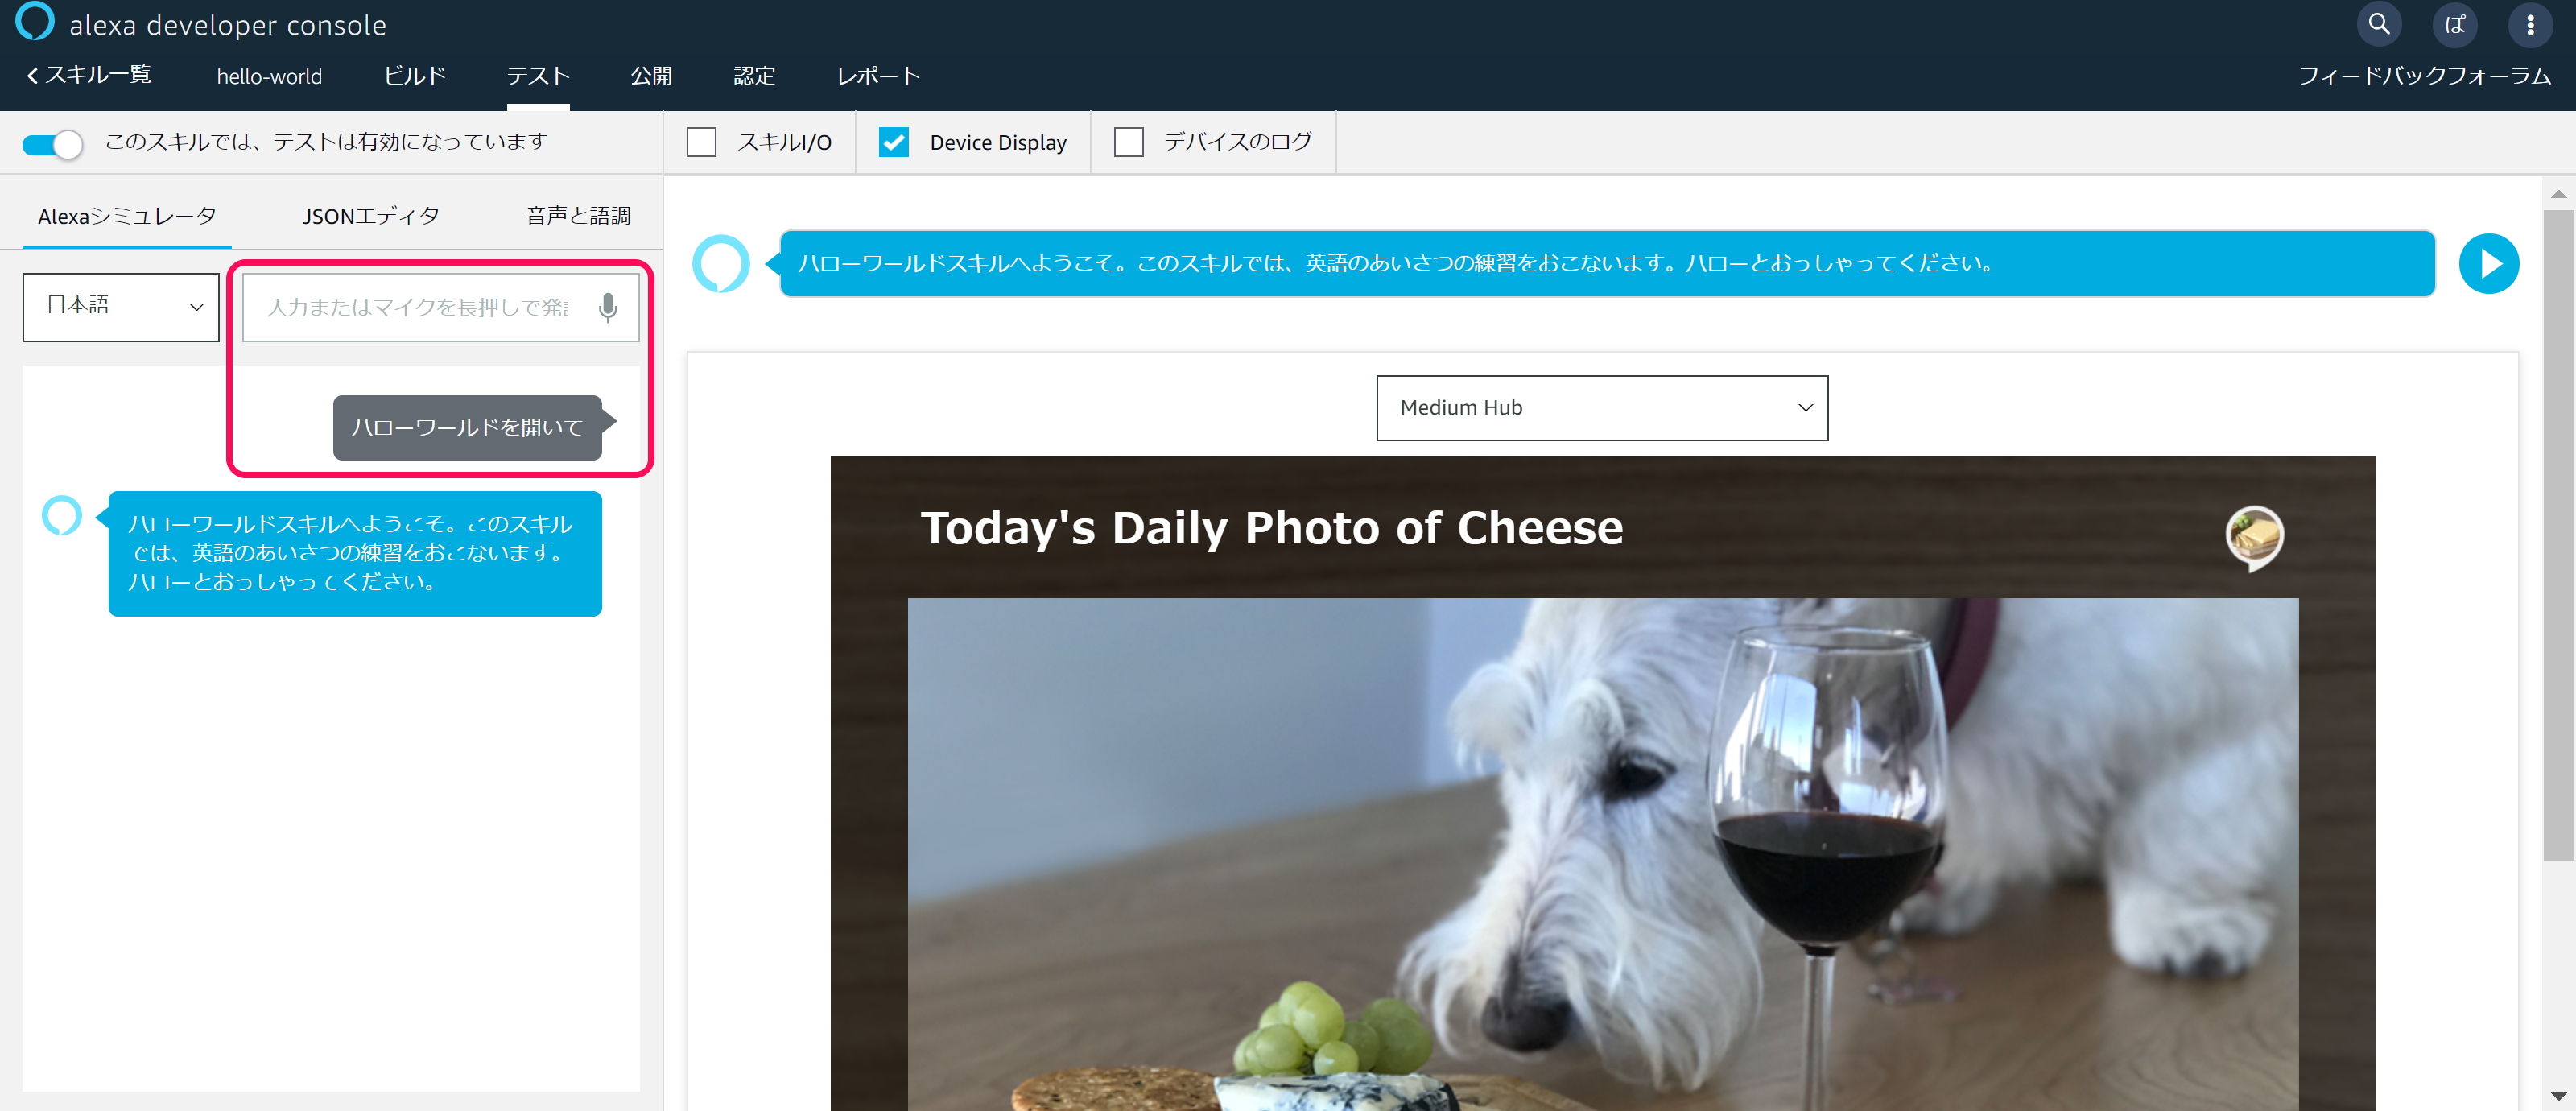
- 「ハローワールドを開いて」と発話し、スキルを起動する。
- ※ APLのサンプル画像が表示されれば、OKです。
8. 補足
APL定義を修正したい場合
- 表示する画像データを変更したい場合は、「data.json」内容の修正にチャレンジしましょう。
- 表示する画像のレイアウトを変更したい場合は、「homepage.json」内容の修正にチャレンジしましょう。
- 直接JSONファイルを編集することも可能ですし、APLオーサリングツール(デザインツール)を利用して編集することもできます。
APLオーサリングツール(デザインツール)の使い方
- 2019年2月21日に開催されたAlexaスキル開発ハンズオンの公開資料「APLハンズオン」のご参照をおすすめいたします。
APLの向こう側
- 動的に「data.json」内容を変えたい!!という場合は、ファイル定義での利用をやめて、Lambdaプログラムのdatasources指定箇所を、直接JSON記述することで、APLの向こう側にたどりつけるかもしれません。
index.js(抜粋:動作検証はしてないよ。)
    // いろいろ試してみてね!!
    let TITLE = 'タイトルを変数で動的に変えてみてね。';

    // ディスプレイ有り(APL対応)の場合
    if (supportsApl(handlerInput)) {
      // APL対応(documentに設定したテンプレートレイアウトを利用し、datasourcesの内容をディスプレイに表示します。)
      handlerInput.responseBuilder
        .addDirective({
          type : 'Alexa.Presentation.APL.RenderDocument',
          version: '1.0',
          document: require('./homepage.json'),
          datasources: {
              bodyTemplate7Data: {
                  "title": `${TITLE}`,
                  "logoUrl": "https://d2o906d8ln7ui1.cloudfront.net/images/cheeseskillicon.png",
                  "url": "https://d2o906d8ln7ui1.cloudfront.net/images/BT7_Background.png"
              }
          }
        });
    }
APLのベータ世界線
- 動的に「data.json」内容を変えたい!!が、Lambdaプログラムで動的操作したいわけじゃない!data.jsonファイルを切り替えて扱いたいだけなんだ!というような利用ケースもあるかもしれません。この場合は、datasources指定箇所でrequireする「ファイル名」を、変数として扱うことで、もう一つのベータ世界線までもたどりつことができるかもしれません。
index.js(抜粋:動作検証はしてないよ。)
    // いろいろ試してみてね!!
    let DATA_JSON = './data2.json';

    // ディスプレイ有り(APL対応)の場合
    if (supportsApl(handlerInput)) {
      // APL対応(documentに設定したテンプレートレイアウトを利用し、datasourcesの内容をディスプレイに表示します。)
      handlerInput.responseBuilder
        .addDirective({
          type : 'Alexa.Presentation.APL.RenderDocument',
          version: '1.0',
          document: require('./homepage.json'),
          datasources: require(`${DATA_JSON}`)
        });
    }
APLの仕組みを深く理解する
- 2019年3月1日に開催されたAlexaスキル開発ハンズオン 〜APL対応スキルのつくりかた〜の後日解説がまとめられている「APLハンズオン コード解説」のご参照をおすすめいたします。
9. おわりに
おわりに
みなさん、Alexa Presentation Language(APL)スキル 開発チュートリアルはいかがでしたか?みなさんの環境でも、うまく実行できていれば幸いです。うまくいけば、1時間もあれば完成するかと思います。
スマートスピーカのディスプレイ対応によって、スマートスピーカ界隈がより盛り上がっていくことを願っております。
2018/11/24 TAKAHIRO NISHIZONO
