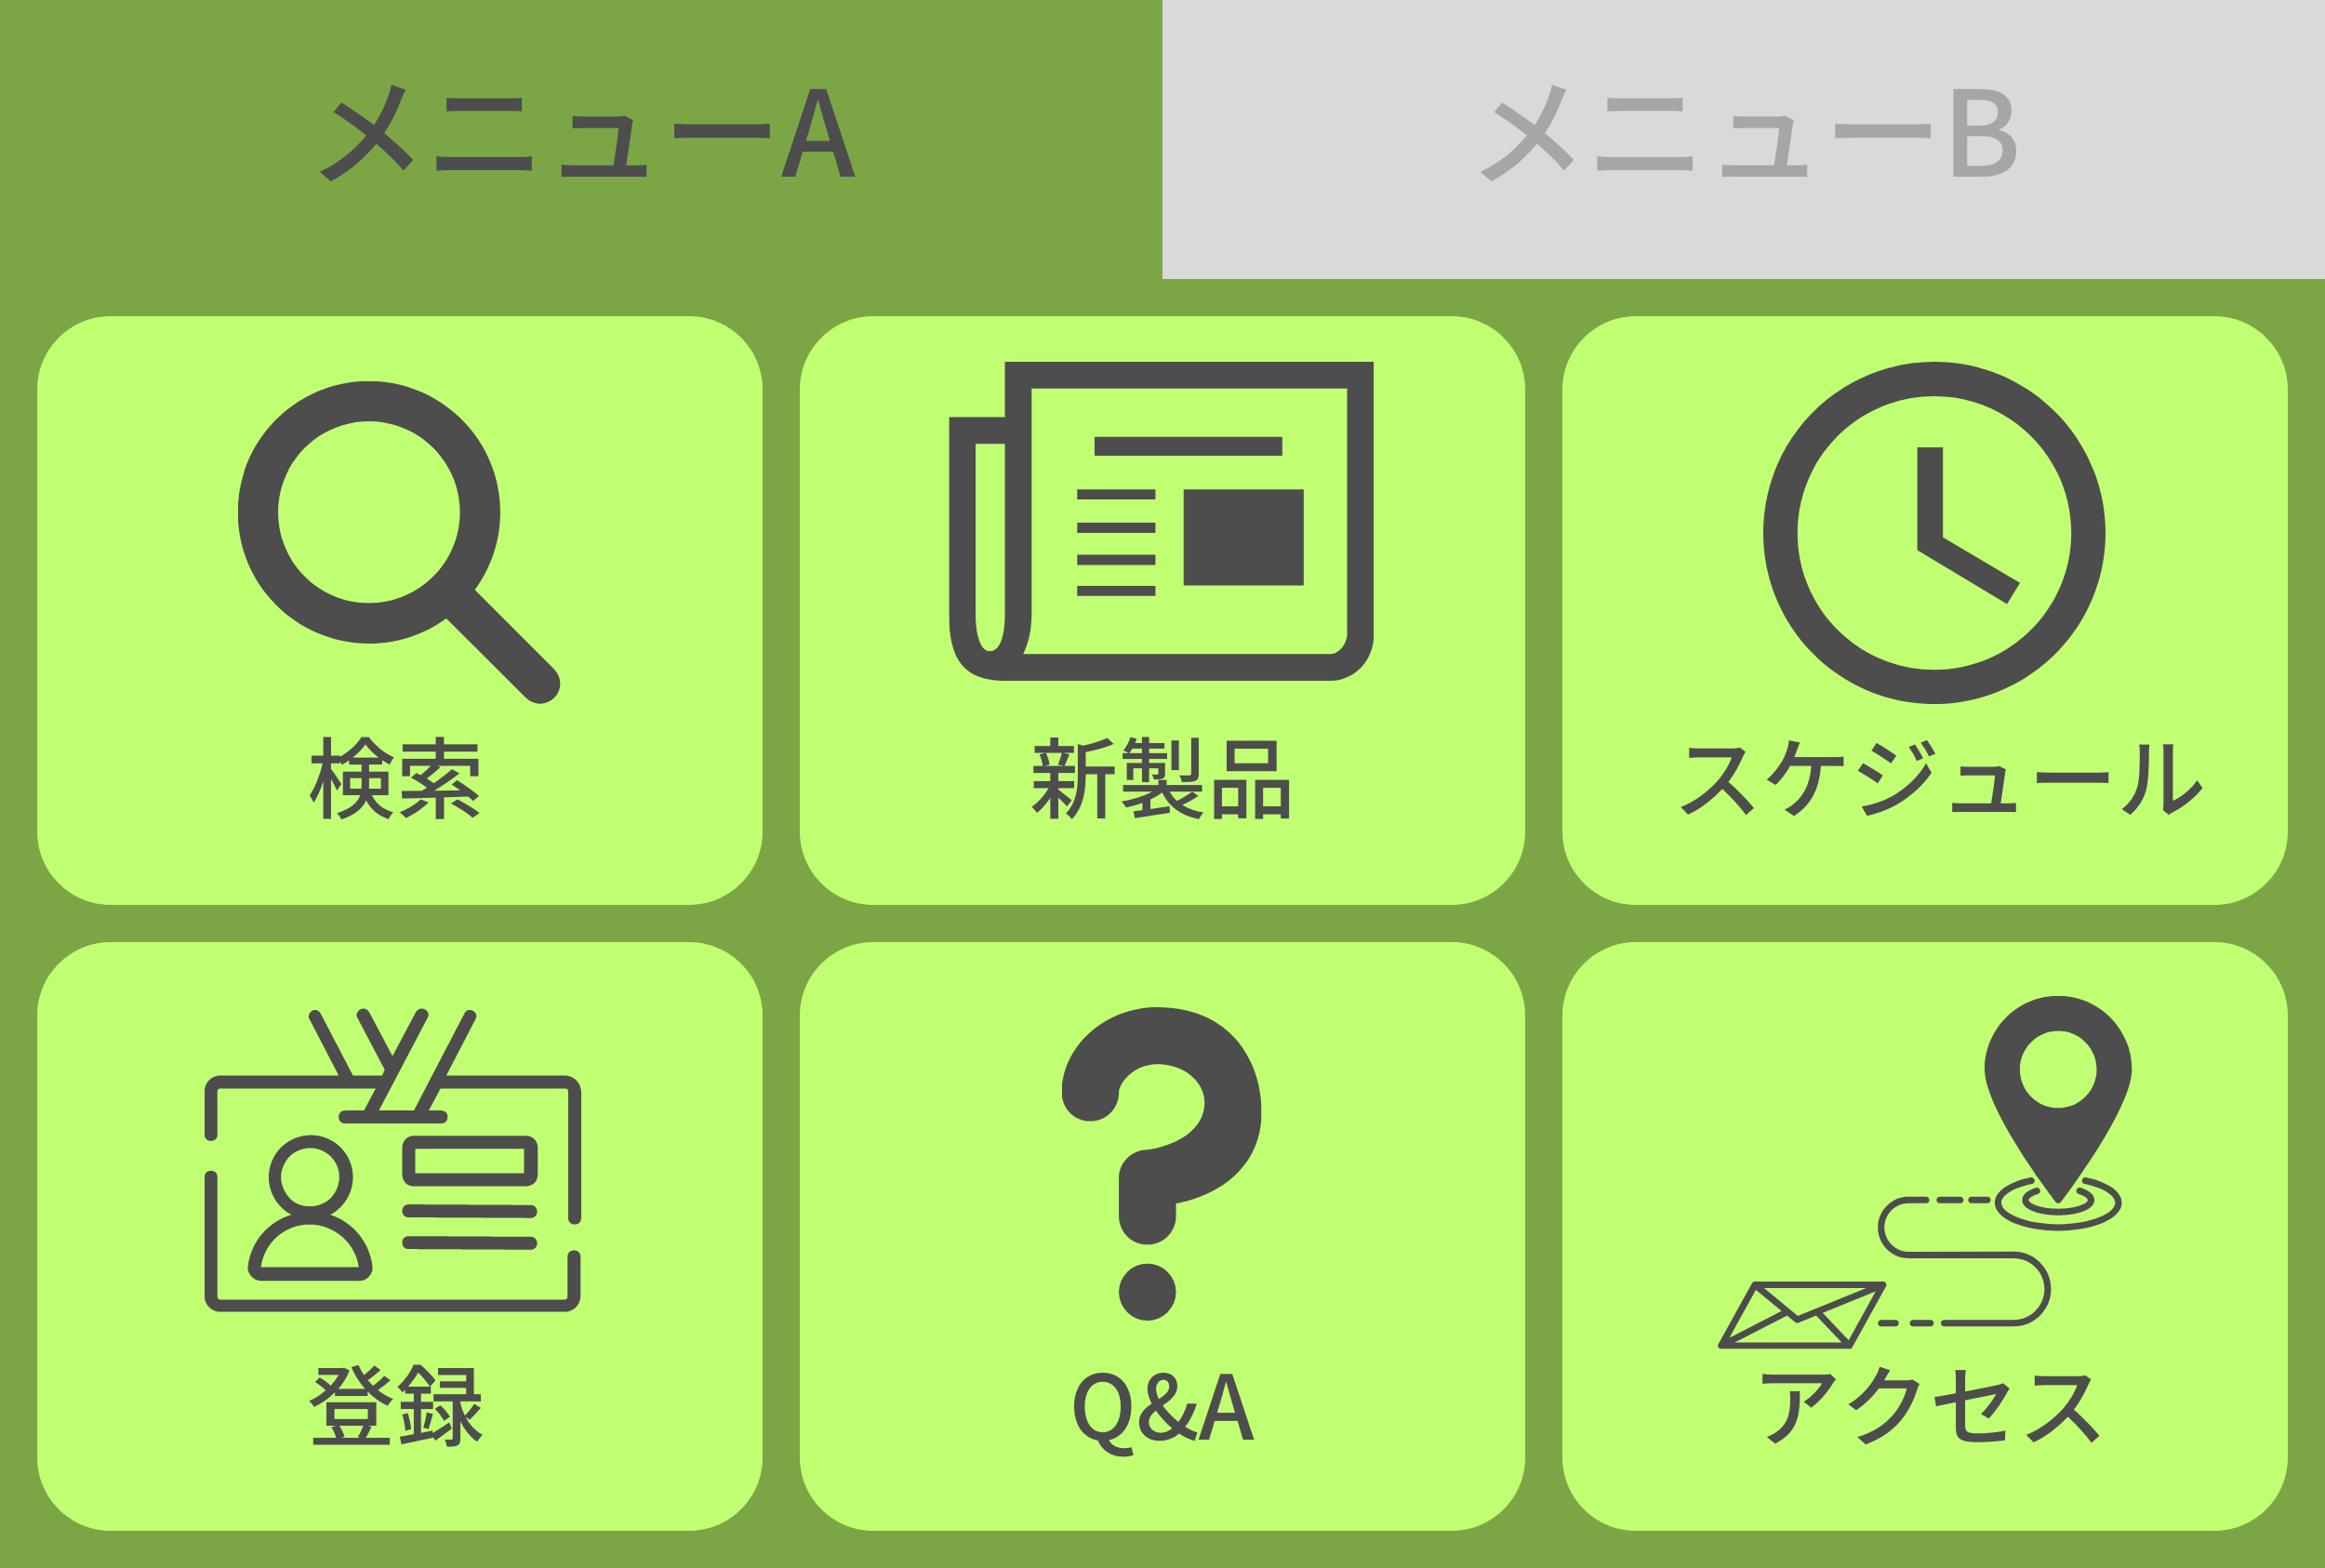
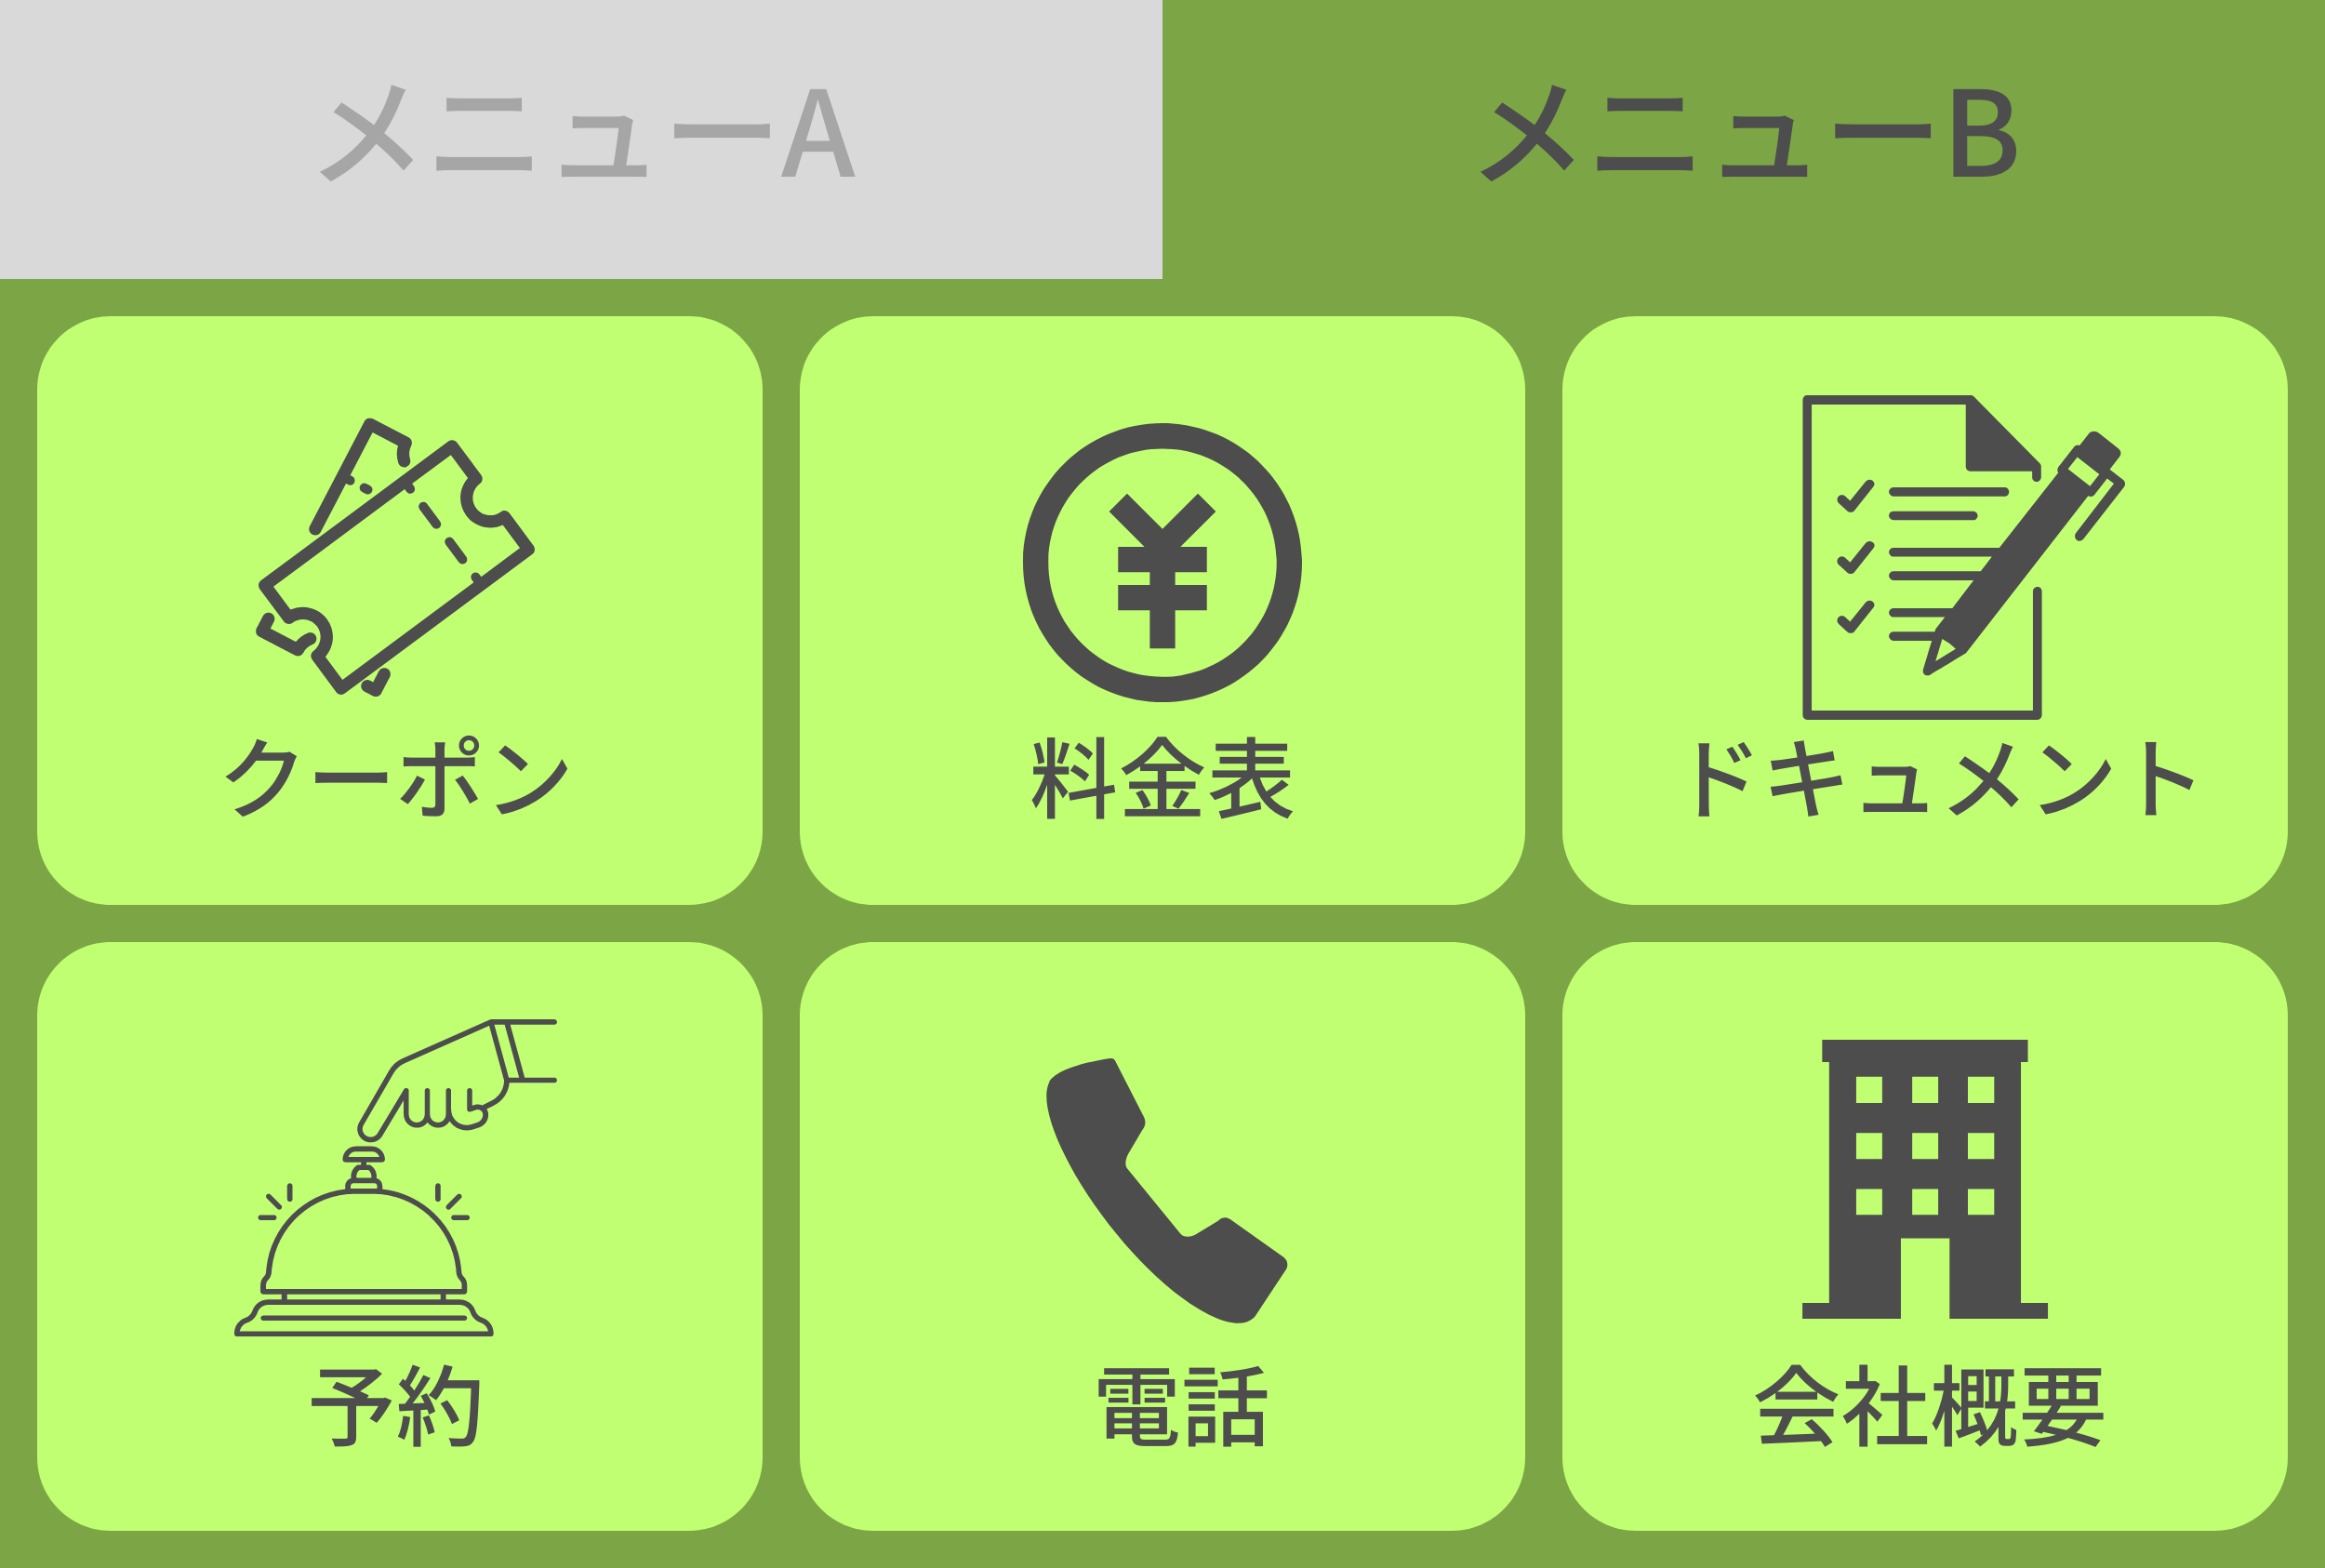
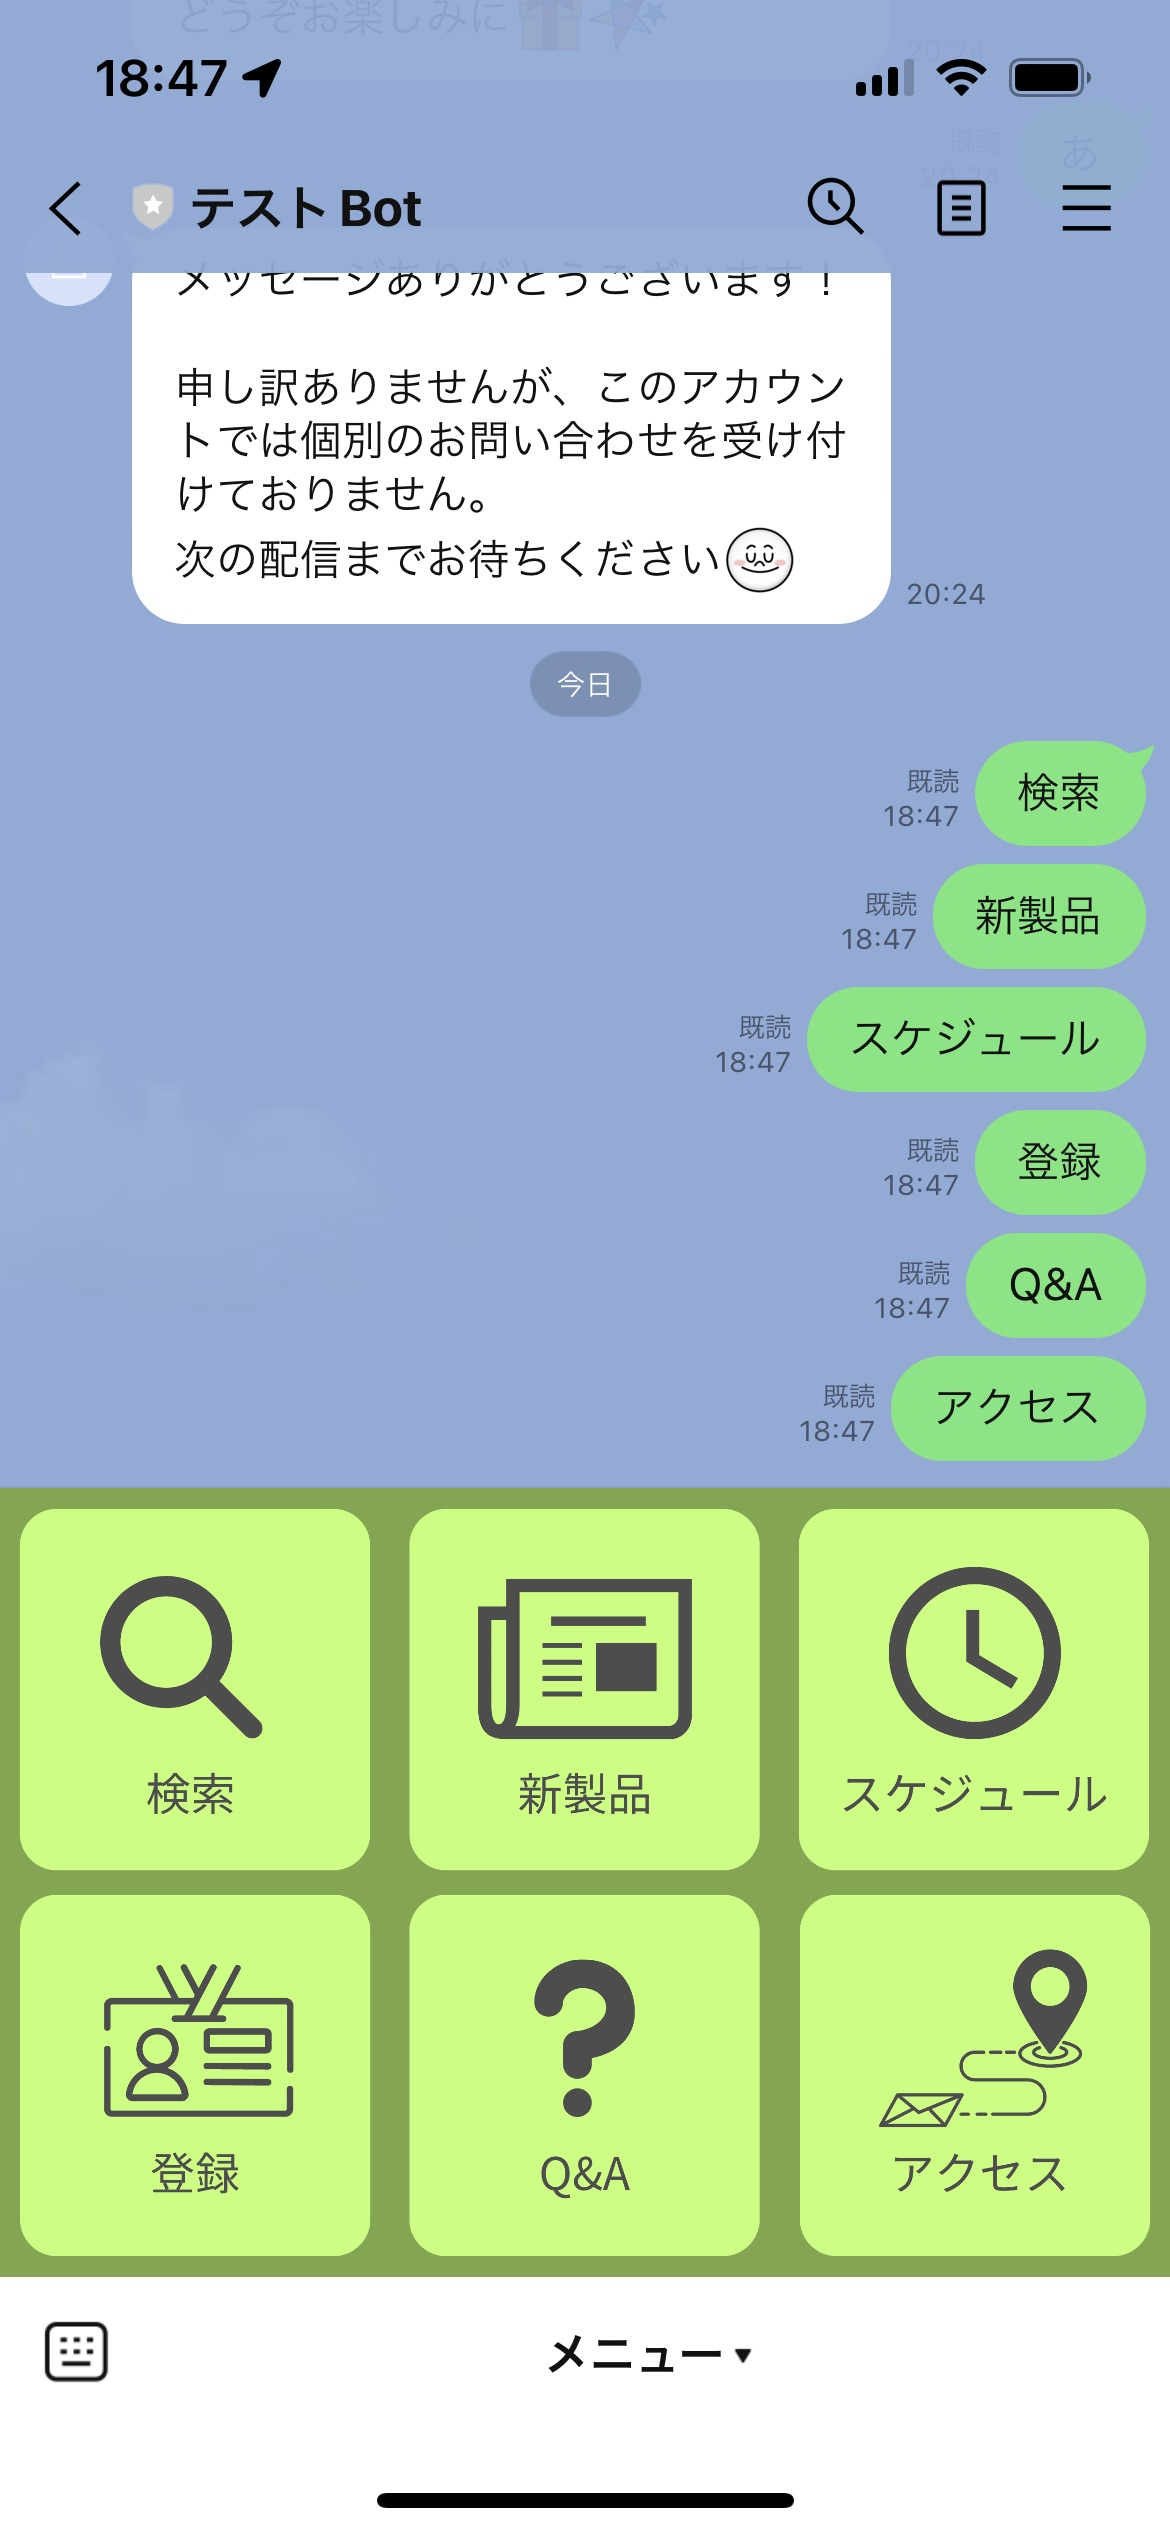
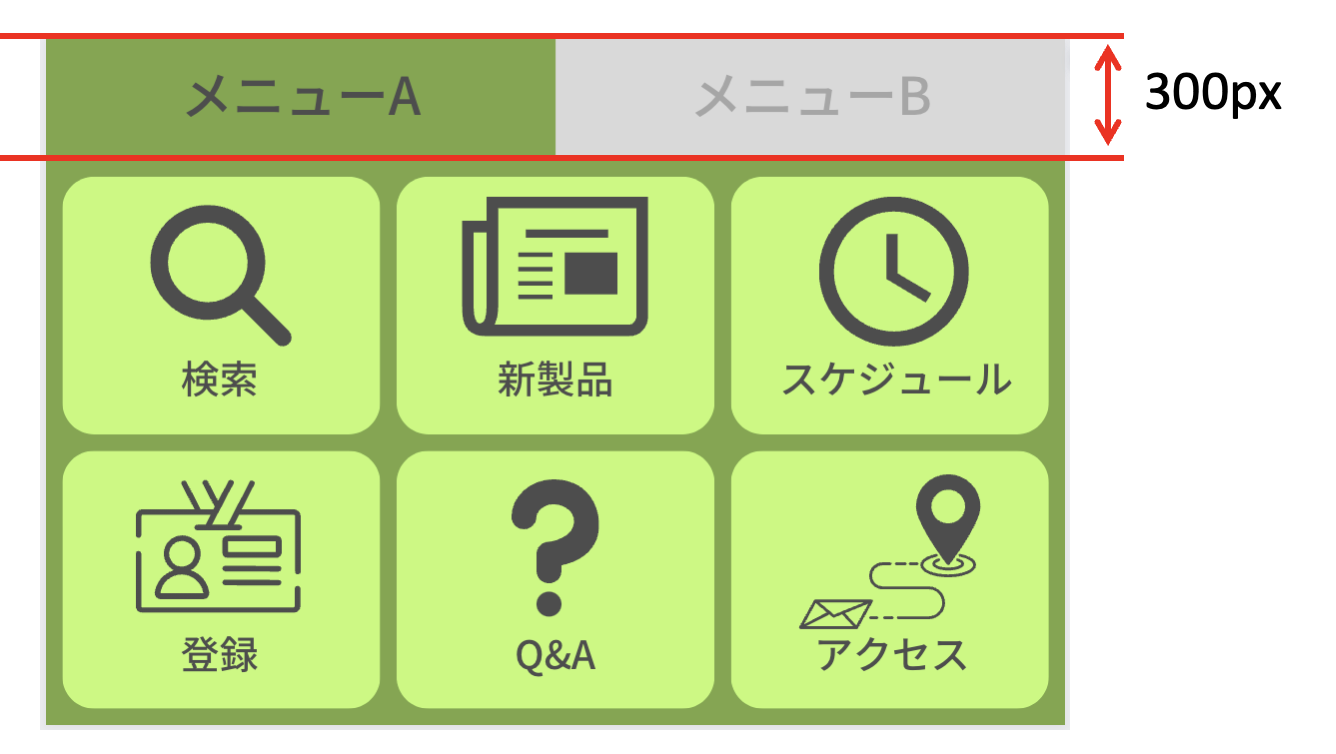
概要
- AWS LambdaとDynamoDBを使ってLINE Botを作ったので、その備忘録の1つです。
- この記事では、作成したリッチメニュー画像をアップロードし、登録する手順を説明します。
環境
macOS: 13.5.1
shell: zsh 5.9 (x86_64-apple-darwin22.0)
前提条件
- リッチメニュー画像を作成済み。
- リッチメニュー画像の作成方法は 以前書いた別の記事(LINE Botのリッチメニュー画像ファイルの作成方法) を参照のこと。
公式ドキュメント
- ここに公式ドキュメントがあります。
リッチメニューの種類について
-
リッチメニューには大きく分けて、2パターン存在します。
- 1: 通常タイプ
- よくあるタイプです。各ボタンをタップして任意の動作をします。
- 2: エイリアス切り替えタイプ
- リッチメニューを切り替えるボタンがついています。
- 1: 通常タイプ
設定の流れ
通常タイプの場合
- リッチメニューデータを作成し、ボタンのサイズ領域やタップ動作を登録する。
- 作成後、richmenu-id が発行される。
- richmenu-id に紐づく画像をアップロードする。
- デフォルトのリッチメニューを設定する。
エイリアス切り替えタイプの場合
- リッチメニューデータ(A)を作成し、ボタンのサイズ領域やタップ動作を登録する。
- 作成後、richmenu-id(A) が発行される。
- リッチメニューデータ(B)を作成し、ボタンのサイズ領域やタップ動作を登録する。
- 作成後、richmenu-id(B) が発行される。
- richmenu-id(A) に紐づく画像をアップロードする。
- richmenu-id(B) に紐づく画像をアップロードする。
- リッチメニューエイリアス(A)を作成する。
- リッチメニューエイリアス(B)を作成する。
- デフォルトのリッチメニューを設定する。
設定コマンド(通常タイプ)
- 上記に貼り付けた、サンプル画像を登録する場合のコードです。
(1)リッチメニューデータの登録
- 以下のCURLコマンドを実行します。
- コードの説明
-
-H 'Authorization: Bearer {channel access token}' \の{channel access token}にはLINE Botのコンソールで発行したチャネルアクセストークンを入力のこと。 -
"selected": true,でチャネルのトーク画面を開いた時に、リッチメニューをデフォルトでOpen設定にできます。falseの場合は、デフォルトCloseです。 -
"chatBarText"はリッチメニューの下側のOpne,Closeをするボタンに表示する文言です。 -
"areas"にボタンのタップ領域や、タップ時のアクションを設定していきます。今回は全てpostbackアクションを設定しています。- ポストバックアクションの公式ドキュメントも参照のこと。
-
"label"がリッチメニューの場合、最大文字数20なので、ここで気づかずに結構エラーになることがあるのでご注意ください。(他の項目にも最大文字数制限はありますが、一番引っかかりやすいのがこの"label"です。)
-
curl -v -X POST https://api.line.me/v2/bot/richmenu \
-H 'Authorization: Bearer {channel access token}' \
-H 'Content-Type: application/json' \
-d \
'{
  "size":{
      "width":2500,
      "height":1686
  },
  "selected": true,
  "name": "richmenu_sample",
  "chatBarText": "メニュー",
  "areas": [
      {
          "bounds": {
              "x": 0,
              "y": 0,
              "width": 833,
              "height": 843
          },
          "action": {
              "type": "postback",
              "label": "Search",
              "data": "type=search",
              "displayText": "検索"
          }
      },
      {
          "bounds": {
              "x": 833,
              "y": 0,
              "width": 833,
              "height": 843
          },
          "action": {
              "type": "postback",
              "label": "New Product",
              "data": "type=new_product",
              "displayText": "新製品"
          }
      },
      {
          "bounds": {
              "x": 1666,
              "y": 0,
              "width": 834,
              "height": 843
          },
          "action": {
              "type": "postback",
              "label": "Schedule",
              "data": "type=schedule",
              "displayText": "スケジュール"
          }
      },
      {
          "bounds": {
              "x": 0,
              "y": 843,
              "width": 833,
              "height": 843
          },
          "action": {
              "type": "postback",
              "label": "Registration",
              "data": "type=Registration",
              "displayText": "登録"
          }
      },
      {
          "bounds": {
              "x": 833,
              "y": 843,
              "width": 833,
              "height": 843
          },
          "action": {
              "type": "postback",
              "label": "Q&A",
              "data": "type=qa",
              "displayText": "Q&A"
          }
      },
      {
          "bounds": {
              "x": 1666,
              "y": 843,
              "width": 834,
              "height": 843
          },
          "action": {
              "type": "postback",
              "label": "Access",
              "data": "type=access",
              "displayText": "アクセス"
          }
      }
  ]
}'
- 登録に成功すると以下のレスポンスを受け取ります。
"richMenuId"を忘れずにメモします。
* We are completely uploaded and fine
< HTTP/2 200
< x-xss-protection: 1; mode=block
< x-line-request-id: 9999aaaa-9999-9999-9999-9z9z9z9z9z9
< x-frame-options: DENY
< x-content-type-options: nosniff
< pragma: no-cache
< expires: 0
< date: Wed, 23 Aug 2023 08:52:14 GMT
< content-type: application/json
< content-length: 58
< cache-control: no-cache, no-store, max-age=0, must-revalidate
< server: legy
<
* Connection #0 to host api.line.me left intact
{"richMenuId":"richmenu-hogehoge9999999999999999999"}%
(2)richmenu-id に紐づく画像をアップロードする。
- まずアップロードする画像を、任意のディレクトリに移動させます。(どこでもOK)
- 次に、アップロード画像を保存しているディレクトリで、以下のCURLコマンドを実行します。
curl -v -X POST https://api-data.line.me/v2/bot/richmenu/{richMenuId}/content \
-H "Authorization: Bearer {channel access token}" \
-H "Content-Type: image/png" \
-T {richmenu_img_sample.png}
- 画像のアップロードが成功すると以下のレスポンスを受け取ります。
* We are completely uploaded and fine
< HTTP/2 200
< server: openresty
< date: Wed, 23 Aug 2023 09:37:27 GMT
< content-type: application/json
< content-length: 2
< x-line-request-id: hogehoge-9999-9999-9999-hogehoge9999
< x-content-type-options: nosniff
< x-xss-protection: 1; mode=block
< cache-control: no-cache, no-store, max-age=0, must-revalidate
< pragma: no-cache
< expires: 0
< x-frame-options: DENY
<
* Connection #0 to host api-data.line.me left intact
{}%
(3)デフォルトのリッチメニューを設定する
- 以下のCURLコマンドを実行します。
curl -v -X POST https://api.line.me/v2/bot/user/all/richmenu/{richMenuId} \
-H "Authorization: Bearer {channel access token}"
設定コマンド(エイリアス設定タイプ)
- 上記に貼り付けた、サンプル画像を登録する場合のコードです。
(1)リッチメニューデータ(A)の登録
- 以下のCURLコマンドを実行します。
curl -v -X POST https://api.line.me/v2/bot/richmenu \
-H 'Authorization: Bearer {channel access token}' \
-H 'Content-Type: application/json' \
-d \
'{
    "size": {
      "width": 2500,
      "height": 1686
    },
    "selected": true,
    "name": "richmenu-sample-a",
    "chatBarText": "メニュー",
    "areas": [
      {
        "bounds": {
          "x": 1250,
          "y": 0,
          "width": 1250,
          "height": 300
        },
        "action": {
          "type": "richmenuswitch",
          "richMenuAliasId": "richmenu-alias-b",
          "data": "richmenu-changed-to-b"
        }
      },
      {
        "bounds": {
          "x": 0,
          "y": 300,
          "width": 833,
          "height": 693
        },
        "action": {
          "type": "postback",
          "label": "Search",
          "data": "type=search",
          "displayText": "検索"
        }
      },
      {
        "bounds": {
          "x": 833,
          "y": 300,
          "width": 834,
          "height": 693
        },
        "action": {
          "type": "postback",
          "label": "New Product",
          "data": "type=new_product",
          "displayText": "新製品"
        }
      },
      {
        "bounds": {
          "x": 1667,
          "y": 300,
          "width": 833,
          "height": 693
        },
        "action": {
          "type": "postback",
          "label": "Schedule",
          "data": "type=schedule",
          "displayText": "スケジュール"
        }
      },
      {
        "bounds": {
          "x": 0,
          "y": 993,
          "width": 833,
          "height": 693
        },
        "action": {
          "type": "postback",
          "label": "Registration",
          "data": "type=registration",
          "displayText": "登録"
        }
      },
      {
        "bounds": {
          "x": 833,
          "y": 993,
          "width": 834,
          "height": 693
        },
        "action": {
          "type": "postback",
          "label": "Q&A",
          "data": "type=qa",
          "displayText": "Q&A"
        }
      },
      {
        "bounds": {
          "x": 1667,
          "y": 993,
          "width": 833,
          "height": 693
        },
        "action": {
          "type": "postback",
          "label": "Access",
          "data": "type=access",
          "displayText": "アクセス"
        }
      }
    ]
}'
- コードの説明
{
        "bounds": {
          "x": 1250,
          "y": 0,
          "width": 1250,
          "height": 300
        },
        "action": {
          "type": "richmenuswitch",
          "richMenuAliasId": "richmenu-alias-b",
          "data": "richmenu-changed-to-b"
        }
      },
(2)リッチメニューデータ(B)の登録
- 以下のCURLコマンドを実行します。
- リッチメニューAへ切り替えるタブ部分の座標やアクションが先ほどとは異なるので、間違えないようご注意ください。
curl -v -X POST https://api.line.me/v2/bot/richmenu \
-H 'Authorization: Bearer {channel access token}' \
-H 'Content-Type: application/json' \
-d \
'{
    "size": {
        "width": 2500,
        "height": 1686
    },
    "selected": true,
    "name": "richmenu_sample_b",
    "chatBarText": "メニュー",
    "areas": [
        {
            "bounds": {
                "x": 0,
                "y": 0,
                "width": 1250,
                "height": 300
            },
            "action": {
		"type": "richmenuswitch",
                "richMenuAliasId": "richmenu-alias-a",
                "data": "richmenu-changed-to-a"
            }
        },
        {
            "bounds": {
                "x": 0,
                "y": 300,
                "width": 833,
                "height": 693
            },
            "action": {
                "type": "postback",
                "label": "Coupon",
                "data": "type=coupon",
                "displayText": "クーポン"
            }
        },
        {
            "bounds": {
                "x": 833,
                "y": 300,
                "width": 833,
                "height": 693
            },
            "action": {
                "type": "postback",
                "label": "Price List",
                "data": "type=price_list",
                "displayText": "料金表"
            }
        },
        {
            "bounds": {
                "x": 1666,
                "y": 300,
                "width": 834,
                "height": 693
            },
            "action": {
                "type": "postback",
                "label": "Document",
                "data": "type=document",
                "displayText": "ドキュメント"
            }
        },
        {
            "bounds": {
                "x": 0,
                "y": 993,
                "width": 833,
                "height": 693
            },
            "action": {
                "type": "postback",
                "label": "Reservation",
                "data": "type=reservation",
                "displayText": "予約"
            }
        },
        {
            "bounds": {
                "x": 833,
                "y": 993,
                "width": 833,
                "height": 693
            },
            "action": {
                "type": "postback",
                "label": "Phone",
                "data": "type=phone",
                "displayText": "電話"
            }
        },
        {
            "bounds": {
                "x": 1666,
                "y": 993,
                "width": 834,
                "height": 693
            },
            "action": {
                "type": "postback",
                "label": "Company Info",
                "data": "type=company_info",
                "displayText": "会社概要"
            }
        }
    ]
}'
(3)richmenu-id(A) に紐づく画像をアップロードする。
- 以下のCURLコマンドを実行します。
- 画像ファイルと
richMenuIdをA,Bで間違えないようにご注意ください。
- 画像ファイルと
curl -v -X POST https://api-data.line.me/v2/bot/richmenu/{richMenuId}/content \
-H "Authorization: Bearer {channel access token}" \
-H "Content-Type: image/png" \
-T {richmenu_img_sample.png}
(4)richmenu-id(B) に紐づく画像をアップロードする。
- 同様に
(3)richmenu-id(A) に紐づく画像をアップロードする。のコマンドを実行します。- 画像ファイルと richMenuId をA,Bで間違えないようにご注意ください。
(5)リッチメニューエイリアス(A)を作成する。
- 以下のCURLコマンドを実行します。
-
"richMenuAliasId"は(1)リッチメニューデータ(A)の登録(2)リッチメニューデータ(B)の登録で設定したidを使います。
-
curl -v -X POST https://api.line.me/v2/bot/richmenu/alias \
-H 'Authorization: Bearer {channel access token}' \
-H 'Content-Type: application/json' \
-d \
'{
    "richMenuAliasId": "richmenu-alias-a",
    "richMenuId": "{richMenuId-a}"
}'
(6)リッチメニューエイリアス(B)を作成する。
- こちらも同様に
(5)リッチメニューエイリアス(A)を作成する。のCURLコマンドを実行します。-
"richMenuAliasId"を間違えないようにご注意ください。
-
(7)デフォルトのリッチメニューを設定する。
- 以下のCURLコマンドを実行します。
curl -v -X POST https://api.line.me/v2/bot/user/all/richmenu/{richMenuId} \
-H "Authorization: Bearer {channel access token}"
- これで、エイリアス切り替えタイプのリッチメニューのアップロード&設定完了です。
その他(登録済みリッチメニューの削除方法)
- 登録済みのリッチメニューを削除する場合は、以下のCURLコマンドを実行ください。
curl -v -X DELETE https://api.line.me/v2/bot/richmenu/{richmenuID} \
-H 'Authorization: Bearer {channel access token}'


