描画の基本
Cairoでは、描画対象(ページ)の左上隅が原点となります。
図形を描画するには、
- パス
- ソース
- マスク
- ストローク/フィルの別
の四つを与えます。パスは図形の輪郭、ソースは図形の塗りの元、マスクは塗り効果をそれぞれ決めるものです。ソースとマスクについては別記事で説明します。全ての図形についてこれらを与えることで、描画がなされます。
例えば前回の例では描画部分は次のようになっていました。
void draw(cairo_t *c, int width, int height)
{
  /* background */
  cairo_set_source_rgb( c, 1, 1, 1 );
  cairo_rectangle( c, 0, 0, width, height );
  cairo_fill( c );
  /* red rectangle */
  cairo_set_source_rgb( c, 1, 0, 0 );
  cairo_rectangle( c, width/4, height/4, width/2, height/2 );
  cairo_fill( c );
}
これで、ページと同じサイズの白い長方形と、ページの1/4サイズの赤い長方形が描画されました。どちらの例もcairo_set_source_rgb()で単色のソースを、cairo_rectangle()で長方形型のパスをそれぞれ与え、cairo_fill()でフィル(パスの内部を塗りつぶすこと)を選んでいます。
後者を
  /* red rectangle */
  cairo_set_source_rgb( c, 1, 0, 0 );
  cairo_rectangle( c, width/4, height/4, width/2, height/2 );
  cairo_stroke( c );
と変えてフィルではなくストローク(パス自体を描くこと)を選べば、次のような絵が出力されるはずです。

フィルした後にストロークも描く場合には、次のようにすればOKです。
  /* red rectangle */
  cairo_set_source_rgb( c, 1, 0.6, 0.8 );
  cairo_rectangle( c, width/4, height/4, width/2, height/2 );
  cairo_fill( c );
  cairo_set_source_rgb( c, 1, 0, 0 );
  cairo_rectangle( c, width/4, height/4, width/2, height/2 );
  cairo_stroke( c );
次のような絵が出力されたでしょうか。

あるいは次のように書いても同じ結果になります。
  /* red rectangle */
  cairo_rectangle( c, width/4, height/4, width/2, height/2 );
  cairo_set_source_rgb( c, 1, 0.6, 0.8 );
  cairo_fill_preserve( c );
  cairo_set_source_rgb( c, 1, 0, 0 );
  cairo_stroke( c );
線の太さを変えたければ、後半を
  cairo_set_source_rgb( c, 1, 0, 0 );
  cairo_set_line_width( c, 10 );
  cairo_stroke( c );
のようにすればOKです。出力は次のようになります。

多角形の書き方
長方形ならば上の例のようにcairo_rectangle()が使えます。
例えばdraw()を次のように変えてみましょう。
void draw(cairo_t *c, int width, int height)
{
/* background */
cairo_set_source_rgb( c, 1, 1, 1 );
cairo_rectangle( c, 0, 0, width, height );
cairo_fill( c );
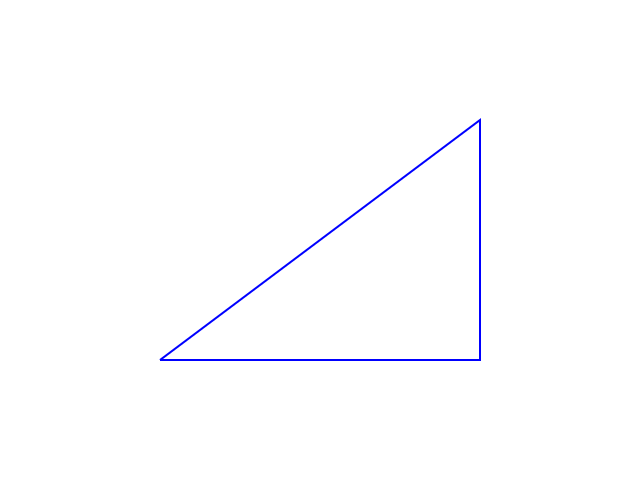
/* blue triangle */
cairo_set_source_rgb( c, 0, 0, 1 );
cairo_move_to( c, width/4, 3*height/4 );
cairo_line_to( c, 3*width/4, 3*height/4 );
cairo_line_to( c, 3*width/4, height/4 );
cairo_line_to( c, width/4, 3*height/4 );
cairo_stroke( c );
}
次のような絵が出力されたはずです。
後者を次のようにしても同じ出力が得られます。
  /* blue triangle */
  cairo_set_source_rgb( c, 0, 0, 1 );
  cairo_move_to( c,   width/4, 3*height/4 );
  cairo_rel_line_to( c, width/2, 0 );
  cairo_rel_line_to( c, 0, -height/2 );
  cairo_close_path( c );
  cairo_stroke( c );
上の例は三角形ですが、一般的な多角形も同様にして描けます。
cairo_set_dash()を用いて線を破線にすることも可能です。線と空白の長さを交互に納めた配列でパターンを与えます。例えば次を試してみましょう。
  cairo_set_source_rgb( c, 0, 0.2, 0.5 );
  double dash1[] = { 10.0, 2.0 };
  int i;
  for( i=0; i<=10; i++ ){
    cairo_set_dash( c, dash1, sizeof(dash1)/sizeof(double), i );
    cairo_move_to( c, width/4, height/4+5*i );
    cairo_rel_line_to( c, width/2, 0 );
    cairo_stroke( c );
  }
  double dash2[] = { 10.0, 3.0, 1.0, 3.0 };
  cairo_set_dash( c, dash2, sizeof(dash2)/sizeof(double), 0 );
  cairo_move_to( c, width/4, height/2 );
  cairo_rel_line_to( c, width/2, 0 );
  cairo_stroke( c );
出力は次のようになります。

前半のループの中では、破線パターンは同じものですが、cairo_set_dash()の4番目引数でパターンの開始オフセット値を与えていることが分かるでしょうか。
円弧の描き方
draw()を次のように変えてみましょう。
#include <cairo/cairo.h>
#include <math.h>

void draw(cairo_t *c, int width, int height)
{
  /* background */
  cairo_set_source_rgb( c, 1, 1, 1 );
  cairo_rectangle( c, 0, 0, width, height );
  cairo_fill( c );

  /* green circle */
  cairo_arc( c, width/4, height/4, height/8, 0, 2*M_PI );
  cairo_set_source_rgb( c, 0, 1, 0 );
  cairo_fill_preserve( c );
  cairo_set_source_rgb( c, 0, 0.5, 0 );
  cairo_stroke( c );

  cairo_arc( c, width/2, height/4, height/8, 0, 3*M_PI/4 );
  cairo_set_source_rgb( c, 0, 1, 0 );
  cairo_fill_preserve( c );
  cairo_set_source_rgb( c, 0, 0.5, 0 );
  cairo_stroke( c );

  cairo_arc( c, 3*width/4, height/4, height/8, 0, 3*M_PI/2 );
  cairo_set_source_rgb( c, 0, 1, 0 );
  cairo_fill_preserve( c );
  cairo_set_source_rgb( c, 0, 0.5, 0 );
  cairo_stroke( c );

  cairo_move_to( c, width/2, 3*height/4 );
  cairo_rel_line_to( c, height/8, 0 );
  cairo_arc( c, width/2, 3*height/4, height/8, 0, 3*M_PI/4 );
  cairo_close_path( c );
  cairo_set_source_rgb( c, 0, 1, 0 );
  cairo_fill( c );
  cairo_arc( c, width/2, 3*height/4, height/8, 0, 3*M_PI/4 );
  cairo_set_source_rgb( c, 0, 0.5, 0 );
  cairo_stroke( c );

  cairo_move_to( c, 3*width/4, 3*height/4 );
  cairo_rel_line_to( c, height/8, 0 );
  cairo_arc( c, 3*width/4, 3*height/4, height/8, 0, 3*M_PI/2 );
  cairo_close_path( c );
  cairo_set_source_rgb( c, 0, 1, 0 );
  cairo_fill( c );
  cairo_arc( c, 3*width/4, 3*height/4, height/8, 0, 3*M_PI/2 );
  cairo_set_source_rgb( c, 0, 0.5, 0 );
  cairo_stroke( c );
}
出力は次のようになります。

このように、cairo_arc( c, 中心x, 中心y, 半径, 開始角度, 終了角度 )は弓型になるのですが、cairo_move_to()、cairo_line_to()、cairo_close_path()と組み合われば扇形を描くことができます。
円弧でない曲線として、楕円弧の描き方、3次ベジエ曲線の描き方をそれぞれ別記事で説明します。