はじめに
今回は ZENRIN Maps API の「ユーザーウィジェット」機能を使って、地図上に任意の画像を重ねて表示し、ズームイン/アウトと連携する方法をご紹介します。
「ユーザーウィジェット」とは、地図上の任意の場所に好きな HTML要素を配置できる仕組みのことを指し、例えば「独自デザインのピン画像を置く」「バナーやロゴを地図に載せる」といった表現をするときに、この機能を利用します。
公式リファレンスでも説明されているものの、実際に手を動かしてみるとつまずいてしまうこともあるかと思いますので、この記事では、東京駅の位置にピン画像を表示するシンプルな例を使って、初心者の方にもわかりやすいようステップごとに解説していきます。
この記事でできること
- 地図上に任意の画像をユーザーウィジェットとして重ねて表示
- 地図をズームイン/アウトすると、画像サイズが地図のスケールに追従して変化
APIキー取得手順
ZENRIN Maps API を利用するには、事前に APIキーの取得が必要です。
現在、ZENRIN Maps API は2か月間の無料トライアルが用意されており、期間中は主要な機能を実際にお試しいただけます。
開発や評価の初期段階でも安心してご利用いただけます。
APIキーの取得方法については、以下の記事で詳しく解説されています。
初めての方は、まずこちらをご覧いただき、APIキーの発行と設定を行ってください。
ZENRIN Maps APIの始め方
公式リファレンス
ディレクトリ構成(ツリー形式)
project-root/
├── zma_userwidget.html        # メインHTMLファイル
├── css/
│   └── zma_userwidget.css     # スタイルシート
├── js/
│   └── zma_userwidget.js      # JavaScriptファイル
├── img/
   └── redpin.png             # 画像ファイル(マーカー等)
ズーム連携する基本コード
以下は、ZENRIN Maps APIで地図を表示し、「ユーザーウィジェット」機能を使って、地図上に任意の画像を重ねて表示し、ズームイン/アウトと連携するサンプルコードです。
このコードはそのままコピー&ペーストで動作します(APIキーはご自身のものに置き換えてください)。
<!DOCTYPE html>
<html lang="ja">
<head>
  <meta charset="UTF-8">
  <title>ZENRIN Maps API - ユーザーウィジェット画像表示</title>

  <!-- ZENRIN Maps API ローダーの読み込み(★APIキーと認証方式を自身の値に) -->
  <script src="https://test-js.zmaps-api.com/zma_loader.js?key=[APIキー]&auth=referer"></script>

  <!-- スタイル読み込み -->
  <link rel="stylesheet" href="css/zma_userwidget.css">
</head>
<body>
  <!-- 地図描画エリア -->
  <div id="ZMap"></div>

  <!-- スクリプト読み込み -->
  <script src="js/zma_userwidget.js"></script>
</body>
</html>
#ZMap {
  width: 100%;
  height: 80vh;
  border: 1px solid #ccc;
}
let map, userWidget, topLeftLatLng, bottomRightLatLng;

// 東京駅の緯度経度
const lat = 35.681406;
const lng = 139.767132;

// 地図の初期化とユーザーウィジェット設定
ZMALoader.setOnLoad(function (mapOptions, error) {
  if (error) {
    console.error('地図の読み込みエラー:', error);
    return;
  }

  // Step 1: 地図の中心を設定
  mapOptions.center = new ZDC.LatLng(lat, lng);

  // Step 2: 地図を描画
  map = new ZDC.Map(document.getElementById('ZMap'), mapOptions, onMapReady, onMapError);
});

// Step 3: 地図の初期化に成功したときの処理
function onMapReady() {
  // 画像のURLを用意(キャッシュ防止のためランダムパラメータ追加)
  const imagePath = 'img/redpin.png';
  const cacheBustedImagePath = `${imagePath}?${Math.floor(Math.random() * 1000000)}`;

  // Step 4: 画像の表示位置(地図座標)を計算
  const centerPoint = map.latlngToPoint(map.getCenter());

  // 画像サイズ 100px × 100px を前提とし、画像下中央を東京駅に合わせる
  const topLeft = new ZDC.Point(centerPoint.x - 50, centerPoint.y - 100);
  const bottomRight = new ZDC.Point(centerPoint.x + 50, centerPoint.y);

  // 緯度経度に変換
  topLeftLatLng = map.pointToLatLng(topLeft);
  bottomRightLatLng = map.pointToLatLng(bottomRight);

  // Step 5: UserWidget に画像HTMLを指定
  userWidget = new ZDC.UserWidget(topLeftLatLng, {
    htmlSource: `<img id="uw1_img" style="width: ${bottomRight.x - topLeft.x}px;" src="${cacheBustedImagePath}">`
  });

  // Step 6: 地図にウィジェットを追加
  map.addWidget(userWidget);

  // Step 7: ズーム時の画像サイズ再調整
  map.addEventListener('zoom_changed', adjustImageSize);
}

// Step 8: 地図の初期化失敗時のエラーハンドリング
function onMapError() {
  console.error('地図の初期化に失敗しました');
}

// Step 9: ズームに応じて画像サイズを調整する関数
function adjustImageSize() {
  const topLeft = map.latlngToPoint(topLeftLatLng);
  const bottomRight = map.latlngToPoint(bottomRightLatLng);
  const img = document.getElementById('uw1_img');

  if (img) {
    img.style.width = `${bottomRight.x - topLeft.x}px`;
  }
}
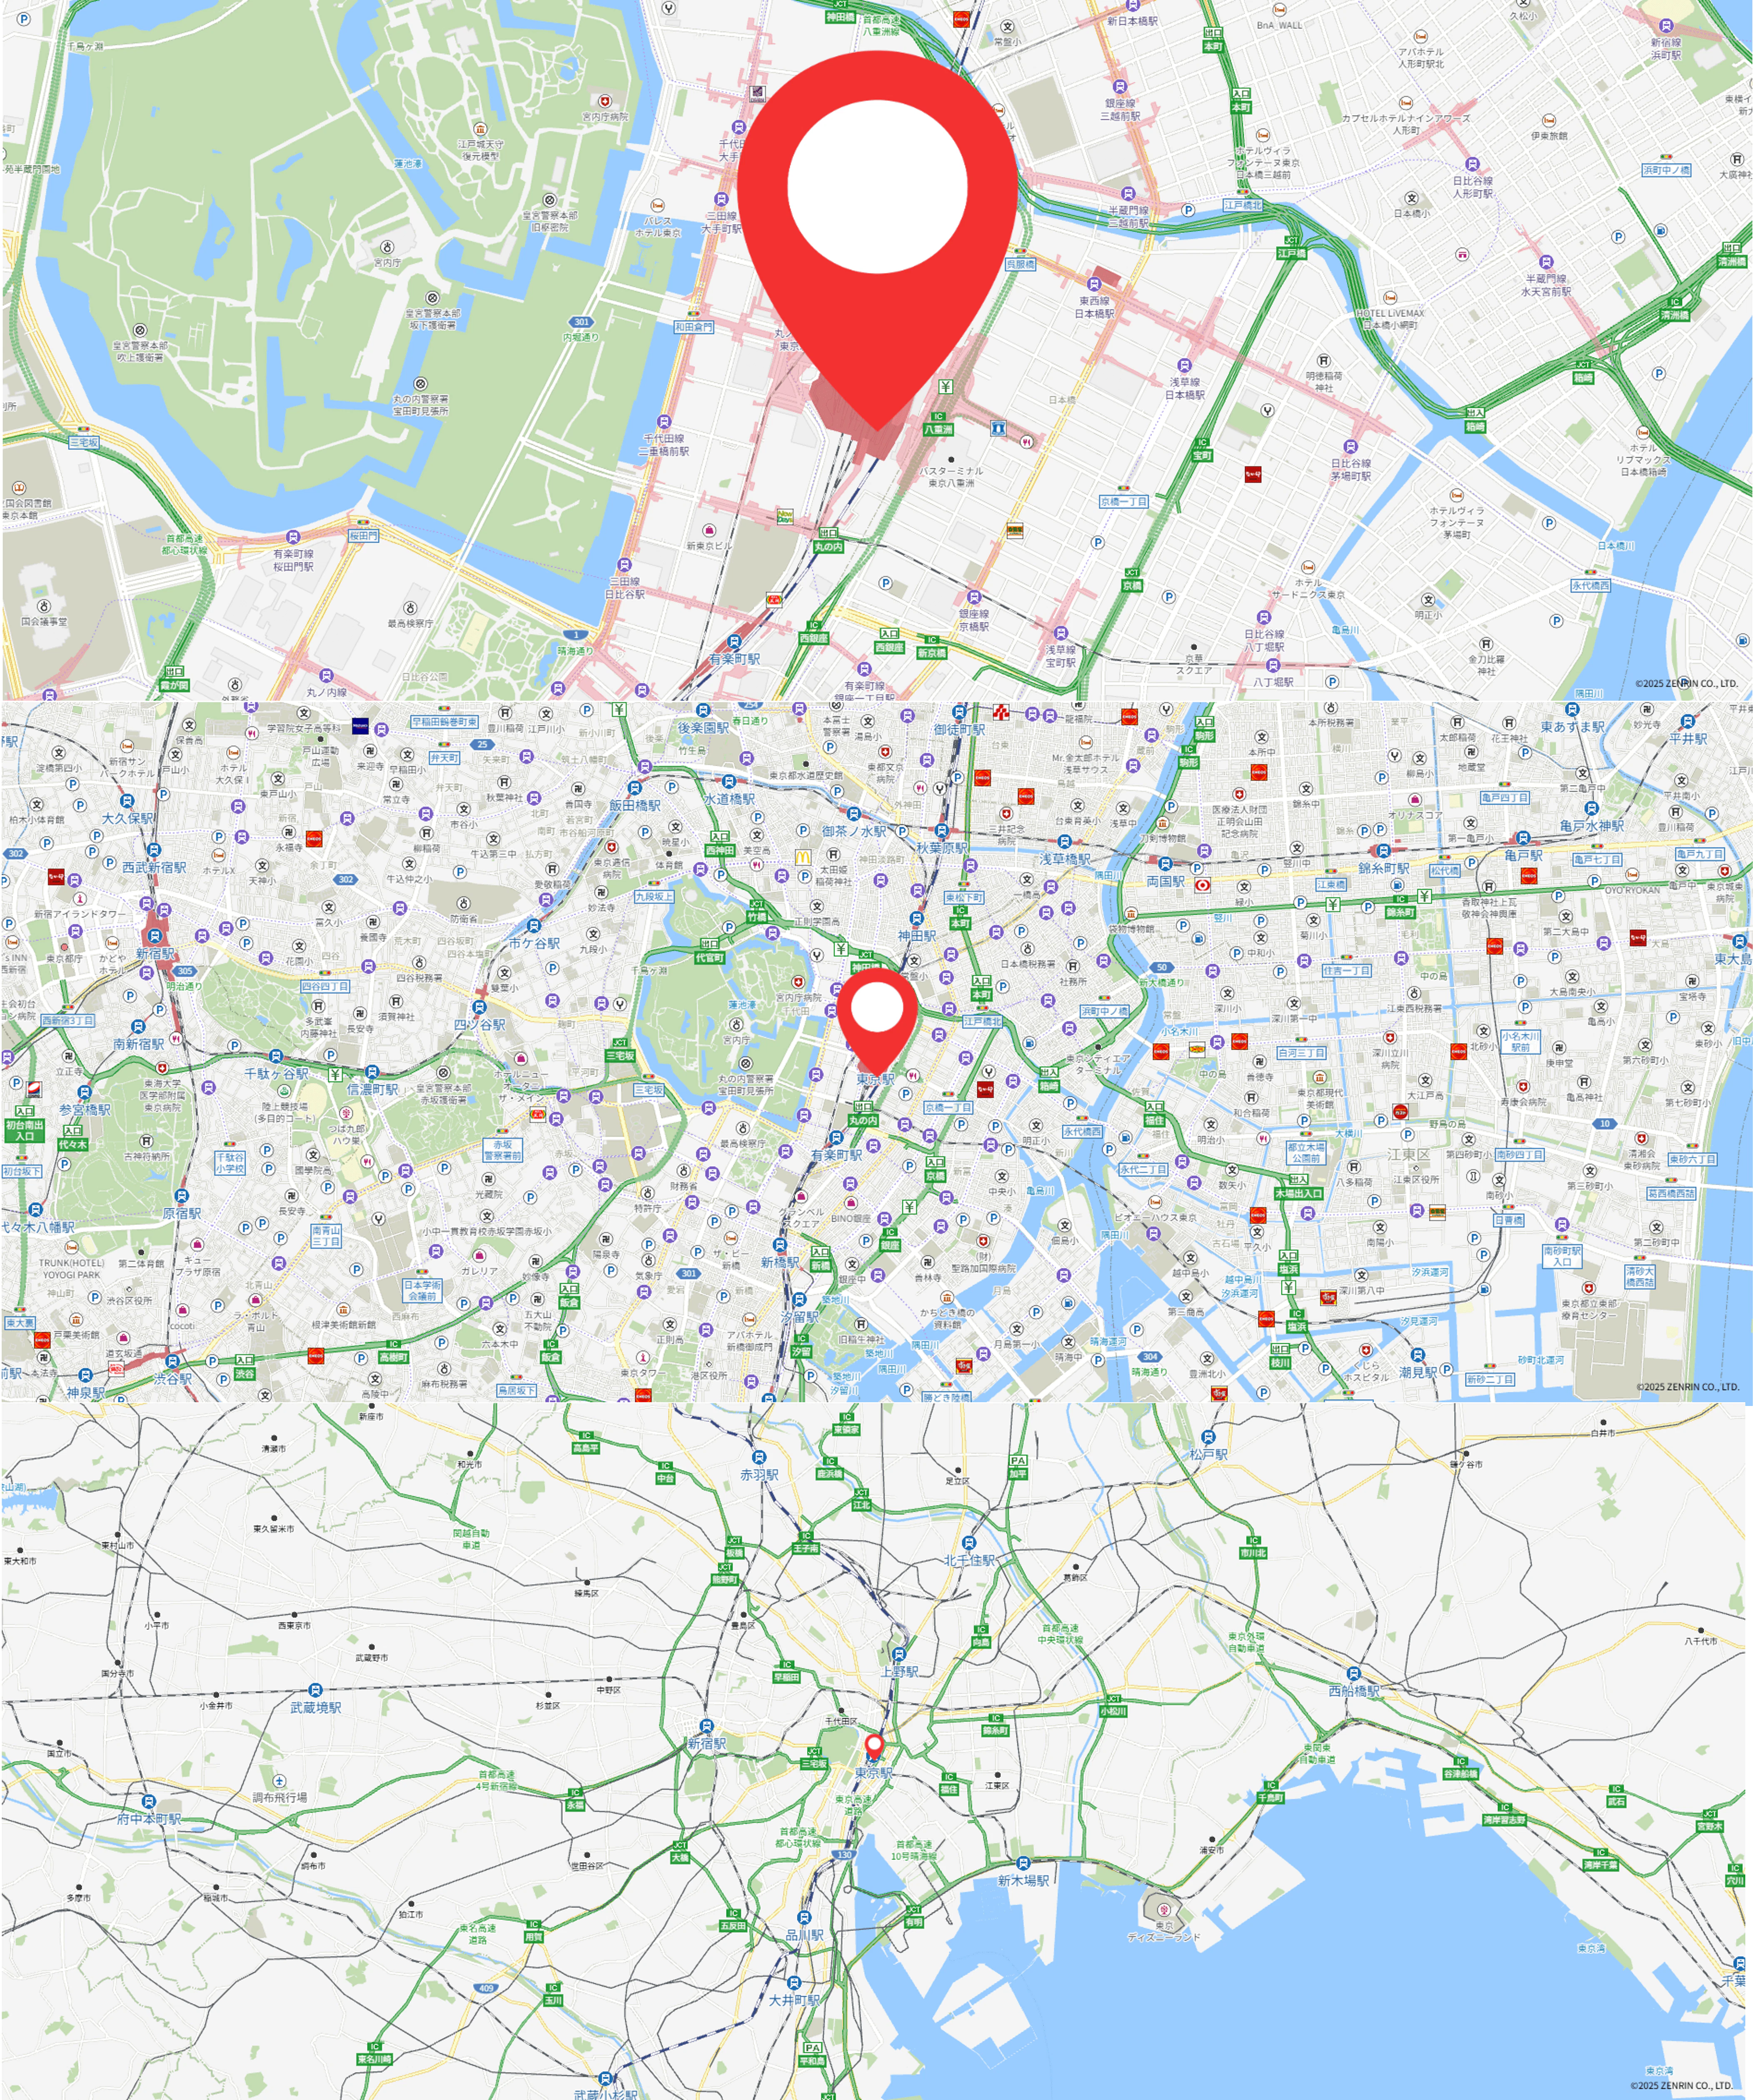
コードを実行した結果は、以下になります。
Step 1:地図の中心を設定
最初に ZMALoader.setOnLoad のコールバック内で、地図の中心座標を東京駅(緯度 35.681406, 経度 139.767132)に設定します。
// 東京駅の緯度経度
const lat = 35.681406;
const lng = 139.767132;

mapOptions.center = new ZDC.LatLng(lat, lng);
Step 2:地図を描画
ZDC.Map を使って、指定したHTML要素上に地図を描画します。
成功時と失敗時のコールバック関数も定義します。
map = new ZDC.Map(document.getElementById('ZMap'), mapOptions, onMapReady, onMapError);
});
Step 3:地図の初期化に成功したときの処理
地図が正常に初期化されると onMapReady が呼ばれ、ここで画像の表示処理を進めます。
function onMapReady() {
  // 画像のURLを用意(キャッシュ防止のためランダムパラメータ追加)
  const imagePath = 'img/redpin.png';
  const cacheBustedImagePath = `${imagePath}?${Math.floor(Math.random() * 1000000)}`;
Step 4:画像の表示位置(地図座標)を計算
画像の左上と右下の地図座標を、地図の中心からピクセル単位でオフセットして算出します。
このとき、画像サイズ(100×100px) の下中央を地図の中心に合わせるように設計しています。
const centerPoint = map.latlngToPoint(map.getCenter());

// 画像サイズ 100px × 100px を前提とし、画像下中央を東京駅に合わせる
const topLeft = new ZDC.Point(centerPoint.x - 50, centerPoint.y - 100);
const bottomRight = new ZDC.Point(centerPoint.x + 50, centerPoint.y);

// 緯度経度に変換
topLeftLatLng = map.pointToLatLng(topLeft);
bottomRightLatLng = map.pointToLatLng(bottomRight);
Step 5:UserWidget に画像HTMLを指定
ZDC.UserWidget を使って、計算した左上座標に画像を貼り付ける HTML を埋め込みます。
画像の横幅は、右下との距離から算出して設定しています。
userWidget = new ZDC.UserWidget(topLeftLatLng, {
    htmlSource: `<img id="uw1_img" style="width: ${bottomRight.x - topLeft.x}px;" src="${cacheBustedImagePath}">`
    });
Step 6:地図にウィジェットを追加
作成した UserWidget を map.addWidget() で地図上に追加します。
map.addWidget(userWidget);
Step 7:ズーム時の画像サイズ再調整
zoom_changed イベントに対応し、ズーム操作のたびに画像サイズが適切にスケーリングされるようにしています。
map.addEventListener('zoom_changed', adjustImageSize);
Step 8:地図の初期化失敗時のエラーハンドリング
初期化に失敗した場合、開発者ツールのコンソールにエラーメッセージを出力します。
function onMapError() {
  console.error('地図の初期化に失敗しました');
}
Step 9:ズームに応じて画像サイズを調整する関数
ズーム変更時に呼ばれる adjustImageSize() 関数では、画像の左右ピクセル距離を再計算して style.width を更新しています。
function adjustImageSize() {
  const topLeft = map.latlngToPoint(topLeftLatLng);
  const bottomRight = map.latlngToPoint(bottomRightLatLng);
  const img = document.getElementById('uw1_img');

  if (img) {
    img.style.width = `${bottomRight.x - topLeft.x}px`;
  }
}
おわりに
ここまでご覧いただきありがとうございました。
ユーザーウィジェット機能を使えば、オリジナルのピンや画像などを地図上に自在に表示でき、アイデア次第で表現の幅が大きく広がります。
今回はシンプルな画像表示にとどめましたが、実際には HTML や CSS を活用して、アニメーションやインタラクティブな要素も埋め込むことができます。
「地図に工夫を加えたい」と思ったときにこの記事が参考になれば幸いです。
今後も機能の活用方法やリリース情報を随時発信していきます。
ぜひフォローいただき、ZENRIN Maps APIの活用にお役立てください。