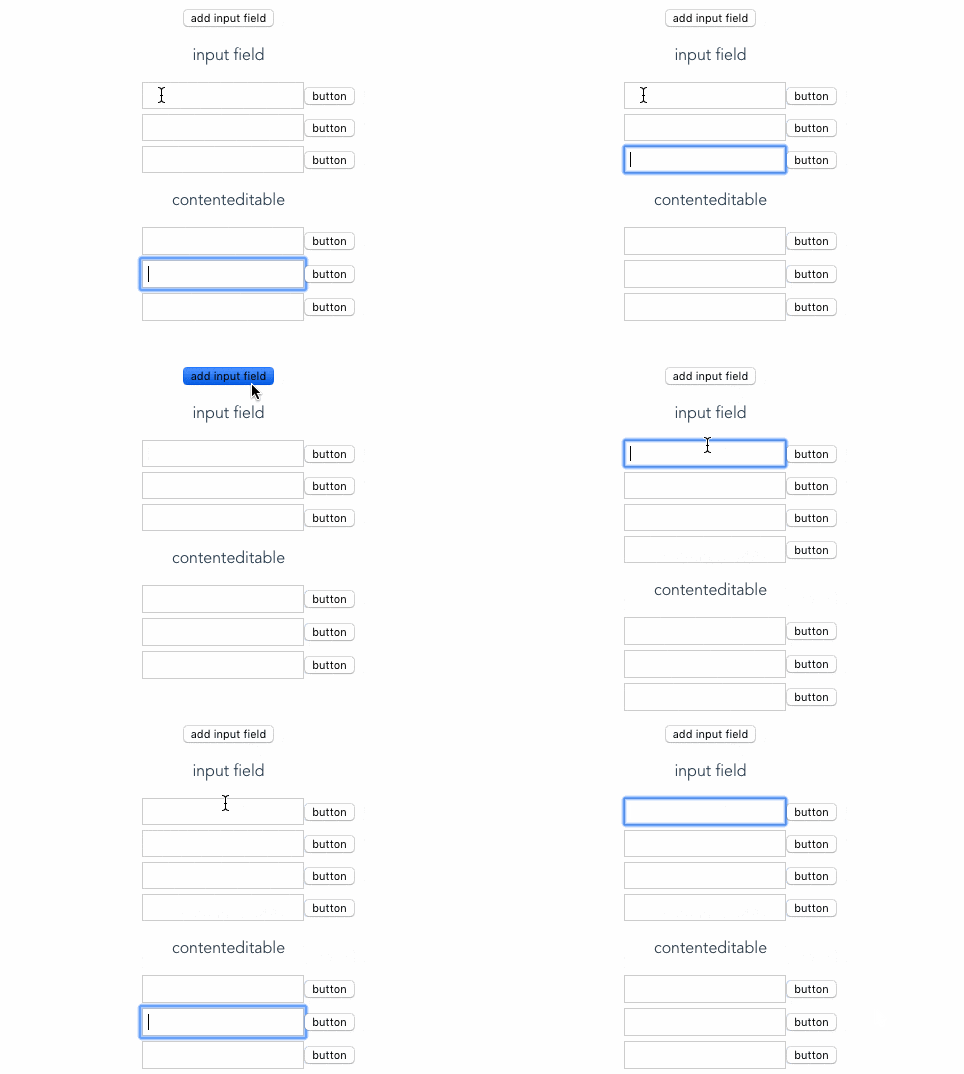
Vue.js に限った話ではないですが、複数ある入力フォームを ↑ や ↓ Tab Shift + Tab キーでフォーカスを移動させるのにちょっと悩んだので僕なりのやり方をまとめておきます。
↓こういう動きをさせたいという話です。
tabindex は使わないのか?
tabindex を使えば Tab キー押下時の入力フォーカスの順序を制御できます。しかしこれはグローバル要素であり、HTML 全体で指定数値の整合性を取る必要があり非常に面倒くさいです。また、あくまで Tab キー押下だけの影響下であり、↑ などの別のキーには影響を与えません。
そこで、普通にキーイベントを拾ってフォーカスを移動させるようにします。
Vue.js のキーバインドイベント
Vue.js のキーイベントは簡単に指定できます。いかが完成形のイベント指定です。
<input type="text"
       class="input-items"
       @keydown.prevent.tab.exact="moveNext"
       @keydown.prevent.shift.tab="movePrev"
       @keydown.prevent.down="moveNext"
       @keydown.prevent.up="movePrev">
まず Tab キーは @keyup ではなく @keydown を利用し prevent 指定が必要です。指定しないと標準の Tab キー押下時の挙動に遷移してしまいます。また、 shift.tab でシステム修飾子キーを使って Shift + Tab のキーバインドイベントを設定していますが、この時 tab イベントも同時に発火してしまいます。これは仕様です。
そこで exact 修飾子を利用します。これはシステム修飾子の正確な記述ができるものです。以下は公式からのサンプル引用です。
<!-- これは Ctrl に加えて Alt や Shift キーが押されていても発行されます -->
<button @click.ctrl="onClick">A</button>

<!-- これは Ctrl キーが押され、他のキーが押されてないときだけ発行されます -->
<button @click.ctrl.exact="onCtrlClick">A</button>

<!-- これは システム修飾子が押されてないときだけ発行されます -->
<button @click.exact="onClick">A</button>
これを利用することで Tab キーのみが押下されたときにだけイベントを発火できます。
前後の入力フォームエレメントを探す
純粋に前後のエレメントであれば Node.previousSibling や Node.nextSibling が使えます。
<input type="text" @keydown.prevent.tab.exact="moveNext">
<input type="text">
methods: {
  moveNext (event) {
    event.target.nextSibling.focus()
  }
}
しかしこれは他の要素が入ってくると駄目になります。
同名 class で探す
そこで対象の入力フォームに同じ class を付けて検索するという地道な方法を採用します。他にもっと良いやり方があれば教えてください。要素の数が増えれば増えるほどパフォーマンスが劣化するという悲しさはあります。
<input type="text"
       class="input-items"
       @keydown.prevent.tab.exact="moveNext">
methods: {
  moveNext (event) {
    const elements = document.getElementsByClassName('input-items')
    const index = [].findIndex.call(elements, e => e === event.target)
    elements[index + 1].focus()
  }
}
指定 class のエレメントを集めて自分自身の順序を取得して、その前後のインデックスでエレメントを取得するというやり方です。ここまでできればあとは実装するだけです。
サンプルコード
<template>
  <div>
    <button @click="num++">add input field</button>
    <p>input field</p>
    <ul>
      <li v-for="(key, index) in lists" :key="`input${index}`">
        <input type="text"
               class="input-items"
               @keydown.prevent.tab.exact="moveNext"
               @keydown.prevent.shift.tab="movePrev"
               @keydown.prevent.down="moveNext"
               @keydown.prevent.up="movePrev">
        <button>button</button>
      </li>
    </ul>
    <p>contenteditable</p>
    <ul>
      <li v-for="(key, index) in lists" :key="`editable${index}`">
        <span contenteditable="true"
              class="input-items"
              @keydown.prevent.tab.exact="moveNext"
              @keydown.prevent.shift.tab="movePrev"
              @keydown.prevent.down="moveNext"
              @keydown.prevent.up="movePrev"></span>
        <button>button</button>
      </li>
    </ul>
  </div>
</template>

<script>
export default {
  name: 'HelloWorld',
  data () {
    return {
      num: 3
    }
  },
  computed: {
    lists () {
      return Array.from(Array(this.num).keys())
    },
    elements () {
      return document.getElementsByClassName('input-items')
    }
  },
  methods: {
    findIndex (target) {
      return [].findIndex.call(this.elements, e => e === target)
    },
    moveFocus (index) {
      if (this.elements[index]) {
        this.elements[index].focus()
      }
    },
    moveNext (event) {
      const index = this.findIndex(event.target)
      this.moveFocus(index + 1)
    },
    movePrev (event) {
      const index = this.findIndex(event.target)
      this.moveFocus(index - 1)
    }
  }
}
</script>

<!-- Add "scoped" attribute to limit CSS to this component only -->
<style scoped>
li {
  margin: 5px 0;
  list-style: none;
}
span, input {
  font-size: 12px;
  min-width: 150px;
  padding: 5px;
  display: inline-block;
  border: 1px solid #ccc;
  text-align: left;
  color: #000;
}
</style>
動作デモはこちら
